Upcycling is the art of transforming old, unused, or unwanted items into something new, useful, and creative. It’s a great way to reduce waste and add a personal touch to your home decor.
One such project that not only lets you practice your sewing skills but also gives new life to your old clothes is turning a long sleeve shirt into a patchwork quilt.
If you have some old shirts gathering dust in your closet, why not repurpose them into a beautiful, functional quilt? It’s a perfect project for beginners and experienced crafters alike. Plus, it allows you to create something sentimental and cozy, all while contributing to a more sustainable lifestyle.
In this guide, I’ll take you step-by-step through the process of turning a long sleeve shirt into a patchwork quilt. By the end, you’ll be able to create a quilt that’s not only practical but also full of personality. Let’s dive in!
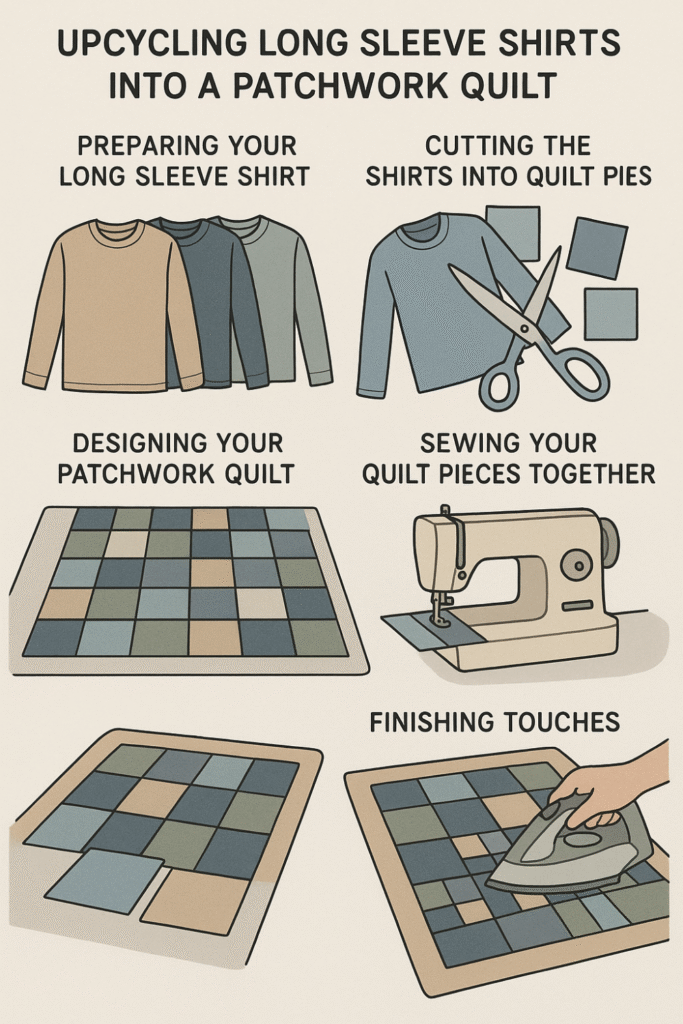
Preparing Your Long Sleeve Shirt
The first step in any quilting project is preparing your fabric. Since we’re working with long sleeve shirts, we need to transform them into usable pieces of fabric that can fit into a quilt design. Here’s how to get started:
Gather Your Materials
Before diving into the cutting process, make sure you have everything you need. Here’s a simple list of the materials you’ll require:
| Material | Quantity | Description |
| Old Long Sleeve Shirts | 3-6 shirts | Depending on the size of the quilt you want to make, choose shirts that are in good condition and made from sturdy fabrics. |
| Scissors or Rotary Cutter | 1 | For cutting the fabric into squares or rectangles. |
| Fabric Ruler or Measuring Tape | 1 | To measure and mark the fabric for cutting. |
| Sewing Machine | 1 | For stitching the quilt pieces together. |
| Thread | 1 spool | Choose a color that matches your shirt fabrics or a neutral tone. |
| Pins or Fabric Clips | 10-20 clips | To hold the fabric pieces together while you sew. |
| Quilt Batting | 1 piece | Optional, but necessary if you want the quilt to have padding. |
| Quilt Backing Fabric | 1 large piece | This fabric will cover the back of your quilt. |
Choose Your Shirts
Next, pick out your long sleeve shirts. They can be of different colors, patterns, and fabrics, which will give your quilt a nice, eclectic look. I suggest choosing shirts that are made from cotton or cotton-blend fabric as they’re easy to work with and provide a soft, comfortable finish.
- Tip: If you have shirts that hold sentimental value (like a favorite old band tee or a shirt with a meaningful print), incorporating them into your quilt adds a personal touch.
Cutting the Shirts into Quilt Pieces
Now comes the fun part: cutting your shirts into quilt squares or rectangles. This part is all about the design you want to create, whether you prefer a traditional grid pattern or something more freestyle.
Measure and Cut the Shirt Fabric
To make this easier, you’ll want to remove the sleeves from your shirts. Once the sleeves are detached, you can cut them into squares, triangles, or strips, depending on the design you have in mind.
Step-by-Step Process:
- Cut off the sleeves of your shirts along the seam. Set them aside if you want to use the fabric for smaller patches.
- Cut the body of the shirt into pieces. If you’re aiming for a simple square or rectangle design, you can start by cutting the shirt into even pieces.
- Trim and remove the seams where necessary, especially if you want a smooth fabric surface.
- Tip: Use a fabric ruler to ensure all your pieces are cut to uniform size for a neater look. For example, if you’re aiming for a classic 6-inch square patchwork quilt, measure and cut all your pieces to that size.
Cutting Tips
- Don’t stress too much about perfection. Imperfections can add character to your quilt, and besides, it’s a handmade project!
- If you want to add more texture, you could incorporate the shirt’s buttons or embroidery as embellishments for some of the patches.
Designing Your Patchwork Quilt
Once you’ve got your shirt pieces cut, it’s time to plan out how you want your quilt to look. There are countless quilt design patterns out there, but here are a few to get you started:
Basic Quilt Patterns for Your Patchwork
- Grid Pattern: This is the most common and easiest to achieve. Simply arrange your quilt pieces into rows and columns, alternating colors or prints as you go.
- Random Patchwork: For a more eclectic look, try randomly placing your patches in a freeform style. This method is perfect if you have shirts with varying prints and textures.
- Stripes or Chevron: If you prefer a geometric design, cutting your pieces into long strips can give you a striped or chevron effect.
Plan Your Quilt Layout
Before you start stitching, it’s important to lay out your design on a flat surface. You can use your floor or a large table to do this. Take the time to experiment with different color combinations and patterns to see what appeals to you. When you’re happy with the layout, take a picture for reference as you start stitching.
Sewing Your Quilt Pieces Together
After designing your quilt layout, it’s time to start sewing! This is the stage where your vision truly begins to come to life. You’ll want to follow a few steps to ensure that everything is lined up properly and that your quilt comes together nicely.
Step-by-Step Sewing Process
- Pin Your Pieces: Start by pinning or clipping your fabric pieces together in rows. Ensure the edges are aligned and secure.
- Sew the Rows: Using your sewing machine, start stitching the rows together. Make sure to use a ¼-inch seam allowance to keep the seams even.
- Join the Rows: After sewing all your rows, sew them together to form the quilt top. Again, pinning is key to make sure everything stays aligned.
- Press the Seams: Once all the pieces are sewn together, use an iron to press the seams flat. This will give your quilt a smooth, professional finish.
- Tip: Don’t rush this step taking your time will ensure that your quilt comes out looking neat and polished.
Finishing Touches
Now that your quilt top is complete, it’s time to add the finishing touches. This includes adding quilt batting for padding and a backing fabric for the reverse side.
Adding the Backing and Batting
- Cut the Backing Fabric: Cut your backing fabric to the same size as your quilt top.
- Attach the Batting: Lay the quilt top, batting, and backing fabric together. Pin or clip the layers in place, then sew all three layers together using a quilting stitch or straight stitch. Be sure to sew around the edges for a secure finish.
Final Quilt Edging
Lastly, add the binding. This is the fabric that will finish off the edges of your quilt and give it a clean, professional look. Cut strips of fabric, join them together, and then sew them around the edges of your quilt.
- Tip: If you want to create a more rustic or vintage look, you can opt for hand-sewing the binding. It will add a unique, personal touch to your project.
Common Mistakes to Avoid
While creating your quilt, here are a few common mistakes that can arise and how to avoid them:
- Uneven Cutting: This can result in a crooked or uneven quilt. To avoid this, always measure carefully and take your time when cutting.
- Mismatched Seams: If your seams don’t line up, your quilt can look unprofessional. Be sure to pin your pieces before sewing to ensure everything aligns properly.
- Skipping the Pressing Step: Pressing your seams flat is crucial to achieving a neat and polished quilt. Don’t skip this step!
Conclusion
Upcycling a long sleeve shirt into a patchwork quilt is a rewarding and creative way to breathe new life into old clothing. With a little patience and a bit of sewing know-how, you can turn those forgotten shirts into a cozy, personal, and functional quilt.
Key Takeaways:
- Start by preparing your shirts and cutting them into usable fabric pieces.
- Design your quilt layout, whether it’s a grid, random patchwork, or a geometric pattern.
- Follow a step-by-step process to sew your quilt pieces together and finish with a quilt backing and binding.
Ready to give it a try? I’d love to hear about your own patchwork quilt creations or any tips you’ve discovered along the way! Leave a comment below, and don’t forget to share this post with fellow crafters. Happy quilting!
FAQs:
- How many shirts do I need to make a quilt?
- The number of shirts you’ll need depends on the size of the quilt you want to make. A standard lap-sized quilt can be made with 3-6 shirts, while a larger quilt may require more.
- Can I use any type of fabric for the quilt?
- While cotton is the easiest fabric to work with, you can also use other fabrics like flannel, denim, or knit shirts. Just keep in mind that stretchy fabrics may be harder to sew.
- Do I need to add quilt batting?
- Adding quilt batting is optional, but it will give your quilt a soft, padded feel. If you want a lighter quilt, you can skip the batting.
- Can I hand sew the quilt?
- Absolutely! If you prefer hand sewing, it can add a unique touch to your quilt. Just make sure to use small, even stitches for durability.