An old cardigan can lose its place in your wardrobe for surprisingly small reasons. Perhaps the buttons feel dated, one sleeve carries a stubborn stain, the shape no longer suits you, or a few holes make the whole garment look beyond saving. I don’t think those problems automatically mean the cardigan has reached the end of its useful life.
I’m always interested in what a worn garment can become after one thoughtful change. A plain cardigan gives you a useful foundation because the main construction has already been completed. You can embroider it, repair damaged areas with visible patches, alter its shape, or reuse the knitted fabric for something that has nothing to do with clothing.
The best approach depends on the condition of the knit. A cardigan that still fits may need only a small decorative update, while a badly damaged one can provide fabric for a cushion or soft toy. Either way, the aim is to work with what remains strong instead of focusing only on what has gone wrong.
Embroider a Flower Onto a Plain Cardigan
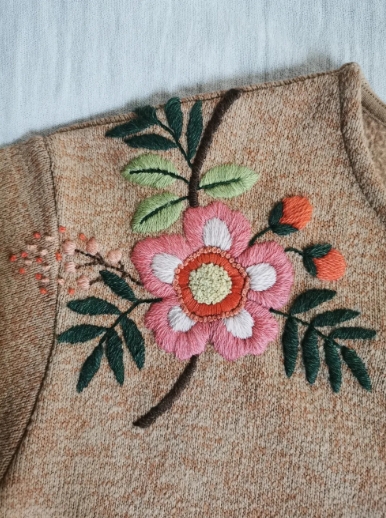
A plain cardigan doesn’t always need a dramatic reconstruction. This project adds a pink embroidered flower to a fleece cardigan, allowing the original garment to remain practical while giving the surface a clear handmade detail.
The idea works because the decoration is concentrated rather than scattered everywhere. One carefully placed flower can draw attention away from an otherwise ordinary surface, and you don’t need advanced embroidery skills to create a recognisable botanical shape.
Fleece and stable, tightly knitted cardigans are generally easier to embroider than loose or highly stretchy knits. The more the material moves under the needle, the more likely the motif is to become distorted. A removable stabiliser placed behind the fabric can make the stitching much easier to control.
Materials and Tools
· A clean cardigan in wearable condition
· Embroidery thread or fine yarn
· Hand-sewing needle with a suitable eye
· Embroidery hoop, if the cardigan fits without being overstretched
· Removable fabric marker or tailor’s chalk
· Lightweight embroidery stabiliser
· Small scissors
· A simple flower template, if needed
Add the Embroidery in Four Steps
1. Choose the position before drawing the design. Put the cardigan on and use a small safety pin or removable marker to identify the general area. Then lay it flat and check that the flower will not sit directly across a buttonhole, seam, pocket opening, or heavily stretched part of the chest.
2. Transfer a simple floral outline. Keep the first design manageable by using a central circle with five or six petals and a short stem. Place stabiliser behind the area, then secure the layers without stretching the cardigan out of its natural shape.
3. Work the main stitches gradually. Outline the flower first, then fill selected areas with satin stitch, split stitch, or small straight stitches. Avoid pulling each stitch tightly because the knit should remain flat rather than gathering around the motif.
4. Finish and check the inside. Secure the thread without leaving a large knot that might rub against the skin. Remove the stabiliser carefully, reshape the cardigan, and examine the embroidery while the garment is hanging as well as lying flat.
I’d keep the design smaller than you initially think it needs to be. Embroidery often feels modest while you’re working close to it, but it becomes much more noticeable once the cardigan is worn.
A beginner could stitch only an outlined flower rather than filling every petal. You could also embroider a small motif near a cuff, pocket, shoulder, or lower front edge. Several tiny flowers can work too, although I’d arrange their positions with paper templates before committing to the first stitch.
Hide a Bleach Mark With a Fabric Patch
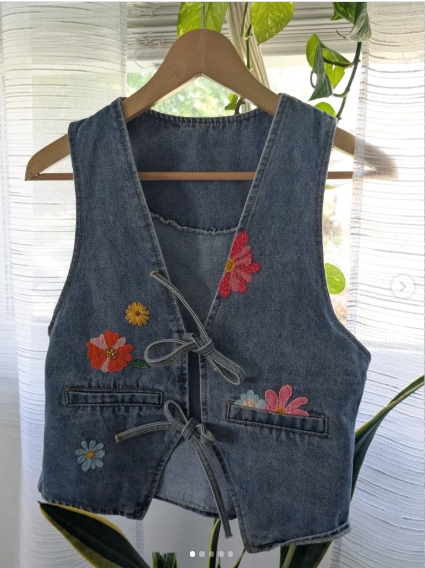
A bleach stain cannot be washed away, but it can become the starting point for a visible repair. This project uses reclaimed vintage fabric, fusible web, and embroidery thread to cover damage on the arm of an old cardigan.
The repair feels intentional because the patch does more than barely cover the mark. Its patterned fabric and stitched edge create a defined feature, so the eye notices the decoration instead of searching for the original damage.
Choose patch fabric that is light enough to move with the cardigan. Heavy denim may drag down a soft sleeve, while thin cotton, linen, or lightweight reclaimed clothing fabric can sit more naturally against the knit.
Materials and Tools
· A cardigan with a permanent stain or localised damage
· Reclaimed patterned fabric
· Paper for creating a patch template
· Fabric scissors
· Pins or fabric clips
· Fusible web suitable for the cardigan fibre, or washable fabric adhesive
· Embroidery thread
· Hand-sewing needle
· Iron and pressing cloth, when heat is safe for the garment
Cover the Damage in Four Steps
1. Measure the damaged area generously. Trace a patch shape that extends beyond the stain on every side. A leaf, oval, flower, heart, or softly rounded rectangle will usually sit more naturally than a tiny patch cut to the exact outline of the mark.
2. Prepare the reclaimed fabric. Wash and press it before cutting so it does not shrink later. Apply fusible web to the back only when the cardigan can tolerate heat, and use a pressing cloth to protect both surfaces.
3. Position the patch without stretching the sleeve. Slide a piece of cardboard inside the sleeve to keep the front and back separate. Pin or lightly fuse the patch in place, then check that the sleeve can still bend comfortably around the elbow.
4. Secure the edge decoratively. Stitch around the patch with blanket stitch, running stitch, or small crossed stitches. Then reinforce any areas that lift, remove loose threads, and test the sleeve movement before wearing the cardigan for a full day.
One detail I wouldn’t skip is rounding the corners. Sharp patch corners tend to lift first, especially on a sleeve that bends and brushes against other surfaces.
For a balanced finish, add a smaller coordinating patch elsewhere, perhaps near the opposite cuff or pocket. There’s no need to pretend the second patch is repairing damage; it simply helps the first one look like a deliberate design choice.
Refresh the Cardigan With Embroidered Buttons
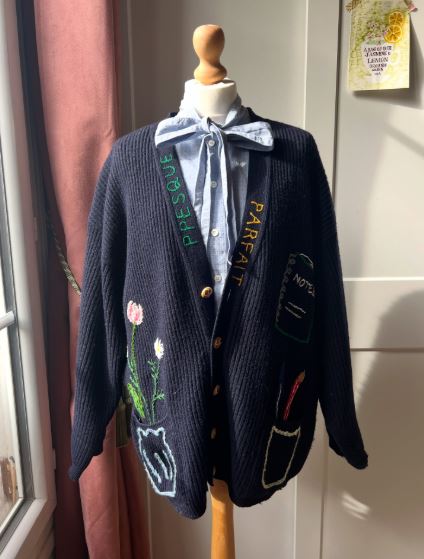
Buttons occupy a small area, but they strongly influence how a cardigan looks. This project pairs a softly cropped cardigan with wooden buttons featuring silk-embroidered floral details.
Replacing the buttons is one of the least intimidating ways to upcycle a cardigan. The garment keeps its original fit, sleeves, seams, and neckline, yet the front gains a new focal point. It is especially useful when the existing buttons are scratched, missing, mismatched, or simply too plain for the knit.
Decorative buttons don’t have to match the cardigan exactly. Warm wood can soften a neutral knit, colourful thread can connect the cardigan to other clothes in your wardrobe, and covered buttons can reuse tiny fabric scraps that would otherwise be difficult to use.
Materials and Tools
· An old cardigan with a secure button band
· Replacement wooden, covered, or decorative buttons
· Strong sewing thread
· Hand-sewing needle
· Small scissors
· Removable marker
· Toothpick or spare needle for creating thread space
· Tiny embroidered fabric scraps, if making covered buttons
Replace the Buttons in Three Steps
1. Check the existing buttonholes. Measure the old buttons before buying or making replacements. The new buttons should pass through comfortably without stretching the holes, but they should not be so small that the cardigan opens while you move.
2. Mark every button position before removing the originals. Replace the buttons one at a time, or mark each position clearly with tailor’s chalk. Sew through the existing reinforced area rather than shifting the button onto weaker knit fabric.
3. Create a small thread shank. Place a toothpick or spare needle across the button while sewing so the thread is not pulled completely flat. Remove it, wrap the thread beneath the button several times, and secure the stitches neatly on the inside.
For me, this is the most manageable starting point for someone who has never altered clothing. The work can be reversed, the cardigan does not need to be cut, and you can stop after one button if the style feels too busy.
You could use a different flower on every button, cover plain buttons with matching fabric scraps, or combine several buttons from a family sewing tin. Just keep their sizes reasonably consistent so the front band hangs evenly.
Make a Cushion Cover From a Cardigan
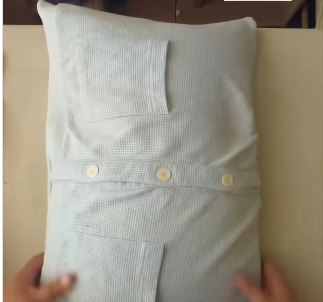
A cardigan that is too stretched, unfashionable, or awkwardly shaped for clothing may still have a perfectly usable knitted body. This project turns an old cardigan into a pillowcase or cushion cover, giving the fabric a practical role around the home.
The front button band can become the cushion opening, which avoids the need to insert a zip. Cable knits, ribbed textures, pockets, and decorative buttons also remain visible, making the cover look more considered than a plain square of fabric.
Choose a cardigan that feels comfortable against the skin and does not shed excessively. Avoid using a heavily damaged or moth-eaten section on the centre of the cushion because regular leaning and handling may enlarge weak areas.
Materials and Tools
· An old cardigan
· Cushion insert
· Fabric scissors
· Sewing machine or hand-sewing needle
· Strong coordinating thread
· Pins or fabric clips
· Measuring tape
· Knit stabiliser or narrow cotton tape
· Optional lightweight lining fabric
Sew the Cushion Cover in Four Steps
1. Position the cushion over the best part of the cardigan. Button the cardigan, lay it flat, and centre the insert so the button band runs across the front or back. Mark a square slightly larger than the cushion, allowing enough room for seams without making the finished cover loose.
2. Stabilise and cut the knit. Sew around the marked square before cutting, especially when the cardigan has a loose structure. Keep the front and back layers aligned, then cut outside the stabilising stitches.
3. Sew the outer edges. Open several cardigan buttons so the cover can later be turned right side out. Pin the layers together and sew around all four edges, reinforcing the corners and catching any loose knitted loops inside the seam.
4. Turn and fill the cover. Trim bulky corners without cutting through the stitching, turn the cover through the button opening, and gently shape the edges. Insert the cushion, close the buttons, and add a few reinforcing stitches if the button band pulls open.
I especially like this idea for a cardigan with cable patterns or attractive pockets. A pocket can remain on the cushion front as a playful place for a small note or television remote, although perhaps not the remote everyone claims they didn’t lose.
Sleeves can become narrow bolster covers, mug cosies, or small draught excluders. Any sound offcuts can also be saved for patching another knitted garment.
Sew a Soft Toy From Damaged Cardigan Fabric
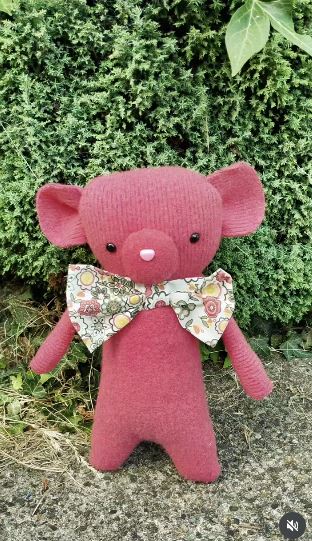
A cardigan with widespread holes may be unsuitable for another wearable project, but its strongest sections can still become a soft toy. The original project combines an old cardigan, a felted holey jumper, and a reclaimed bow tie to create a monkey.
Felting is useful here because it tightens wool fibres and makes the material less likely to unravel after cutting. However, deliberately felting a garment is permanent. I’d use that method only for wool knitwear that is already beyond wearable repair and has no reason to remain in its original form.
A handmade soft toy can also preserve recognisable parts of a sentimental cardigan, such as a pocket, button band, cuff, or embroidered section. For a child’s toy, every attachment must be secure, and small buttons or loose decorations should be avoided.
Materials and Tools
· Damaged cardigan or felted wool knitwear
· Paper for creating pattern pieces
· Fabric scissors
· Strong sewing thread
· Hand-sewing needle or sewing machine
· Pins or clips
· Washable toy stuffing
· Fabric scraps for inner ears or facial details
· Embroidery thread for stitched features
· Optional reclaimed ribbon or bow tie for decoration
Make the Toy in Five Steps
1. Select only strong sections of the cardigan. Hold the fabric up to the light and avoid areas with thinning fibres, running holes, or weak seams. Place paper pattern pieces over the sound material, using ribs, pockets, or colour changes where they can become part of the toy’s design.
2. Cut paired pieces carefully. Trace each body, limb, ear, and tail piece before cutting so the shapes remain balanced. Keep the stretch direction consistent across matching pieces, otherwise one arm or leg may lengthen more than the other after stuffing.
3. Sew and turn the components. Stitch each pair with a secure seam, leaving an opening for turning and stuffing. Clip curved seam allowances where necessary, then turn the pieces gently without pulling on the knit.
4. Stuff and assemble the toy. Add small amounts of filling gradually so the shape remains soft rather than rigid. Attach the limbs with repeated secure stitches, then embroider the eyes, nose, and mouth instead of using loose plastic parts when the toy is intended for a young child.
5. Add the finishing details. Close every stuffing opening with small ladder stitches. Attach any reclaimed bow, collar, or fabric decoration securely, and inspect the finished toy for loose fibres, open seams, or pieces that could be pulled away.
The knitted texture already gives the toy plenty of character, so I don’t think it needs a complicated face. A few well-placed embroidered stitches are often more appealing than several added components.
A damaged cardigan could also become a simple bear, rabbit, whale, or flat comfort toy. Choose a pattern with fewer narrow limbs for your first attempt, as wide shapes are easier to turn and stuff evenly.
Common Mistakes to Avoid
Cutting Knit Fabric Without Securing It
Many cardigans unravel once a knitted loop has been cut. Sew around the intended shape or apply suitable stabiliser before cutting. Keep a generous seam allowance until you know how the material behaves.
Stretching the Cardigan While Embroidering
An embroidery hoop can pull knit fabric beyond its normal shape. Secure the area gently and use stabiliser behind it. The cardigan should lie flat without being stretched tight like a drum.
Choosing a Patch That Is Too Heavy
A thick patch can drag down a lightweight sleeve or distort the cardigan’s shape. Choose fabric with a similar weight and flexibility, then reinforce the area with several small stitches rather than a thick layer of adhesive.
Using Heat Without Checking the Fibre
Synthetic cardigans may flatten, shine, or melt under excessive heat. Check the care label and test the iron through a pressing cloth on a hidden area before applying fusible web.
Replacing Buttons Without Measuring the Buttonholes
Decorative buttons are not useful when they cannot pass through the existing holes. Measure first and test one replacement before sewing the entire set.
Ignoring the Cardigan’s Weak Areas
Decoration cannot repair a failing shoulder seam or severely thinned underarm. Fix structural damage before starting the visible makeover, or reserve the strongest fabric for a non-wearable project.
Adding Unsafe Details to a Child’s Toy
Buttons, beads, and loosely attached ribbons can come away. Use embroidered facial features and secure every seam carefully when the finished item may be handled by a young child or pet.
Frequently Asked Questions
What is the easiest way to upcycle a cardigan?
Replacing the buttons or adding a small embroidered motif is usually the simplest starting point. Neither option requires major cutting, and both allow you to keep the original garment structure.
Can I cut a knitted cardigan without it unravelling?
Some tightly knitted or felted fabrics remain stable, but many cardigans begin unravelling after cutting. Sew a stabilising line around the intended shape first and test a hidden section before attempting a major reconstruction.
How can I cover a permanent stain on a cardigan?
A fabric patch, embroidery, applique, or combination of patching and decorative stitching can conceal the area. Extend the design beyond the exact stain so the result looks intentional rather than like a tiny emergency repair.
Can fabric glue replace sewing?
Fabric glue may help hold an applique temporarily, but it can stiffen the knit and may not withstand repeated washing. Hand or machine stitching generally creates a more flexible and durable attachment.
Which cardigan fabric is easiest to embroider?
Stable fleece, felted wool, and tightly constructed knits are usually easier to control than loose, highly stretchy cardigan fabric. A lightweight stabiliser can help keep the stitches even.
Can I make a cushion cover without a sewing machine?
Yes. Use a strong hand-sewing thread and small backstitches around the cut edges. The process will take longer, but careful hand stitching can create a secure cover.
What can I do with leftover cardigan sleeves?
Sleeves can become small cushion covers, bottle cosies, mug warmers, soft storage tubes, draught excluders, or fabric for future visible repairs. Stabilise the cut edges before using them.
Keep the Best Parts of an Old Cardigan in Use
Learning how to upcycle a cardigan isn’t only about decorating a garment until it looks different. It begins with deciding which parts are still useful and choosing a project that respects their condition.
A cardigan that fits well may need nothing more than a flower, a fabric patch, or a row of better buttons. One that no longer works as clothing can become a dress, cushion cover, or soft toy. I’d begin with the smallest change that solves the actual problem, then save any sound offcuts rather than discarding them.
Which cardigan in your wardrobe could be repaired, reshaped, or given a completely different purpose?