An old chair can look tired long before it stops being useful. The finish may be scratched, the seat fabric may feel dated, or the joints may have loosened after years of being moved from room to room. Underneath those problems, however, there is often a sound frame with shape and size that are difficult to find in newer furniture.
I don’t think every chair needs a dramatic redesign. Sometimes the best chair upcycle keeps the original shape and simply makes it clean, secure, comfortable, and suitable for the room again. A careful repair, a calmer paint colour, fresh seat covering, or restored cane can change the whole piece without hiding what made it worth saving.
The chair’s condition should decide the project. Paint cannot correct a weak joint, and attractive fabric cannot make a damaged seat safe. Begin with the structure, then work towards the visible finish. That order may feel less exciting, but it is what separates a useful furniture makeover from a chair that only looks finished in photographs.
Check the Chair Before You Decide What to Do
Put the chair on a flat floor. Press gently on the seat, back, and arms. Check that all four legs touch the floor and notice where the chair moves. A small wobble may come from one loose joint or one uneven foot, so find the real problem before adding glue.
Look closely at the underside. Old staples, webbing, springs, corner blocks, screws, and previous repairs often reveal more than the visible surface. If the chair has severe rot, large cracks in the parts that hold weight, active woodworm, broken metal welds, or a frame that cannot be make steadyd, ask a furniture repairer to check it.
Then work out what the chair is made from. Wood, metal, plastic, cane, and padded chairs do not all need the same cleaning or paint. Test any cleaner, glue, stain, or paint on a small hidden spot first.
Inspect:
• Loose or separating joints
• Split legs, rails, arms, or back supports
• Missing screws, dowels, corner blocks, or brackets
• Rust, flaking paint or finishs, or deep corrosion
• Lifting thin wood top layer or swollen wood
• Broken, brittle, or sagging cane
• Torn seat covering, damaged webbing, flattened foam, or exposed springs
• Sharp staples, tacks, splinters, or metal edges
• Strong odours, damp marks, mould, or signs of pests
• The stability of the chair under gentle pressure
Gather the Tools and Materials
• Protective gloves, eye protection, and a dust mask suited to the work
• Vacuum, soft brush, mild cleaner, clean cloths, and a bucket
• Screwdrivers, pliers, staple remover, small hammer, and suitable clamps
• Wood glue, replacement screws, dowels, or repair materials suited to the frame
• Medium and fine sandpaper or sanding pads
• Primer, furniture paint, stain, or clear finish suitable with the chair
• Paintbrushes, a small roller, painter’s tape, and a dust-free cloth
• Strong seat fabric, suitable foam or batting, seat covering scissors, and a staple gun
• Cardboard or kraft paper for templates
• Drop cloths and containers for keeping removed hardware organised
Keep every screw, bracket, tack strip, and usable piece of old fabric until the chair is put back together. The old fabric can act as a cutting template, and a small bag of labelled hardware saves a surprising amount of confusion later.
Clean, Sand, and Paint the Chair
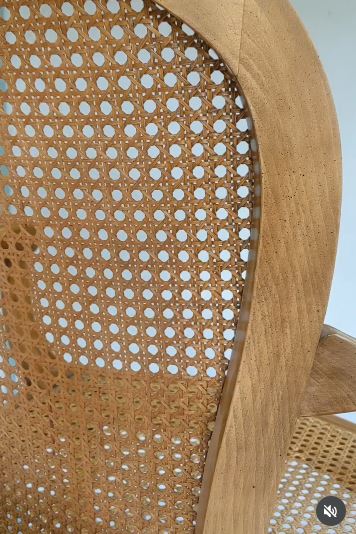
Surface preparation depends on what is already on the chair. A sound painted finish may need cleaning and light light sanding rather than complete stripping. Peeling paint, peeling or loose varnish, rust, wax, or heavy grease and dirt needs more attention. The goal is not to sand away every sign of age; it is to create a clean, stable surface that can accept the chosen finish.
Materials and Tools
• Abrasive paper or sanding pads in the right roughness
• Dust mask and eye protection
• Tack cloth or slightly damp lint-free cloth
• Primer suitable with the frame and topcoat
• Furniture paint, stain, or clear protective finish
• Small brush for spindles and a roller for broader areas
• Painter’s tape and a drop cloth
Refinish the Chair
1. Find the existing paint or finish. Test a hidden area and look for wax, polish, peeling varnish, or rust. Choose preparation products that suit the chair rather than assuming one method works on every surface.
2. Smooth only what needs smoothing. Remove loose paint or finish and soften rough edges with gentle sanding. Follow the grain on wood and take care around thin wood top layer, carved details, and sharp corners. Vacuum the dust, then wipe the surface clean.
3. Prime where necessary. Use a suitable primer when changing from a dark colour to a light one, covering repaired areas, working with metal, or dealing with a surface that may stain through. Apply thin, even coverage and follow the product instructions.
4. Apply the finish in light coats. Work from the underside and less visible areas towards the outer frame. Brush along edges and spindles, then smooth broader areas before the paint or finish begins to set. Let each layer dry properly before adding another.
5. Protect and recheck the frame. Add a suitable clear finish only when the paint or stain system calls for it. Once the chair is ready to handle, check the joints and feet again before fitting the seat.
I don’t think every old chair needs to be painted. Nice wood may only need cleaning and a clear finish or stain. Paint is useful when old repairs and different wood pieces make the frame look patchy, because one colour helps everything sit together.
A two-tone version can keep the seat rails or arms in natural wood while the remaining frame is painted. Stencilled details may suit a flat back panel, but test the scale on paper first; small furniture can become too busy very quickly.
Clean and Protect Woven Cane
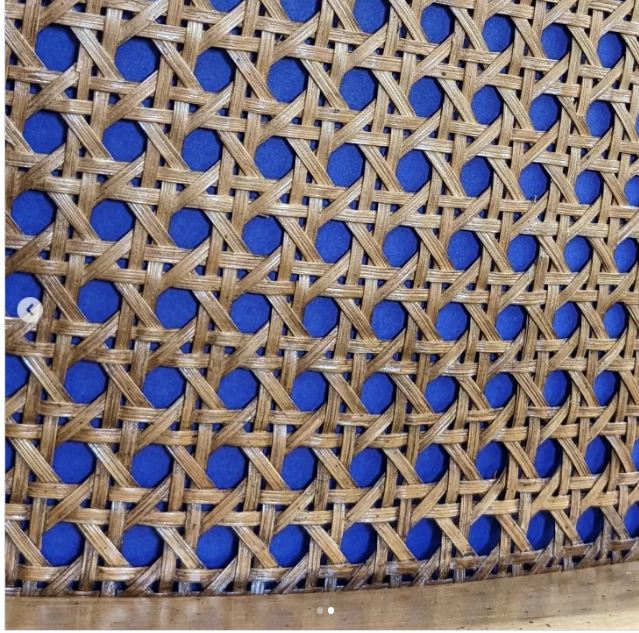
Cane needs gentler care than wood. It bends a little when the chair is used, and thick paint can make later repairs difficult. Good cane often looks best after careful cleaning, especially when the wooden frame is painted and the natural weave is left showing.
Materials and Tools
• Soft brush and vacuum with gentle suction
• Mild cleaning method suitable for cane
• Painter’s tape and thin card or paper
• Small artist’s brush for the frame edge
• Replacement cane or professional caning service if damaged
• Fine sanding pad for the surrounding wood only, when suitable
Refresh a Cane-Back Chair
1. Check the weave. Check for broken strands, sagging areas, loose edges, and previous patching. Do not sit on the chair during checkment. A cane back panel and a cane seat that holds a person’s weight have different repair demands.
2. Clean gently. Remove surface dust with a soft brush and low suction. Avoid soaking old cane or scrubbing it aggressively. Let it dry naturally before masking or working on the frame.
3. Protect the cane. Mask the woven panel carefully when refinishing the surrounding wood. Slide lightweight card behind the cane where possible, and avoid pressing tape so firmly that it pulls fibres when removed.
4. Finish the frame precisely. Use a small brush where wood meets cane and keep wet paint or finish out of the openings. Remove masking before it becomes permanently trapped beneath a dry paint edge.
5. Repair rather than disguise damage. Arrange proper new cane weaving when the weave is brittle, broken, or unable to support its intended load. Paint cannot restore lost strength, and a cushion should not be used to hide an unsafe cane seat.
For me, the contrast is the reason to keep good cane visible. A painted timber frame beside a warm natural weave gives the chair more depth than one flat colour across every surface.
A removable padded pad can make a cane seat more comfortable without permanently covering it. Use ties or a non-slip base rather than staples through the weave.
Put the Chair Back Together and Test It
Do not rush when putting the chair back together. Remove any dried paint from screw holes, then return each screw to the right place. Tighten the screws evenly, but do not force them. Old wood can split if a screw is made too tight.
Place the chair on a level floor and test it gradually. Press on the seat with your hands, then sit carefully while keeping your feet planted. Listen for movement and check whether the back, arms, and legs remain firm. A chair intended mainly for display still needs to be safe if a visitor assumes it can be used.
Add felt pads only after confirming that the legs are even. Pads can protect flooring, but they should not be used to disguise a major wobble or damaged foot.
Common Mistakes to Avoid
Painting Before Repairing
Paint may conceal a loose joint temporarily, but it also makes later repair messier. Stabilise the frame first.
Sanding Through Veneer
Thin thin wood top layer can disappear quickly at corners and edges. Use light pressure and stop once the surface is stable.
Using Decorative Fabric for Heavy Use
A fabric may look suitable but wear badly on a dining or desk chair. Choose seat covering material for seats that will be used regularly.
Pulling Seat covering Unevenly
Completing one entire side before the opposite side often twists the pattern and creates ripples. Work from the centres in alternating pairs.
Covering Unsafe Cane
A cushion or fabric panel does not restore brittle, broken cane. Repair the structure before treating it as seating.
Closing Screw Holes With Paint
Thick paint or finish inside holes can make reassembly difficult and may cause screws to enter at the wrong angle.
Ignoring the Underside
Loose webbing, protruding staples, rusted springs, and weak corner blocks are easier to correct while the seat is already removed.
Using the Chair Too Soon
A finish may feel dry before it is ready for pressure, friction, or seat covering installation. Follow the paint or finish maker’s handling and curing guidance.
How to Look After the Finished Chair
Dust painted and wooden surfaces with a soft cloth and clean spills promptly with a method suited to the finish. Avoid harsh scrubbing around distressed edges, stencils, cane, and fabric joins. Vacuum seat covering using a gentle attachment, and deal with stains by following the fabric care instructions.
Check the chair every few months for movement, especially if it is used at a dining table or desk. Tightening a loose screw or fitting early is easier than repairing a split caused by repeated movement. Keep cane away from extreme heat and persistently damp areas, and protect the chair from prolonged direct conditions that may fade fabric or finishes.
Frequently Asked Questions
What is the easiest way to upcycle a chair?
A sound wooden chair with a removable seat is usually a manageable first project. Clean and lightly prepare the frame, apply a suitable finish, and recover the seat using the old fabric as a template.
Can I paint a chair without sanding it?
Some paint products need only thorough cleaning and light light sanding, while peeling or loose varnish, gloss, wax, rust, or peeling paint requires more preparation. Follow the finish manufacturer’s guidance and test a hidden area.
Should I remove old seat covering before adding new fabric?
Remove it when it is dirty, damaged, bulky, hiding failed padding, or attached with loose or rusty staples. A clean, firmly attached layer may sometimes remain, but the seat structure still needs inspection.
Can I upcycle a wobbly chair?
A minor loose joint may be repairable, but the cause must be identified. Do not rely on paint, filler, or seat covering to make steady a frame. Seek professional help for major cracks or failed weight-holding parts.
What fabric should I use for a chair seat?
Choose strong seat fabric suited to the expected level of use. Consider durability, cleanability, pattern placement, and whether the fabric can wrap neatly around the corners.
Can I paint woven cane?
It may be possible, but sound natural cane is often better left uncoated, particularly when it needs to flex. Damaged or weight-holding cane should be checked and repaired rather than hidden under paint.
How do I stop an upcycled chair from scratching the floor?
Confirm that the feet are sound and even, then attach pads suited to both the chair and flooring. Replace worn pads before grit becomes trapped beneath them.
Give the Chair a Useful Second Life
A good chair upcycle does not begin with choosing a colour. First, check that the chair is safe and find out what it is made from. Repair the frame, then clean and sand it. After that, paint or finish the wood and add the new seat fabric.
Working in this order helps you keep the chair’s original shape and character. Fresh seat fabric makes it comfortable, and a simple paint colour can help it fit the room. For me, the best result is not an old chair pretending to be brand new. It is the same chair, repaired, cleaned, and ready to be used again.