Old clothes rarely become useless all at once. More often, one sleeve loses its shape, a knee tears, a hem feels dated, or a shirt simply stops fitting the way it once did. I don’t think that means the whole garment has finished its job. Fabric still has value, details like pockets and buttons still have purpose, and even scraps can become something worth using every day.
I’m always interested in the practical side of reuse. Clothing upcycles work best when they solve a problem instead of creating a pile of awkward leftovers.
A good idea can help you save a favourite piece, cut waste, and make something that feels genuinely useful rather than decorative for the sake of it. The strongest upcycling projects usually begin with small habits: checking the fabric first, cutting with care, keeping good parts, and reinforcing what will take wear.
That’s what matters in these clothes upcycling tips. Each one grows out of a simple, realistic approach that a beginner can follow at home. Some focus on preparation, some help you avoid common mistakes, and some show how to use every workable part of a garment. None of them require a studio full of equipment. A careful eye, a few basic tools, and a little patience will take you much further than buying more supplies.
Check the Condition of Each Garment Before You Start
A quick inspection saves time and stops you from building a project on weak fabric. Before you cut, pull, stitch, or reshape anything, check the areas that usually fail first.
· Look at knees, underarms, crotch seams, cuffs, and collars for thinning fabric.
· Test stretchy knitwear gently so you can tell whether the fibres still recover their shape.
· Check for stains that may spread attention away from the part you actually want to feature.
· Inspect buttons, zips, pockets, and waistbands because these details are often worth saving.
· Separate garments that are best for wearing again from garments that are better for cutting up.
Gather Simple Tools That Make Clothing Upcycling Easier
You do not need a large sewing room to upcycle clothes well, but a few basic tools make the work neater and much less frustrating.
· Sharp fabric scissors or a dedicated cutting pair.
· Pins or sewing clips.
· A tape measure or ruler.
· Tailor’s chalk or a washable fabric marker.
· Hand-sewing needles and thread in a few useful colours.
· An iron and ironing surface.
· A seam ripper for removing pockets, trims, and stitched sections.
· Small containers or bowls for buttons, zips, tabs, and saved fabric pieces.
Decide What to Keep Before You Cut Anything Away
One of the easiest upcycling mistakes is cutting too quickly. I know it can feel tempting to jump straight into the exciting part, but garments often contain reusable details that are harder to replace later.
· Keep sturdy pockets that could become storage features, appliqués, or patch pieces.
· Save buttons, studs, buckles, and zips for later repairs or future projects.
· Use clean flat areas of fabric for patches, pocket linings, or small bags.
· Reserve long strips from hems or side seams for ties, loops, or braided projects.
· Think about whether the finished upcycle needs a soft drape, structure, or stretch before choosing which part of the garment to use.
Measure and Pin Before Reshaping a Shirt
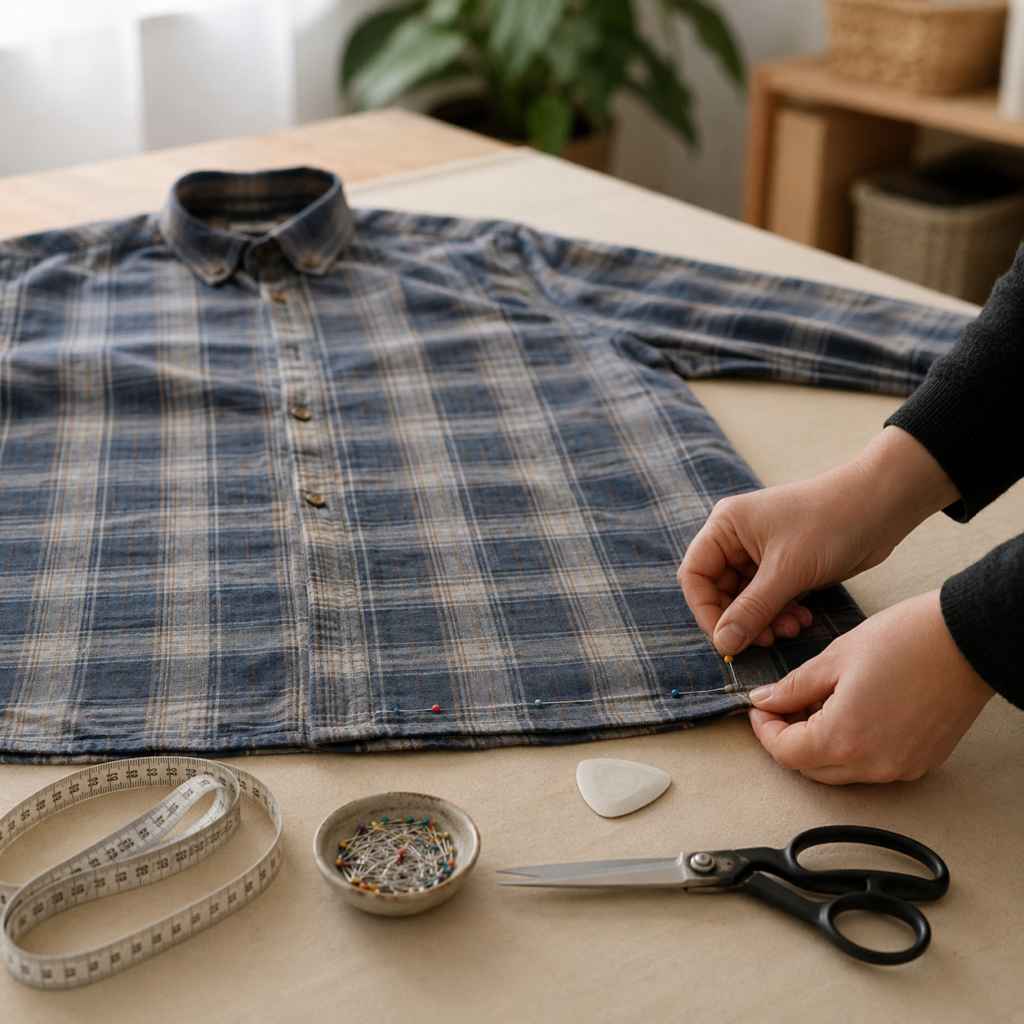
Some clothing mistakes happen before the scissors even touch the fabric. A shirt that looks simple to shorten or reshape can easily end up crooked if you trim one side by eye and hope the other side matches. That is why I like this tip so much. It reminds you that neat planning is part of the upcycle, not a delay before the upcycle.
Plaid and striped garments make this especially clear because the pattern immediately shows whether your cut line has drifted. Even plain fabric benefits from the same care. Once the hem is pinned and measured, then you can step back and decide if the new length still suits the shirt’s proportions.
Materials and Tools
· A shirt you want to shorten or reshape
· Tape measure or ruler
· Pins or sewing clips
· Tailor’s chalk or a washable marker
· Sharp fabric scissors
· Iron if the fabric is creased
Steps
- Lay the shirt flat on a stable surface and smooth out every wrinkle. If the fabric is badly creased, press it first so the front and back sit evenly and do not trick you into measuring the wrong length.
- Decide where you want the new hem, then measure from a fixed point such as the underarm or shoulder seam rather than guessing from the bottom edge. Mark several points across the shirt and connect them into one clean guide line.
- Pin the shirt along that line before you cut anything. This helps you see whether the front and back look balanced and gives you a chance to adjust the curve or straightness while the garment is still intact.
- Cut slowly, keeping the fabric flat and the scissors level. If you plan to sew a hem afterwards, leave enough allowance for folding and pressing so the final edge does not creep shorter than you intended.
- Press the edge and finish it in the way that suits the project. You might sew a proper hem, leave a deliberately raw edge on casual fabric, or turn the trimmed strip into ties or small patch pieces.
One detail I wouldn’t skip is checking the shirt while it is still pinned. For me, that is the moment when proportion becomes obvious, and it is much better to change your mind then than after a permanent cut.
Variations and Alternatives
· Use the same method to crop a T-shirt, reshape a tunic, or turn a dress into a shorter top.
· If you do not sew, choose a fabric that looks tidy with a raw edge or use fusible hem tape.
· Try tracing a gentle curved hem instead of a straight line if you want a softer finish.
Repair Damaged Denim With a Backing Patch Instead of Throwing It Away
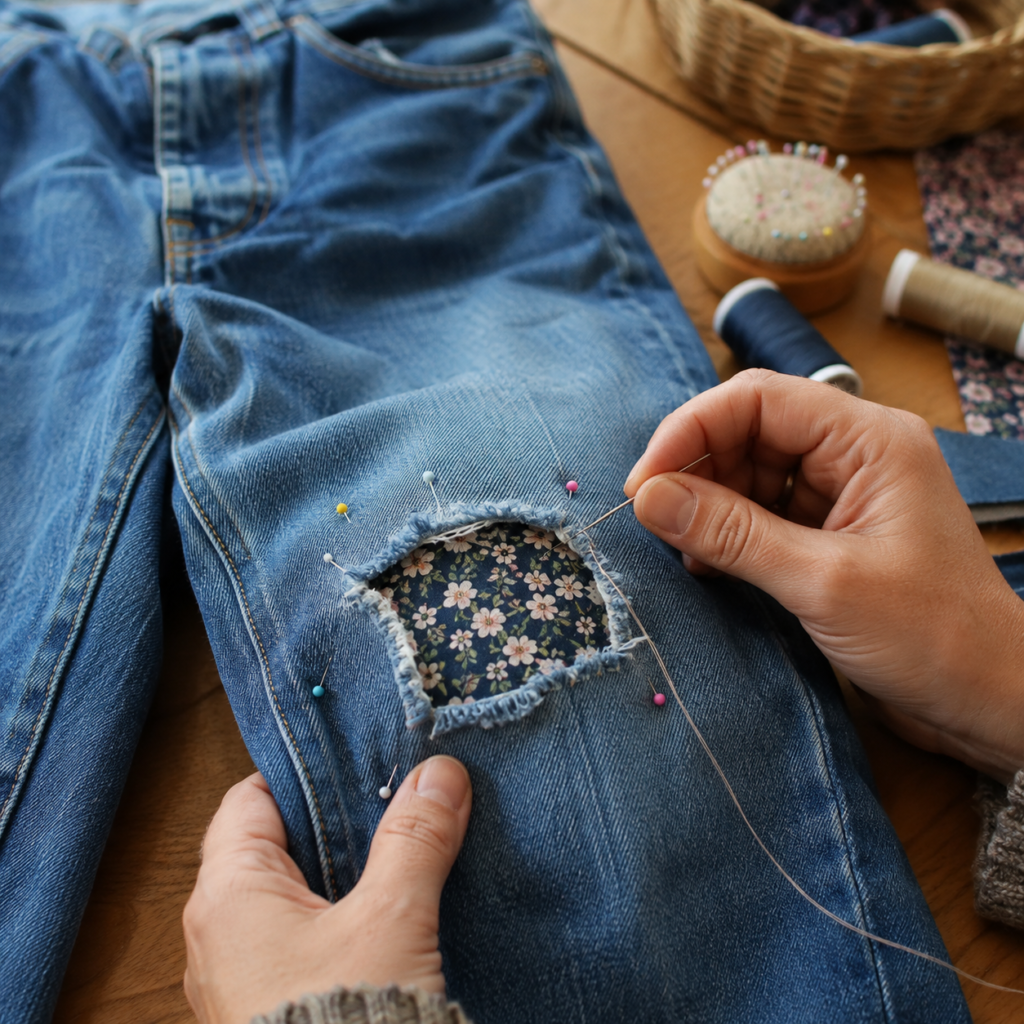
A hole in jeans does not have to become the end of the garment. In fact, torn denim is often one of the most rewarding places to start because the repair can become part of the design. Instead of letting the rip grow wider in the wash, you can stabilise it and add a patch behind it that gives both support and contrast.
This tip also helps you avoid a common beginner mistake: sewing straight over a damaged opening without supporting the weakened area underneath. That usually pulls the tear out of shape. A backing patch gives the denim something stable to hold onto, which means the repair lasts longer and looks more deliberate.
Materials and Tools
· Jeans with a tear or worn area
· A fabric patch cut slightly larger than the hole
· Pins
· Needle and thread or a sewing machine
· Small scissors
· Iron if needed
Steps
- Trim only the loose threads that are truly hanging free, but keep as much solid denim around the hole as possible. Then cut a patch that extends beyond the tear on all sides so the repair has enough support.
- Place the patch behind the opening and pin it securely from the front. If the jeans are difficult to handle, turn them inside out first so you can check that the patch sits flat and does not bunch under the damaged area.
- Stitch around the hole with small, steady stitches that catch both the denim and the patch. You can use matching thread for a quiet repair or a visible stitch style if you want the mend to become part of the garment’s character.
- Reinforce the outer edges of the weak area rather than packing the entire opening with heavy stitching. Too much dense stitching can make the knee or thigh feel stiff, which is not ideal for something you still want to wear comfortably.
- Check the inside once you are finished, trim thread tails, and make sure the patch remains smooth. Then wash gently the next time so the new repair settles without pulling.
I know some people feel they need to hide every repair, but I don’t think that is always the best approach. A tidy visible patch often looks more honest and more attractive than pretending the tear never happened.
Variations and Alternatives
· Use old cotton shirts, lightweight denim, or leftover quilting fabric for the backing patch.
· Try hand-stitching for a softer mended look or machine stitching for speed and strength.
· Repeat the method on jacket elbows, shirt cuffs, or worn canvas bags.
Save Pockets, Tabs, and Flat Denim Pieces for Future Projects
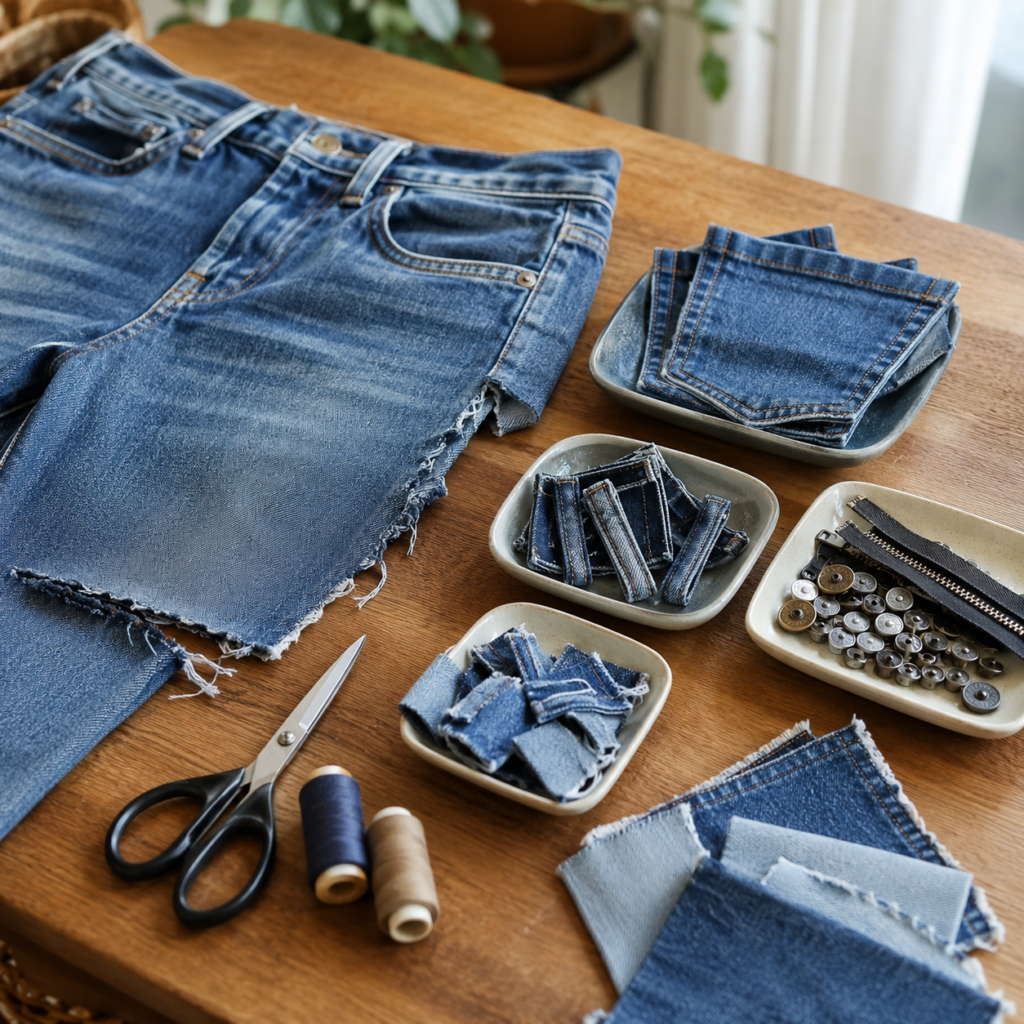
One of the smartest upcycling habits is learning to see parts instead of just garments. A pair of jeans can offer pockets, belt loops, long seam strips, sturdy flat panels, zip sections, and small scraps for patching. When these pieces are cut carefully and sorted, you build a supply of ready-to-use materials without buying anything new.
This tip matters because clothing projects often produce leftovers. If those leftovers are not organised, they quickly become clutter and then get thrown away. By trimming and grouping them properly, you turn scraps into a practical resource.
Materials and Tools
· Old jeans or other sturdy garments
· Fabric scissors
· Seam ripper
· Small bowls or trays for sorting
· Thread and labels if you want to bundle similar pieces together
Steps
- Start by deciding which parts of the garment are still strong. Flat thigh panels, back pockets, and waistband sections usually offer the best usable material, while badly worn knees or crotch seams may be better for tiny scraps only.
- Cut or unpick the reusable parts one category at a time. Keep pockets whole if possible, remove tabs and loops without shredding them, and trim large panels into clean shapes so they will be easier to use later.
- Sort the pieces immediately into trays, envelopes, or boxes. I’d separate pockets, narrow straps, hardware, and patch fabric so you can find what you need quickly instead of tipping out one tangled pile every time you start a new idea.
- Trim frayed excess fabric from the saved parts, but leave a little seam allowance where useful. That extra edge can help when you sew the piece onto another item.
- Store the sorted pieces in a dry place and review them before your next upcycling session. You may find that one old pair of jeans gives you materials for several projects rather than one.
The part I like here is the change in mindset. Once you begin saving good details separately, you stop seeing leftovers as mess and start seeing them as building blocks.
Variations and Alternatives
· Do the same with shirt buttons, dress zips, jacket snaps, and waistband elastic.
· Use clear jars or paper envelopes if you have very limited storage space.
· Turn sorted pockets into wall organisers, tote-bag fronts, or notebook covers later on.
Wash and Press Clothes Before You Start Upcycling
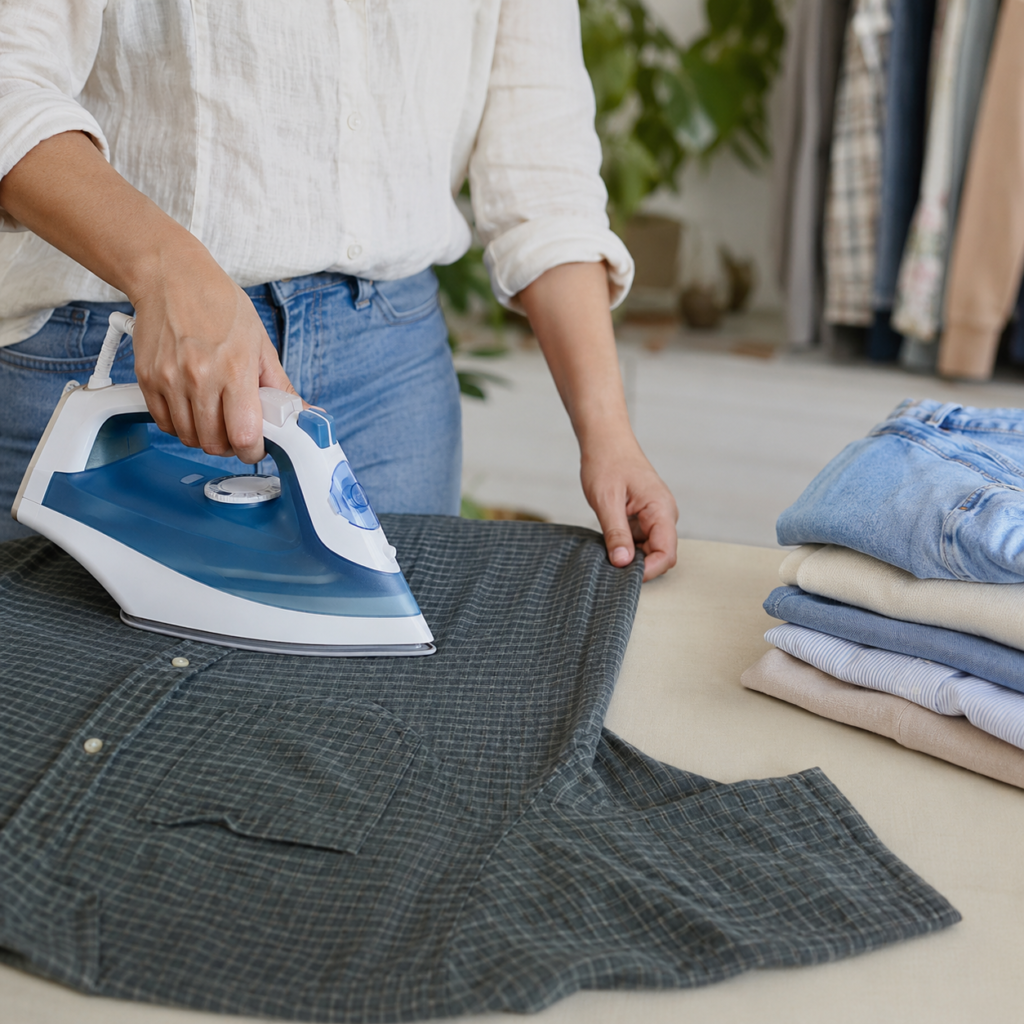
Preparation can feel less interesting than cutting and stitching, but it affects nearly every stage that comes after. Washing and pressing clothes before you upcycle them helps you work with the fabric as it really is. Shrinkage happens before the project instead of after it, wrinkles stop distorting your measurements, and hidden dirt does not get locked into the finished piece.
This is especially important when you are combining parts from different garments. A crisp shirt panel and a crumpled one may look the same size on the table while actually behaving quite differently once pressed. Clean fabric also lets you inspect stains, wear, and weak spots more honestly.
Materials and Tools
· Garments to be upcycled
· Laundry supplies suitable for the fabric
· Iron or steamer
· Ironing surface
· Lint remover if needed
Steps
- Wash the garment in the safest way for its fibre type before any cutting begins. If the item is delicate or vintage, choose a gentler cleaning method so you do not weaken the fabric further.
- Dry it fully and inspect it in good light. This is where you may spot a stain near the hem, thinning at the elbow, or a twisted seam that would have caused trouble if you had started cutting too soon.
- Press the fabric thoroughly, especially along hems, button plackets, sleeves, and folds. Then lay it flat and smooth it with your hands so the grain of the fabric is not skewed.
- Remove lint or pilling if the surface needs refreshing. A cleaner finish can make even a simple upcycle look more intentional.
- Only after the garment is clean and pressed should you mark your pattern, pin your adjustments, or take it apart for another use.
I’d rather spend ten quiet minutes pressing a garment than spend an hour correcting a warped cut later. It is one of the least exciting tips, but it prevents so many avoidable problems.
Variations and Alternatives
· Use a pressing cloth for delicate fabrics that may shine under direct heat.
· For quick projects, steam the garment well if a full wash is not necessary.
· Apply the same preparation habit to fabric saved from curtains, bedding, or tablecloths.
Reinforce Seams and Handles So the Finished Piece Lasts
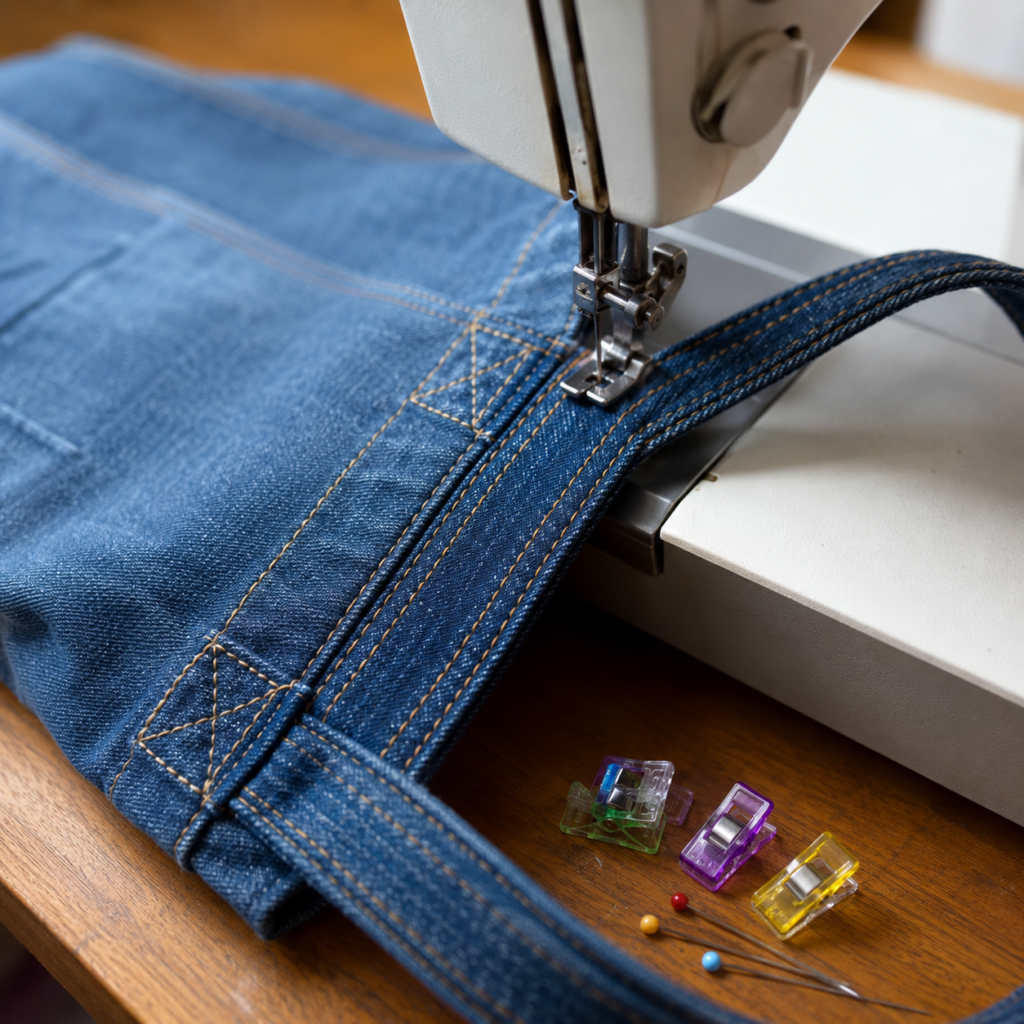
There is no point turning old clothes into a tote, apron, cushion, or organiser if the seams fail after a few uses. Reinforcement is the step that gives an upcycle staying power. Stress points such as straps, pocket corners, waistband joins, and hanging loops take repeated pulling, so they need more than one quick line of stitching.
This tip is less about making something fancy and more about making it dependable. A simple project with strong construction is always better than a complicated one that comes apart.
Materials and Tools
· Upcycled fabric item ready for assembly
· Sewing machine or hand-sewing needle
· Strong thread
· Pins or clips
· Extra fabric for interfacing or reinforcement patches if needed
Steps
- Identify the areas that will carry weight or receive frequent handling. On a tote this would be the straps and top edge; on an apron it might be the neck loop, waistband, and pocket corners.
- Pin or clip those sections securely before sewing so they stay aligned. If the fabric is soft or stretched, add a small reinforcement patch or extra layer behind the area that needs support.
- Sew the main seam first, then go back and strengthen the stress points with a second pass or a boxed cross stitch where appropriate. Then test the item gently by pulling the straps or lifting the edge to check whether anything shifts.
- Trim loose threads and inspect the stitching from both sides. Uneven or skipped stitches at a handle base are worth redoing immediately, because that is where failure usually begins.
- Use the finished piece carefully the first few times and watch how the seams behave. A small correction now can extend the life of the project considerably.
- For me, durability is one of the biggest differences between a rushed craft and a useful upcycle. I don’t think reinforcement is optional when the finished item is meant to work hard.
For me, durability is one of the biggest differences between a rushed craft and a useful upcycle. I don’t think reinforcement is optional when the finished item is meant to work hard.
Variations and Alternatives
· If you sew by hand, use a backstitch in high-stress areas for extra strength.
· Add topstitching in a contrast colour if you want the reinforcement to become a visible design detail.
· Use salvaged denim or canvas patches behind thin fabric when straps need extra support.
Use Small Fabric Scraps in Practical Projects Instead of Throwing Them Out
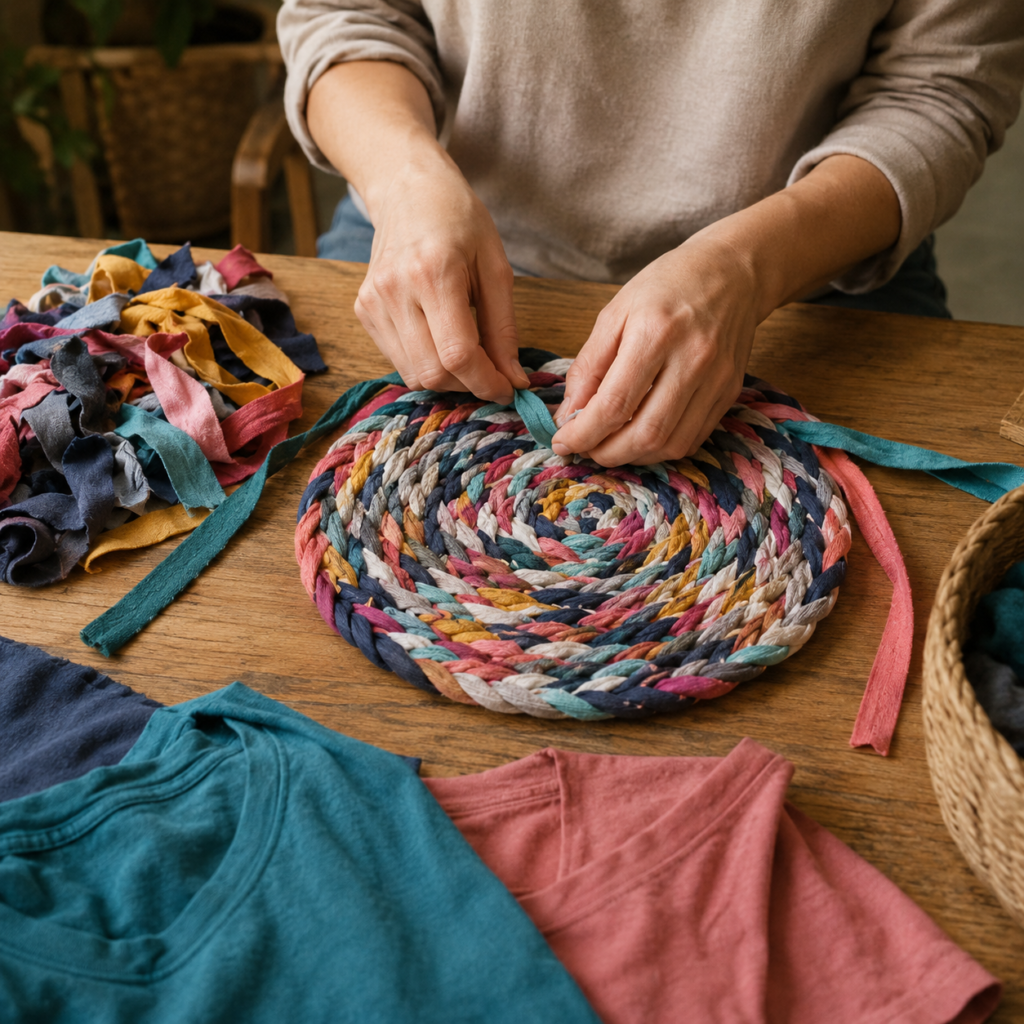
Tiny leftover pieces are often where good intentions disappear. People save large fabric sections but sweep away the narrow strips because they seem too small to matter. Yet soft T-shirt scraps, jersey offcuts, and lightweight strips can be braided, twisted, or stitched into useful pieces for the home.
A braided mat is a strong example because it uses humble material in a very visible way. The colours do not need to match perfectly. In fact, a little variation gives the finished surface more personality and helps make use of whatever scraps you actually have.
Materials and Tools
· T-shirt or knit fabric strips
· Scissors
· Pins or clips
· Needle and thread or a sewing machine
· Optional non-slip backing if the mat will be used on a smooth floor
Steps
- Cut the fabric into long strips and remove only the unusable parts such as thick seams or badly damaged patches. Sort the colours loosely if you want some visual balance, but do not worry about matching every piece exactly.
- Join shorter strips as needed and braid three lengths together, adding more fabric as the braid grows. Keep the tension even so the braid remains flexible and does not twist on itself.
- Coil the braid into a spiral shape on a flat surface and stitch it together gradually from the back or along the inner edges. Then continue wrapping and stitching until the mat reaches the size you want.
- Check the shape frequently and ease the braid outward if the circle begins to cup. Small adjustments during the coiling stage are much easier than trying to flatten a finished mat that has become too tight.
- Secure the final tail neatly, trim stray ends, and add a backing if the mat needs extra grip. Then place it where soft fabric and light use make sense, such as beside a bed or under a small basket.
A little variation actually helps this kind of project. I’d rather use the scraps I have than delay the whole idea while searching for perfectly matching colours.
Variations and Alternatives
· Make coasters, basket trims, or chair-pad covers from shorter braids.
· Use a single colour family for a calmer look or mix everything for a more playful finish.
· Turn very small leftovers into stuffing for pet beds or floor cushions if braiding is not practical.
Clothes Upcycling Mistakes That Quietly Ruin Good Ideas
Cutting first and planning later is probably the fastest way to spoil a promising garment. Once fabric is removed, the mistake is often difficult to reverse. Marking, measuring, and pinning may feel slow, but they protect the shape of the item and help you see whether the idea still makes sense before you commit.
Ignoring fabric condition is another common problem. A shirt may look usable from a distance while being threadbare under the arms or at the side seams. If you build a tote handle, apron tie, or cushion edge from weak fabric, the project can fail even if the sewing looks tidy.
Many beginners also forget to clean and press clothes before starting. Wrinkled fabric can throw off measurements, and unwashed garments may shrink after the upcycle is complete. That leaves finished items looking uneven or feeling smaller than planned.
Throwing away useful details too soon is a missed opportunity. Pockets, loops, buttons, zips, and flat panels can support future projects and reduce waste. Once they are cut badly or discarded, you often end up buying new supplies to replace what you already had.
There is also a tendency to underbuild practical items. If a finished piece is meant to hold weight, hang from a hook, or be washed often, reinforce it. Decorative sewing alone rarely survives real use.
Frequently Asked Questions
Can beginners really upcycle clothes successfully?
Yes, especially if they begin with simple ideas such as hemming, patching, saving usable parts, or making small accessories from leftover fabric. The easiest wins usually come from improving or reusing what is already there rather than attempting a major refashion straight away.
Do I need a sewing machine for clothes upcycling?
Not always. Many small repairs, patches, and simple fabric projects can be done by hand. A sewing machine helps with speed and stronger seams, but careful hand stitching is perfectly workable for many beginner upcycles.
Should I wash clothes before every upcycling project?
In most cases, yes. Clean fabric is easier to measure, cut, and sew, and it lets you see the real condition of the garment. Delicate or vintage pieces may need gentler cleaning, but some kind of preparation is still worth doing.
What is the best thing to do with tiny fabric scraps?
Soft knit scraps can become braided mats, stuffing, ties, or patch pieces. Small woven scraps can support mending, appliqué work, or pocket details. The key is sorting them by size and type so they stay usable rather than becoming clutter.
How can I make an upcycled item last longer?
Choose strong sections of the original garment, reinforce stress points, and avoid using weak fabric for handles or weight-bearing areas. Good pressing, neat finishing, and sensible use after the project also help a lot.
Is visible mending acceptable in clothes upcycling?
Absolutely. Visible mending can turn damage into character while extending the life of a garment. The important part is that the mend stabilises the fabric rather than just covering the hole.
Give Old Clothes a More Useful Second Life
The best tips for upcycling clothes are usually the ones that help you slow down and use what you already have more thoughtfully. A measured cut, a backing patch, a saved pocket, a pressed shirt, a reinforced seam, or a bundle of saved scraps may seem small on its own, but each one makes the next project more successful.
That is why clothes upcycling can be so satisfying. It is not only about making something new. It is also about noticing what still works, protecting the useful parts, and giving fabric another chance to earn its place.
If you are unsure where to begin, start with one manageable improvement rather than a dramatic remake. A repaired pair of jeans or a neatly reshaped shirt is still a meaningful success.
If you have a pile of garments waiting for attention, which piece are you most likely to rescue first?