Paper mache looks forgiving until the paper starts fighting the shape. A strip that is too stiff lifts from a curve. A sheet that is too fragile turns to pulp before it reaches the form. A paper that holds too much paste can make a sculpture heavy, slow to dry, and soft underneath even when the surface feels firm.
That is why choosing paper by appearance alone is rarely enough. For most paper mache work, the useful qualities are much more practical: the paper should wet evenly, bend around the form without springing back, hold together while damp, and dry into a layer that bonds cleanly to the layer beneath it. Sheet size matters too. Large sheets are efficient when you are covering bowls, masks, animals, props, or piñata forms, while smaller pieces can be easier to control around noses, corners, handles, and other tight details.
The five papers below approach the job in different ways. Four are lightweight, unprinted packing or newsprint-style sheets that lend themselves naturally to strip work. The fifth is a much heavier handmade paper with a rough deckled surface, which makes more sense for selected texture, collage-like details, or decorative finishing than for covering an entire rounded form. Knowing that difference before the paste is mixed saves a surprising amount of frustration.
What Makes Paper Behave Well With Paste
Paper mache is simple in principle: paper is combined with an adhesive paste and layered over a form until the dry shell has the shape and strength you want. In practice, paper choice controls how easily those layers go on and how much finishing work follows.
Absorbency should be balanced, not extreme
A useful sheet accepts enough moisture for the paste to spread into the fibers, but it should not disintegrate the moment it becomes wet. Lightweight uncoated newsprint works well because it softens quickly and conforms to curves without needing to be soaked for a long time.
Very dense, heavily sized, glossy, or coated paper behaves differently. Paste can sit on the surface instead of penetrating readily, and the sheet may stay stiff. At the opposite end, very weak tissue can become difficult to handle once saturated. The goal is not maximum absorbency; it is controllable absorbency.
Wet strength matters while you are positioning a strip
Dry strength and wet strength are not the same thing. A paper can feel perfectly sturdy in your hand and then tear as soon as you pull a paste-covered strip around a corner. That does not always make it unusable, but it changes how you have to work.
For broad body layers, I prefer paper that can be smoothed with a few finger strokes without opening holes. For tiny contours, some tearing is less troublesome because smaller pieces are easy to patch. This is one reason light newsprint is so practical: it becomes flexible before it becomes completely unmanageable.
Fiber direction and torn edges influence the finish
A torn edge usually blends more softly than a clean scissor-cut edge. Museums and experienced paper-mache makers commonly demonstrate torn paper, overlapping pieces, and smoothing the edges into the neighboring layer. That softer transition reduces ridges that otherwise have to be filled or sanded later.
You do not need every strip to be identical. In fact, mixed widths are useful. Long, medium-width strips are efficient on open areas; shorter narrow pieces behave better around sharp curves. If a strip wrinkles no matter how carefully you smooth it, the strip is probably too large for that part of the form.
Thickness changes both strength and flexibility
A thicker paper is not automatically a better structural paper. Heavy paper may contribute more material per layer, but it also resists bending, especially around small radii. Lightweight sheets often build a stronger-looking shell more easily because they laminate closely and let you cross the direction of successive layers.
For paper mache, several well-bonded thin layers are usually more predictable than forcing one thick sheet over a complicated form. Heavy handmade or watercolor-style paper can still be useful, but it should be chosen because you want its texture, stiffness, or decorative character rather than because a high GSM number sounds stronger.
Sheet size affects speed and waste
Small pre-cut sheets are convenient if your projects are modest or you dislike handling large floppy paper. Large sheets are better when you want to tear your own strips to match a sculpture. They also let you create long continuous pieces across broad surfaces.
Think about what you make most often. A 12 x 12 inch sheet can be efficient for masks, bowls, ornaments, small animals, and classroom work. A 30.5 x 17 inch newsprint sheet gives you much more freedom for large props and forms because you can tear it into wide body strips, narrow detail strips, or irregular patches without running out of length.
| Product Image | Product Name | Features | Price |
|---|---|---|---|
 |
12 * 12 inch Packing Paper for Moving 100 Sheets | Lightweight & Durable. Safe & Clean. Eco-Friendly Choice. |
Check Price |
 |
70 Sheets Newsprint Packing Paper Sheets | Generous Size & Quantity. Recyclable and reusable material. Lightweight yet strong. |
Check Price |
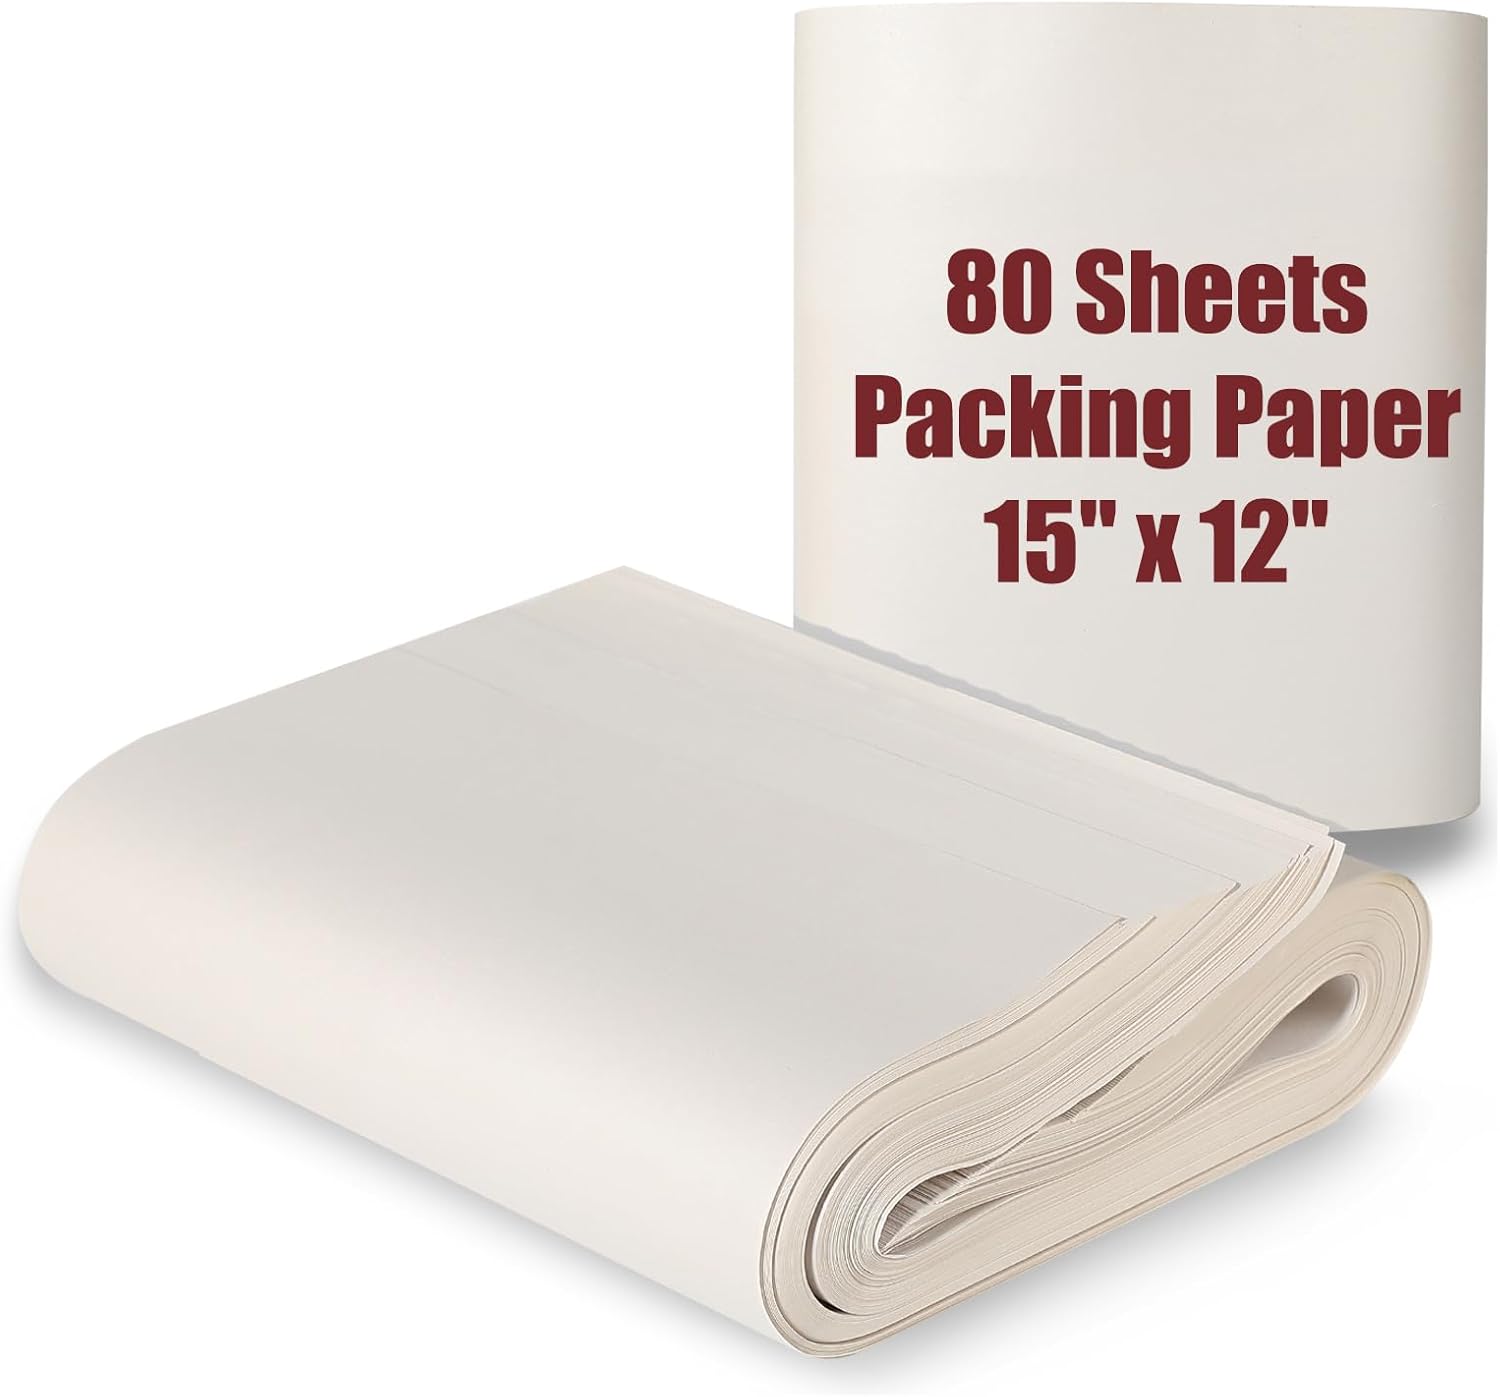 |
15″ x 12″ Packing Paper Sheets | Easy to Use. Made from natural wood pulp; acid-free, wax-free, and smear-free. Pre-cut 15″x12″ sheets with soft, smooth texture; no extra cutting required. |
Check Price |
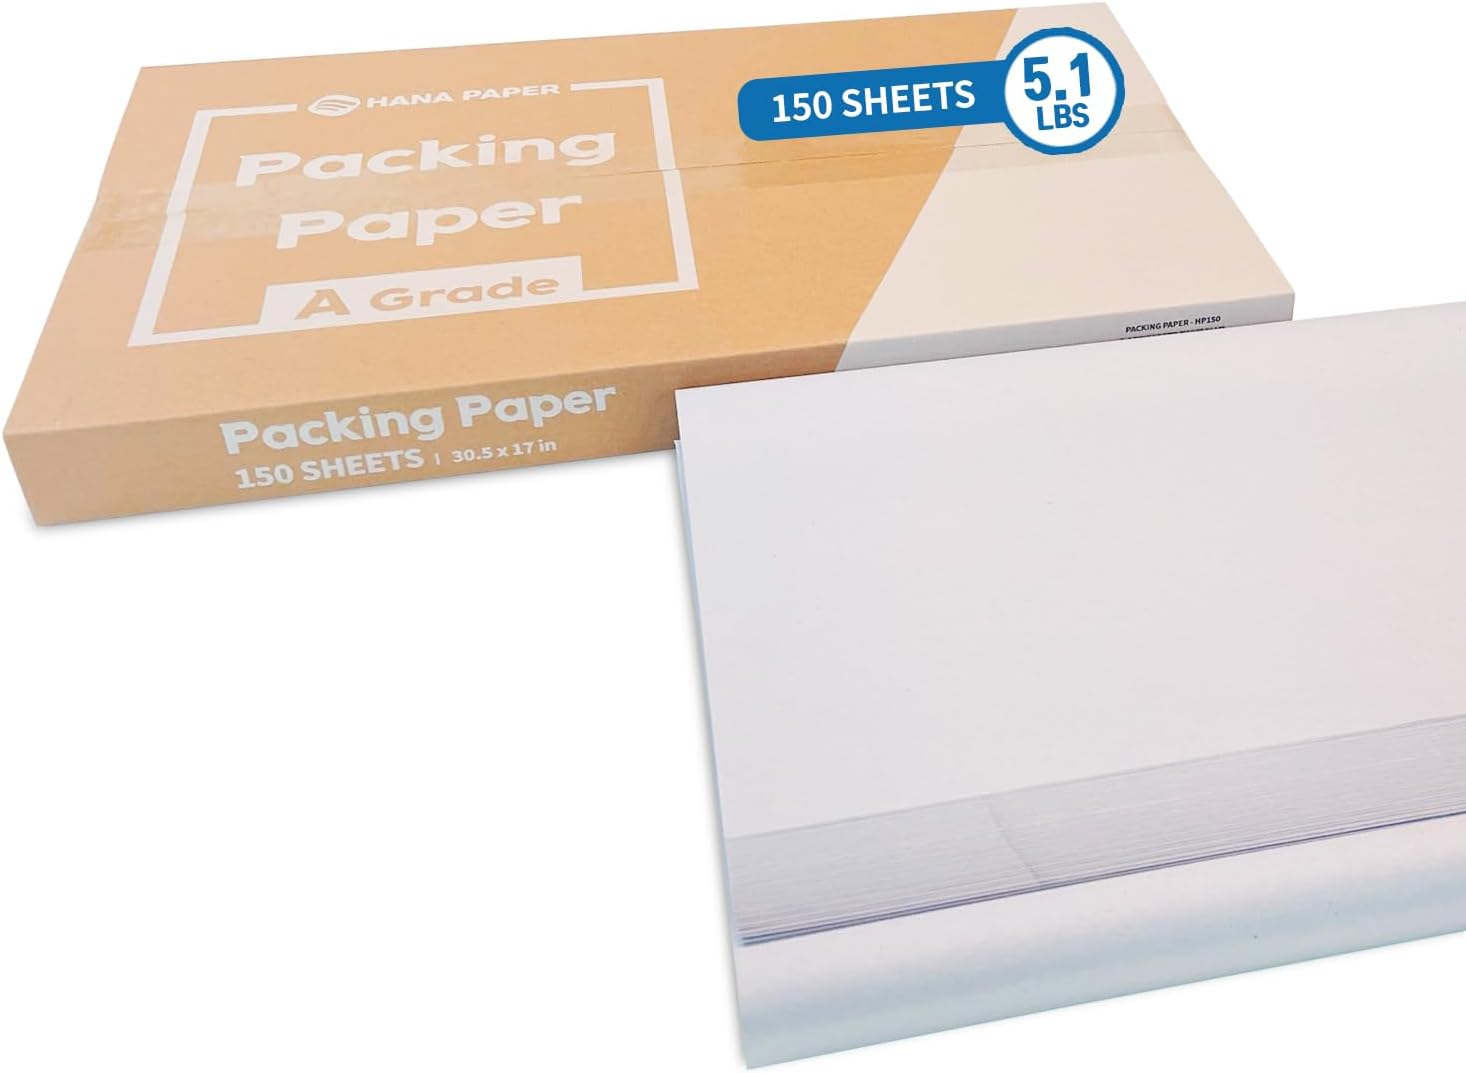 |
HANA PAPER 30.5″ x 17″ Large Size | Made from pure unprinted newsprint with no fillers or low-grade materials, ensuring durability and strength. Unlike traditional newspapers, these sheets contain no soybean ink, keeping hands and items stain-free. |
Check Price |
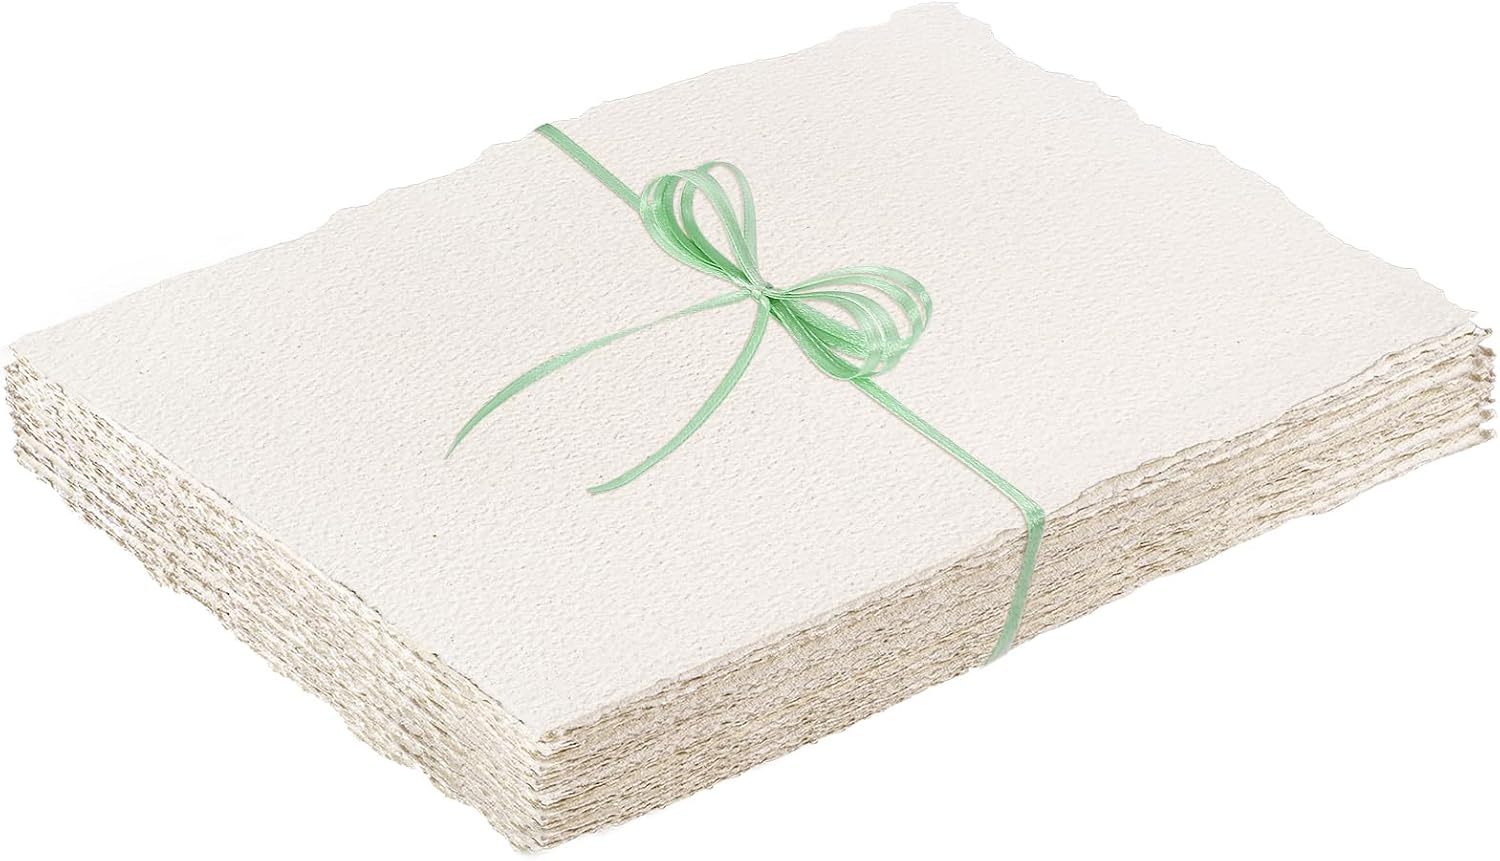 |
50 Sheets Deckled Edge Paper 4 x 6inch | Cold-pressed with deckled edges, offering a rough, textured surface for a vintage aesthetic. Durable & Thick. Compact Size, 4″x6″ sheets with 160gsm weight |
Check Price |
What to Check Before You Buy Paper for Paper Mache
The best paper for paper mache is not necessarily the most expensive or the most artistic-looking. I would start with the behavior you need from the sheet once it is wet.
Choose unprinted paper when you want a cleaner surface
Printed newspaper is traditional and still usable, but unprinted packing newsprint has a few practical advantages. There is no ink to transfer to your hands, paste, pale paint, or the surface of the project. That matters most when the final finish is light-colored or when children are handling wet strips for a long session.
Unprinted sheets also make it easier to see coverage. You can mark layers with pencil, use alternating paper tones if you have them, or simply watch the overlap without a dense field of text distracting your eye.
Look at the sheet count in relation to the sheet dimensions
One hundred 12 x 12 inch sheets and seventy 26 x 15 inch sheets are not directly comparable. The larger sheets provide far more paper area per sheet. If you are planning one small mask, the compact pack may be easier to store and perfectly adequate. If you are covering a large animal form or a group of classroom projects, sheet area becomes more important than the printed count on the package.
I do not recommend buying purely by the biggest number on the listing. Estimate the amount of usable paper area and how much cutting or tearing you want to do.
Decide whether you want soft newsprint or a firmer textured sheet
The first four options below are suited to the traditional strip-and-paste approach because they are lightweight packing papers. The deckled-edge 160 GSM paper is fundamentally different. It is thicker, rougher, and much smaller at 4 x 6 inches.
That heavier sheet can be attractive if you are deliberately building visible texture, adding raised patches, making small decorative forms, or using paper mache as part of a mixed-media piece. It is less convenient when your goal is to cover a balloon or curved armature quickly with many overlapping strips.
Avoid assuming “acid-free” changes the basic working method
Acid-free paper can be desirable for artwork intended to last, particularly where paper aging and discoloration matter. For ordinary craft projects, however, wet handling, adhesive choice, paint, storage conditions, and moisture exposure will often affect longevity just as much.
If archival durability is important, treat the whole material system as important rather than relying on one label. That includes the paper, adhesive, pigments, topcoat, and storage environment.
Consider how easily the paper tears by hand
Pre-cut packing sheets are useful because you can tear them into working strips without setting up a cutting station. A soft torn edge also blends into neighboring pieces more naturally. If you are crafting with children, hand tearing reduces dependence on scissors and makes it easy to prepare a large pile before paste comes out.
For a very crisp collage effect, cut edges can be intentional. For a traditional smooth shell, torn edges usually save finishing time.
Think about the finish before you build the shell
A smooth painted character needs a different surface strategy from a rustic lantern or a sculpture where torn fibers are part of the look. Lightweight newsprint is easier to hide under a thin finishing layer, primer, or paper-mache clay. Rough handmade paper announces itself visually.
I know it is tempting to choose the most decorative paper first, but the body layers should primarily make the structure easy to build. Decoration can come later.
12 x 12 Inch Packing Paper for Moving, 100 Sheets – Easy to Control on Small Forms
This 100-sheet pack uses compact 12 x 12 inch unprinted packing-paper sheets. Current retail information describes the sheets as ink-free and intended for wrapping, cushioning, drawing, crafts, and similar uses. For paper mache, that combination of small sheet size and lightweight construction is most useful when you want quick hand-torn strips without wrestling with oversized newsprint.
A square sheet gives you flexibility in how you tear it. You can make several medium strips from one sheet, tear short pieces for a mask or bowl, or create irregular patches for a rounded form. Because the paper is unprinted, the wet surface stays visually clean and does not introduce newspaper ink into the paste.
Why the 12 x 12 inch format can be convenient
Large packing paper is economical for big builds, but it can be awkward on a crowded craft table. These smaller sheets are easier to stack beside a paste bowl and easier for children or occasional crafters to handle. If you make ornaments, small masks, hand-sized sculptures, classroom models, bowls, or decorative forms, that compact format reduces prep work.
It also helps with portion control. Instead of tearing a huge sheet and leaving long scraps hanging off the table, you can work through one square at a time. For a small project, convenience can matter more than maximum paper area per sheet.
Unprinted paper keeps the wet work cleaner
The current listing emphasizes that the sheets are unprinted and ink-free. That does not make the finished craft automatically archival or stain-proof, but it removes the obvious transfer issue that comes with printed newspaper. If you plan to finish in white, pale cream, pastel colors, or translucent tissue, a clean base is easier to cover.
The absence of printing also makes it easier to spot dry areas. When you smooth a strip down, you can see bubbles, lifted edges, and gaps without having text or photographs underneath.
Where this paper fits best
The sheet dimensions favor modest projects rather than huge props. You can certainly build something large with it, but you will spend more time opening and tearing sheets than you would with a 26- or 30-inch-long paper.
For detailed shapes, that is not necessarily a drawback. Smaller source sheets encourage shorter strips, and shorter strips naturally behave better around cheeks, ears, noses, handles, narrow necks, and tight corners.
- The 12 x 12 inch sheets are easy to handle on a small work surface. You can keep the paper close to the paste bowl without large sheets dragging through glue or paint.
- One hundred sheets give you plenty of repeatable material for small and medium craft sessions. The consistent sheet size makes it simple to estimate how much you are using from layer to layer.
- The unprinted, ink-free surface is cleaner than ordinary newspaper. That is especially helpful under light paint colors or when you do not want ink on hands and tools.
- The paper can be torn into many useful strip sizes without measuring. A square sheet works well for both medium body strips and short detail patches.
- The compact sheets are less efficient for very large props or wide forms, where longer newsprint sheets reduce the amount of tearing and joining needed.
Who It’s Best For
This is a practical fit for small sculptures, masks, bowls, classroom crafts, ornaments, and anyone who values manageable sheets more than maximum coverage per piece.
Not Ideal For
It is less appealing if you regularly build large theatrical props, oversized animals, or broad geometric structures and want long strips that can span a large section in one pass.
70 Sheets Newsprint Packing Paper Sheets – Large Strips Without an Oversized Pack
The verified 70-sheet version is sold as unprinted newsprint packing paper measuring about 26 x 15 inches per sheet, with the pack listed at roughly 1.8 pounds. The sheets are intended to crumple, wrap fragile objects, and conform around irregular shapes, which is exactly the kind of behavior that translates well to traditional paper-mache strip work.
Compared with the 12 x 12 inch pack, the immediate advantage is length. A 26-inch sheet can be torn into long strips for broad body areas or divided into many smaller pieces. That means fewer sheet changes during a large layer and less waste when you need a specific strip length.
Large newsprint is useful because you control the strip size
A paper-mache form rarely has one scale from top to bottom. A large mask may have broad forehead and cheek areas but still need tiny pieces around the nostrils and eye sockets. Starting with a large flexible sheet gives you both options.
I would tear a stack before mixing paste: some long strips for easy areas, medium pieces for transitions, and narrow short pieces for details. Then you are not trying to tear wet paper with sticky hands halfway through the layer.
Lightweight sheets follow curves readily
Packing newsprint is designed to conform around dishes, frames, and other objects without adding unnecessary bulk. For paper mache, that flexibility is valuable because it lets the strip settle onto the armature rather than pulling away from it.
Do not confuse flexibility with weakness. Once multiple paste-saturated sheets overlap and dry, the strength comes from the laminated shell rather than one strip behaving like cardboard. Close contact between layers matters more than stiffness in a single dry sheet.
The unprinted surface is useful for pale finishes
Like the first option, this paper is sold as plain and unprinted. If you want a white gesso layer, a pale acrylic finish, or a tissue-paper skin at the end, you start with less visual contamination underneath.
That does not eliminate the need for opaque primer when you want a perfectly even surface, but it makes the job easier than covering dense newspaper graphics.
- The 26 x 15 inch sheets provide substantially more usable strip length than compact square sheets. That saves preparation time on medium and large forms.
- The paper is lightweight enough to crumple and conform around irregular objects. The same softness is helpful around rounded paper-mache armatures.
- Unprinted newsprint keeps the paste and working surface cleaner. There is no newspaper ink to smear into a light-colored final layer.
- The 70-sheet pack balances useful sheet size with manageable storage. You get large paper without committing to a very heavy bulk box.
- The larger sheets need more table space and more deliberate pre-tearing, especially if you are working with young children or in a small kitchen-sized craft area.
Who It’s Best For
This suits makers who build medium-size masks, bowls, animals, piñatas, props, or sculptural forms and want the flexibility to tear both long strips and small detail pieces from the same sheet.
Not Ideal For
It is less convenient for a tiny craft station where large loose sheets are likely to fall into paste, or for someone who wants every working piece pre-sized before the project begins.
15 x 12 Inch Packing Paper Sheets – Pre-Cut Newsprint for Neat, Repeatable Prep
Current listings for this 15 x 12 inch packing paper identify an 80-sheet pack of lightweight newsprint, described as acid-free and smear-free. The sheets arrive pre-cut, so their main advantage is not novelty; it is predictable handling. They sit between the compact 12 x 12 squares and the much longer 26 x 15 newsprint sheets.
That middle size can be surprisingly useful for paper mache. The 15-inch length is enough for efficient strips across many masks, bowls, and small sculptures, while the 12-inch width keeps the original sheet easy to handle. You do not need a large cutting mat or a big staging table.
The medium sheet size is a practical compromise
If you frequently switch between small and medium projects, this format avoids extremes. A single sheet can become a few long strips, several short strips, or a collection of irregular patches. You are unlikely to feel that every piece is too small, but you also avoid the floppy handling of very large newsprint.
The smooth, lightweight character described by the current listing is appropriate for wrapping fragile objects, and that same flexibility helps the paper settle into paste and follow a form.
Acid-free and smear-free are useful, but working behavior still comes first
The listing’s acid-free description is a welcome feature for paper-based art, especially if you care about yellowing over time. Smear-free paper also makes the craft session cleaner. Still, neither label replaces basic construction technique.
A sculpture can fail because the paste is applied too heavily, the interior stays damp, or the layers do not overlap well even if the paper itself is good. Use the material label as one part of the decision, not as a substitute for drying and layering discipline.
Pre-cut sheets reduce setup for group projects
For classrooms, clubs, or family craft sessions, uniform sheets make it easy to distribute equal stacks. People can tear their own strips without one person managing a huge roll of paper. The size is also easier to store flat in a drawer or box between sessions.
If a project is interrupted, stack the unused sheets somewhere dry. Newsprint will pick up moisture from a damp workspace, and even a little curling makes neat tearing less pleasant later.
- The 15 x 12 inch size gives more strip length than a 12-inch square without becoming awkward on the table. It works well across a broad range of small and medium forms.
- The verified 80-sheet pack is pre-cut and ready to portion among several makers. That can simplify classroom or family projects.
- The current listing describes the newsprint as acid-free and smear-free. Those qualities are useful when you want a clean paper surface and care about the paper component aging more gracefully.
- The lightweight sheets can be torn and molded without the resistance of heavy craft paper. That makes them practical for rounded forms and overlapping layers.
- The medium sheet size does not provide the long uninterrupted strips of the 26- or 30.5-inch options, so very large builds will involve more joints and more sheet handling.
Who It’s Best For
This is a sensible all-purpose choice for masks, bowls, school models, decorative animals, smaller piñatas, and makers who want an easy-to-store pack that still produces useful strip lengths.
Not Ideal For
It is less efficient for oversized sculptures or props where you want large pieces to bridge broad areas quickly.
HANA PAPER 30.5 x 17 Large Size – Best Suited to Big Forms and Bulk Strip Prep
HANA PAPER sells large 30.5 x 17 inch A-grade unprinted newsprint in bulk pack sizes, including a current 250-sheet version. Manufacturer and retailer information describes the paper as unprinted and intended for moving, wrapping, storage, and shipping, with an emphasis on avoiding the ink transfer that comes with used newspaper.
For paper mache, the defining advantage is not simply that the sheet is large. It is that one sheet can be converted into almost any working size you need, from long broad strips for a giant body form to narrow pieces for curves. If you build large work regularly, that flexibility can reduce the constant stop-start rhythm of opening small packs.
Large sheets are efficient on oversized armatures
A large prop often has big easy surfaces: the side of a dragon body, a giant mask forehead, a parade head, a costume shell, or a broad cardboard structure. Using tiny strips everywhere wastes time and creates more seams than necessary.
With a 30.5-inch sheet, you can make long strips for those open areas and reserve short pieces for transitions. The key is to match strip size to surface shape rather than using the largest piece everywhere. Large strips on tight curves wrinkle; narrow strips on flat expanses take forever.
Bulk newsprint is useful when consistency matters
Using one paper throughout a large piece makes the wet behavior more predictable. You learn how much paste the sheet wants, how quickly it softens, how far you can pull it before tearing, and how it dries. That consistency is valuable on a multi-day project.
A bulk pack also works for workshops or group builds where several people are covering different parts of the same structure. You can pre-tear baskets of strips in different widths and keep everyone supplied.
Clean, unprinted newsprint avoids a common newspaper annoyance
HANA PAPER specifically markets its unprinted newsprint as a cleaner alternative to printed newspaper. For crafts, the lack of ink is a real practical benefit. Wet hands stay cleaner, pale paint has less to cover, and you avoid transferring print to adjacent materials.
This does not mean the large pack is always the most economical choice for a single small project. If you only make one ornament each year, most of the box may sit unused. It earns its space when you make larger work or craft frequently.
- The 30.5 x 17 inch sheets provide the most tearing flexibility among these lightweight packing papers. You can prepare very long strips, medium pieces, or detail patches from one consistent source sheet.
- Bulk pack sizes suit large sculptures, workshops, classroom programs, and repeated craft sessions. You are less likely to stop halfway through a large build because the paper ran out.
- The paper is unprinted, so there is no newspaper ink to transfer during wet work. That keeps hands, paste, and pale undercoats cleaner.
- A-grade newsprint is intended to wrap and conform around fragile objects. That pliable behavior is well matched to strip-based paper mache.
- The large sheets and bulk quantity require more storage and workspace, so this can be excessive for someone making only occasional small pieces.
Who It’s Best For
This is the strongest fit here for large props, big masks, group projects, frequent paper-mache makers, and anyone who wants to prepare many strip sizes from one large unprinted sheet.
Not Ideal For
It is less sensible for a tiny craft drawer, a one-off ornament, or a maker who values compact pre-cut sheets over bulk efficiency.
50 Sheets Deckled Edge Paper 4 x 6 Inch – A Textured Accent Paper Rather Than a Body-Layer Workhorse
This option is very different from the four packing papers above. Current listings describe it as 50 sheets of 4 x 6 inch handmade, rough-textured watercolor paper at 160 GSM, produced with a cold-pressed look and deckled edges. It is sold primarily for invitations, cards, watercolor, collage, and decorative crafts.
That heavier weight changes its role in paper mache. A 160 GSM sheet is much firmer than lightweight newsprint, so it does not drape around a balloon or tight facial curve as willingly. Using it for every layer would make the build slower, stiffer, and more difficult to smooth.
Where it becomes interesting is at the surface. If you want visible fiber, a handmade edge, raised patches, rustic texture, or mixed-media detail, this paper can add character that ordinary newsprint deliberately avoids.
Use the texture intentionally
The rough surface and deckled edge are decorative features. If your goal is a perfectly smooth painted shell, those same features become extra work. You would need to bury them under filler, additional thin paper, or a smoothing compound, which defeats the reason to buy textured paper in the first place.
For a bark effect, antique ornament, folk-art surface, collage sculpture, textured frame, decorative mask, or small dimensional accent, the roughness can be useful. Torn or softened fragments can create visual changes in the final skin.
The 4 x 6 inch size naturally suits detail work
Each sheet is small. That limits efficiency on large structures, but it also means you are not wasting expensive textured paper on hidden inner layers. Use cheaper lightweight newsprint to build the shell, let it dry, and then decide where a 4 x 6 sheet or a torn fragment will add something visible.
That layered approach is more resourceful: structure comes from practical paper; visual texture comes from the specialty sheet.
Heavy paper needs more patience around curves
If you do use this paper wet, work with smaller pieces than you would with newsprint. A small heavy patch can conform where a full 4 x 6 sheet will buckle. Allow enough time for paste to soften the fibers, but avoid soaking the paper until the surface starts to abrade.
You may also find that brushing paste onto both sides gives better control than dipping the entire piece into a bowl. The objective is even moisture without turning the sheet into a floppy saturated pad.
- The rough handmade surface creates visible texture that ordinary newsprint cannot provide. It can add character to selected finishing areas and mixed-media details.
- The 160 GSM weight gives each patch more body. That can be useful for raised accents, tabs, decorative layers, or small forms where you deliberately want a firmer paper.
- The 4 x 6 inch sheets are easy to reserve for visible work instead of wasting specialty paper inside the structure. A pack can go a long way when used as an accent.
- Deckled edges and cold-pressed texture support rustic, vintage, botanical, or handmade-looking finishes. The paper can remain part of the final aesthetic instead of disappearing under paint.
- The heavy textured sheets are much less efficient for traditional curved body layers than lightweight newsprint, especially on balloons, masks, and tightly contoured forms.
Who It’s Best For
This suits mixed-media makers who want visible texture, deckled fiber, collage effects, or firmer decorative patches on top of an already stable paper-mache shell.
Not Ideal For
It is not the most practical choice for someone who wants to cover a large rounded armature quickly with many smooth, flexible strips.
Comparing the Five Papers by the Way You Actually Work
The five options become easier to choose once you stop asking which paper sounds the most premium and start asking what the project needs from the wet sheet.
For small masks, bowls, ornaments, and classroom pieces
The 12 x 12 inch 100-sheet packing paper is especially convenient. The sheets are compact, easy to stack, and easy to tear without taking over the table. The 15 x 12 inch sheets offer a little more strip length while staying similarly manageable.
Between those two, I would choose by workspace and project scale. The 12-inch square is simpler for small hands and small tables. The 15-inch length is useful if you regularly want strips that can cross a larger cheek, bowl, or model section without a join.
For medium and large sculptures
The 70-sheet 26 x 15 inch newsprint pack gives you noticeably longer strips without requiring the biggest bulk box. It is a good middle ground for people who make substantial projects but do not need hundreds of large sheets.
The HANA PAPER 30.5 x 17 inch newsprint makes more sense once the project itself gets large or the craft habit becomes frequent. Long source sheets are simply more efficient when you are covering broad armatures or preparing material for several people at once.
For the cleanest traditional body layers
All four lightweight unprinted packing-paper options have an advantage over printed newspaper because they avoid ink transfer. For a light final finish, that makes priming easier. Their soft newsprint-like behavior also makes them more appropriate than the heavy 160 GSM paper for building smooth overlapping shells.
If smoothness is the goal, paper thickness should stay modest and your finishing technique should do the rest: torn edges, thin paste, close overlaps, bubbles pressed out, full drying, and a final smoothing layer if necessary.
For deliberate visible texture
The 50-sheet deckled-edge paper is the clear outlier. Its rough handmade appearance can be the point of the design. Use it where you want the surface to look fibrous or crafted rather than perfectly uniform.
I would not use it as the hidden inner material unless there were a specific structural reason. The paper costs more effort to bend and smooth, and those attractive edges disappear if buried under multiple coats. It is better saved for the layer the viewer can actually see.
For group projects and repeated making
HANA PAPER’s large bulk format is the easiest to justify for workshops, clubs, schools, community props, and households that make paper-mache work regularly. The 70-sheet 26 x 15 option is a good step down when you want large sheets but do not need a bulk quantity.
For a one-afternoon family project, the smaller pre-cut packs are easier to store afterward. Buying more paper than you will use is not automatically economical, even if the price per square foot is lower.
How to Get Better Results From Paper and Paste
Good paper can still produce a poor shell if the pieces are oversized, dripping with paste, or trapped under wet layers. A simple working method keeps the paper doing what it does best.
1. Prepare the form before the paste comes out
Make sure the armature is stable, taped securely, and able to support wet paper. Balloons, cardboard forms, crumpled paper cores, bowls used as molds, and taped structures all behave differently, so decide in advance whether the form will stay inside the finished piece or be removed later.
Cover the work surface. Paper mache is supposed to be messy, but glue under the paper stack makes every later strip harder to handle.
2. Tear several strip sizes in advance
Prepare a generous pile of long strips, medium strips, and small patches. Torn edges blend into neighboring pieces more softly than hard scissor edges, which can reduce ridges in the dry surface.
Do not force one strip width over the whole form. Broad open areas can take large strips; eyes, ears, handles, corners, and small curves need shorter narrower pieces.
3. Mix or prepare only the paste you expect to use
Use the adhesive system appropriate to your project and follow its instructions. Flour-and-water paste is traditional and inexpensive; white craft glue diluted as appropriate for the product is another common approach. Whatever you use, the working mixture should coat the paper without leaving thick puddles.
If you are using a homemade paste that can spoil, keep utensils clean and discard it when it changes odor or appearance. Do not store a bowl of paste indefinitely simply because there is some left.
4. Wet the paper evenly without drowning it
You can dip a strip and wipe off the excess, or brush paste onto the paper. Both methods work. The important point is that the strip should be fully coated enough to bond but not carrying a heavy rope of paste.
Too much liquid increases drying time, encourages sagging, and can make the surface look dry while the interior stays wet. The paper should feel saturated enough to bend, not so wet that paste runs off when you lift it.
5. Overlap every piece and smooth the edges
Lay the first strip on the form, press out trapped air, then overlap the next piece. Work in different directions as the layer grows rather than creating one stack of parallel seams.
Use fingertips or a brush to feather torn edges into the surrounding paper. This is where lightweight newsprint earns its place: it softens and becomes easy to laminate closely.
6. Use smaller pieces when a curve starts wrinkling
Wrinkles are often a geometry problem, not a paper-quality problem. A flat strip cannot wrap tightly around every compound curve without folding somewhere. Tear the strip shorter, split an edge, or switch to a small patch.
Then smooth the overlapping sections down. Trying to stretch a large wet sheet over a tight curve usually creates a ridge you will have to repair later.
7. Build strength with connected layers
Aim for complete coverage rather than random thick spots. Each layer should tie the form together, with seams offset from the layer below. The number of layers depends on paper weight, paste, project size, and how the object will be used.
A display ornament does not need the same shell as a large prop that will be carried and bumped. Add layers because the object needs them, not because a fixed number appears in every tutorial.
8. Let moisture escape before sealing the surface
Drying is structural. A shell that is still damp inside can deform, smell stale, or develop surface problems after painting. Keep the piece in a dry, ventilated place and turn it when possible so air reaches different sides.
Do not rush to seal wet paper under paint. The exterior can feel crisp while deeper layers are still cool and damp.
9. Add specialty texture only after the basic shell is stable
If you are using the 160 GSM deckled-edge paper, apply it after the lightweight structural layers have dried. Tear or cut only the amount needed for the visible effect.
This keeps the heavy paper from making early body layers harder to shape and lets you place the texture exactly where it contributes to the design.
10. Finish according to the surface you want
For a rustic finish, you may only need paint and a protective topcoat appropriate to the project. For a smoother sculpture, fill obvious ridges, add a fine paper layer, apply gesso or another suitable ground, and sand only if your materials and project allow it.
The smoother the desired finish, the more valuable those careful torn overlaps become. It is easier to prevent ridges than to sand them away after the shell has hardened.
Keeping Paper and Finished Pieces in Good Condition
Unused paper should stay flat, dry, and clean. Store newsprint in its box or a large folder away from damp floors, leaking windows, or humid storage areas. If large sheets arrive folded, keeping them under light flat weight before use can reduce curling.
The handmade 160 GSM paper deserves even more protection from bent corners and moisture because its surface texture is part of its value. Keep the sheets in a clean envelope or rigid folder rather than loose in a crowded craft bin.
Finished paper-mache pieces should also be kept dry unless they were specifically engineered and sealed for another environment. Paper and water-based adhesives remain moisture-sensitive materials. Paint can slow moisture entry, but decorative paint alone should not be treated as waterproofing.
Dust indoor pieces gently with a soft dry brush or cloth. Avoid soaking a finished sculpture to clean it. If a piece has been stored somewhere damp and develops an odor, softness, staining, or visible biological growth, move it away from other stored crafts and assess whether it can be safely cleaned or should be discarded.
Where Paper Mache Projects Commonly Go Wrong
Using paper that is too stiff for the shape
Heavy paper can look stronger on the package, but it may fight the armature. The result is lifted corners, deep creases, and hollow pockets under the surface.
Use lightweight newsprint for the body and reserve heavy paper for deliberate accents. If a thick sheet must follow a curve, reduce the piece size dramatically.
Cutting every strip into perfect rectangles
Neat rectangles look organized on the table, but their hard edges often stay visible under paint. Crafters do this because scissors are fast and the pieces look professional before they are used.
Tear the edges for body layers instead. The feathered fibers overlap more softly and usually require less filling later.
Leaving too much paste on each strip
A strip dripping into the bowl feels thoroughly coated, but the extra moisture does not create proportionally more strength. It creates weight and extends drying time.
Wipe or squeegee excess paste off before applying the strip. You want intimate paper-to-paper contact, not a thick cushion of wet adhesive between layers.
Covering detailed areas with the same pieces used on flat areas
A long strip that works beautifully on a balloon’s broad side can wrinkle badly around a nose, ear, claw, or handle. The usual reaction is to add even more paste and force it down.
Instead, tear the strip smaller. Paper mache follows difficult geometry through many small overlaps, not by stretching flat paper beyond what it can do.
Adding new wet layers before the project can dry properly
It is easy to become impatient when a form still feels flexible, so makers add more paper hoping the extra thickness will make it rigid. That can trap additional moisture inside.
Give the piece ventilation and time. Then add more structure once the existing shell is genuinely dry enough to support it.
Treating decorative paper as if it were automatically better structural paper
The deckled-edge watercolor paper looks more substantial than newsprint, so it can seem like the premium choice. But its weight and rough texture make it less cooperative on curved body layers.
Use materials according to their strengths. Lightweight paper builds the shell efficiently; specialty paper creates a visible surface effect.
Ignoring the final paint color until the end
Printed or strongly colored paper can show through pale coatings and force extra priming. The options here are largely unprinted, which is one reason they are useful, but the same planning principle still applies.
If the finished piece will be white or pastel, keep the underlayers visually quiet and test the opacity of your primer before painting the entire sculpture.
Safety and Clean-Working Notes
Paper mache is approachable, but the work still involves wet adhesives, craft tools, and long drying periods. Follow the adhesive manufacturer’s safety instructions, especially with commercial glues, sealers, primers, or coatings.
For children, supervise scissors, craft knives, hot tools, and any finishing products not intended for unsupervised use. A flour-and-water paste may be simple, but it is still messy and should not be eaten. Wash hands after crafting and keep paste containers separate from food containers used for serving.
Ventilation matters during drying and finishing. Water needs a route out of the paper shell, and paints or sealers may have their own ventilation requirements. Never use an oven or other uncontrolled high-heat method to rush a paper-mache piece dry. The armature, adhesive, coatings, or trapped materials may not be safe to heat.
If the piece is intended for outdoors, near food, around pets, or for children to wear, treat that as a separate design question. Paper choice alone does not make a finished object waterproof, food-safe, chew-safe, or suitable for prolonged skin contact.
Frequently Asked Questions
What is the easiest paper to use for traditional paper mache?
Lightweight unprinted newsprint or packing paper is one of the easiest choices because it wets quickly, tears easily, and bends around curves. Among these five options, the first four fit that traditional strip method more naturally than the 160 GSM handmade paper.
Is packing paper basically the same as newspaper for paper mache?
Unprinted packing newsprint behaves similarly in many craft situations, but exact paper weight and finish can vary by product. Its main practical advantage is cleanliness: there is no newspaper printing to smear into wet paste or show through pale paint.
Should I tear paper mache strips or cut them?
Tearing is usually better for a smooth layered shell because the soft fiber edge blends into neighboring pieces. Cutting can be useful when you intentionally want a crisp collage edge or a precise shape.
How wide should paper mache strips be?
There is no single correct width. Use wider and longer strips on broad simple surfaces and smaller pieces on tight curves or detailed areas. If the strip repeatedly wrinkles, it is too large for that part of the form.
Is thicker paper stronger for paper mache?
Not automatically. Thick paper has more body, but it can resist curves and leave gaps between layers. Strength comes from a well-bonded laminated shell, so several flexible layers can be more successful than one or two stiff layers that do not sit flat.
Can I use the 160 GSM deckled-edge paper for the whole project?
You can, particularly on a small angular form, but it is not the most efficient use of that paper. It makes more sense as a decorative or textural finishing material over a lightweight paper shell.
How do I know when paper mache is dry enough to paint?
The piece should feel uniformly dry, firm, and room-temperature rather than cool or soft in isolated areas. Drying time changes with layer thickness, paste, humidity, airflow, and the armature, so avoid relying on one fixed number of hours.
Can finished paper mache be recycled?
That depends on what you added. Clean unused newsprint is commonly recyclable where local paper programs accept it, but a finished sculpture may contain glue, paint, tape, foil, foam, wire, varnish, or mixed materials that make normal paper recycling inappropriate. Check local rules and separate reusable components where practical.
Choose Paper for the Shape First, Then the Finish
The most useful lesson in choosing the best paper for paper mache is that the sheet should cooperate with the form before it impresses you on the package. Lightweight unprinted newsprint is difficult to beat for body layers because it tears easily, accepts paste, and conforms to curves. The size you choose simply changes how efficiently you can prepare those layers.
The 12 x 12 and 15 x 12 inch packs are convenient for small and medium work. The 26 x 15 inch newsprint gives you longer strips without a huge bulk commitment. HANA PAPER’s 30.5 x 17 inch sheets make the most sense when projects become larger or more frequent. The 160 GSM deckled-edge paper belongs in a different role: use it when its visible texture and handmade character are part of the design.
Start with the paper that makes the structure easy to build, then add specialty texture only where it improves the finished piece. That approach keeps the craft practical, reduces unnecessary waste, and leaves you more time for the part that actually makes paper mache fun: shaping something ordinary into an object with personality.