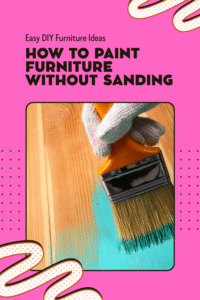
Renovating a kitchen or bathroom doesn’t always require a complete overhaul. In fact, one of the quickest and most cost-effective ways to refresh your space is by painting your laminate countertops.
Whether your countertops are dated, scratched, or just not your style anymore, painting them can breathe new life into your kitchen or bathroom.
I’ve been there before looking at those worn-out laminate counters and feeling like they were dragging the entire room down.
But instead of replacing them (and spending a small fortune), I decided to take matters into my own hands.
And let me tell you, the transformation was incredible. It was one of those DIY projects that seemed daunting at first but was actually easier than expected.
In this post, I’ll walk you through everything you need to know to paint laminate countertops like a pro.
From preparing the surface to applying the paint and finishing with a protective sealant, I’ve got all the tips and tricks you need for a flawless result. You don’t need to be a professional to get professional-looking countertops, so let’s dive right in!
Preparation: Why Proper Prep Work is Key
Before we even think about paint, we need to talk about the most crucial part of any painting project preparation.
This phase is often the most time-consuming, but trust me, it’s also the most important. If you skip the prep, your paint job will not only look bad, but it’ll wear off quickly too.
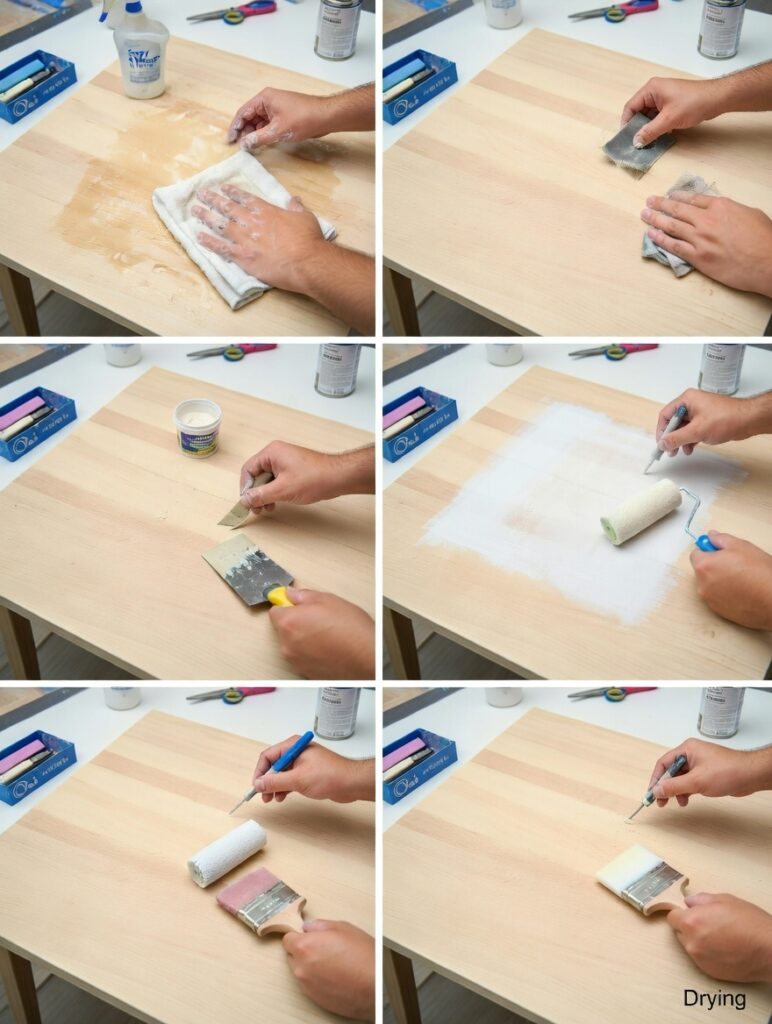
Step 1: Clean the Surface
The first thing you’ll want to do is clean the laminate countertop thoroughly. Any dirt, grease, or grime left behind will prevent the paint from adhering properly. Here’s how to do it:
- Start by wiping down the countertop with warm soapy water and a clean cloth. Make sure you remove all debris.
- After cleaning, use a degreaser or a solution of water and vinegar to get rid of any grease or sticky residues.
- Dry the countertop completely before moving on to the next step.
Step 2: Sand the Surface
Now, let’s talk sanding. Laminate has a slick surface that paint can’t adhere to without a little help. You need to scuff it up to give the paint something to grip onto. But be careful, we’re not trying to strip the laminate here, just creating a rough surface.
- Use a medium-grit sandpaper (about 120-150 grit) and sand the countertop lightly. Don’t go overboard! You just want to rough up the surface, not remove the laminate.
- Once you’ve sanded it, use a damp cloth to wipe away all the dust. A clean surface is essential to getting a smooth paint application.
Step 3: Fill Any Cracks or Holes
Check your countertops for any cracks, chips, or holes. These imperfections need to be filled before you proceed. Use a high-quality wood filler or laminate repair paste to fill these areas. Apply the filler, let it dry completely, then sand it smooth until it’s level with the surface.
Choosing the Right Paint: Not All Paints Are Created Equal
Now comes the fun part choosing the paint! When it comes to laminate, not just any paint will do. You need something that’s durable and can handle the wear and tear that countertops are subjected to.
What to Look For:
- Bonding Primer: Before applying any paint, you’ll need a bonding primer that’s specifically designed for laminate. This helps the paint stick better and prevents peeling or chipping down the line.
- Epoxy or Acrylic Paint: For the best results, opt for epoxy or acrylic paint. Epoxy is particularly durable and perfect for high-traffic areas like kitchen counters. It’s also resistant to stains and moisture.
- Topcoat/Sealer: A protective topcoat is crucial. It not only enhances the paint job’s durability but also gives the countertop a nice glossy finish that looks like real stone or granite.
Step-by-Step Painting Process
Now that your surface is prepped and you’ve got the right paint, it’s time to get started. Follow these steps for a smooth, long-lasting finish.
Step 1: Apply the Bonding Primer
Start by applying a thin, even coat of bonding primer to the countertop. Use a high-quality paintbrush or foam roller for an even application.
Make sure to cover the entire surface, including edges and corners. Allow the primer to dry according to the manufacturer’s instructions typically about 2-4 hours.
Step 2: Sand Lightly Between Coats
Once the primer is dry, lightly sand the surface again using a fine-grit sandpaper (220 grit). This step ensures that the paint adheres properly and gives the countertop a smoother finish. Wipe away the sanding dust with a damp cloth and let the surface dry.
Step 3: Apply the First Coat of Paint
Now, it’s time to paint! Apply your first coat of epoxy or acrylic paint. Use a brush or roller, depending on your preference. I recommend using a roller for a smoother, more uniform finish, but a brush works fine for getting into the edges and corners.
Apply the paint in long, even strokes, working from one side of the countertop to the other. Avoid overloading your brush or roller to prevent drips or uneven coverage.
Let the first coat dry completely (this may take 4-6 hours, depending on the type of paint). Once it’s dry, lightly sand it again with fine-grit sandpaper for a smooth finish.
Step 4: Apply Additional Coats of Paint
For the best results, apply 2-3 coats of paint. Between each coat, sand lightly to ensure the paint adheres properly. This step is essential if you want your countertop to have a solid, professional look.
Allow each coat to dry fully before applying the next one. Once all your coats are applied, let the paint dry for at least 24-48 hours before proceeding to the next step.
Step 5: Apply a Protective Topcoat
After the final coat of paint has dried, it’s time to add the protective topcoat. This will ensure that your countertop is resistant to scratches, stains, and water damage.
Apply a thin, even layer of the topcoat and allow it to dry fully. Some topcoats may require a second coat check the manufacturer’s instructions for guidance.
Tips and Tricks to Make Your Paint Job Last
You’ve done all the hard work, now let’s talk about how to make your painted laminate countertops last.
- Be Patient: Patience is key in the drying process. Don’t rush between coats, and allow the paint and topcoat to fully cure before using your countertops.
- Use Coasters and Trivets: Although your new painted surface is durable, it’s still a good idea to protect it from hot pots, sharp objects, or heavy items. Use trivets and coasters to preserve the finish.
- Clean Gently: Clean your countertops with a soft cloth and mild cleaning solution. Avoid abrasive cleaners or scrubbers that could damage the paint.
- Avoid Excess Moisture: Laminate can swell if exposed to too much water, so be cautious with excessive moisture.
Common Mistakes to Avoid
While painting laminate countertops is a relatively easy process, there are a few common mistakes that can make or break your project.
Mistake 1: Skipping Prep Work
As tempting as it may be to skip the sanding or cleaning steps, don’t. Proper preparation is essential for a smooth, durable finish. Skipping this step is the number one mistake I see people make.
Mistake 2: Using the Wrong Paint
Not all paints are created equal. Always use a bonding primer designed for laminate, and choose either an epoxy or acrylic paint for the best results. Avoid cheap paints that aren’t made for high-traffic areas.
Mistake 3: Rushing the Drying Process
I get it waiting is hard. But trust me, rushing the drying process will only lead to disaster. If you don’t let each coat dry completely before applying the next one, the finish will be uneven and could peel or chip.
Mistake 4: Not Using a Topcoat
A topcoat is a must if you want your paint job to last. Some people skip this step thinking it’s unnecessary, but a good topcoat protects the paint and adds a glossy finish that looks professional.
Conclusion
Painting laminate countertops is an easy and affordable way to transform your kitchen or bathroom.
With a little preparation, the right materials, and some patience, you can achieve a durable and stylish surface that looks just like granite, marble, or any other high-end material.
Remember, the key to success lies in the prep work and patience. Take your time, follow the steps carefully, and soon you’ll have a countertop that looks brand new. So, what are you waiting for? Get started on your laminate countertop transformation today!
FAQs
Q1: How long does it take for the paint to cure on laminate countertops?
A1: It can take anywhere from 48-72 hours for the paint and topcoat to fully cure, depending on the type of paint used and the environment’s humidity. Make sure to give it enough time before using your countertops to ensure a durable finish.
Q2: Can I paint over laminate without sanding?
A2: While it’s possible to paint laminate without sanding, it’s highly recommended to lightly sand the surface to ensure the paint adheres properly. Skipping this step could result in the paint peeling or not adhering well.
Q3: How do I maintain painted laminate countertops?
A3: Clean your countertops regularly with a mild soap solution and a soft cloth. Avoid using abrasive cleaners or harsh chemicals that can damage the paint. Also, use trivets and coasters to protect the surface from heat and scratches.
Q4: Can I paint my laminate countertops a dark color?
A4: Yes! Dark colors can look stunning on laminate countertops, but keep in mind that dark shades may show wear and tear more quickly. If you choose a dark color, be extra cautious with cleaning and protecting the surface.