Refurbishing a vanity is one of the most rewarding DIY projects you can take on in your bathroom.
Whether you’re looking to update an old, worn-out vanity or give a fresh look to a piece of furniture with sentimental value, this process is both fun and budget-friendly.
With the right tools, materials, and a little patience, you can achieve a professional-quality finish that adds character to your space.
So, have you ever walked into your bathroom and felt that your vanity just doesn’t match the vibe anymore? Maybe it’s looking a bit dated, or perhaps it’s showing signs of wear and tear.
If you’ve been thinking about refurbishing your vanity, you’re not alone. It’s a great way to breathe new life into a space without the expense of replacing everything.
Let’s walk through the process, step-by-step, so you can tackle this project with confidence and creativity.
In this article, I’ll show you exactly how to refurbish a vanity from assessing its current condition to selecting materials and finishing it off with style. Whether you’re a DIY beginner or an experienced home renovator, I’ve got you covered.
Assessing the Vanity’s Condition
Before jumping into any DIY project, it’s essential to assess the condition of the vanity you’re working on. Here’s how to do it:
- Check for Structural Integrity:
Start by checking the frame of the vanity for any signs of damage or wear. Look for cracks, dents, or loosened joints. If the structure is solid, you can focus on the surface treatments. However, if there are significant issues with the frame, you might need to repair or replace parts of the vanity before moving forward. - Inspect the Finish:
The surface of your vanity will often show the most signs of wear. Peeling paint, water stains, and scratches are common, especially if the vanity is used frequently. This is where the fun begins—these imperfections are exactly what you’ll be fixing and refinishing. - Evaluate the Hardware:
Take a good look at the knobs, pulls, and hinges. Are they outdated, rusted, or broken? If so, you can easily replace them with modern or vintage-inspired hardware to enhance the new look. - Identify Materials:
Find out what materials your vanity is made of. Is it wood, laminate, or a combination of both? Understanding the material will help you choose the right type of paint, adhesive, or finish.
Preparing Your Vanity for Refinishing
Now that you’ve assessed the vanity, it’s time to get it ready for the refurbishing process. Preparation is key to a smooth and successful project.
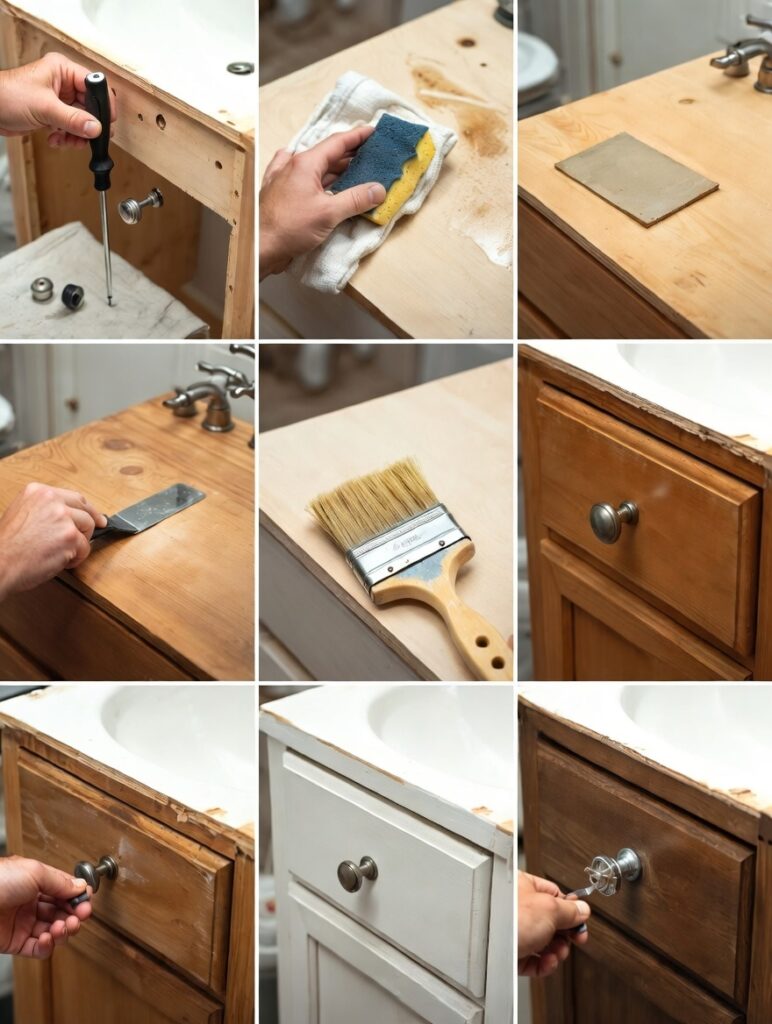
- Remove the Hardware:
Start by unscrewing and removing the knobs, pulls, and any other hardware. This will prevent any accidental damage during the refinishing process. Keep all screws and hardware in a safe place for later installation. - Clean the Vanity:
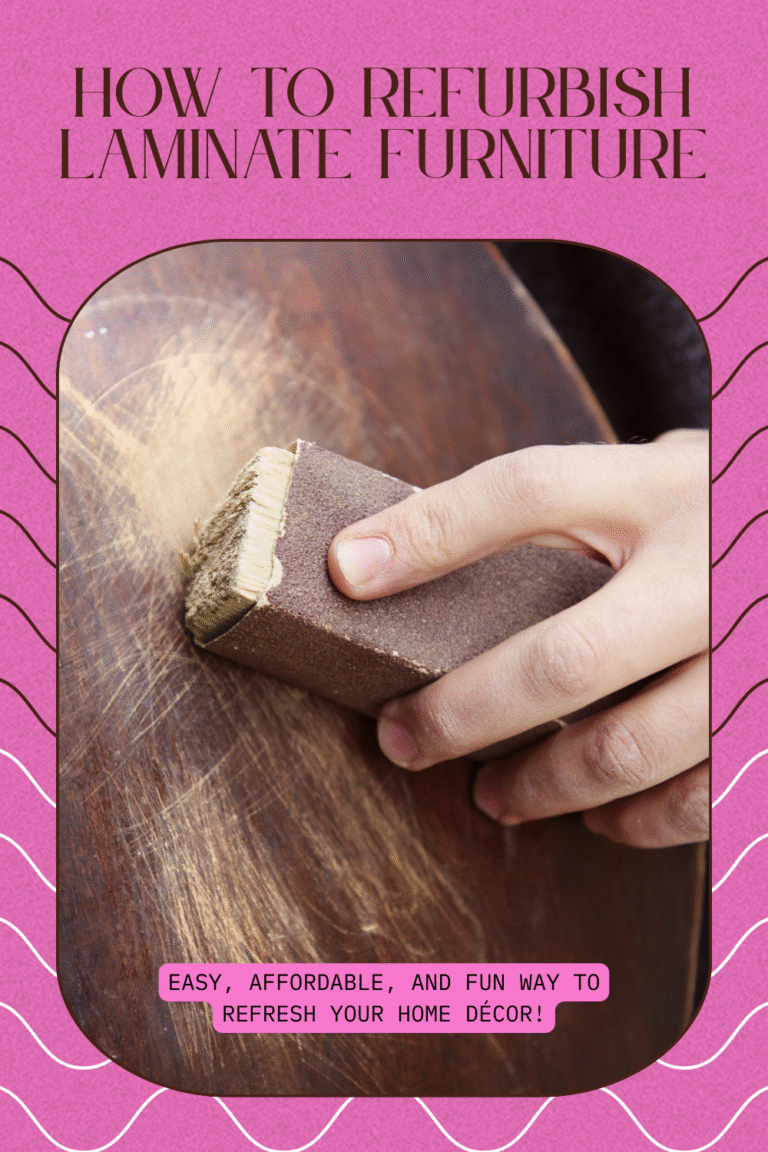
Use a mild soap solution or a wood cleaner to clean the vanity thoroughly. Remove any dust, grime, or oils that might have accumulated. If you’re working with a laminate surface, use a degreaser to ensure the paint sticks well. - Sand the Surface:
Lightly sand the vanity to create a smooth surface for painting or staining. If your vanity has a glossy finish, you may need to use a medium-grit sandpaper (around 120-150 grit) to scuff it up a little. This will help the new finish adhere better. - Fill in Any Imperfections:
If there are dents, scratches, or holes in the vanity, fill them in with wood filler. Smooth it out with a putty knife and let it dry completely. Afterward, sand it again to make the surface even.
Choosing the Right Finish
One of the most exciting parts of refurbishing your vanity is choosing the finish that will give it new life. Here’s what to consider:
- Paint or Stain?
The decision between paint and stain depends on the look you’re going for. Paint offers a wide range of colors and finishes, while stain highlights the natural beauty of wood grain. If you’re refurbishing a wooden vanity, you’ll need to choose between a fresh coat of paint for a modern look or a rich stain for a classic touch. - Choosing the Color or Shade:
If you opt for paint, choose a high-quality, water-resistant paint specifically designed for bathroom furniture. Satin or semi-gloss finishes are the best choices because they offer durability and easy cleaning. When it comes to stain, select a shade that complements your bathroom’s overall color scheme. - Sealers and Topcoats:
No matter which finish you choose, it’s essential to seal the surface with a clear topcoat. This will protect the finish from moisture and wear over time. For painted finishes, use a polyurethane sealer, and for stained surfaces, go with a clear wood finish that enhances the wood’s natural beauty.
Step-by-Step Refurbishing Process
Let’s break down the refurbishing process into clear, actionable steps that you can follow.
- Step 1: Sanding
Start by sanding the vanity to remove the existing finish. If you’re working with a laminate surface, be careful not to damage it. Sanding will also help to smooth out any imperfections in the surface. - Step 2: Applying Primer (if necessary)
If you’re painting the vanity, apply a coat of primer. This step is crucial, especially if you’re changing from a darker to a lighter color or if the vanity has an old, glossy finish. Let the primer dry for several hours. - Step 3: Painting/Staining
Once the primer is dry, you can start painting or staining the vanity. Apply the first coat and let it dry completely before applying a second coat. When staining, use a clean cloth to apply the stain in even strokes, wiping off any excess to prevent blotchiness. - Step 4: Sealing the Finish
Once the paint or stain has dried, apply a protective clear coat or polyurethane. This will ensure your work lasts and is protected from bathroom humidity and wear. - Step 5: Reattaching Hardware
After the vanity is completely dry, reattach the hardware. If you decided to replace the hardware, now is the time to install the new knobs or pulls.
Common Mistakes to Avoid
Even experienced DIYers can make mistakes during the refurbishing process. Here are some common pitfalls and how to avoid them:
- Skipping the Sanding Step:
One of the biggest mistakes is not sanding the surface properly before applying paint or stain. Without this step, the new finish may not adhere well, leading to peeling or streaks. - Using the Wrong Paint or Stain:
Always choose paint or stain that is specifically designed for use in bathrooms. Regular paint may not hold up well in a humid environment, leading to chipping or discoloration. - Not Allowing Enough Drying Time:
It’s tempting to rush through the process, but patience is key. Allow each coat of paint, stain, and topcoat to dry thoroughly before moving on to the next step. Otherwise, you risk smudging or damaging the finish. - Not Protecting the Vanity During Drying:
After the final coat is applied, don’t forget to protect your vanity while it dries. Dust, pets, or accidental bumps can ruin the finish before it has time to set.
Conclusion
Refurbishing a vanity is a simple yet satisfying way to update your bathroom without breaking the bank. Whether you’re working with an old family heirloom or just trying to freshen up your space, the process can be fun and rewarding.
Remember to take your time with the preparation and painting steps, and don’t rush through the drying times. With the right tools, materials, and techniques, you’ll end up with a beautiful vanity that looks brand new.
FAQs
How long does it take to refurbish a vanity?
The time it takes to refurbish a vanity depends on the type of finish you’re applying and how many coats you need. Typically, it can take anywhere from a couple of days to a week, including drying time between coats.
Can I refurbish a vanity without sanding?
While it’s possible, sanding is highly recommended. It helps the new paint or stain adhere better, resulting in a smoother and longer-lasting finish.
Do I need to replace the hardware when refurbishing a vanity?
Not necessarily. If the existing hardware is in good condition and matches the new style, you can keep it. However, replacing old or worn hardware can give your vanity an entirely new look.
Can I refurbish a laminate vanity?
Yes! You can refurbish a laminate vanity, but the process may require additional steps like using a bonding primer to help the paint adhere better.