A finished diamond painting can look secure while it is lying flat on the table and still behave very differently once it is lifted, framed, stored, or moved from room to room. Tiny drills that seemed firmly planted can begin to loosen at the edges, exposed adhesive can catch dust, and a heavy-handed topcoat can solve one problem while creating another by filling the facets that make the picture sparkle.
That is why choosing a sealer is less about finding the strongest glue and more about deciding what you want the finished piece to keep doing after it is sealed. A wall piece that will sit behind glass has different needs from a project that will be handled, gifted, or displayed without glazing. The finish matters too.
Gloss can support a bright look, while matte formulas deliberately reduce reflection. Application style matters just as much: a silicone brush gives more control than a built-in sponge, but the sponge is quicker and leaves fewer tools to clean.
One important point before comparing the eleven products below: only the first two are genuine Mod Podge formulas. The rest are glazes or dedicated diamond-art and craft sealers that appeared in the original product list. I have kept that list intact, but I will not pretend the formulas are interchangeable. The useful question is which type of clear finish suits your project, your preferred level of shine, and the way you plan to display the finished canvas.
Why Sealing Diamond Art Needs More Thought Than It Seems
The Canvas Adhesive and the Topcoat Do Different Jobs
Diamond paintings already rely on an adhesive layer beneath the drills. That adhesive is what holds each round or square piece to the canvas during construction. A topcoat does something different: it flows around the exposed spaces, dries into a film, and helps reduce movement after the piece is finished.
That difference matters because a sealer is not a substitute for poor placement. If several drills are sitting on top of dried debris, overlapping one another, or barely touching the original adhesive, flooding the canvas with more liquid does not magically correct the alignment. It may lock the problem in place. Before sealing, the drills should be seated, aligned, and pressed into the original adhesive as well as possible.
A good sealing job therefore starts before the bottle is opened. Roll or press the completed work, inspect the edges, remove lint, and straighten any drills that have shifted. Once a clear film cures around them, making small corrections becomes more difficult.
Round and Square Drills Leave Different Gaps
Round drills leave visible spaces between neighboring pieces. Those channels give a liquid sealer somewhere to travel, so a thin coat can reach the canvas adhesive without completely covering the top of each drill. This is one reason many people find round-drill paintings relatively forgiving to seal.
Square drills fit much more tightly. A well-made square-drill canvas can look almost tiled, with narrow seams between pieces. That is visually satisfying, but it also means a thick sealer has less open space to settle into. If too much product is brushed across the surface, more of it can remain over the facets rather than sinking into the gaps.
The practical lesson is simple: the tighter the drill field, the lighter your application should be. You are trying to reinforce the spaces around the drills, not bury the reflective faces beneath a clear sheet.
More Sealer Can Mean Less Sparkle
A clear coating can still change the way light moves across a diamond painting. The drills sparkle because their angled faces reflect light in different directions. If a thick liquid layer dries over those faces, it can partially level the microscopic changes in angle that produce the glittering effect.
That does not mean every sealer ruins sparkle. Dedicated diamond-art formulas are often sold specifically with a clear or glossy finish, and careful application can preserve much of the visual effect. The risk rises when the layer is unnecessarily heavy, when multiple coats are added without a real need, or when a dimensional glaze is used over a broad area.
I know it is tempting to think that twice as much sealer must give twice as much protection. It usually does not work that way. Once the gaps are filled and the drills are reasonably locked in, extra material mostly adds film thickness. Thin, even coverage is normally safer than building a heavy shell.
Flexibility Matters Before Framing
A diamond painting is usually made on a flexible canvas. Before framing, many people roll a completed piece loosely for transport or store it flat between protective sheets. A cured sealer can change how freely that canvas bends.
Some formulas are described by their makers as flexible; others form harder decorative films. Even with a flexible sealer, a finished, sealed canvas should not be treated like an uncoated fabric roll. Tight rolling can stress the dried film and the bond around drills, especially near the edges.
If you know the artwork must travel before framing, plan that before sealing. Flat transport is safest. If rolling is unavoidable, use a wide diameter and avoid sharp reverse bends. A topcoat is there to support the finished work, not make it immune to mechanical stress.
Drying and Curing Are Not the Same
This is one of the most useful distinctions in the entire process. “Dry” usually means the surface no longer feels wet. “Cured” means the film has progressed much further toward its final hardness and stability.
The difference can be dramatic. Plaid states that its standard Mod Podge Gloss and Matte formulas typically dry to the touch in about 15 to 20 minutes, yet require approximately 28 days for a full cure. Dedicated diamond-art sealers often advertise much shorter drying or cure windows, with some listing roughly two hours and others around 30 to 60 minutes depending on coat thickness.
Those figures should not be mixed together. A product that feels dry quickly may still be vulnerable to pressure, stacking, moisture, or tight framing. Follow the current instructions for the exact bottle you own, and give the piece more time rather than less when the coating looks thick or the room is humid.
Not Every Finished Diamond Painting Needs Sealing
Sealing is useful, but it is not compulsory. A well-adhered painting that will be mounted flat and protected behind glass may need very little extra help. In that situation, adding a topcoat introduces a new finish that can alter sparkle without providing much practical benefit.
Sealing becomes more attractive when drills are prone to lifting, the piece will be displayed without glass, exposed adhesive remains between round drills, or the artwork will be handled more than usual. It can also make sense when you simply prefer the finished, unified surface that a clear coat creates.
I don’t think the right question is “Should every diamond painting be sealed?” A better question is “What problem am I trying to prevent?” If the answer is clear, choosing the formula becomes much easier.
| Product Image | Product Name | Features | Price |
|---|---|---|---|
 |
Mod Podge Gloss Sealer | Dries clear with a durable & high-shine coating Quick-Drying & Surface-Friendly Easy Cleanup Non-toxic |
Check Price |
 |
Mod Podge Matte Sealer | Combines glue, sealer, and finish in one convenient formula Versatile Surface Compatibility Durable Matte Finish Quick-Drying & Buildable |
Check Price |
 |
Judikins Diamond Glaze, 8-Ounce (GP008) | Easy-to-use nozzle Glass-Like Raised Finish Adds depth and shine to flat surfaces with minimal effort |
Check Price |
 |
Faburo 2pcs Diamond Painting Sealer | Ready-to-use 120ml bottle Non-Toxic Formula Waterproof & Dust-Proof Protection Prevents diamond paste from falling off |
Check Price |
 |
Diamond Painting Sealer 250ML with Silicone Brush | Dries fully in just 2 hours Safe & Non-Toxic Formula Large 250ml bottle covers multiple projects Permanent Hold & Gloss Finish |
Check Price |
 |
ARTDOT 16 oz Diamond Art Sealer Kits for Adults | Quick-Drying for Fast Results Silicone brush ensures smooth, bubble-free coverage Lint roller compacts beads and removes impurities |
Check Price |
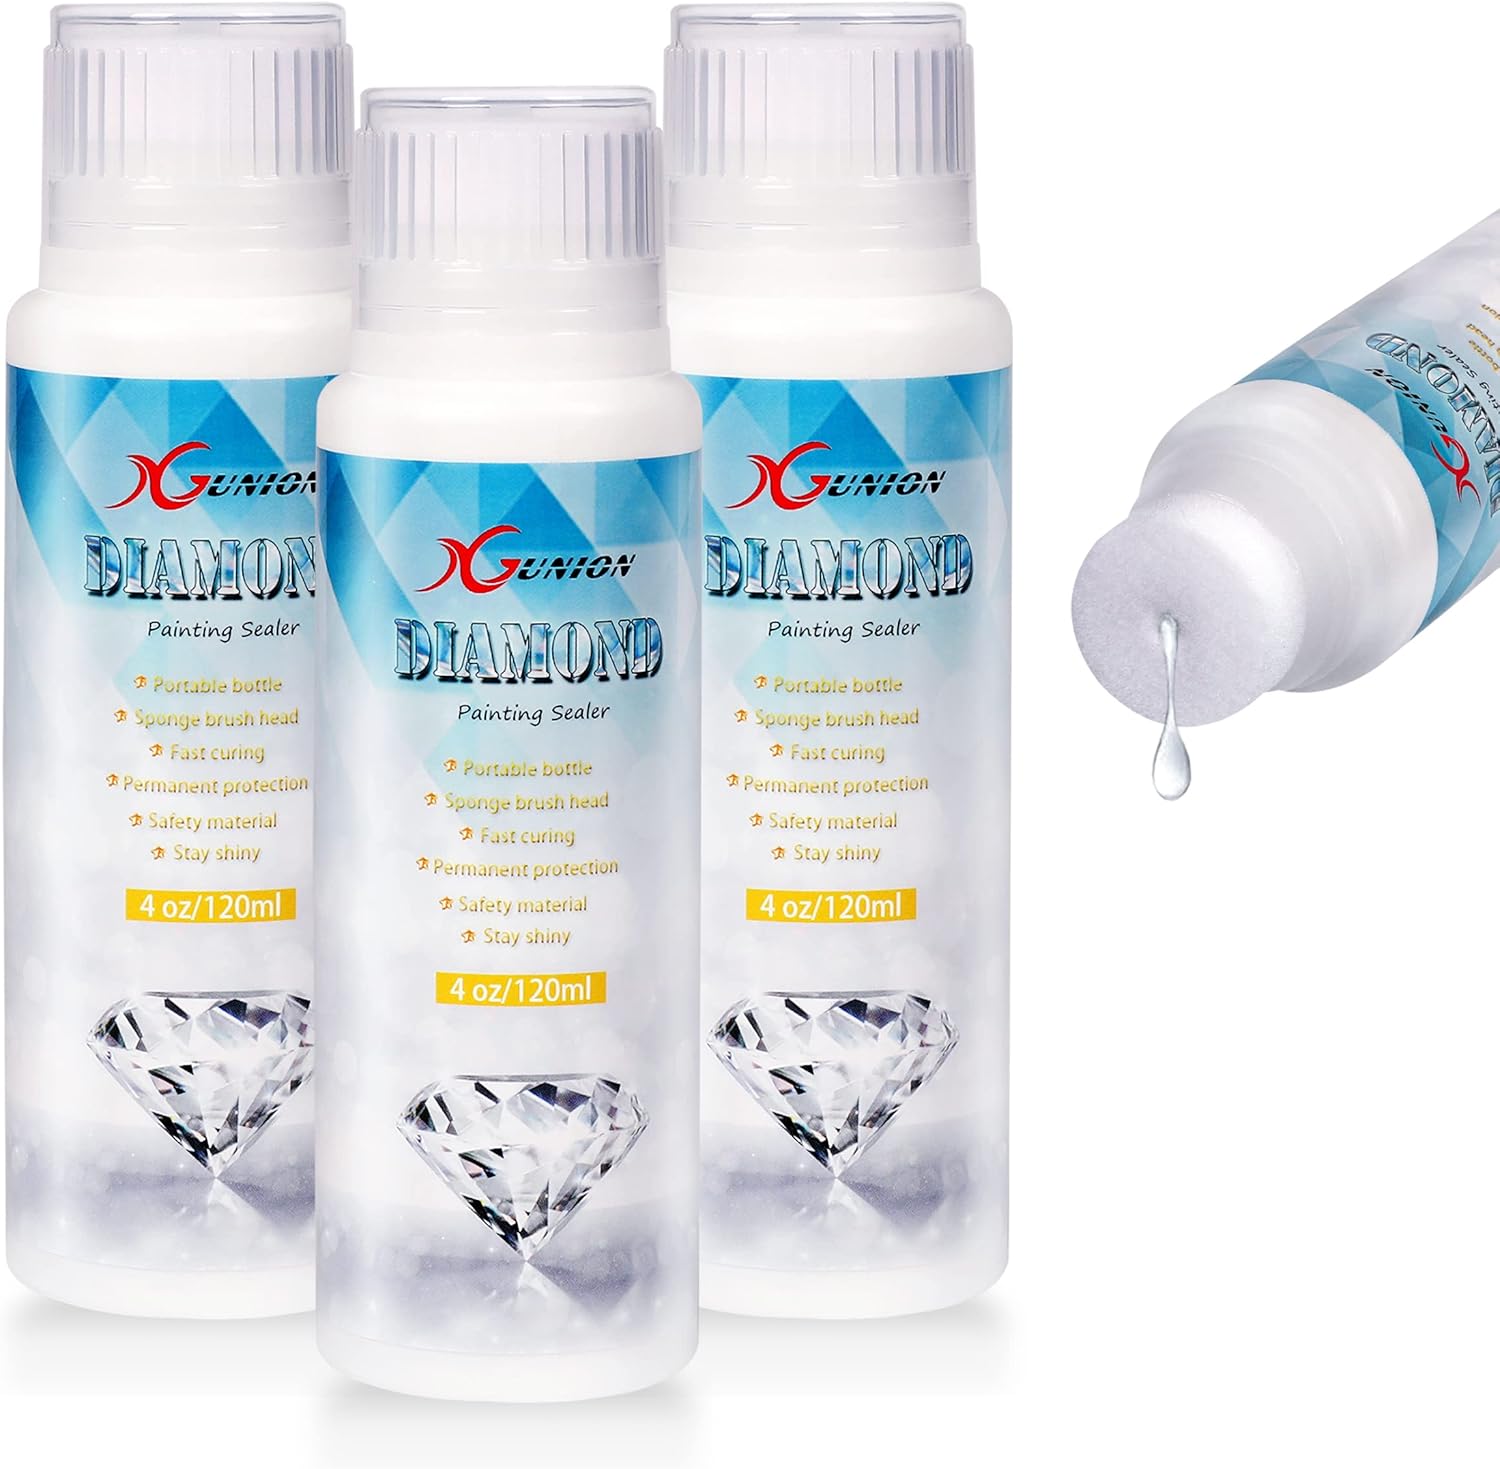 |
Diamond Painting Sealer 3-Pack 360ML | Long-Lasting Shine Safe & Non-Toxic Formula Rapid Curing Time urface cures in just 15 minutes, fully cured in about 30 minutes Adds a high-gloss finish |
Check Price |
 |
SCORCH MARKER – Maker’s Magic Sealer | Crystal-clear gloss finish with mirror-like shine Flexible & waterproof Leaves no clumps or residue Fast-Drying & Easy Cleanup |
Check Price |
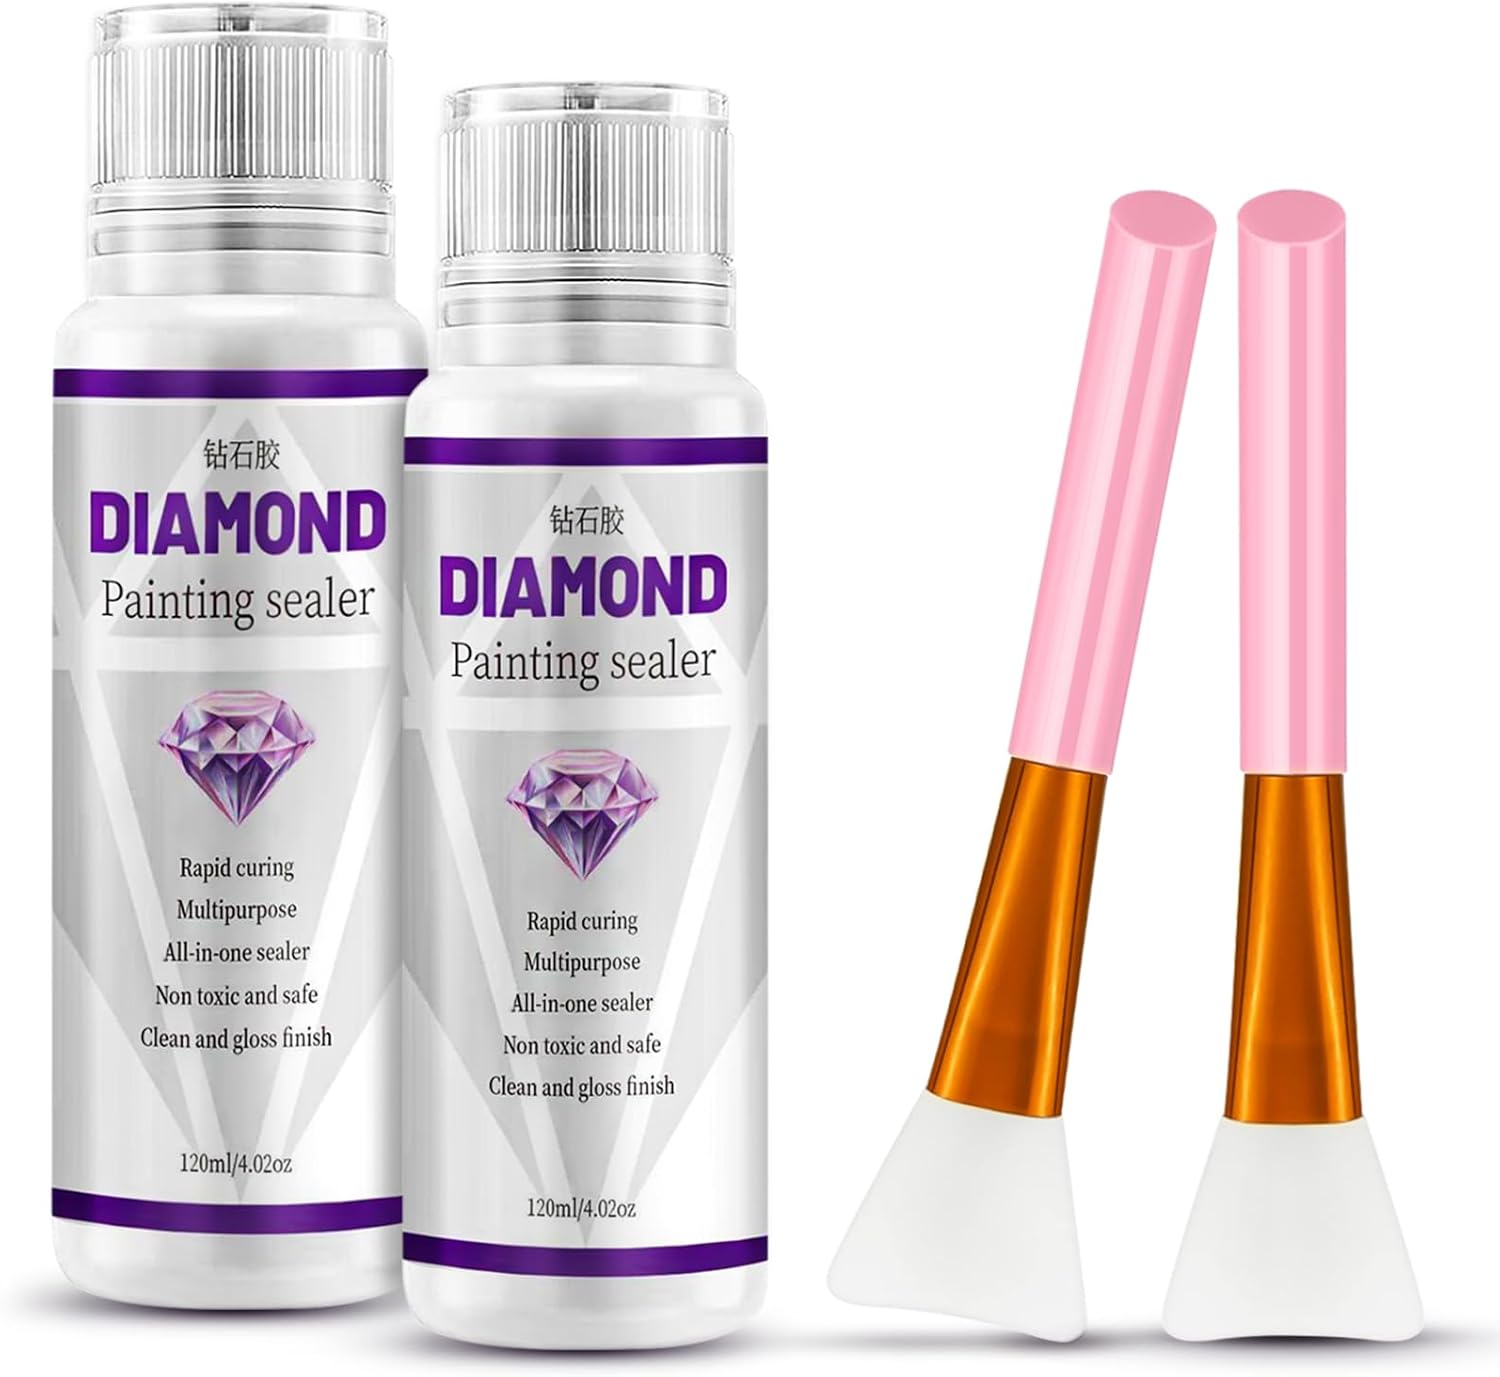 |
Yunnuo Diamond Painting Sealer Kits 240ML with 2 Silicone Brushes | Permanent Hold & Gloss Finish Safe & Non-Toxic Formula Fully cures in about 2 hours Large 240ml (8 oz) bottle |
Check Price |
 |
2 Pack Diamond Painting Sealer | Includes 2 bottles × 120ml Comes with a built-in sponge brush for smooth Surface dries in 15 minutes, fully cured in 30 minutes |
Check Price |
 |
Mereido Diamond Art Glue Painting Sealer | Multi-Purpose Craft Sealer Surface cures in 15–25 minutes; fully cured in 30–60 minutes Creates a clear, protective layer that locks diamonds in place |
Check Price |
What to Check Before You Choose a Sealer
Decide How Much Shine You Want to Keep
Diamond art is built around reflection, so finish is not a small detail. Gloss products are usually the natural starting point when sparkle matters. A matte finish intentionally scatters light and creates a flatter visual surface, which can be useful if glare bothers you but is a poor match for someone who wants every drill to flash under changing light.
Even glossy products vary. A thin PVA-style diamond sealer may mainly settle around the drills, while a dimensional glaze such as Judikins Diamond Glaze is designed to create a raised, glass-clear surface. Both can look shiny, but they do not create the same film thickness or texture.
Choose the visual effect first, then choose the chemistry that can deliver it. Do not buy a matte product simply because it is familiar if the whole reason you enjoy diamond art is its sparkle.
Look at the Applicator, Not Just the Bottle
The applicator changes how easy it is to use a thin coat. Silicone brushes are useful because they do not absorb much liquid, they spread viscous sealers well, and dried residue is generally easier to peel or wash away than from a natural-bristle brush. Traditional paint brushes offer excellent control around edges and detailed borders but need prompt cleaning.
Built-in sponge heads are a different approach. Xgunion and Unixing-style bottles are designed so the product can be spread with the applicator attached to the bottle. That reduces setup and cleanup, and it can be convenient for a quick finish. The trade-off is control: a wide sponge can release more liquid than you intended if you press too firmly.
For a large canvas, an applicator that feels comfortable for ten minutes may matter more than a small difference in bottle size. For a tiny coaster or partial-drill design, precision matters more than speed.
Match Volume to the Way You Actually Craft
Large bottles make sense for people who finish many canvases. ARTDOT’s 16-ounce kit is built around that kind of repeated use, while several other options come as two or three smaller bottles. Smaller containers can be easier to handle over the artwork and may expose less of the remaining supply to air each time you work.
Do not assume the largest bottle is automatically better value for your situation. If you complete one small painting every few months, a giant container may spend a long time in storage. If you seal several full-size canvases in a weekend, constantly opening small bottles becomes inconvenient.
Think about storage too. Caps, sponge heads, and bottle mouths need to stay clean so dried residue does not interfere with the next application. A multipack can be useful because unopened containers remain sealed while you work through one bottle at a time.
Pay Attention to Film Thickness
A dedicated diamond-art sealer is normally meant to be spread across a drilled surface. A dimensional craft glaze is meant to create visible depth. A decoupage medium is designed to glue, seal, and finish a broad range of craft materials. Those purposes overlap, but the products do not behave identically.
Thicker is not automatically stronger in the way a diamond painter needs. A heavy film can gather around drill edges, bridge over narrow gaps, or make the canvas feel rigid. The safest approach is to use only enough material to reach the gaps and create the finish you want.
If a product is unfamiliar, test it on spare drills attached to scrap material. That small test reveals how clear it dries, how much shine remains, whether the film feels rubbery or hard, and how easily you can control the applicator.
Think About Timing Before a Gift or Framing Deadline
Drying time matters if the artwork needs to be wrapped, mounted, or gifted soon. Some dedicated sealers are marketed around short drying windows. Xgunion’s listing, for example, describes roughly 15 minutes for the surface and around 30 minutes for a full cure, depending on film thickness. Mereido lists about 15 to 25 minutes for the surface and 30 to 60 minutes for fuller curing. ARTDOT and VansyLife describe roughly two hours.
Standard Mod Podge has a very different timetable. Plaid says the surface can become touch-dry quickly, but the product continues curing for weeks. That does not mean you must leave the project untouched on a table for 28 days. It does mean you should avoid treating “not tacky” as the same thing as “fully cured.”
If a frame will press directly against the sealed surface, allow generous cure time. Pressure against a film that is still developing can leave marks or encourage sticking.
Check Whether the Formula Was Actually Made for Diamond Art
Dedicated sealers have one obvious advantage: their application instructions assume the surface is covered in drills. Brands such as ARTDOT, VansyLife, Xgunion, Yunnuo, Unixing, and Mereido sell products specifically for diamond painting. Their included brushes or sponge heads are part of that design.
Mod Podge Gloss and Matte are general craft products. Judikins Diamond Glaze is a glaze-and-glue product. Maker’s Magic is a broad craft sealer and finish. They may all be usable for certain diamond-art finishing jobs, but they require more judgment because the maker is not necessarily optimizing the formula around resin drills and a flexible adhesive canvas.
A general craft product can still be the right choice if you already understand its behavior or want one bottle for several crafts. A dedicated sealer is usually the simpler choice for someone whose only goal is finishing diamond paintings.
Treat Water-Resistance Claims Carefully
Finished diamond art is still artwork, not outdoor tile. Plaid explicitly says standard Mod Podge is not waterproof. Maker’s Magic is marketed by its manufacturer as waterproof after curing, while some dedicated sealer listings also use waterproof or water-resistant language.
Even then, the canvas, printing, adhesive layer, frame backing, and drills are all part of the finished object. A waterproof top film does not convert the entire project into something that should be washed, soaked, or displayed where water can repeatedly reach the edges.
For normal indoor display, protection from dust and occasional handling is a more realistic goal. If you need a piece to live in a humid area, protect the whole artwork with appropriate framing and placement rather than relying on sealer alone.
What a Sealer Can and Cannot Fix
A clear coat can help lock drills in place, cover exposed adhesive, and make surface cleaning easier once fully cured. It can also give the artwork a more unified gloss. Those are useful benefits, especially on paintings that will remain unframed or be displayed without glass.
What it cannot do is repair a poor base. If the canvas adhesive has failed across a large area, a topcoat is only holding the drills from above. If the canvas is wrinkled, the sealer will follow that shape. If square drills are badly misaligned, the coating can preserve the misalignment rather than correct it.
It also cannot guarantee color stability. UV resistance may be mentioned on some listings, but the printed canvas and drills can still be affected by prolonged strong sunlight. A sealed diamond painting should still be displayed away from harsh direct sun when possible.
Finally, no finish can protect the piece from rough folding. Once sealed, think of the work as finished artwork rather than flexible craft material. Support it from underneath when moving it and frame it in a way that does not crush the drill faces.
Mod Podge Gloss – A Familiar Glossy Craft Finish
Mod Podge Gloss is the most familiar general craft product in this list. Plaid describes it as an all-in-one glue, sealer, and finish that dries clear with a smooth glossy surface. It is water-based and acrylic, and it is designed for a broad range of craft materials rather than specifically for diamond painting.
That broad usefulness is exactly why some diamond painters consider it. If you already keep Mod Podge on hand for decoupage, paper, wood, canvas, or mixed-media projects, you may prefer to work with a finish whose brushing behavior you already understand. The glossy finish also makes more visual sense for diamond art than a flat matte topcoat when sparkle is a priority.
The biggest reason to use restraint is cure time. Plaid says the product can dry to the touch in roughly 15 to 20 minutes, yet needs about 28 days to fully cure. That is a very different timetable from dedicated diamond-art sealers that are marketed around same-day curing. For a piece that will go straight into a tight frame, patience is important.
Features
Mod Podge Gloss dries from a milky appearance to a clear, glossy film. On diamond art, that means the spaces between drills can receive a transparent protective layer without deliberately flattening the finish the way a matte formula does. The product is quick to become touch-dry, which makes careful layering possible, but a touch-dry surface should not be mistaken for a fully developed film.
Its all-in-one formulation is useful if you make many types of crafts. Plaid also says the product cleans up while wet and works across materials such as wood, fabric, plastic, and canvas. The limitation is that the manufacturer does not present standard Mod Podge Gloss as a purpose-built diamond-art sealer, so application thickness is entirely in your hands.
- The clear glossy finish is more compatible with a sparkling diamond-art look than a deliberately flat finish.
- It is a familiar multipurpose craft medium that can also be used for decoupage and other projects.
- The product becomes touch-dry relatively quickly, making it easier to see where a first thin coat has settled.
- Plaid publishes clear manufacturer guidance on drying, curing, water exposure, and compatible craft uses.
- The approximately 28-day full-cure period is much longer than the cure windows listed for several dedicated diamond-art sealers.
Who It’s Best For
This is best for a crafter who already uses Mod Podge, wants a glossy finish, and does not mind giving a finished canvas generous cure time before tight framing or heavy handling.
Not Ideal For
It is not ideal for someone who wants an applicator kit built specifically around diamond painting or who needs the finished piece fully cured on a short deadline.
Mod Podge Matte – For a Deliberately Low-Glare Finish
Mod Podge Matte uses the same familiar all-in-one glue, sealer, and finish idea but dries to a matte surface. Plaid describes it as quick-drying, water-based, acrylic, and clear when dry. The important difference for diamond painting is visual rather than structural: a matte film is designed to reduce shine.
That makes this an unusual choice for artwork built from faceted drills. Most people want to preserve sparkle, so Matte should not be treated as a default simply because it is a standard Mod Podge formula. It becomes interesting when glare is genuinely unwanted, perhaps on a design where the image and colors matter more than a jewel-like flash.
The same cure-time caution applies here. Plaid gives approximately 28 days for full cure. It also states that standard Mod Podge is not waterproof, so a matte topcoat should not be treated as an outdoor or wash-safe conversion for the finished canvas.
Features
The matte film dries clear but visually softens reflections. That can reduce harsh glare from room lighting and make printed details easier to see from some angles. On the other hand, the same light-scattering effect can mute the sparkle that defines diamond art, so the visual trade-off needs to be intentional.
Like the Gloss formula, Matte works as a general craft adhesive and sealer across many surfaces. It is therefore useful for a mixed craft room where one container has several jobs. It does not include a diamond-painting applicator, and you will need to supply your own soft brush, foam tool, or silicone spreader.
- The low-glare finish suits people who intentionally prefer a subdued surface rather than maximum reflection.
- It is a versatile glue, sealer, and finish for many craft projects beyond diamond art.
- It dries clear, so the underlying colors remain visible rather than being covered by an opaque layer.
- Manufacturer instructions and cure guidance are easy to verify directly from Plaid.
- The matte finish can noticeably reduce the sparkle that many people consider the main visual appeal of diamond painting.
Who It’s Best For
Choose this if you specifically dislike glare or want a flatter decorative finish and are willing to trade some sparkle for a calmer surface.
Not Ideal For
It is not ideal for a diamond painter whose first priority is maintaining crisp, bright reflections from every drill facet.
Judikins Diamond Glaze GP008 – A Dimensional Glaze for Small Areas
Judikins Diamond Glaze is different from both Mod Podge and the dedicated sealers further down. Judikins describes it as both a glaze and a glue, with a glass-clear finish that can be applied over artwork to create a raised surface. The GP008 version is an 8-fluid-ounce bottle with an applicator.
That raised-film behavior is the reason I would treat it as a specialist option for diamond art rather than the obvious choice for coating a large canvas. Used selectively, a dimensional clear glaze can reinforce a small embellishment area or add deliberate depth. Spread heavily across thousands of faceted drills, the same thickness can fill texture you may have wanted to keep visible.
Diamond Glaze also adheres materials such as beads, plastic, glass, paper, wood, and metal, so it makes sense for mixed-media pieces where the diamond painting is only one part of the project. Its appeal is precision and dimensional finish, not speed over a broad canvas.
Features
The formula is designed to dry glass-clear and build a raised finish. That makes it useful when you actually want a visible resin-like layer rather than a sealer that disappears mainly into gaps. The bottle applicator can place material into smaller areas with more control than pouring from a wide-mouth container.
Judikins also positions Diamond Glaze as an adhesive for beads and other embellishments. For a crafter who mixes rhinestones, charms, paper elements, and diamond drills in one piece, that versatility can be genuinely useful. The same thickness that helps with dimensional craft work demands a lighter hand on a standard full-coverage diamond canvas.
- The glass-clear finish suits decorative work where transparency and depth matter.
- The applicator supports controlled placement on small details and edges.
- It doubles as an adhesive for beads and several common mixed-media materials.
- It is a useful choice for partial coverage, embellishments, or small projects that benefit from a raised finish.
- Its dimensional nature makes it easier to apply a film that is too thick for a large diamond painting.
Who It’s Best For
This fits mixed-media crafters and people sealing a small or highly detailed area where a controlled, glassy raised finish is part of the design.
Not Ideal For
It is not ideal for quickly brushing a very large full-drill canvas where the main goal is to keep the facets as exposed and crisp as possible.
Faburo 2-Pack Diamond Painting Sealer – Simple Ready-to-Use Coverage
Faburo’s two-pack is a dedicated diamond-painting sealer rather than a general decoupage medium. Current listings identify two 120 ml bottles, for about 240 ml total, and describe the liquid as ready to use without mixing. The intended jobs are straightforward: help hold drills, form a clear protective layer, and support a glossy-looking finished surface.
That makes Faburo a more direct fit for someone who does not want to adapt a general craft product. There is no need to interpret whether a decoupage finish is suitable for a drilled canvas; the bottle is sold for that purpose. The two-bottle format can also be convenient because one container can stay sealed while the first is in use.
The listing makes several broad claims about water, dust, and UV protection. I would treat those as product-listing claims rather than a reason to expose finished diamond art to harsh conditions. The canvas, print, and base adhesive still benefit from ordinary indoor display and protection from prolonged strong sunlight.
Features
Faburo is supplied as a clear, ready-to-use sealer. The listing describes it as forming a transparent protective layer that helps secure drills and retain luster. Because no separate mixing step is required, application is mostly about controlling the quantity and spreading it evenly.
The product is also marketed for puzzles and other art projects, which gives it some value outside diamond painting. The two smaller bottles are easier to hold and store than one very large container, although the exact applicator setup is simpler than kits that include silicone brushes, rollers, or alignment tools.
- The formula is sold specifically for diamond painting, so its intended use matches the surface you are finishing.
- Two 120 ml bottles give a practical total volume while allowing one bottle to remain unopened until needed.
- The ready-to-use format avoids measuring or mixing before application.
- The clear finish is designed to support a bright rather than deliberately matte appearance.
- The package is less tool-focused than kits that include dedicated silicone brushes, lint rollers, or alignment accessories.
Who It’s Best For
Faburo is a sensible fit for someone who wants a straightforward dedicated sealer and already owns a brush or spreader they like using.
Not Ideal For
It is less attractive for a first-time sealer who wants one purchase to include every preparation and application tool.
VansyLife 250 ml Sealer with Silicone Brush – Controlled Spreading Without a Large Kit
VansyLife pairs a 250 ml bottle with a silicone brush. That combination hits a useful middle ground: there is enough liquid for multiple projects, yet the kit stays simple and compact. Current listings describe a PVA, water-soluble sealer intended for diamond paintings, jigsaw puzzles, and other crafts.
The silicone brush is the feature that most changes day-to-day use. It lets you pour a small amount where you need it, then push the liquid through the drill field with relatively little absorption into the tool. A brush that does not soak up much product gives you a better chance of keeping the coat thin.
VansyLife’s listing describes roughly two hours for full drying, depending on application thickness. That is far shorter than the full cure Plaid gives for standard Mod Podge, although you should still avoid stacking or pressing a freshly sealed piece simply because the surface no longer looks wet.
Features
The 250 ml single-bottle format is easier to manage than a very large container while still being substantial enough for repeated projects. The included silicone brush can spread the sealer over square and round drills without bristles getting caught between them, and silicone is generally easy to clean before residue fully hardens.
The listing positions the formula as PVA and water-soluble, with a clear glossy result. That combination is familiar in dedicated diamond-art sealers. The key limitation is that the included brush handles application, not preparation; you still need your own roller, straightening tool, and lint-removal method if the canvas needs them.
- The included silicone brush provides good control over coat thickness and works well around raised drills.
- A 250 ml bottle offers a useful balance between capacity and easy handling.
- The product is purpose-made for diamond paintings and puzzles rather than adapted from a different craft use.
- The listing’s roughly two-hour drying window suits people who want to finish a project in one crafting session.
- The kit focuses on sealing and does not include preparation tools such as a lint roller or drill-alignment tool.
Who It’s Best For
This is well suited to a diamond painter who wants a dedicated glossy sealer and prefers the control of a separate silicone brush without buying a larger accessory kit.
Not Ideal For
It is not ideal for someone who specifically wants a no-cleanup built-in sponge applicator or a full bundle of preparation tools.
ARTDOT 16 oz Diamond Art Sealer Kit – Large Capacity with Preparation Tools
ARTDOT’s 16-ounce kit is the most complete system in this group. The current manufacturer page lists a 480 ml sealer together with a fixing tool, lint roller, silicone brush, and paint brush. That changes the value proposition: you are not only buying liquid but also the tools needed to prepare and coat the canvas.
The preparation tools are not filler. A lint roller helps remove loose dust and fibers before they become trapped in the coating, while the fixing tool can straighten drills before the finish hardens around them. The silicone brush is useful for broad spreading, and the paint brush gives more control around edges or small unsealed areas.
ARTDOT describes the material as water-soluble PVA and gives a drying time of around two hours. It also promotes the clear finish as one that preserves the artwork’s shine. As with any glossy sealer, that promise depends partly on technique: a thin coat is more likely to preserve visible facets than a flooded surface.
Features
The 480 ml capacity is aimed at repeated use. ARTDOT says the bottle is designed for numerous projects, and the wide mouth makes it easy to dip a brush or transfer a smaller working amount. For someone who seals regularly, that is more convenient than squeezing multiple tiny bottles.
The four included tools cover both preparation and application. The lint roller and fixing tool come into play before sealing; the silicone and paint brushes cover broad areas and detail work. The kit therefore makes particular sense for someone starting from scratch who does not already own suitable tools.
- The large 480 ml volume suits frequent diamond painters and larger canvases.
- A lint roller and fixing tool help prepare the drill field before any sealer is applied.
- Both silicone and conventional brushes are included, giving you a choice between broad spreading and edge control.
- ARTDOT publishes clear manufacturer instructions and describes roughly a two-hour drying time.
- The large bottle and multi-tool kit are more than a very occasional crafter needs for one small project.
Who It’s Best For
ARTDOT is best for frequent diamond painters, larger projects, or beginners who want a single kit that includes preparation and application tools.
Not Ideal For
It is not ideal for someone who seals one small canvas occasionally and wants the smallest possible bottle and storage footprint.
Xgunion 3-Pack 360 ml Sealer – Fast Application with Built-In Sponge Heads
Xgunion takes a different approach from brush-based kits. The three 120 ml bottles use an all-in-one sponge-head design so the sealer can be applied directly without a separate brush. The total 360 ml volume is split across three bottles, which is useful for storage and helps keep unopened product separate until you need it.
The built-in sponge is the main reason to choose this product. It reduces setup, prevents the need to clean a separate applicator, and makes the process feel more like wiping on a finish than painting one. For people who dislike glue-coated brushes in the sink, that convenience is real.
The listing describes a fast timeline: roughly 15 minutes for the surface and about 30 minutes for fuller curing, depending on thickness. That speed means you should work deliberately. Once a fast-setting film begins to skin over, repeatedly dragging the sponge across the same place can leave uneven texture.
Features
Each bottle combines storage and application in one unit. The sponge head is protected by the cap, and the sealer is marketed as water-based PVA for diamond paintings, puzzles, cross stitch, and other crafts. A clear high-gloss finish is part of the product’s intended result.
Because the sponge releases liquid when pressed, pressure control matters. Start lightly and let the product move into the gaps. If the head feels dry, add a little more pressure rather than squeezing a large pool onto one area. The fast curing window rewards working in manageable sections.
- The built-in sponge head removes the need for a separate brush and simplifies cleanup.
- Three smaller bottles are easy to store and let you open fresh product only when needed.
- The 360 ml total volume is substantial without requiring one oversized container.
- The short listed curing window is useful when you need a project ready sooner than standard craft finishes allow.
- A sponge head offers less fine control than a separate silicone or detail brush, especially around borders and partial-drill areas.
Who It’s Best For
Choose Xgunion if you value speed, low tool cleanup, and a direct sponge-on application method for full-drill canvases.
Not Ideal For
It is not ideal for highly detailed partial-drill work where you want to steer the sealer precisely between decorated and undecorated areas.
SCORCH MARKER Maker’s Magic Gloss – A Flexible Multipurpose Craft Sealer
Maker’s Magic Gloss is another general craft finish rather than a dedicated diamond-art formula. SCORCH MARKER describes it as a glue, sealer, and finish that dries crystal clear, remains flexible, and becomes waterproof after curing. The manufacturer also lists puzzles, glass, plastic, canvas, leather, vinyl, and many other craft surfaces.
That broad compatibility makes it interesting for a craft room where diamond painting is only one hobby. It can serve as a clear project finish without dedicating a bottle solely to drills. The flexible-film claim is also relevant to canvas-based art, although a sealed diamond painting should still be handled gently rather than rolled tightly.
The manufacturer’s current product information contains slightly inconsistent drying language in different places, but its FAQ on the Gloss page says about one hour to dry and 48 hours to cure. That is the safer timetable to use for planning. It is much shorter than standard Mod Podge’s full cure, but still long enough that I would not seal a canvas the morning it needs to be framed.
Features
Maker’s Magic Gloss is water-based and can be applied with different tools; SCORCH MARKER specifically mentions Taklon or silicone brushes in its FAQ. The company promotes a smooth clear finish with minimal bubbles or brush marks and describes the cured coating as strong and flexible.
Its biggest practical distinction is versatility. The same bottle can handle decoupage, puzzles, photo-transfer work, glass, plastic, and other craft surfaces. Unlike a dedicated diamond-art kit, however, it does not come with a drill roller, alignment tool, or purpose-selected silicone brush.
- The crystal-clear gloss suits projects where preserving a bright finish is important.
- The manufacturer describes the cured film as flexible and waterproof, useful qualities for many general craft projects.
- It works across a wide range of craft surfaces, so the bottle is not limited to diamond painting.
- The roughly 48-hour cure window is shorter than the full cure stated for standard Mod Podge formulas.
- Because it is a multipurpose finish rather than a diamond-art kit, you must supply your own preparation and application tools.
Who It’s Best For
This suits a mixed-media crafter who wants one clear glossy sealer for diamond art, puzzles, decoupage, and other projects and is comfortable choosing an applicator separately.
Not Ideal For
It is not ideal for a first-time diamond painter who wants product-specific instructions and a ready-made brush or sponge system in the package.
Yunnuo 240 ml Two-Pack with Silicone Brushes – A Balanced Small-Kit Option
Yunnuo’s listing combines two bottles for 240 ml total with two silicone brushes. That is a sensible configuration for someone who wants dedicated tools but does not need the scale of the ARTDOT kit. One brush can stay clean as a spare, or two people can work without sharing a sticky applicator.
The product is sold specifically as a glossy diamond-art sealer, with use extending to puzzles and similar craft work. The two-bottle arrangement is practical for storage because you can finish the first bottle before exposing the second to repeated opening and closing.
I would treat the current bottle instructions as the authority on exact drying time. Retail listings around this product have repeated a roughly two-hour figure, but product pages can change, and coat thickness strongly affects any drying estimate. The dependable principle is to keep the coat thin and let it become fully clear and firm before framing.
Features
Two silicone brushes are the standout feature. Silicone spreads viscous craft sealer without holding much liquid inside bristles, so it is easier to control how much stays on the painting. The brushes are also useful for working sealer into narrow gaps without aggressively scrubbing the drill faces.
The 240 ml total volume makes the set manageable for occasional or moderate use. It is enough to avoid buying a new bottle after every project, while the split containers remain easier to handle over a canvas than a large jug-style bottle.
- Two silicone brushes give you an applicator and a spare without requiring a separate purchase.
- The two-bottle format helps keep unused sealer closed until it is needed.
- A glossy clear finish is a natural match for people trying to preserve a sparkling appearance.
- The kit is compact and purpose-built for diamond painting rather than general decoupage.
- It does not include preparation tools such as a lint roller or drill-straightening tool.
Who It’s Best For
Yunnuo is a good fit for someone who wants a modest-sized dedicated kit with reusable silicone applicators and does not need a large accessory bundle.
Not Ideal For
It is less suitable for a high-volume crafter who would rather buy one large-capacity container than manage several smaller bottles.
Unixing 2-Pack 240 ml Sealer – Built-In Sponge Convenience in a Smaller Pack
Unixing offers two 120 ml bottles, giving 240 ml total, and current listings identify the formula as PVA with a built-in sponge-style application approach. It occupies a similar space to Xgunion but in a smaller two-bottle pack, making it easier to justify for someone who likes sponge application but does not need 360 ml at once.
The product is marketed for diamond painting, puzzles, and DIY craft use, with a clear glossy result. Retail data lists a roughly 30-minute full-cure figure. As always, thickness matters, and the safest practice is to allow extra time before putting pressure on the surface.
A built-in sponge can be very convenient on a full-drill rectangular canvas. You can move in overlapping passes and put the cap back on when finished. The limitation shows up at edges and partial designs, where a separate brush makes it easier to stop precisely at a boundary.
Features
The two 120 ml containers are compact and easy to grip. Current structured listing data identifies the material as polyvinyl acetate (PVA) and the finish as clear. The integrated application style reduces the number of tools on the table and eliminates a separate brush-cleaning step.
For a smooth result, avoid pressing the sponge like a stamp. Light passes are better. Let the liquid travel into the gaps, inspect from an angle for puddles, and move on before the first section starts to set.
- The built-in sponge approach is fast and minimizes cleanup after sealing.
- Two smaller bottles are convenient to store and handle over the artwork.
- The product is made specifically for diamond paintings and puzzle-style craft sealing.
- The listed short cure time makes it practical for projects that need a quicker turnaround.
- The attached sponge is less precise than a separate brush when you need to protect an unsealed border or partial-drill background.
Who It’s Best For
Unixing suits someone who wants a compact two-pack, a glossy finish, and the convenience of applying straight from the bottle.
Not Ideal For
It is not ideal for intricate partial-drill canvases or crafters who prefer to meter the sealer into a separate tray and use different brushes for different areas.
Mereido 2-Pack 240 ml with Three Brushes – More Brush Choice for Detail Work
Mereido takes the opposite route from sponge-head sealers. The kit combines two 120 ml bottles with three separate brushes. Current listings describe a clear high-gloss PVA sealer for diamond paintings, puzzles, cross stitch, and related craft work, with roughly 15 to 25 minutes for the surface and 30 to 60 minutes for fuller curing depending on coat thickness.
Three brushes are useful if you work on different sizes of project or want one brush for broad areas and another for edges. They also make it easier to stop at the boundary of a partial-drill design. The trade-off is cleanup: separate brushes need to be washed promptly before the product dries inside them.
Mereido’s structured retail information specifically lists the product as not water resistant. That is a useful reminder not to assume every clear diamond-art sealer is waterproof simply because it forms a protective film.
Features
The kit provides 240 ml total and three applicators. The listing describes the sealer as water-based PVA with a clear, glossy result. The brushes make it possible to use different stroke widths or keep a clean spare available during a larger project.
The relatively short listed cure window is convenient, but faster curing also means you should not overwork the same section. Spread a thin coat, correct visible puddles while the product is still fluid, and then leave it alone to level and dry.
- Three included brushes provide more application choice than a single-brush kit.
- Two 120 ml bottles are easy to store and allow you to keep one container unopened until needed.
- The glossy clear finish is designed for diamond-art presentation rather than a deliberately flat look.
- The listed 30-to-60-minute fuller cure window is useful for same-day project finishing when applied thinly.
- The included brushes require prompt cleaning, so it creates more cleanup than a built-in sponge system.
Who It’s Best For
Mereido is a strong fit for someone who values brush control, works on partial-drill or detailed projects, and wants several applicators included in the pack.
Not Ideal For
It is not ideal for a crafter whose priority is the fastest possible cleanup with no loose brushes to wash or store.
Comparing the Eleven Options
The most useful comparison is not simply which bottle holds the most liquid. These products differ in finish, applicator, cure expectations, and whether they were designed specifically for diamond painting. Once those differences are clear, the list becomes much easier to narrow down.
If You Want a Traditional Craft Medium
Mod Podge Gloss is the most obvious choice if you already work with Plaid products and want a familiar glossy decoupage finish. It is broadly useful and well documented, but the long full-cure period deserves respect. Mod Podge Matte is the same kind of general-purpose choice for someone who deliberately wants low glare, though that is a niche preference in diamond art because it reduces reflection.
Maker’s Magic Gloss sits in the multipurpose camp too. Its manufacturer emphasizes a flexible, clear and waterproof cured finish across many craft surfaces. If you make puzzles, decoupage, glass crafts, and diamond art, one multipurpose bottle may be more practical than maintaining separate sealers for every hobby.
Judikins Diamond Glaze is the specialist within this group. Its glass-clear raised film makes more sense for selective dimensional work and embellishment than routine full-canvas coating.
If Preserving Sparkle Is the Main Goal
Start with a glossy formula and focus on application thickness. ARTDOT, VansyLife, Faburo, Xgunion, Yunnuo, Unixing, and Mereido are all sold around a clear or glossy diamond-art finish. Mod Podge Gloss and Maker’s Magic Gloss are also glossy, but they are general craft products rather than drill-specific systems.
The tool matters almost as much as the formula. A silicone brush can push a small amount between drills without holding much liquid. A sponge head is fast but can deposit too much if pressed hard. A standard bristle brush gives precision but can create visible strokes if the layer is already starting to set.
If sparkle is the priority, stop coating as soon as the gaps are covered and the drills feel secure. A second coat should solve a specific problem, not be added automatically.
If You Prefer a Silicone Brush
VansyLife is the simplest silicone-brush setup: one 250 ml bottle and one brush. Yunnuo includes two silicone brushes with its two-bottle 240 ml set. ARTDOT adds a silicone brush but also includes a conventional brush, lint roller, and fixing tool.
Choose based on how much preparation gear you already own. If you have a roller, tweezers, and cleaning tools, VansyLife or Yunnuo keeps the package compact. If you are building your diamond-art toolkit from scratch, ARTDOT’s added accessories are more useful.
If You Want a Built-In Sponge Head
Xgunion and Unixing are the two obvious choices. Both emphasize direct application without a separate brush. Xgunion gives three 120 ml bottles for 360 ml total; Unixing gives two 120 ml bottles for 240 ml total.
The sponge approach works especially well on full-drill canvases with clear rectangular boundaries. For partial-drill work, a separate brush generally gives better control. If you choose a sponge model, keep the head clean and replace the cap promptly so dried residue does not create rough spots during the next project.
If You Seal Large or Frequent Projects
ARTDOT’s 480 ml bottle has the clearest advantage in capacity. It is intended for repeated projects and includes tools that support a larger workflow. Xgunion’s 360 ml multipack is another practical option if you prefer smaller bottles and integrated sponges.
For moderate use, 240 to 250 ml kits from VansyLife, Yunnuo, Unixing, Faburo, and Mereido are easier to store. Quantity should follow your actual crafting habits rather than the assumption that bigger is always better.
If You Need a Faster Turnaround
The dedicated sealer listings generally promise much faster timelines than standard Mod Podge’s full cure. Xgunion and Unixing are listed around a roughly 30-minute fuller cure, while Mereido describes about 30 to 60 minutes. VansyLife and ARTDOT are around two hours.
These are still approximate and depend on the thickness of the coat, room conditions, and how much liquid settles between drills. Maker’s Magic is a middle ground at roughly 48 hours to cure according to the manufacturer FAQ. Standard Mod Podge is the slowest by far for full cure at approximately 28 days.
If the artwork is a gift, do not plan around the shortest number on a listing. Build in extra time. A finish that appears clear may still be developing strength beneath the surface.
If You Want a Multipurpose Sealer Beyond Diamond Art
Mod Podge Gloss, Mod Podge Matte, Maker’s Magic, and Judikins Diamond Glaze have the broadest identities outside diamond painting. They make sense for a craft room where decoupage, mixed media, puzzles, paper, glass, or embellishment work happens regularly.
The dedicated sealers can often be used on puzzles and other crafts too, but their packaging and applicators are optimized around flat drilled surfaces. If most of your projects are diamond paintings, that specialization is helpful. If diamond art is only one small part of your crafting, a general-purpose finish may earn its shelf space more easily.
How to Seal a Diamond Painting Without Dulling the Drills
The goal is to reinforce the drill field while leaving as much of the faceted surface visible as possible. The following process works as a general method, but the bottle directions for your exact sealer always take priority where they differ.
1. Seat and straighten the drills first. Place a protective sheet over the finished canvas and use a roller or flat pressing tool to make sure every drill is firmly attached to the original adhesive. Correct crooked square drills and replace obviously loose pieces before adding any liquid finish.
2. Remove lint, hair, wax, and loose debris. Inspect the surface under bright side lighting. A lint roller can help on appropriate areas, but use it gently so it does not pull up drills. Fine tweezers are better for individual fibers caught between pieces.
3. Test the sealer before committing to the full canvas. Use spare drills on scrap material, an unobtrusive border, or a small practice project. Let the test cure long enough to judge clarity and sparkle rather than deciding while the product is still wet and milky.
4. Choose the right amount and applicator. With a separate brush, pour a small working amount rather than tipping a large bottle over the artwork. With a sponge-head bottle, start with minimal pressure. You can always add a little more, but removing a flood from between drills is frustrating.
5. Apply one thin coat in manageable sections. Spread the sealer across a small area, moving it into the gaps rather than repeatedly scrubbing the drill faces. For square drills, use an especially light hand because there is less open space between pieces.
6. Inspect from an angle before the surface starts to set. Side lighting reveals puddles that are hard to see from directly above. Pull excess material away from borders and obvious low spots while the product is still fluid. Once a fast-drying sealer begins to skin, stop brushing it.
7. Keep the canvas flat while it dries. A level surface prevents liquid from migrating toward one edge. Protect the work from dust and pet hair, but do not lay plastic directly on the wet finish.
8. Respect the product’s drying and cure schedule. Do not stack, tightly roll, frame under pressure, or wrap the surface simply because it feels dry. Mod Podge in particular has a much longer full-cure period than its touch-dry time.
9. Check the edge drills after curing. Edges experience the most handling during framing. If one or two pieces still move, address those individual spots rather than automatically applying a second full coat.
10. Frame with the finish in mind. If the artwork is going behind glass, use a mounting method that keeps the drill field flat and avoids crushing high drills. If it will be displayed open, make sure the sealer is fully cured before the surface starts collecting normal household dust.
Planning the Finish Around the Way You Will Display It
The display method should influence the sealer decision before you coat the canvas. A diamond painting mounted behind glass has less exposure to dust and casual touching than a piece placed in an open frame. That extra barrier can reduce the need for a heavy protective film. If the drills already feel secure, a very light coat – or no coat at all – may preserve the most sparkle behind glazing.
An open frame creates a different situation. The drill field becomes the outer surface of the artwork, so it will gradually collect normal household dust. Here a clear sealer can make practical sense because it reduces exposed adhesive and helps keep individual drills from moving during occasional gentle cleaning. The open-frame piece needs a cleanable surface, not a thick shell. The lightest effective coat is still the better goal.
Frameless display puts even more responsibility on the cured coating. If a canvas will hang from magnetic poster rails, wooden hangers, or another system that leaves the drill field fully exposed, pay close attention to edge adhesion. The outer rows are the drills most likely to be touched while the piece is moved. A small detail brush can be more useful at the perimeter than adding a second full coat across the center.
Shadow boxes create space between the drill faces and glazing, which is helpful for raised or unusually large drills. They also give you more freedom with dimensional accents. If you have used a thicker product such as Diamond Glaze on selected details, a shadow box avoids pressing those raised areas against glass.
Gift projects deserve their own planning. A freshly sealed canvas should not be rolled into a tube, wrapped tightly in tissue, or pressed under packaging simply because the surface feels dry. If the recipient will frame the piece later, flat presentation between rigid boards is safer. Include enough time for the specific sealer to cure before packing it.
The same thinking applies to mounted canvases. If you plan to glue the diamond painting onto foam board, canvas board, or another backing, decide whether mounting should happen before or after sealing. A perfectly flat mounted surface can make sealing easier because it prevents flexing while the film dries. On the other hand, if the mounting adhesive requires pressure across the face of the work, it may be better to mount first and seal afterward so you are not pressing on a newly cured topcoat.
There is no single display method that demands sealer. The useful sequence is to decide where the artwork will live, how often it will be touched, and whether anything will press against the drill faces. Then choose the minimum protection that suits that plan.
Keeping Sealers and Finished Diamond Art in Good Condition
Most water-based craft sealers last better when their caps and bottle mouths stay clean. Wipe drips before closing the container. On sponge-head bottles, make sure the applicator is not left with a thick skin of partially dried sealer, because that rough layer can scratch across drills during the next use.
Silicone brushes should be cleaned according to the product directions while residue is still manageable. Conventional brushes need faster attention. Water-based PVA and acrylic products are much easier to remove before they cure inside the bristles.
Store bottles upright in a moderate indoor environment. Avoid freezing, strong heat, and direct sun unless the manufacturer specifically says the product tolerates those conditions. If a formula has separated after long storage, follow the label directions rather than automatically thinning it.
The finished artwork needs care too. A sealed surface can collect dust, but aggressive wiping is unnecessary. Use a soft dry cloth or gentle duster once the finish is fully cured. Do not saturate the canvas with cleaning liquid, even when the topcoat itself is marketed as water resistant or waterproof.
If a sealed piece must be stored, keep it flat between clean protective layers that do not stick to the surface. If you must roll it, use a broad tube and the orientation recommended for the artwork, avoiding sharp folds. Never tightly roll a freshly sealed piece.
Finishing Habits That Can Flatten the Sparkle
Flooding the Canvas Because the Sealer Looks Milky When Wet
Many clear-drying products look cloudy during application. That can make a thin coat seem insufficient, so the natural reaction is to add more until the surface looks uniformly white. Once dry, that extra volume becomes a thicker film over the drill faces.
Apply based on coverage, not wet color. If the gaps are filled and the surface is evenly damp, give the product time to clear before deciding it needs another coat.
Brushing the Same Area After It Starts to Set
Fast-curing dedicated sealers can begin to develop a skin while the neighboring section is still being coated. Going back with a brush or sponge may drag partly dried material into ridges.
Work in an orderly direction and inspect each section immediately. Correct puddles while the liquid is still fluid, then leave that area alone.
Sealing Dust and Wax Into the Finish
Loose wax from a drill pen, hair, lint, and tiny paper fibers can become permanent once clear sealer dries around them. The problem is especially visible on dark drill fields where a pale fiber catches light.
Preparation takes less time than repair. Use side lighting and tweezers to inspect the whole surface before opening the sealer.
Assuming a Gloss Label Guarantees Maximum Sparkle
Gloss describes the cured film, not how much of the drill facet remains exposed. A thick glossy layer can still soften the crisp reflections from a faceted drill.
The most sparkle-friendly technique is usually a thin glossy coat that settles into the gaps. Formula and technique have to work together.
Treating Touch-Dry as Fully Cured
A surface can feel dry while the film underneath remains soft. Tight framing, stacking, rolling, or wrapping during that stage can imprint the finish or encourage sticking.
Follow the longest relevant timing on the product instructions. This is particularly important with standard Mod Podge, where Plaid distinguishes a short touch-dry period from an approximately 28-day full cure.
Adding a Second Coat Without a Specific Reason
A second coat may be useful if the first application missed obvious gaps or if a few areas still feel insecure. It should not be automatic. Every additional coat adds material over the facets and increases stiffness.
Inspect the cured first coat under bright light. If the drills are secure and the gaps are sealed, stopping is often the better finish.
Ignoring the Unsealed Border
Many diamond paintings have a printed or adhesive border beyond the drill field. Broad sponge strokes can push sealer onto that border, creating a visible texture or shiny patch that complicates mounting.
Use a smaller brush around boundaries or mask the surrounding area carefully. A clean edge makes later framing much easier.
Safety and Handling Notes for Diamond-Art Sealers
Even water-based craft products should be used with ordinary workshop care. Keep the bottle closed when you are not actively using it, avoid contact with eyes, and wash hands after a messy application. If the manufacturer provides a safety data sheet or specific ventilation instructions, follow those rather than relying on a generic assumption that “water-based” means no precautions are needed.
Keep sealers and wet brushes away from children and pets unless the exact product directions say supervised use is appropriate. Small drills are already a swallowing hazard, and an open bottle adds another avoidable risk to the work area.
Do not use a craft sealer on food-contact surfaces unless the manufacturer explicitly approves that use for the exact cured product and application. Even when a maker markets a finish as suitable for certain household craft surfaces, the safest approach is to keep diamond-art sealers on decorative objects.
Protect the table beneath the canvas. A thin sealer can migrate through exposed edges or spill while you are refilling a brush. Wax paper, a non-stick craft mat, or another disposable protective layer is easier to replace than a damaged tabletop.
Finally, do not combine sealers unless the manufacturers say the formulas are compatible. Layering an acrylic craft finish over an unknown PVA sealer, or adding a dimensional glaze over a partially cured topcoat, can create cloudiness or adhesion problems that are difficult to reverse.
Frequently Asked Questions About Sealing Diamond Paintings
Do I have to seal every diamond painting?
No. A well-adhered piece that will be mounted flat behind protective glazing may be perfectly satisfactory without a topcoat. Sealing is more useful when drills are lifting, exposed adhesive is collecting dust, or the artwork will be displayed and handled without glass.
Is Mod Podge Gloss better than Mod Podge Matte for diamond painting?
For most people who want to preserve sparkle, Gloss is the more natural choice because Matte intentionally reduces reflection. Matte only makes sense when you specifically prefer low glare or a subdued finish. Both standard formulas have the same important cure consideration: Plaid states approximately 28 days for full cure.
Will sealer make my diamond painting less sparkly?
It can if the coat is too thick. A thin clear gloss coat that settles mainly between drills usually preserves more visible facets than a heavy film that covers the drill faces. Test first if sparkle is especially important to you.
Which is easier to use: a silicone brush or a built-in sponge?
A sponge is faster and creates less cleanup, while a silicone brush offers better control over thickness and boundaries. Full-drill canvases are well suited to sponge application. Partial-drill designs, borders, and detailed areas often benefit from a separate brush.
How long should I wait before framing a sealed diamond painting?
Use the cure guidance for the exact product, not a universal number. Some dedicated sealers list 30 minutes to a few hours, Maker’s Magic lists about 48 hours to cure, and Plaid states roughly 28 days for standard Mod Podge to fully cure. If the frame will press against the surface, extra waiting time is sensible.
Can I roll a diamond painting after sealing it?
A sealed canvas may tolerate a gentle broad curve, especially with a flexible finish, but tight rolling can stress the cured film and the drill bond. Flat storage or transport is safer. If rolling is unavoidable, use a large-diameter tube and never roll a piece before the sealer is fully cured.
Is a waterproof sealer enough for bathroom or outdoor display?
Not by itself. The topcoat is only one part of the finished artwork. The canvas, printed inks, base adhesive, edges, and frame can still be affected by moisture and sunlight. Use protective framing and sensible placement even if the sealer itself is marketed as waterproof.
Can I use two different sealers on the same painting?
I would avoid it unless you have tested the exact combination. Different formulas can cure at different rates and may not bond well to one another. If one coat has already done its job, adding another chemistry usually creates more risk than benefit.
Protect the Drills Without Hiding Their Sparkle
The best Mod Podge for diamond painting is not automatically the thickest, glossiest, fastest, or largest bottle. The right choice is the one that gives you enough hold while preserving the finish you actually want to see.
For a traditional craft approach, Mod Podge Gloss is the more sparkle-friendly of Plaid’s two formulas here; Mod Podge Matte is for intentionally low-glare results. Dedicated sealers make more sense when you want short drying times, purpose-made applicators, or kits built around the diamond-painting workflow.
The application technique matters just as much as the label. Seat the drills first, clean the surface, test an unfamiliar finish, then use the thinnest even coat that solves the problem. Give the product its full recommended cure time before tight framing or storage.
If you compare the eleven options above by finish, applicator, cure time, and how often you seal projects, the choice becomes much less confusing. Pick the system that matches your real workflow, apply it lightly, and let the drills remain the part of the artwork that catches the light.