Nightstands are small enough to overlook, yet they often have exactly the structure a useful upcycling project needs: a solid top, a drawer, a shelf, and a footprint that fits into awkward corners. Even a bedside table that no longer matches your bedroom may still be strong enough to become storage, a work station, or a practical household fixture.
I like repurposing furniture when the original shape already solves half the problem. A nightstand does not need to remain beside a bed simply because that was its first purpose.
The drawer can hold pet supplies, bar tools, craft materials, or garden gloves. The open section can become a bookcase, towel shelf, produce rack, or bottle store. Sometimes the most important change is not decorative at all; it is cutting one opening, adding wheels, or fitting a basket in the right place.
Before changing anything, decide where the finished piece will live and what it must safely support. That choice affects the finish, hardware, ventilation, moisture protection, and the amount of structural work required.
A simple painted toy organizer is very different from a sink vanity, but both begin with the same question: is the nightstand sturdy enough for its new job?
Before You Start
Remove the drawer and hardware, then inspect every joint, leg, shelf, and panel. Tighten loose screws, reglue weak wooden joints, and replace damaged drawer runners before adding paint or making cuts. A fresh finish cannot compensate for a table that rocks every time it is touched.
· Clean grease, dust, polish, and residue from every surface before sanding or painting.
· Measure the nightstand and the intended location, including doors, pipes, skirting boards, and nearby furniture.
· Check whether the top is solid wood, veneer, laminate, or manufactured board before cutting into it.
· Use eye protection when drilling or cutting, and support the furniture so it cannot shift while you work.
· Choose finishes that suit the new environment, especially for bathrooms, kitchens, pet areas, and covered outdoor spaces.
· Keep food-contact surfaces, pet bowls, and sink components separate from decorative paint and unsuitable sealers.
Turn a Nightstand Into a Pet Feeding Station
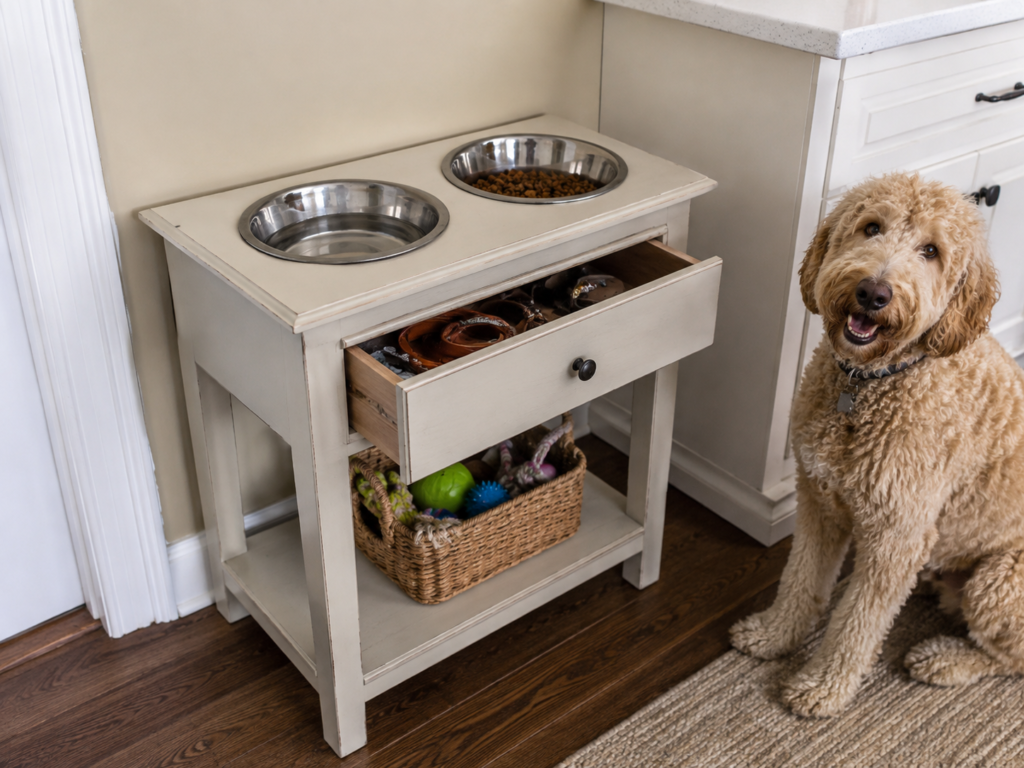
A raised pet station changes the top of a nightstand into a stable platform for food and water while keeping the drawer and lower shelf useful. The inset bowls matter because they reduce sliding and make the finished piece look intentional rather than temporary. The drawer can store leads, waste bags, grooming tools, or sealed treats, while a basket below keeps toys from spreading across the room.
The height should suit the animal rather than the original furniture. A small nightstand may work well for a medium or large dog, while cats and smaller dogs may need a shorter piece. I don’t think decorative detail should take priority here; easy cleaning, bowl stability, and smooth edges are much more important.
Materials and Tools
· Sturdy nightstand with a solid top
· Two removable stainless steel pet bowls with a raised rim
· Pencil, measuring tape, compass, or bowl template
· Drill and jigsaw suitable for the top material
· Sandpaper and wood filler
· Pet-safe, wipeable furniture finish for non-food-contact areas
· Optional basket for toys and drawer dividers for supplies
A Practical Method
1. Check the height and bowl position. Place the empty bowls on the top and confirm that your pet can reach them comfortably without stretching. Leave enough wood around every opening so the top stays strong, and keep the bowls clear of the drawer structure below.
2. Mark and cut the openings. Trace around the narrower part beneath each bowl rim, drill a starter hole inside each circle, and then cut slowly with a jigsaw. Test the fit gradually; the rim should rest on the top without the entire bowl dropping through.
3. Smooth and protect the top. Sand the cut edges carefully, seal any exposed wood or board, and repair chips before finishing the furniture. Then repaint or refinish the nightstand, keeping the removable bowls out of the work area until every surface has fully settled.
4. Organize the storage and test stability. Use the drawer for lightweight pet items and place a basket on the lower shelf for toys. Set the station on a level floor, press gently on each corner, and correct any wobble before your pet begins using it.
One detail I would not skip is making the bowls removable. Fixed bowls may look neat for a day, but removable ones are far easier to wash and refill. A simpler version uses one bowl opening and keeps the second bowl on a washable mat beside the station.
Convert a Nightstand Into a Small Bathroom Vanity
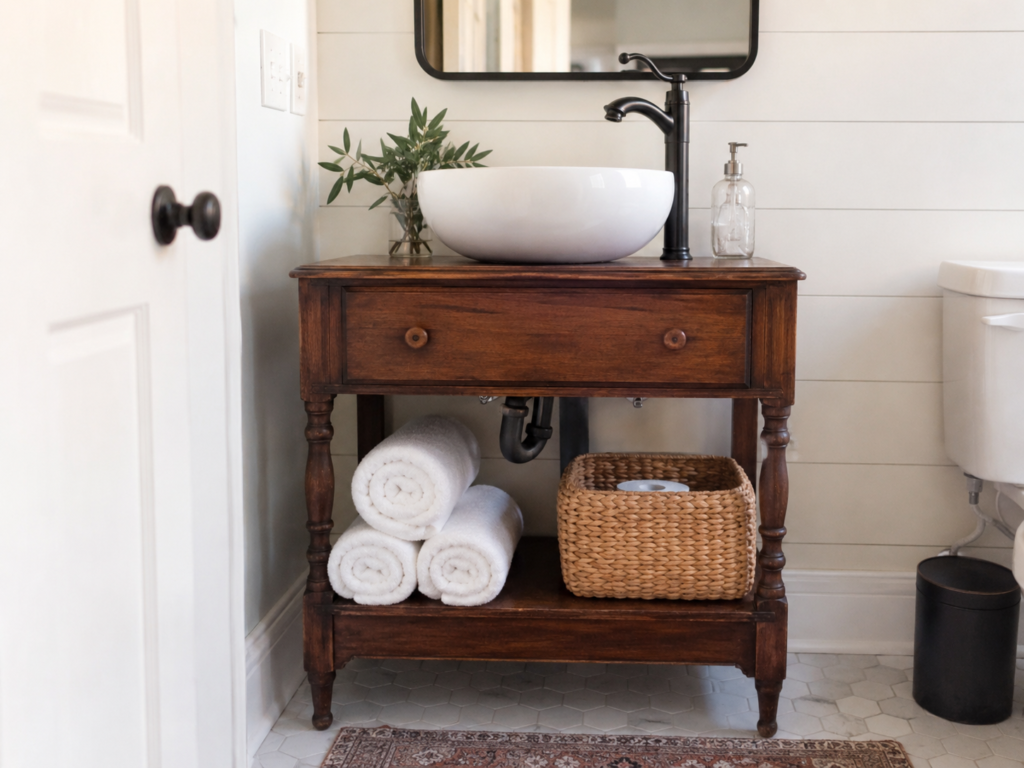
A nightstand can become a compact vanity when its width, height, and construction suit the sink and plumbing. This is a more involved conversion because water adds weight and exposes the furniture to splashes. The open lower section remains useful for towels and baskets, while the drawer may need to become shallow or fixed in place to clear the basin and pipes.
I know it can feel tempting to choose the sink first because it is the most visible part, but measure the plumbing route before buying or cutting anything. A vessel sink often preserves more drawer space than a deep inset basin, although every layout is different.
Materials and Tools
· Structurally sound nightstand
· Vessel sink and compatible faucet
· Drain assembly, trap, supply lines, and shut-off access
· Drill, hole saw, jigsaw, and measuring tools
· Moisture-resistant finish or suitable sealed top
· Wood reinforcement pieces if the top is thin
· Basket and towels for the lower shelf
· Qualified plumbing help where required
A Practical Method
1. Plan the sink and plumbing together. Position the nightstand in the bathroom and mark the wall pipes, drain path, faucet hole, and basin center. Check the door swing, toilet clearance, and comfortable standing space before making permanent changes.
2. Reinforce and cut the top. Remove the drawer, inspect the underside, and add support if the top feels thin or weak. Cut only the openings required for the drain and faucet, then dry-fit every component to confirm that nothing clashes with the frame or drawer.
3. Modify the drawer and back. Shorten the drawer box, create a U-shaped plumbing clearance, or secure the original drawer front as a false front. Open the back only where pipes need access, keeping as much of the structure as possible.
4. Seal, install, and test. Apply a moisture-resistant finish to the top, edges, cutouts, and splash-prone areas. Then install the sink and plumbing according to the component instructions, check carefully for leaks, and keep the lower shelf clear until the system has been tested.
For me, this project succeeds when the conversion still looks like furniture rather than a cabinet with plumbing forced through it. A simpler option is to use the nightstand as storage beside an existing pedestal sink instead of altering it for water.
Make a Rolling Mini Bar From an Old Nightstand
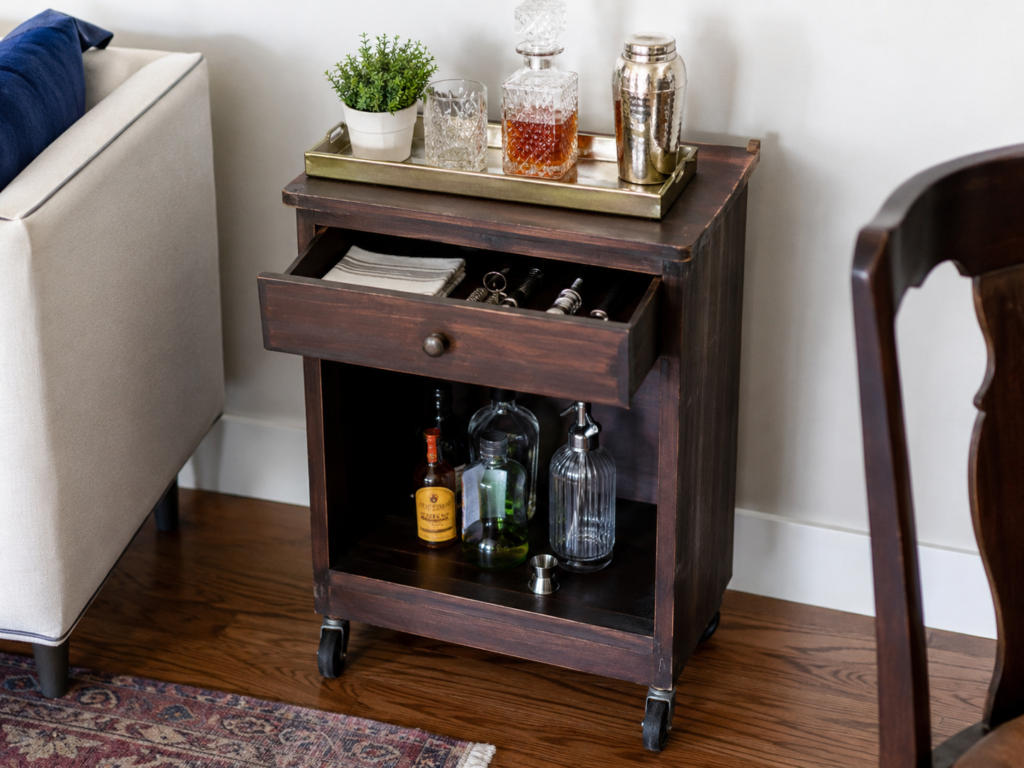
A rolling bar gives the drawer and open shelf clear new jobs. The top becomes a serving surface, the drawer keeps small tools together, and the lower section holds bottles or mixers. Adding casters is the change that makes the repurpose obvious, but the base must be strong enough to carry the extra moving load.
Keep the arrangement restrained. A nightstand is smaller than a full bar cart, so overcrowding it quickly makes bottles difficult to reach and raises the risk of tipping.
Materials and Tools
· Nightstand with a strong base and open shelf
· Four locking or suitable furniture casters
· Drill, screws, washers, and reinforcement blocks if needed
· Serving tray or washable top liner
· Drawer organizer for napkins and bar tools
· Optional bottle rail, side handle, or shelf lip
· Protective furniture finish
A Practical Method
1. Repair and balance the furniture. Tighten the frame, check that the bottom corners can accept caster screws, and add reinforcement blocks where the base is thin. Remove unnecessary decorative feet if they prevent the wheels from sitting level.
2. Fit the casters. Mark each mounting position equally from the corners, drill pilot holes, and attach the wheels securely. Use locking casters on at least the front side so the cart remains still while drinks are being prepared.
3. Prepare the storage zones. Line the drawer or add dividers for small tools, folded cloths, and coasters. Add a low rail or secure basket to the lower shelf when bottles might slide during movement.
4. Finish and load it carefully. Protect the surface with a tray, place heavier bottles low, and keep lighter glasses or a shaker on top. Then roll the cart slowly across the actual floor and correct any wobble, loose wheel, or unbalanced loading.
A side handle can make the cart easier to move, but only add one if the frame can carry the pulling force. For an alcohol-free version, use the same idea for tea, sparkling water, coffee syrups, or party glassware.
Repurpose a Nightstand as Children’s Book and Toy Storage
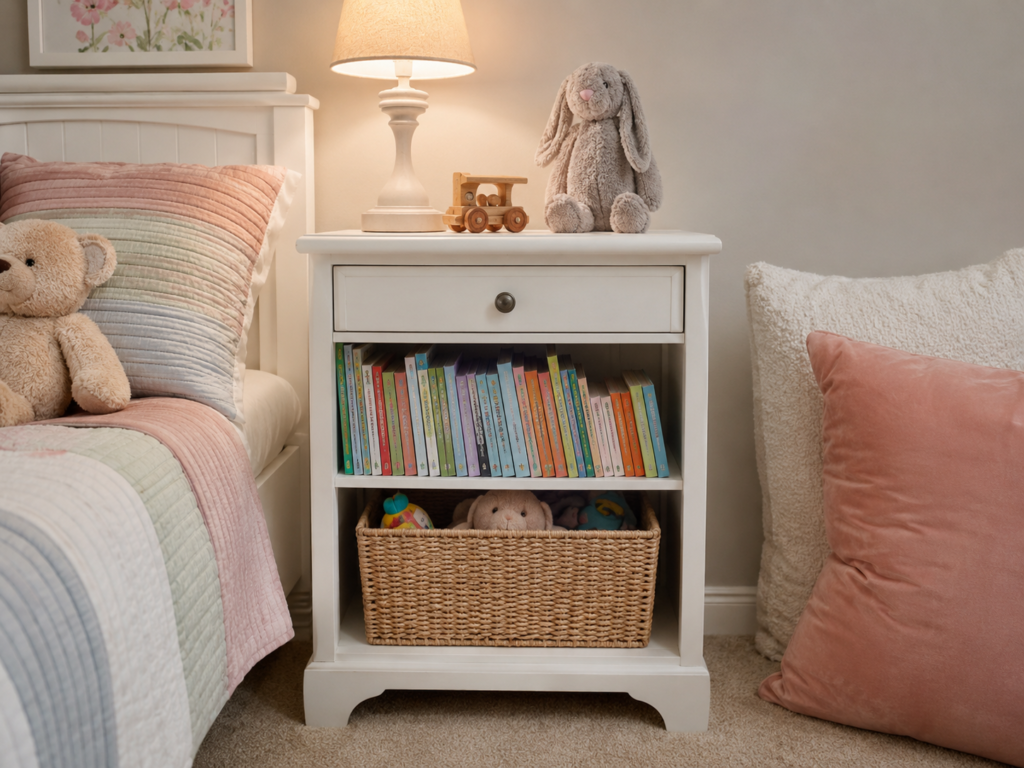
A low nightstand naturally suits a child’s reading corner because books can sit at eye level and a basket can slide into the lower space. The original drawer remains useful for puzzles, art supplies, night-time items, or small toys that would otherwise disappear.
The important part is safety rather than perfect styling. Round sharp corners, repair loose hardware, and secure the furniture to the wall when a child might pull, climb, or lean on it.
Materials and Tools
· Low, stable nightstand
· Child-safe furniture paint or finish
· Sandpaper and wood filler
· Shelf board and supports if an extra level is needed
· Rounded knob or recessed drawer pull
· Wall anti-tip strap suitable for the wall type
· Lightweight basket for toys
A Practical Method
1. Inspect from a child’s point of view. Check for splinters, peeling finish, protruding screws, loose knobs, and gaps that could trap fingers. Repair the frame first, then decide whether the open space needs an additional shelf.
2. Prepare and finish the surfaces. Clean, sand, fill damage, and apply a durable finish suitable for a child’s room. Keep the design simple enough that scratches can be touched up later without repainting the entire piece.
3. Create accessible storage. Arrange books upright on the strongest shelf and use a light basket below for soft toys. Avoid placing heavy objects high on the unit, and do not overload a newly added shelf.
4. Secure and test the unit. Fix the nightstand to the wall with appropriate anti-tip hardware, then pull gently on the drawer and shelves to confirm stability. Keep cords from lamps secured and out of reach.
I’d rather use one roomy basket than several tiny containers here. Children can return toys more easily when the storage method is obvious. A nursery version could hold nappies and blankets instead of books.
Use a Nightstand as an Outdoor Potting Station
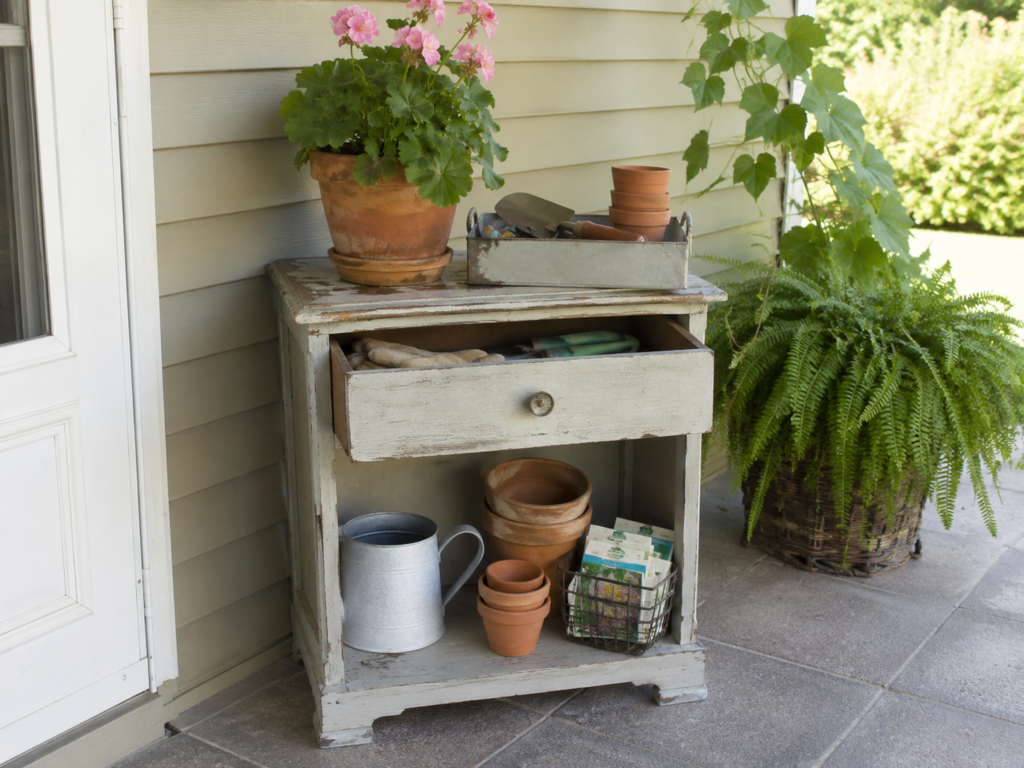
A nightstand makes a compact potting station for a covered porch, balcony, or sheltered patio. The top supports a working tray or potted plant, the drawer holds gloves and hand tools, and the lower shelf stores pots, seed packets, and a small watering can. It is especially useful where a full potting bench would be too large.
This version needs a realistic location. Indoor furniture will not tolerate constant rain simply because it has been painted, so keep it under cover and raise the feet away from standing water.
Materials and Tools
· Solid nightstand suitable for a sheltered outdoor area
· Exterior-suitable primer, paint, or protective finish
· Replacement screws or corrosion-resistant hardware
· Tray for soil and wet pots
· Small pots, watering can, and basket for seed packets
· Optional hooks for hand tools
· Furniture feet or pads to reduce contact with damp flooring
A Practical Method
1. Repair the structure before finishing. Replace loose screws, reglue joints, and remove weak veneer or swollen board that cannot be stabilized. Outdoor use will expose existing damage quickly, so begin with the strongest piece you can find.
2. Prepare every exposed surface. Clean, sand, and protect the top, underside, drawer edges, shelf, and feet rather than painting only the visible front. Then allow the finish to settle fully before placing pots or tools on it.
3. Assign storage by moisture level. Keep seed packets, labels, and gloves in the drawer, place pots and metal tools on the lower shelf, and use a tray on top to catch soil and water. Avoid storing damp cloths inside the closed drawer.
4. Position and maintain it. Set the station under cover, keep the back slightly away from the wall for airflow, and wipe up water after use. Check the feet and joints periodically because outdoor temperature changes can loosen old furniture.
A no-paint version can keep the worn wood visible if the structure is sound and the surface receives suitable protection. For a balcony, use smaller pots and avoid loading the top with more weight than the original table was designed to carry.
Build a Mobile Craft Supply Cart
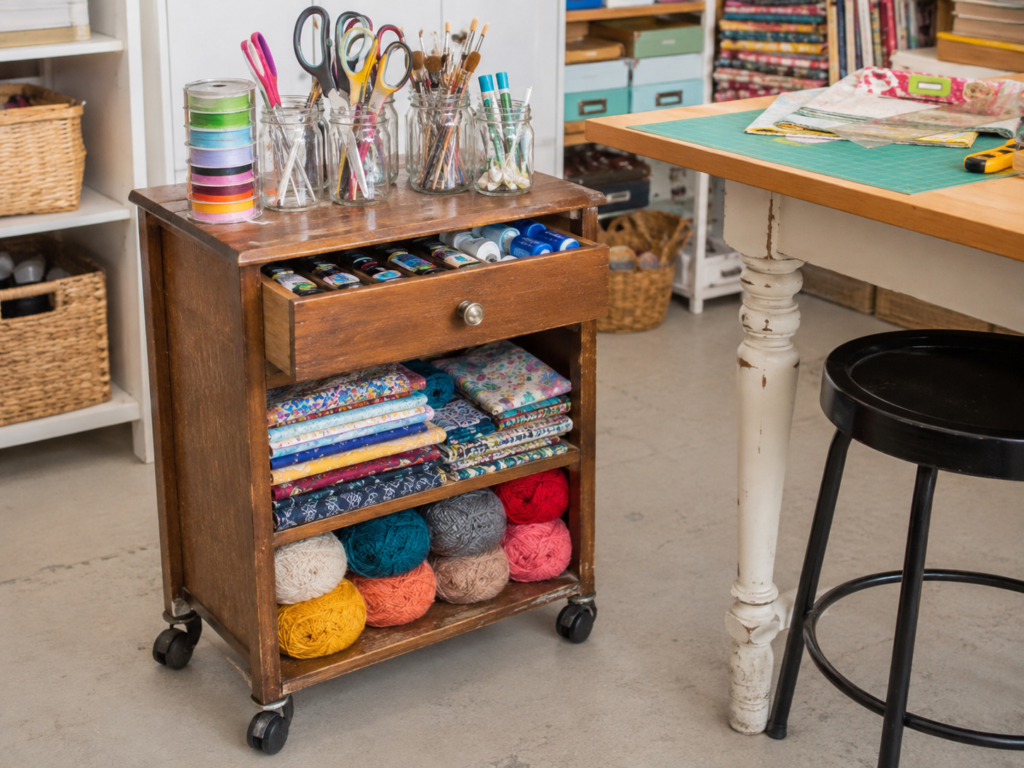
Craft supplies benefit from shallow, visible storage, which makes a nightstand with a drawer and open shelves a sensible base. Jars on top hold tools, the drawer contains smaller tubes and accessories, and the shelves keep fabric or yarn grouped by type. Casters allow the station to move beside a sewing table and then roll away.
The first arrangement rarely stays unchanged, so use removable baskets and jars rather than building too many fixed compartments.
Materials and Tools
· Nightstand with accessible shelves
· Four furniture casters
· Drill, screws, and reinforcement blocks
· Jars or reused containers for upright tools
· Drawer trays or small boxes
· Baskets for fabric, yarn, paper, or paint
· Optional side rail or handle
A Practical Method
1. Sort the supplies before modifying the furniture. Group tall tools, small items, folded materials, and heavier equipment so you know what each zone must hold. This prevents adding shelves or containers that do not suit the actual collection.
2. Repair the nightstand and add wheels. Strengthen the bottom corners, drill pilot holes, and fit casters that suit the expected load. Check that the cart rolls beneath or beside the worktable without catching on chair legs.
3. Create flexible storage. Use jars for scissors and brushes, a divided tray inside the drawer, and removable baskets or folded stacks on the shelves. Place heavy paint bottles or tools low so the cart stays balanced.
4. Label lightly and test the workflow. Keep labels simple enough to change as supplies change, then work on one small project with the cart beside you. Move any item that requires awkward bending or repeated reaching.
I know it can feel satisfying to display every colorful supply, but the top still needs a little empty space. A crowded cart is harder to move and easier to spill. A smaller version can become a wrapping station with ribbon, tags, tape, and folded paper.
Turn a Nightstand Into a Kitchen Produce Station
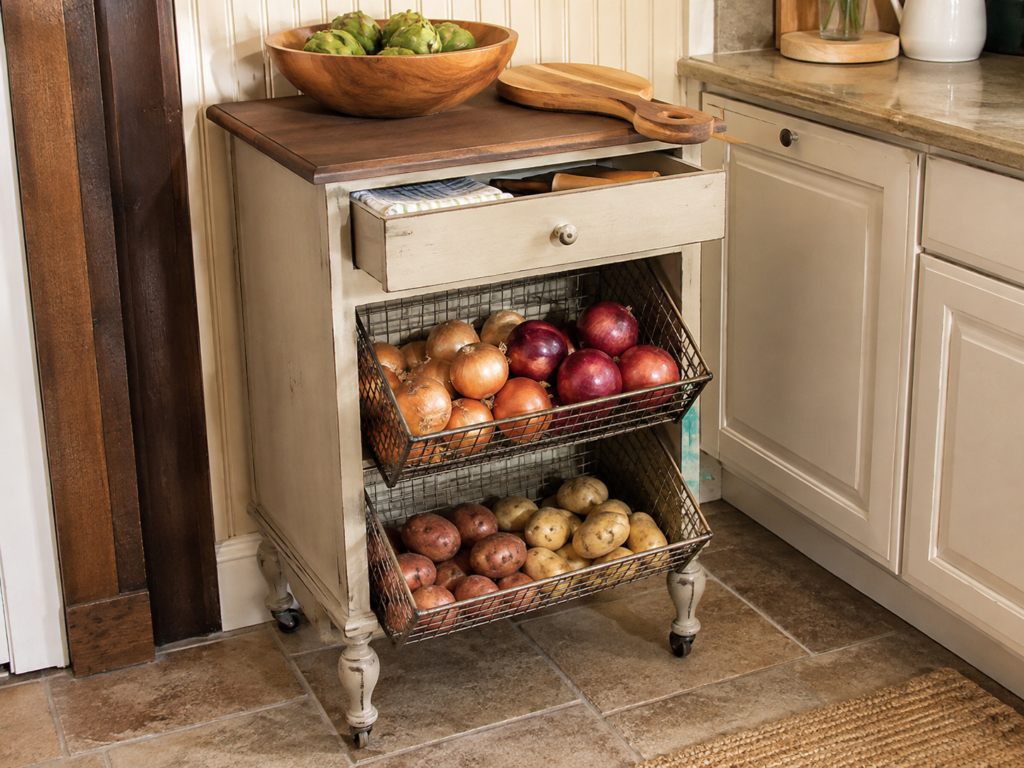
A produce station makes a particularly clear repurpose because the open shelf becomes ventilated basket storage. Angled wire baskets keep onions and potatoes visible, while the drawer stores kitchen cloths or lightweight utensils. The top can support a wooden bowl, serving board, or another dry kitchen item.
Ventilation and cleanliness matter more than the decorative finish. Do not use flaking paint near food storage, and avoid placing produce in direct contact with freshly painted surfaces.
Materials and Tools
· Nightstand with a wide open lower section
· Two wire baskets or ventilated pull-out bins
· Wooden runners, brackets, or secure shelf supports
· Drill, screws, measuring tape, and level
· Washable liner or removable basket trays
· Durable finish for the furniture exterior
· Optional casters with locks
A Practical Method
1. Measure the opening and choose the baskets first. Confirm that each basket can tilt or slide without striking the drawer, legs, or floor. Leave enough space for air to circulate and for produce to be removed without scraping the frame.
2. Build secure supports. Fit strong wooden runners or metal brackets at matching heights on both sides, then test each empty basket. The supports should carry the full basket without twisting or pulling away from the nightstand.
3. Prepare the furniture and baskets. Clean and refinish the exterior, smooth rough wood, and remove loose paint. Wash the removable baskets separately and use a suitable liner only if it does not block ventilation.
4. Load and monitor the station. Keep different produce types separated, avoid overfilling, and remove spoiled items promptly. Then check the runners, fasteners, and floor stability after the station has carried a normal load for several days.
A single-basket version is easier for beginners and leaves the lower area available for reusable shopping bags. You could also repurpose the space for packaged snacks or clean tea towels rather than fresh produce.
Common Mistakes to Avoid
Choosing the new purpose before checking the structure. A nightstand may look solid while hiding loose joints, damaged board, or weak drawer supports. Repair the furniture first and reject any piece that cannot safely carry the intended load.
Cutting the top without understanding what is underneath. Drawer rails, corner blocks, plumbing, and fasteners may occupy the same space as a sink drain or pet bowl. Remove the drawer and inspect from below before marking a cut.
Using an indoor finish in a wet or outdoor setting. Bathroom splashes, wet pet bowls, and covered porch moisture can damage exposed wood and manufactured board. Protect edges, cutouts, feet, and undersides rather than coating only the front.
Adding casters to a weak base. Wheels concentrate force into small areas and can tear out of thin board. Reinforce the corners and use appropriate screws before turning a nightstand into a moving cart.
Ignoring balance. Bottles, craft supplies, heavy pots, and produce can make a narrow piece top-heavy. Keep the heaviest items low, lock wheels when needed, and secure children’s furniture to the wall.
Overdecorating the finished piece. Handles, labels, trim, and baskets should support the new function. If a detail makes cleaning, loading, or movement more difficult, it probably does not need to be there.
Frequently Asked Questions
Do I need to sand a nightstand before repurposing it?
Usually, some surface preparation helps the new finish adhere and removes rough areas. The amount of sanding depends on the existing finish and the material, so test a small hidden section rather than sanding aggressively through veneer.
Can I repurpose a particleboard nightstand?
Yes, for lighter indoor uses when the board remains dry and structurally sound. Avoid projects that require large cutouts, heavy plumbing, outdoor exposure, or repeated moisture unless the piece can be reinforced and fully protected.
Which nightstand project is easiest for a beginner?
A children’s book organizer or simple craft station requires the fewest structural changes. The bathroom vanity and pet feeding station involve cutting and need more careful measuring.
Can a nightstand stay outdoors?
A solid piece may work in a sheltered area after proper preparation, but it should not sit in standing water or constant rain. Manufactured board and damaged veneer are poor choices for outdoor use.
How do I stop a rolling nightstand from tipping?
Use suitable casters, reinforce the base, place heavy items on the lowest shelf, and avoid overloading the top. Locking wheels also help keep the cart still during use.
Is it safe to store food or pet bowls in painted furniture?
Keep food and water in removable containers intended for that use, and prevent direct contact with decorative paint. Smooth, sealed surrounding surfaces should still be easy to wipe clean.
Should I keep the original drawer?
Keep it when it supports the new function and has enough clearance. For sink conversions, the drawer may need shortening, reshaping, or replacing with a fixed drawer front.
Let the Nightstand Earn a New Place in Your Home
The most useful way to repurpose nightstands is to work with the structure already there. A drawer provides contained storage, an open shelf keeps larger items visible, and the compact size fits rooms where a full cabinet or cart would be excessive. The best projects do not disguise those features; they assign them better jobs.
Begin with the conversion that requires the least permanent change. Add baskets, organizers, or wheels before cutting a top for bowls or plumbing. Once you understand how the frame carries weight, you can decide whether a more involved project makes sense.
Which unused nightstand in your home could become more useful somewhere else: beside a pet bowl, under a sink, in a craft room, or holding produce in the kitchen?