Wedding cards are often too personal to recycle immediately, yet keeping every card in a loose stack is not especially useful. Their printed flowers, textured paper, foil lettering, handwritten messages, and carefully chosen colours can become part of something you will actually see or use. Even a card with writing across the inside may still offer a decorative front, a meaningful sentence, or a small patterned section worth saving.
I prefer to separate the emotional part of a card from the amount of paper that needs storing. You do not have to preserve every blank edge to respect the person who sent it.
A small piece containing a name, date, message, or floral detail can hold the same memory while fitting into a frame, box, garland, tag, or bookmark.
The best way to repurpose wedding cards is to plan before cutting. Some cards deserve to stay whole, while others can be divided into useful shapes. I know it can feel strange to cut a card that was given with love, so photograph the full card first and keep any private message that matters. Then the decorative paper can take on a practical second use without losing its story.
Sort the Cards Before Cutting Anything
Lay the cards out in good light and decide which parts carry the memory. This takes a little longer than reaching for scissors, but it prevents the one cut you cannot undo.
· Keep complete cards aside when the full design, handwriting, or sender’s message matters more than the paper pattern.
· Photograph the front, inside message, sender’s name, and date before altering a sentimental card.
· Group cards by colour, floral style, paper weight, metallic detail, or size so the finished project feels connected.
· Mark private messages that should stay hidden, especially when making gifts, garlands, or wall art for shared spaces.
· Separate heavily textured, embossed, or layered cards because they may need stronger adhesive and different cutting tools.
· Set aside damaged corners and creased areas. A small decorative section may still be usable even when the whole card is not.
· Choose one or two cards as practice material before cutting the pieces you care about most.
Gather Simple Paper-Craft Tools
Most wedding-card projects do not require specialist equipment. Clean cutting, careful measuring, and an adhesive suited to paper will do more for the result than a crowded craft cupboard.
· Sharp scissors and a craft knife for straight or detailed cuts
· Cutting mat, metal ruler, pencil, and eraser
· Paper trimmer for repeated straight pieces
· Acid-free glue stick, double-sided tape, or paper adhesive
· Hole punch, corner rounder, or decorative-edge punch when useful
· Twine, narrow ribbon, thread, or small eyelets for hanging projects
· Plain card, recycled box board, or lightweight backing board for support
· Frame, storage box, gift boxes, or books according to the project
· Soft clean cloth for pressing glued paper without marking foil or raised print
Decide Which Details Deserve to Stay Visible
A wedding card usually contains more decoration than one small project needs. Choose a few details to repeat, then leave enough plain space for the design to breathe.
· Save readable words such as love, congratulations, together, happiness, or thank you when they suit the new object.
· Use floral corners and borders as complete shapes instead of cutting individual petals unless the card is very damaged.
· Keep foil lettering away from fold lines because metallic print may crack when sharply bent.
· Mix large and small pieces rather than cutting every card into identical squares.
· Repeat one colour across the project to connect cards from different senders.
· Hide private writing on the back or cover it with backing paper when the finished piece will be displayed publicly.
· Leave a favourite card mostly whole and build the remaining arrangement around it.
Create a Framed Collage from Wedding Card Details
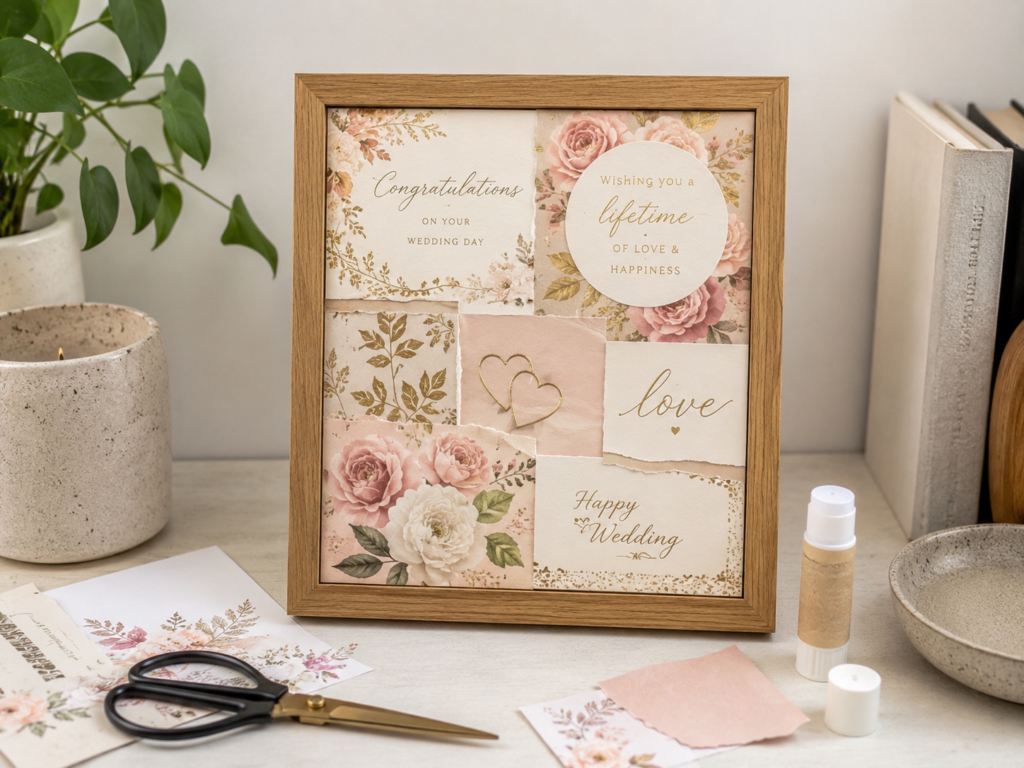
A framed collage is one of the most forgiving ways to reuse wedding cards because each card contributes only its strongest detail. Floral corners, foil words, torn paper edges, circular labels, and small messages can sit together without every piece matching exactly. A simple wooden frame keeps the arrangement calm while the blush, cream, and gold paper does the decorative work.
This idea is especially useful when you have cards from several people and want to remember the collection rather than one individual design. The frame protects the paper from handling, and a backing sheet lets you test the layout without attaching anything to the frame itself. I don’t think every edge needs to be cut perfectly; a few torn or deckled edges can soften the straight lines and make the collage feel less mechanical.
Materials and Tools
· Wedding cards with complementary colours or patterns
· Picture frame with glass or clear acrylic front
· Plain backing card sized to the frame
· Scissors, craft knife, ruler, and cutting mat
· Paper adhesive or removable photo corners
· Optional decorative paper, pressed petals, ribbon, or small metal heart details
· Soft cloth for pressing pieces flat
A Practical Method for the Collage
1. Choose the focal pieces. Select one or two larger sections that can carry the arrangement, such as a full floral panel, a circular message, or a card front with clear lettering. Add smaller words, borders, and flower details around them. Photograph the chosen pieces before cutting if the original cards hold sentimental messages.
2. Cut and test the shapes. Trim each section gradually and leave a little extra paper until you see how the pieces overlap. Lay the backing card flat and move everything around without glue. Then step back from the table and check whether one side looks heavier or more crowded than the other.
3. Build the collage from the back layer forward. Attach the largest background pieces first, keeping adhesive away from visible foil and textured surfaces. Add smaller sections over the joins to create a connected layout. Press through a clean sheet of paper so fingerprints and glue marks do not transfer onto pale card.
4. Add one small dimensional detail. A tiny paper heart, narrow ribbon loop, or raised floral piece can give the collage depth, but keep it shallow enough to fit beneath the frame front. I know it can feel tempting to use every lovely scrap, yet the frame will look stronger when a few areas of the backing remain visible.
5. Frame and protect the finished piece. Allow the adhesive to settle, remove loose fibres, and place the collage in the frame without forcing thick layers against the glass. Add a label on the back with the wedding date and a short note about the cards. Hang it away from strong direct sunlight and damp rooms.
A simpler variation uses one complete wedding card in the centre with only two or three small pieces around it. This works well for a beginner and keeps the sender’s design almost untouched.
Cover a Keepsake Box with Wedding Card Panels
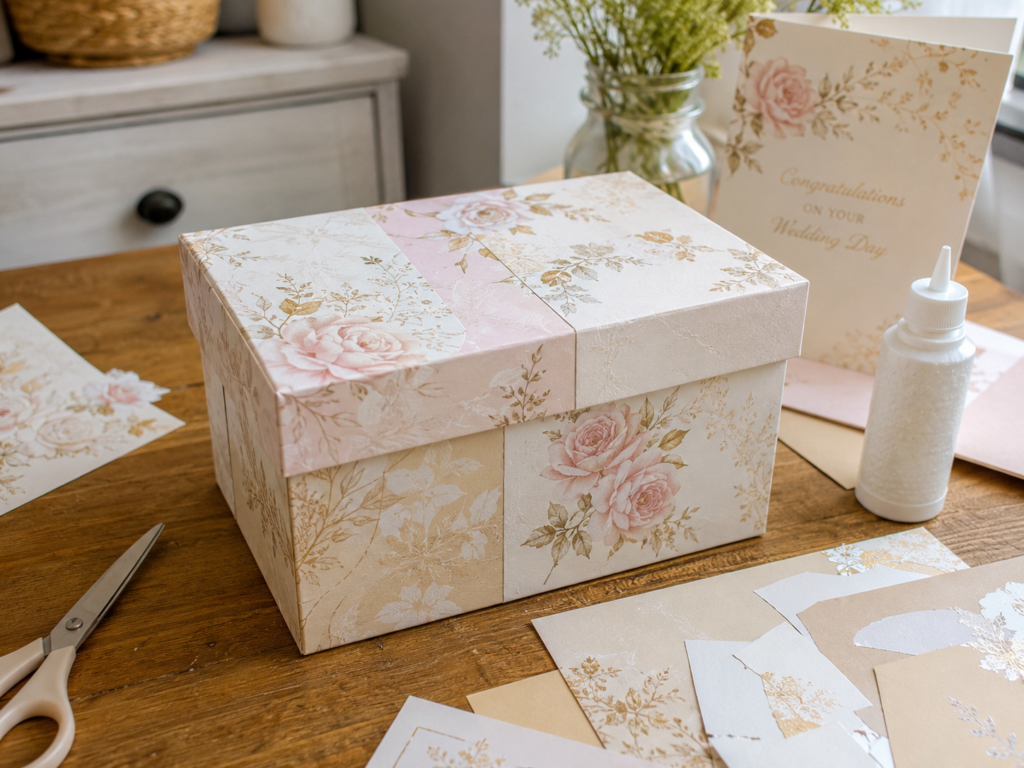
A plain box gives wedding-card paper a useful structure. Floral panels can cover the lid and sides, while smaller pieces hide joins or create a patchwork effect. The result is a storage box that can hold photographs, invitation copies, ribbon, dried flowers, place cards, or the messages you chose not to cut.
The visible design works because the pieces follow the box rather than fighting it. Large panels sit across broad faces, and narrow strips wrap the lid edge. Use a box with a firm surface and a lid that already fits comfortably; adding paper to a tight lid may stop it closing.
Materials and Tools
· Rigid cardboard or wooden keepsake box
· Wedding-card fronts and decorative paper sections
· Plain paper for templates
· Ruler, pencil, scissors, craft knife, and cutting mat
· Paper adhesive or decoupage medium suitable for the box surface
· Soft brush or foam applicator
· Bone folder, clean cloth, or smooth card for pressing
· Optional plain lining paper for the inside
How to Build the Covered Box
1. Check the lid clearance. Open and close the empty box several times and note where the lid fits closely around the base. Avoid thick paper layers in those contact areas. If the box is dusty or glossy, clean it and lightly prepare the surface according to its material before attaching paper.
2. Make paper templates for every face. Trace the lid top, lid sides, and box panels onto plain paper first. Test each template and leave a small border where the box material should remain visible. Templates prevent wasting a favourite floral section on a piece that is slightly too short.
3. Plan the panel placement. Place the largest floral design on the most visible surface, usually the lid. Use quieter cream or gold sections on the sides so the box does not become too busy. Keep important words upright and avoid placing them where the lid edge will cut through the lettering.
4. Attach the paper in a controlled order. Glue the broad flat panels first, smoothing from the centre towards the edges. Then add narrow lid strips and corner details. Use only enough adhesive to cover the surface evenly; too much moisture can wrinkle card stock or make printed layers separate.
5. Finish the inside and check the fit. Line the inside with plain paper if the original box looks unfinished, but keep the lid joint free. Let every surface settle before closing the box. Once that’s done, test the lid gently and trim or smooth any paper edge that catches.
For a lower-risk version, decorate only the lid. The box will still feel connected to the wedding cards, and you will not need to wrap corners or alter the lid clearance.
Turn Wedding Cards into a Paper Garland
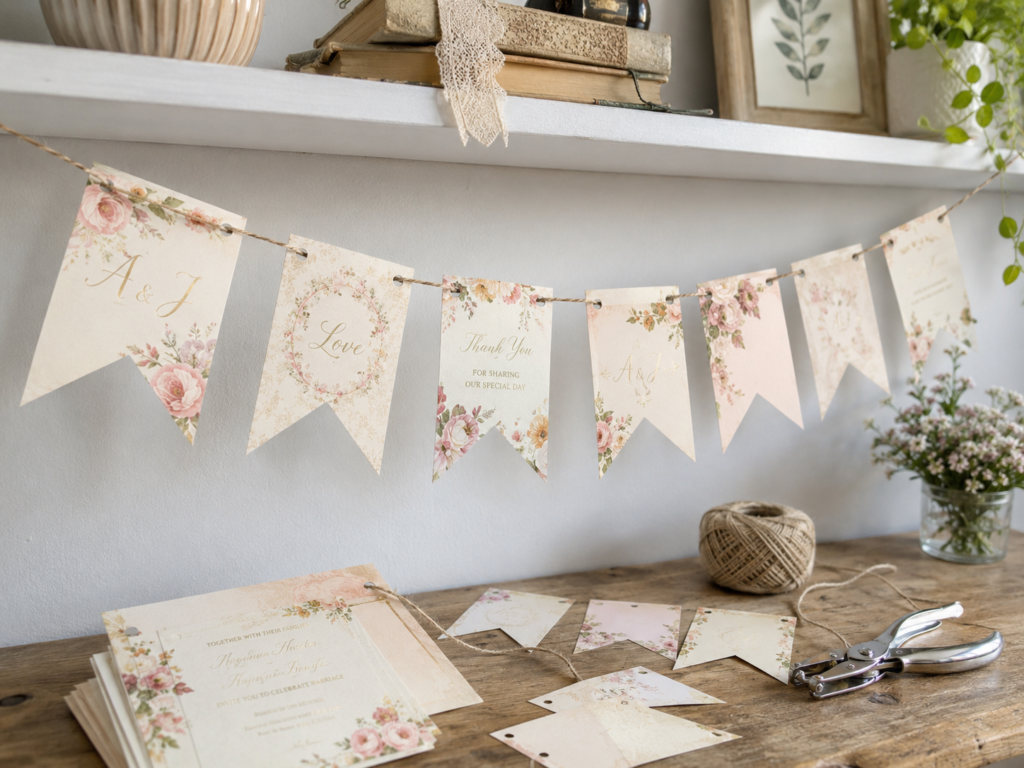
A garland uses the front panels of wedding cards without requiring complicated construction. Repeated flag shapes make different prints feel related, while twine keeps the arrangement relaxed. It can hang above a memory table, across a shelf, inside a craft room, or for an anniversary meal, then fold away when it is not needed.
The best pieces for this project are medium-weight cards that can hang without curling heavily. Very thick layered cards are better saved for tags or collage pieces. Arrange the flags by colour rather than sender, and place the strongest messages where they can be read from the front.
Materials and Tools
· Wedding-card fronts or large decorative panels
· Card template for one repeated flag shape
· Scissors or paper trimmer
· Single-hole punch
· Twine, ribbon, or strong thread
· Optional small eyelets or reinforcement circles
· Pencil, ruler, and eraser
How to Assemble the Garland
1. Create one reliable template. Cut a rectangle from scrap card and add a shallow V-shaped notch at the bottom. Test the size against several wedding cards before tracing it. A slightly narrower flag will fit more card designs and leave room to avoid handwritten sections.
2. Select and cut the flags. Place the template over floral corners, foil words, and pale patterned areas, then trace lightly. Cut each flag cleanly and erase visible pencil marks. Save the offcuts because small flower sections can become gift tags or bookmark decorations later.
3. Punch balanced hanging holes. Mark two holes near the top of each flag, keeping them the same distance from the edge. Reinforce soft paper with small paper circles or eyelets if needed. Avoid punching through foil lettering, raised decoration, or a weak fold line.
4. Thread and arrange the pieces. Lay the flags in their final order before adding twine. Alternate busy floral designs with quieter cream panels, then thread the cord from the back so it runs neatly across the front edge. Leave enough space between flags for them to hang separately rather than overlap.
5. Hang the garland without straining it. Support it at several points when the span is long, and keep it away from candles, cooking heat, and damp windows. The garland should curve slightly instead of being pulled tight. Roll it loosely around a cardboard tube for storage so the flags do not crease.
A beginner can make a shorter version with five flags and hang it inside a frame or above a small anniversary display. There is no need to turn the full card collection into one very long banner.
Cut Reusable Gift Tags from Wedding Cards
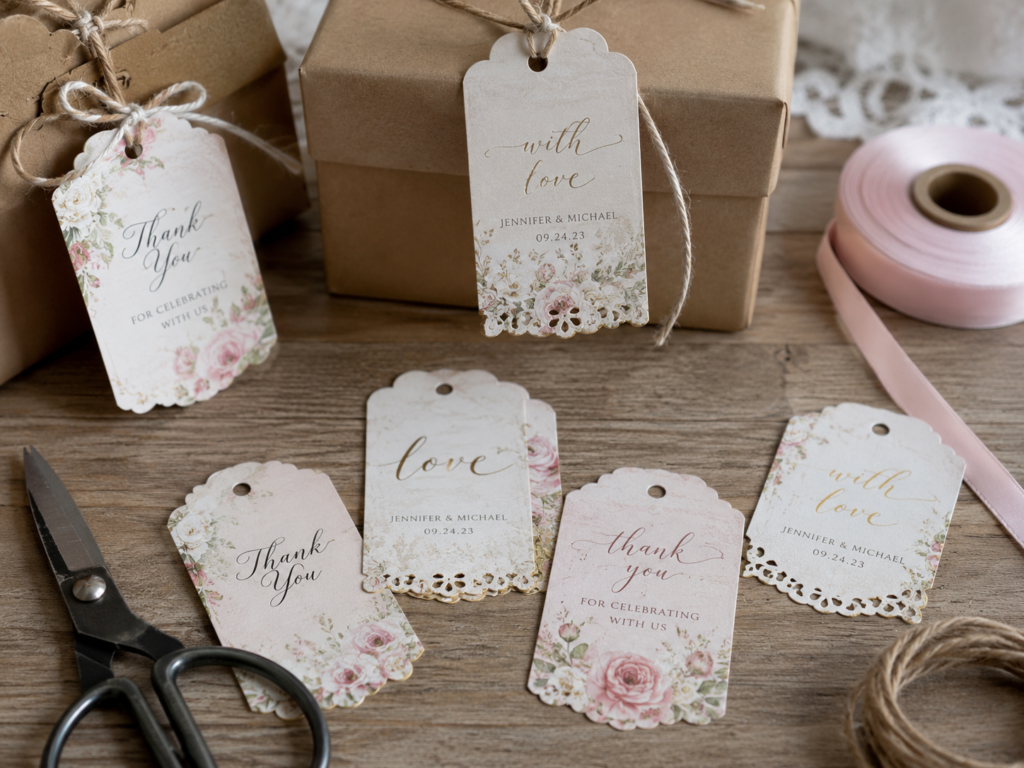
Gift tags are a sensible use for cards with damaged edges or only one remaining decorative corner. A small tag needs very little paper, and the original floral print does most of the decorating. Blank card on the back provides space for a new name or message, while twine or ribbon attaches the tag to a parcel.
Avoid using a section that still displays another couple’s names or wedding date unless the tag is for them. General words such as love, thank you, or with love are easier to reuse. I’d rather make fewer tags from strong card than many thin tags that bend as soon as they are tied.
Materials and Tools
· Wedding-card offcuts with floral borders or general wording
· Plain recycled card for backing where needed
· Tag template or existing luggage tag
· Scissors, craft knife, or paper trimmer
· Hole punch and optional corner punch
· Paper adhesive or double-sided tape
· Twine, narrow ribbon, or cotton string
· Fine pen for new messages
How to Make Strong Gift Tags
1. Choose small reusable details. Look for floral clusters, decorative borders, and short words that make sense outside the original wedding message. Trace the tag shape so the strongest detail sits near the lower half, leaving a clear area near the top for the hole.
2. Add backing when the paper is thin or written on. Cut a matching tag from plain card and attach it behind the decorative piece. This hides private writing and gives the tag enough strength for tying. Press the layers flat and trim them together after the adhesive settles.
3. Finish the edges and hole. Round the corners or add a simple scalloped edge if it suits the card design. Punch the hole away from the top edge so the paper cannot tear easily. A small reinforcement circle on the back helps when the tag will be reused several times.
4. Tie and store the finished tags. Add twine or ribbon in colours already present in the card. Write new names on the plain back rather than over busy print. Keep unused tags flat in an envelope or small box so the corners and decorative edges remain clean.
These tags can also label flower jars, favour bags, storage boxes, or small handmade items. A plain rectangular tag is perfectly acceptable; decorative punches are optional, not compulsory.
Make Bookmarks from Long Wedding Card Panels
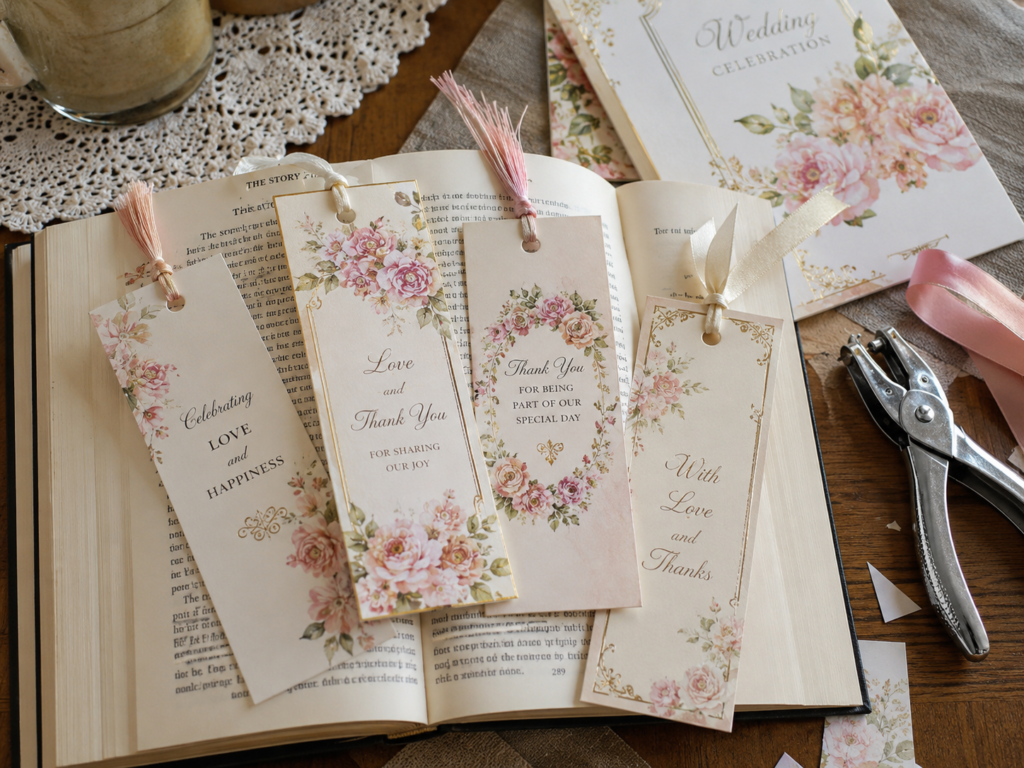
Wedding cards often contain long floral borders that naturally suit bookmarks. The narrow format keeps one decorative strip intact, and a ribbon or thread tassel makes the piece easy to find between pages. Bookmarks are also useful small gifts for close family members who may remember the wedding and recognise the original card design.
Use smooth, fairly flat card so the bookmark does not damage a book’s binding. Thick bows, gems, and raised flowers may look attractive on a card but create uncomfortable lumps between pages. Remove those parts or choose a flatter section.
Materials and Tools
· Wedding cards with long floral borders or centred wording
· Ruler, pencil, paper trimmer, or craft knife
· Plain backing card for thin pieces
· Paper adhesive or double-sided tape
· Single-hole punch
· Ribbon, embroidery thread, or ready-made tassel
· Optional corner rounder or clear protective sleeve
How to Create the Bookmarks
1. Identify a long uninterrupted section. Choose a floral border, pale panel, or short message that reads well in a narrow strip. Measure before cutting and leave enough width that the bookmark will not curl easily. Avoid creases, damaged folds, and thick attached decorations.
2. Cut and reinforce the strip. Trim the card with a ruler and craft knife or paper trimmer for straight edges. If the card is thin, glue it to plain backing card and press it beneath a clean heavy book after placing protective paper above and below. Then trim both layers together.
3. Shape the corners and add a hole. Round the corners slightly so they do not catch on pages or bags. Punch one centred hole near the top, leaving enough paper above it to prevent tearing. Keep the hole clear of important lettering or a delicate foil border.
4. Add a light tassel or ribbon. Fold ribbon or thread through the hole and keep the knot small. The decoration should sit outside the book rather than create bulk inside it. Match the tassel colour to one small feature in the card instead of trying to copy every shade.
5. Check the bookmark in an ordinary book. Slide it between several pages and close the book gently. Remove anything that catches, sheds glitter, or leaves a mark. If the surface is fragile, place the bookmark in a thin clear sleeve rather than coating it with an unsuitable liquid finish.
A simple variation uses the bookmark as a memory label inside a wedding album or keepsake box. Write the sender’s name and the date on the plain back so the decorative front remains uncluttered.
Wedding Card Upcycling Choices That Waste the Best Details
Cutting sentimental cards before recording them. A decorative front can distract you from a meaningful handwritten message. Photograph or scan the complete card first, and keep the original message section when it matters.
Trying to use every piece in one project. Too many colours, fonts, and metallic finishes can make a keepsake look crowded. Choose a limited palette and save unused sections for tags or bookmarks.
Applying too much wet adhesive. Wedding-card stock may wrinkle, separate into layers, or lose its smooth foil finish. Apply a thin, even layer and press through clean paper instead of rubbing the printed surface directly.
Placing private messages on public display. A collage or garland may reveal words that were intended only for the couple. Read both sides before cutting and cover personal writing with backing card.
Folding foil and raised print sharply. Metallic lettering and embossed details can crack along hard folds. Keep them on flat surfaces and use plain card for wrapped corners or box edges.
Making paper projects too thick. Heavy layers can stop a frame closing, make a box lid stick, or create bulky bookmarks. Test the final thickness before gluing everything permanently.
Using card near heat or moisture. Paper garlands, tags, and frames should stay away from open flames, cooking steam, and damp windows. Choose a dry display area and use safer non-paper decoration near candles.
Frequently Asked Questions
Is it disrespectful to cut wedding cards?
Not when you treat the message thoughtfully and preserve what matters to you. Photograph the card first, keep meaningful handwriting, and use the decorative paper in a way that allows the memory to remain visible.
Which adhesive is best for wedding-card paper?
Use a paper adhesive that dries cleanly and suits the project surface. Test it on an offcut because coated, metallic, and layered cards may react differently to moisture.
Can I use cards with handwriting on both sides?
Yes. Cover the written side with backing card, place it against the inside of a box, or use only a small front detail. Keep any private or sentimental text separately before cutting.
How can I make old cards look coordinated?
Group them by one repeated feature, such as blush flowers, cream backgrounds, gold print, or green leaves. Plain backing paper and consistent shapes also help unrelated cards feel like one collection.
Do I need to laminate bookmarks and gift tags?
No. Lamination can change the feel of textured paper and may not suit every card. Strong backing card or a removable clear sleeve is often enough for light use.
Can children help with these projects?
Children can help sort colours, arrange collage pieces, and thread finished flags with supervision. Adults should handle craft knives, sharp punches, and any cutting through thick layered cards.
How should I store unused wedding-card pieces?
Keep them flat in labelled envelopes or a shallow document box. Separate foil, textured, and plain paper so delicate surfaces do not rub against rough edges.
Keep the Message, Not Necessarily Every Blank Edge
The most useful lesson in learning how to repurpose wedding cards is that memory does not depend on keeping every card exactly as it arrived. A floral corner, handwritten name, short message, or piece of foil lettering can carry the story into an object that is easier to display and use.
Begin with the least intimidating project. A bookmark or gift tag lets you practise cutting and backing the paper before moving on to a framed collage or covered keepsake box. Then save the remaining offcuts, because even a narrow border may be exactly what another project needs.
Choose one card that has been sitting in storage and decide which detail you would be pleased to see again. Would it work best in a frame, on a box, across a garland, or inside a favourite book?