Vintage sinks are often removed because a room changes, not because the basin has stopped being useful. A heavy enamel bowl, an old Belfast sink, or a patterned ceramic basin may no longer fit a modern kitchen, yet its depth, drainage hole, and strong rim still give it plenty of practical value.
I enjoy finding sensible second uses for old household pieces before deciding they belong in a skip. With sinks, the condition has to lead the idea. A cracked bowl may suit a dry display but not a water-filled project, while a sound basin can become a planter, potting station, outdoor cooler, or working vanity.
The character is already there. Faded enamel, old tap holes, and a worn edge can make the finished piece feel settled rather than newly bought. What matters is choosing a new job that suits the material, supporting the weight properly, and keeping drainage, sharp edges, and hygiene in mind.
Check the Sink Before Choosing Its New Job
Vintage sinks can be extremely heavy even before they are filled with soil, water, ice, or bottles. Move one with help and use a trolley when possible. Do not lift it by old taps, a narrow back panel, or a damaged rim.
Clean the sink first, then inspect it in bright light. Look for deep cracks, loose enamel, rust around fittings, sharp chips, unstable repairs, and damage around the plughole. A small flaw that seems decorative can become structural when the bowl is drilled, moved, or loaded.
Identify the material before cutting or drilling. Cast iron, steel, porcelain, fireclay, stone, and ceramic need different tools and support. When you are uncertain, choose a no-drill method or ask someone experienced to make the opening.
Any project involving permanent water connections, bathroom plumbing, or altered waste pipes needs suitable professional input. Decorative upcycling should never hide a weak connection or make a leak difficult to reach.
Basic Materials and Safety Equipment
• Protective gloves
• Eye protection
• Soft cleaning brush
• Mild cleaner suited to the surface
• Clean cloths
• Tape measure and pencil
• Stable supports or a trolley for moving
• Tools matched to the sink material
• Help from a plumber or experienced craftsperson when needed
Turn a Vintage Sink Into a Garden Planter
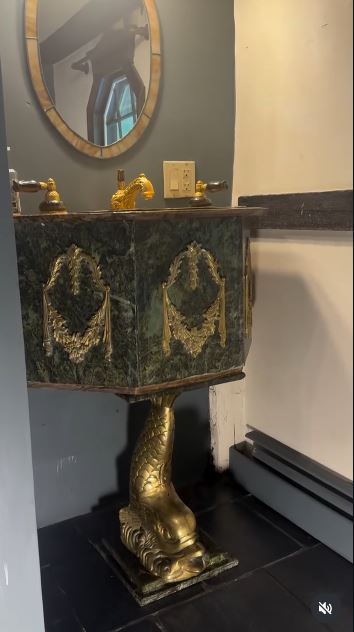
An old sink already has the shape of a generous planting bowl, so this is one of the most natural ways to reuse it. A deep Belfast, porcelain, enamel, or metal basin can hold herbs, flowers, grasses, or a mixture of trailing plants. The original plughole may even help with drainage, although it still needs checking before any soil goes in.
What I like here is that the sink does not need to look newly restored. Light staining, worn enamel, and small marks can sit comfortably in a garden. The important part is making sure the basin is stable, the edges are safe, and water can escape. Once those basics are sorted, the plants can do most of the decorating.
Materials and Tools
• Structurally sound vintage sink
• Strong base, bricks, reclaimed frame, or garden stand
• Potting mix suited to the chosen plants
• Small stones or mesh for the plughole
• Compact herbs, flowers, or trailing plants
• Gardening gloves
• Soft brush and mild cleaner
• Eye protection if drilling is required
How to Make It
1. Inspect and clean the sink. Check the bowl, rim, back, plughole, and any old tap openings. Remove loose dirt with a soft brush, then wash the surface with a mild cleaner. I don’t think every stain needs to disappear, but sharp chips and unstable rust need attention before the sink becomes a planter.
2. Create safe drainage. Test the plughole by pouring in a small amount of water. If it drains freely, place mesh or a few stones over the opening so compost cannot block it. When there is no usable outlet, ask someone experienced to drill the correct material rather than forcing an unsuitable bit through old enamel or ceramic.
3. Build a stable support. Set the sink on a level base that can hold its weight after wet soil is added. A reclaimed timber frame, brick supports, or a strong metal stand can work, but the bowl should not rock when you press lightly on the rim. Then check that the drainage outlet is not pressed flat against the ground.
4. Fill and arrange the planting. Add potting mix gradually and stop below the rim. Place taller plants towards the back or centre, then use smaller plants to fill the middle and trailing plants near the front edge. The old taps or tap holes can remain visible because they help the finished planter keep its sink character.
5. Water and watch the first few weeks. Water slowly and confirm that moisture leaves through the plughole. After that, check the compost according to the plants rather than following a fixed timetable. A deep old sink can hold moisture longer than a shallow pot, especially when it sits in shade.
For me, the best sink planters still look unmistakably like sinks. I’d keep at least part of the rim, taps, or back visible instead of covering every inch with foliage.
Ways to Adapt the Idea
• Use only culinary herbs near an outdoor cooking area.
• Create a soft cottage mix with trailing flowers and small ferns.
• Place nursery pots inside the sink for a removable, lower-mess version.
• Use artificial greenery when the sink sits in a very dark covered space.
Build a Potting Bench Around an Old Sink
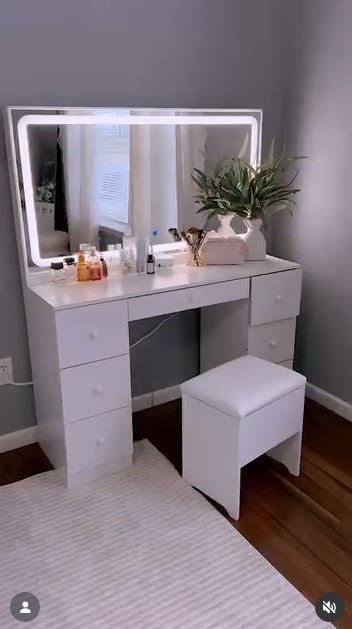
A vintage sink can do more than hold plants. Fitted into a strong bench, it becomes a useful place for mixing compost, washing pots, catching loose soil, or rinsing garden tools. The bowl contains the mess, while the bench gives you space for pots, labels, gloves, and watering equipment.
This version needs more planning than a simple planter because the sink is heavy and the bench must support it safely. Still, the construction does not need to look like a fitted kitchen. Reclaimed timber, an old workbench, or a sturdy table can provide the base. The slightly mismatched look often suits a garden better than a perfectly new unit would.
Materials and Tools
• Vintage sink with a sound bowl and rim
• Strong reclaimed workbench, table, or timber frame
• Exterior-grade screws and suitable brackets
• Tape measure and pencil
• Jigsaw or suitable cutting tool
• Drill and driver
• Eye and hearing protection
• Exterior wood finish when needed
• Bucket or safe drainage connection
• Hooks, shelf boards, and storage containers
How to Make It
1. Measure the sink before cutting. Measure the widest and deepest parts of the sink, including any lip that will rest on the bench. Mark the opening carefully and check it twice. I know it can feel tempting to follow the bowl shape exactly, but the supporting rim needs enough timber beneath it to stay secure.
2. Strengthen the bench. Inspect the legs, joints, top, and lower braces before making the opening. Repair loose sections and add support rails beneath the future sink position. Once that’s done, place the empty sink on top to check height, reach, and balance before you cut anything.
3. Cut and fit the opening. Drill a starter hole inside the marked area, then cut slowly with a suitable jigsaw blade. Wear eye protection and support the cut section so it does not tear away. Lower the sink into position and make small adjustments rather than enlarging the opening too quickly.
4. Secure the bowl and organise drainage. Use brackets or another method suited to the sink and frame so the bowl cannot shift. For a dry potting bench, place a removable bucket beneath the plughole to catch water and soil. A permanently plumbed outdoor sink needs proper water and waste planning by someone who understands local requirements.
5. Add useful storage. Fit a shelf, hooks, or a lower rack only after the main structure feels solid. Keep heavy compost low and lighter tools within easy reach. Then protect exposed timber with a finish suited to outdoor conditions, following the product directions.
The part I would keep simple is the storage. A few strong hooks and one open shelf are often more useful than lots of tiny compartments that immediately fill with damp soil.
Ways to Adapt the Idea
• Use the sink dry as a compost-mixing bowl.
• Add a removable worktop that covers the bowl when extra space is needed.
• Fit wheels only when they are rated for the full loaded weight and can lock securely.
• Place the bench under a roof or lean-to when the timber is not suited to full weather exposure.
Details That Can Let a Vintage Sink Project Down
Choosing the idea before checking the sink. A damaged sink may look suitable in a photograph but fail once it carries wet soil or water. Inspect the material, rim, base, and outlet first, then choose a job that matches its real condition.
Ignoring the loaded weight. Soil, ice, water, bottles, and timber supports add far more weight than many people expect. Build the base for the finished load, not for the empty sink sitting in the workshop.
Blocking the plughole. A planter or drinks station needs a clear route for water. Cover the hole with mesh when necessary, but do not pack it tightly with compost or leave a bucket beneath it until the bucket overflows.
Relying on sealant as a structural support. Sealant can close a small gap, but it should not be the only thing holding a heavy basin in a vanity or bench. Use proper framing, brackets, or supports suited to the material.
Leaving sharp enamel exposed. A chipped edge can cut hands, snag clothing, or worsen during use. Smooth or protect the area appropriately, and reject the sink when the damage cannot be made safe.
Using an unknown old surface for loose food. Vintage coatings, repairs, and residue are not always suitable for direct food contact. Keep drinks sealed or use a clean removable food-safe container inside the sink.
Hiding plumbing completely. A boxed-in connection may look neat until it needs repair. Leave practical access to traps, valves, and joins, especially inside a repurposed cabinet.
Adding decoration before solving function. Flowers, paint, hooks, and old taps can all improve the look, but they cannot correct poor drainage or an unstable frame. Get the structure right first, then add only the details that help the final use.
Frequently Asked Questions
What is the easiest way to repurpose a vintage sink?
Using it as a garden planter is usually the simplest choice when the bowl is structurally sound and already has a working plughole. A removable arrangement of nursery pots makes the project even easier because you do not need to fill the entire sink with compost.
Can a cracked vintage sink still be reused?
A lightly marked sink may suit a dry decorative display, but a structural crack makes water-filled, hanging, or heavily loaded uses risky. Do not assume paint, grout, or adhesive has restored the original strength.
Do I need to drill drainage holes in a sink planter?
Not always. Many sinks already have a plughole that works as drainage. Test it first and keep it clear with mesh or stones; drill only when the material and method are understood.
Can I use an old sink as a working outdoor sink?
Yes, when the basin is sound and the water supply, waste route, support, and local requirements are handled correctly. A simple dry potting bench or bucket-fed setup may be easier than permanent plumbing.
Is old enamel safe for a drinks station?
Use the sink only for sealed bottles and cans, or place removable food-safe tubs inside it. Avoid putting loose food directly on an unknown vintage surface, especially when it has chips, repairs, or old coatings.
Can I paint a vintage sink?
Some materials can be refinished, but preparation and coating choice depend on the surface and intended use. Paint used on a decorative garden piece is not automatically suitable for a working basin or a surface exposed to constant water.
How do I move a heavy sink safely?
Empty it completely, remove loose fittings, protect fragile edges, and ask for help. Use a trolley or lifting equipment when needed, and never carry the weight by old taps or a narrow decorative back.
Give an Old Sink a Useful Place Again
The best way to repurpose vintage sinks is to work with the shape and condition already in front of you. A deep bowl naturally suits planting, a broad rim can support a potting area, a clear plughole makes temporary cooling practical, and a decorative basin may deserve another working life indoors.
I’d begin with the least complicated version that suits your sink. Clean it, check the damage, test the drainage, and make the support dependable before adding plants, storage, ice, or plumbing. Once those practical parts are ready, the age and wear stop looking like faults and start becoming the reason the piece feels worth keeping.
Which forgotten sink would you rescue first: one for the garden, the potting bench, an outdoor gathering, or a small bathroom?