Tiny clothes can carry an astonishing amount of memory. A faded onesie, a pair of soft leggings, or a little shirt with a worn neckline may no longer fit, yet it can still feel much too personal to drop into a donation bag. I’m Stella Eve Louise, and this is exactly the kind of material I like to pause over before deciding what should happen next. Baby clothes are often made from soft cotton jersey, fleece, flannel, knit fabric, or light woven material, and many of those fabrics can be useful long after the original garment has been outgrown.
The best upcycling choices don’t try to preserve every garment exactly as it was. Instead, they keep the part that matters: a print, a pocket, an embroidered detail, a stretch of familiar fabric, or simply the colors you remember. I don’t think sentimental fabric needs to stay folded in a box forever, but I also wouldn’t cut into it without a plan. A small amount of preparation makes it much easier to turn those cherished pieces into quilts, storage, soft decor, accessories, and keepsakes that can actually be used and seen.
Sort the Baby Clothes Before You Cut Anything
Before choosing a project, separate the clothes by condition, fabric type, and emotional value. This matters more with baby clothes than with many other upcycling materials because a tiny garment may have very little usable fabric, and one careless cut can remove the detail you wanted to save. I like to decide first which pieces can be cut freely and which should stay mostly intact.
· Set aside irreplaceable keepsakes. If one outfit matters deeply, photograph it and consider framing it rather than cutting it into small pieces.
· Group similar fabrics together. Jersey works well with other stretch knits, while woven cottons and flannels are easier to combine in structured projects.
· Check for stains and worn areas. A stain may disappear inside a seam allowance, but thinning fabric should not be used where strength is important.
· Save useful details. Pockets, embroidered motifs, small ruffles, printed panels, and labels can become focal points in a new project.
· Remove unsafe hardware when necessary. Loose buttons, snaps, beads, bows, and decorative pieces should not remain on items intended for babies or young children unless they are permanently secure and appropriate for that use.
Prepare Stretchy, Thin, and Sentimental Fabrics Carefully
Baby clothing fabric can curl, stretch, twist, or shrink while you work, especially after it has been cut away from its original seams. A little preparation makes the pieces easier to sew and helps the finished project sit flatter. I know it can feel tempting to start cutting the moment you choose an idea, but pressing, testing, and stabilizing first usually saves far more time than it costs.
· Wash and dry the garments first using the care method you would normally use, so hidden shrinkage does not distort the finished project later.
· Press gently rather than stretching. Lift and place the iron instead of pushing thin knit fabric across the board.
· Use paper templates for repeated shapes. Templates make patchwork squares, block panels, bib shapes, and bin pieces much more consistent.
· Consider lightweight stabilizer behind very stretchy jersey when the project needs crisp seams or a flatter surface.
· Test glue and heat on scraps first. Printed surfaces, vinyl decorations, and delicate appliques may react differently from plain cotton.
Decide Whether the Finished Project Is for Display, Storage, or Child Use
The intended use should guide every material choice. A framed outfit only needs to look neat and stay supported, while a bib, beanie, block, or puppet may be handled repeatedly and needs much more attention to comfort and secure construction. For me, function comes before squeezing every last decorative piece into the design.
· For display pieces, focus on preserving the garment and avoiding permanent adhesive where possible.
· For household storage, reinforce seams and choose a lining or stabilizer that can handle the expected weight.
· For washable projects, use fabrics, thread, and closures that tolerate repeated laundering.
· For items used by babies or toddlers, avoid loose small parts, long cords, rough seams, and decorative pieces that can detach.
· For accessories, check stretch and fit carefully and never treat homemade headwear or headbands as sleepwear.
Turn Cherished Outfits into a Patchwork Quilt
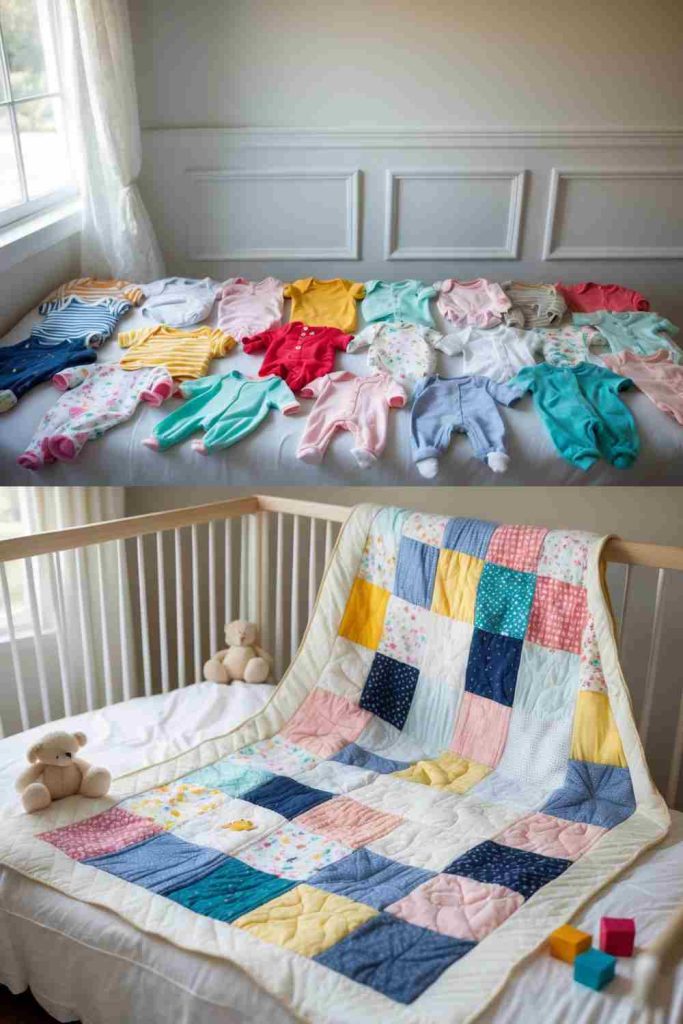
A patchwork quilt is one of the most forgiving ways to combine many small garments because no single piece has to provide a large amount of fabric. Sleeves, backs, trouser legs, and even tiny front panels can become individual patches. The result can hold pieces from several stages of a baby’s first years without looking like a pile of mismatched clothing.
What makes this project work is restraint. If every square contains a bold motif, the quilt can become visually noisy, so I would mix printed patches with quieter solids and small-scale patterns. Stretchy jersey also behaves differently from woven cotton, which is why stabilizing the softest pieces can make the quilt top much easier to assemble. A backing made from a soft sheet, flannel blanket, or another large textile can also keep the project grounded in reuse rather than requiring a completely new fabric purchase.
Materials and Tools
· Clean outgrown baby clothes in a mix of colors and prints
· Paper or cardboard template for patch shapes
· Fabric scissors or rotary cutter and cutting mat
· Lightweight fusible stabilizer for very stretchy pieces, if needed
· Sewing machine or hand-sewing needle
· Thread
· Pins or sewing clips
· Backing fabric from a sheet, blanket, or other reusable textile
· Batting or a lightweight reclaimed quilt layer
· Binding fabric or strips cut from sturdy leftover cloth
Steps
1. Plan which parts of the clothes you want to preserve. Lay the garments out before cutting and mark any motifs, pockets, embroidery, or printed areas you especially want to keep. Choose a consistent patch shape and use a template so the pieces will align later. If a garment is very stretchy, fuse a lightweight stabilizer to the back before cutting the final patch so it does not grow while you sew.
2. Build the quilt top in small sections. Arrange the patches on the floor or a large table and move them until strong prints are spread evenly rather than clustered in one corner. Sew patches into rows, pressing seams gently as you go, then join the rows. Keep checking the overall shape because a slightly stretched jersey square can pull its neighbors out of line if you ignore it.
3. Add the backing and inner layer. Place the backing fabric face down, add the batting or soft inner layer, and position the quilt top on top. Smooth the layers from the center outward and secure them with pins or clips. Quilt through the layers with simple straight lines, tied stitches, or another manageable pattern; the goal is to hold the layers together without overwhelming the sentimental patchwork.
4. Finish the edges and check the whole quilt. Trim uneven edges only after the quilting is secure, then bind the perimeter with fabric strips. Check every seam for loose threads and reinforce any weak patch before the quilt goes into regular use. If the quilt is mainly a keepsake, gentle display or occasional use will reduce stress on delicate older fabrics.
I’d rather make a slightly smaller quilt with strong, meaningful patches than force fragile fabric into a large design. A crib-size keepsake, lap quilt, or wall-hung textile can be every bit as special as a full bed quilt.
A Realistic Variation
For a simpler version, sew nine or twelve large memory patches into a square panel and add a wide border from an old sheet. That gives the baby clothes plenty of visual space and reduces the number of seams a beginner has to manage.
Upcycling Baby Clothes Ideas: Create Adorable Throw Pillows from Cherished Outfits
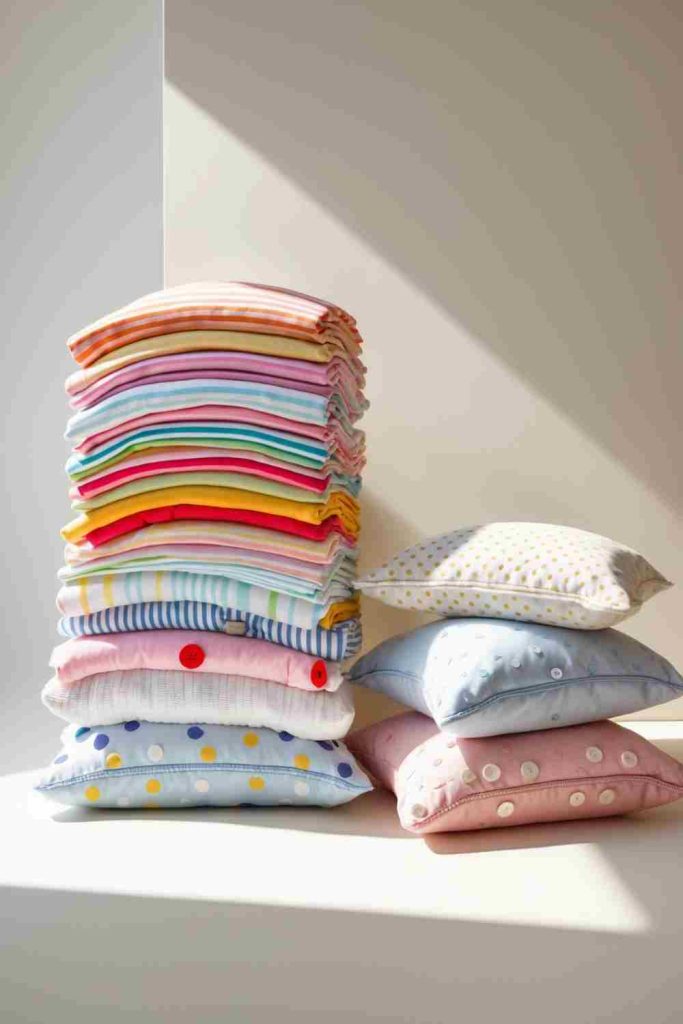
Throw pillows are useful when you want to preserve one or two favorite garments rather than cut an entire collection into small patches. A shirt front with a tiny pocket, a onesie with a memorable print, or a section of patterned pajamas can become the main face of a cushion. Because the pillow stays visible on a chair or shelf, the original clothing detail can still be recognized.
I especially like envelope-style pillow covers for this kind of project because the cover can be removed for washing and you do not need to install a zipper. The main challenge is giving thin knit fabric enough structure. Pairing it with a firmer backing, adding interfacing, or stitching several baby-clothes pieces onto a stable base fabric can prevent the cover from sagging around the pillow form.
Materials and Tools
· One or more clean baby garments
· Stable backing fabric or reclaimed cotton
· Lightweight interfacing for stretchy fabric
· Pillow form or existing cushion insert
· Fabric scissors
· Ruler or paper pattern
· Sewing machine or needle and thread
· Pins or clips
· Optional saved pocket, applique, or embroidered panel
Steps
1. Choose the feature that should face forward. Place the garment flat and decide whether the print, pocket, embroidery, or overall fabric should become the center of the pillow. Cut a front panel slightly larger than the final pillow face so you have room for seams and squaring. Stabilize very stretchy jersey or applique it onto a firmer reclaimed fabric panel before assembling the cover.
2. Prepare a washable pillow-cover construction. For an envelope back, cut two overlapping rear panels from sturdy fabric. Hem the inner edges that will overlap, then place both rear pieces over the front panel with right sides together. If you prefer a fully closed keepsake pillow, you can instead use one back panel and leave an opening for stuffing or inserting the form.
3. Sew and reinforce the edges. Stitch around the perimeter with an even seam allowance, then reinforce corners and any area where thick clothing seams meet the new fabric. Clip bulky corners carefully before turning. Turn the cover right side out, push the corners out gently, and press from the fabric side rather than directly over heat-sensitive printed graphics.
4. Insert the cushion and make final adjustments. Slide in the pillow form and smooth the cover so the saved garment detail sits where you intended. If the cover pulls or puckers, remove the form and correct the seam instead of stretching the baby-clothes fabric into position. Finish by trimming loose threads and checking that no old buttons or decorations are loose.
A pillow does not need to look like a complete garment to feel personal. Sometimes a single pocket or small printed panel surrounded by plain fabric is stronger than covering the whole surface with memorabilia.
A Realistic Variation
Use several tiny clothing pieces as narrow horizontal bands across a neutral pillow front. This works well when the garments are too small or damaged to provide large panels but still contain useful sections of fabric.
Transform Tiny Outfits into Adorable Bandana Bibs
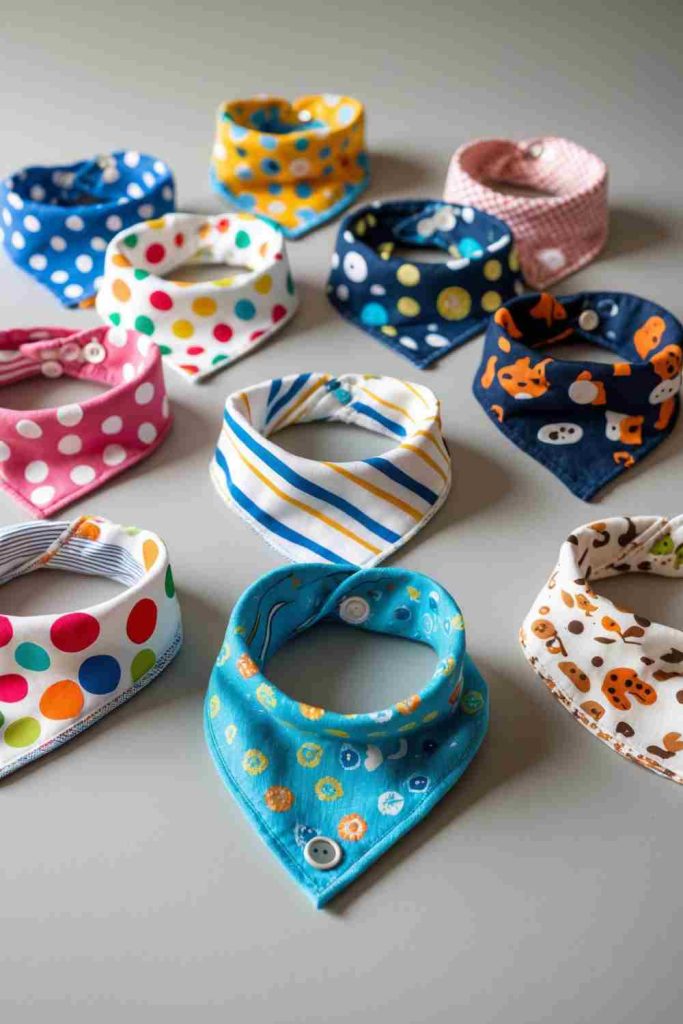
Bandana bibs suit small pieces of soft fabric because the front shape is compact and can highlight a favorite print. A worn onesie may have damage around the snaps or neckline while the body fabric is still perfectly usable. Pairing that fabric with an absorbent backing gives the old garment a practical new role instead of saving it only for sentimental reasons.
The important part here is not decoration; it is comfort and safe construction. The backing should feel soft against the child, seams should lie flat, and the closure should be secure without creating a tight neckline. I would avoid reusing loose decorative buttons or bulky embellishments on a bib intended for a baby.
Materials and Tools
· Soft baby-clothes fabric
· Absorbent backing such as flannel, terry cloth, or another soft reusable textile
· Paper bib template
· Fabric scissors
· Washable marker or tailor’s chalk
· Pins or clips
· Sewing machine or hand-sewing needle
· Thread
· Secure sew-on snaps or another child-appropriate closure
Steps
1. Make a comfortable template before cutting sentimental fabric. Use an existing well-fitting bandana bib as a reference or draft a simple curved triangle with neck tabs. Test the paper shape around the intended neckline without putting it tightly against a child. Once the proportions look right, place the template over the best area of the baby garment and trace it without stretching the fabric.
2. Cut the front and absorbent backing. Cut one front piece from the upcycled clothing and one matching piece from the backing. If the front is very stretchy, handle it gently and use clips rather than pulling it into alignment. Place the right sides together, match the curves, and mark a small opening along a straighter edge for turning.
3. Sew, turn, and topstitch the bib. Stitch around the shape, leaving the marked opening unsewn. Clip the seam allowance around curves so the edge can turn smoothly, then turn the bib right side out and press carefully. Topstitch around the perimeter to close the opening and help the layers stay flat after washing.
4. Add the closure and inspect it closely. Attach snaps or another suitable closure to the neck tabs and reinforce the fabric around the attachment point if necessary. Check that the hardware is firmly fixed and that no loose threads, rough edges, or detachable decorations remain. Use the bib only while the child is awake and supervised, and discontinue use if the closure or fabric becomes damaged.
The print can be playful, but the construction should stay boringly secure. That is one place where I would never trade function for a cute extra detail.
A Realistic Variation
If you do not need another bib, use the same compact pattern idea to make a small scarf for a stuffed toy or a decorative keepsake bunting piece instead. That avoids child-wear safety concerns while still preserving the fabric.
Craft a Beautiful Braided Rag Rug from Beloved Outfits
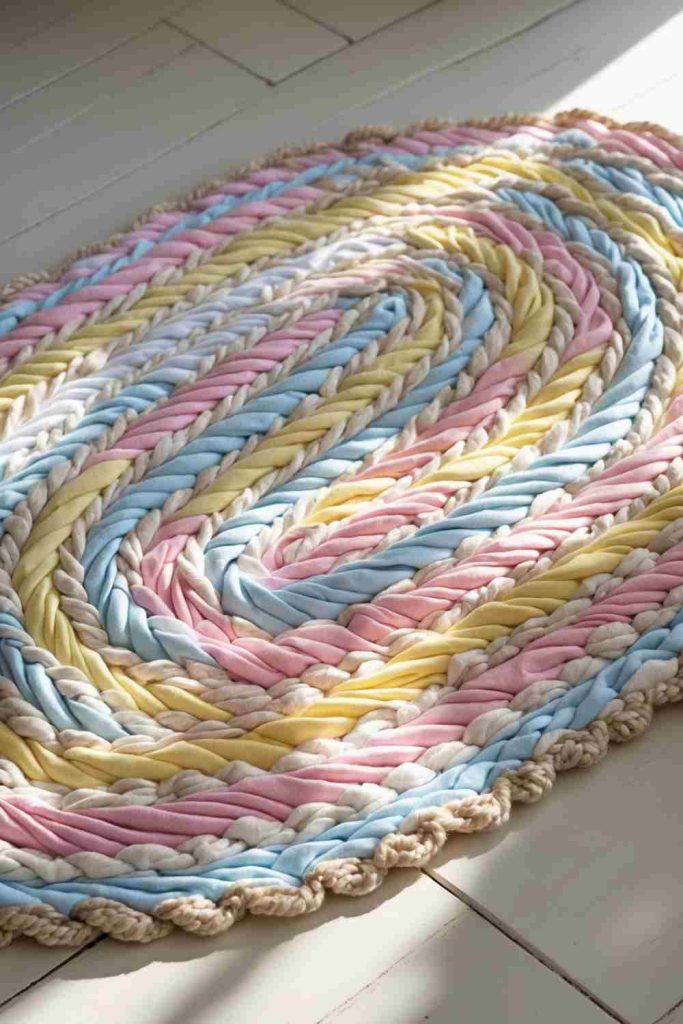
A braided rag rug is a good destination for garments that are too stained, stretched, or oddly shaped for neat patchwork. Once the clothes are cut into long strips, small imperfections disappear into the braid, while familiar colors remain visible. Jersey knit is particularly convenient because it can roll slightly at the edges and form a soft cord-like strip.
The rug becomes heavier as it grows, so consistency matters more than perfectly equal fabric strips. Tight braiding and frequent stitching between coils help the shape stay flat. If you mix very different fabric weights, I would distribute them throughout the braid rather than placing all the thick fleece in one section and all the thin cotton in another.
Materials and Tools
· Outgrown cotton knit or jersey baby clothes
· Fabric scissors
· Large safety pins or clips
· Strong hand-sewing thread
· Sturdy needle
· Optional non-slip rug pad for use on smooth floors
· Large flat work surface
Steps
1. Turn the garments into long workable strips. Remove thick waistbands, snaps, and bulky seams, then cut the usable fabric into strips of reasonably similar width. Join short strips by overlapping and stitching their ends rather than tying large knots that can create bumps. Sort the strips loosely by color if you want a gradual pattern, but there is no need to make every length identical.
2. Create a firm continuous braid. Secure three strip ends together and braid with steady tension. Add new lengths before a strip becomes too short to handle, stitching the overlap so it does not pull apart later. Keep the braid firm but not stretched to its limit; over-stretched knit can shrink back and make the finished rug curl.
3. Coil the braid while checking for flatness. Place the beginning of the braid on a table or floor and coil it into a circle or oval. Stitch neighboring rows of braid together every short distance using strong thread. Then pause, lay the rug completely flat, and correct any area that is starting to cup or ripple before adding more rows.
4. Secure the final end and prepare the rug for use. Taper the last few fabric strips if possible so the final braid end does not form a bulky lump. Stitch it firmly into the neighboring coil and inspect the back for loose thread ends. On a smooth floor, place the finished rug on a suitable non-slip pad rather than relying on the fabric alone to stay in place.
This project is forgiving about stains and faded prints, which is part of its appeal. The colors read as a whole once the strips are braided, so a garment does not need to look pristine to contribute something useful.
A Realistic Variation
Make a small braided mat first and use it under a basket, plant pot, or bedside item. A compact mat lets you learn how tightly to braid and stitch before committing an entire collection of clothes.
Craft a Cute Cloth Laundry Bag from Cherished Outfits
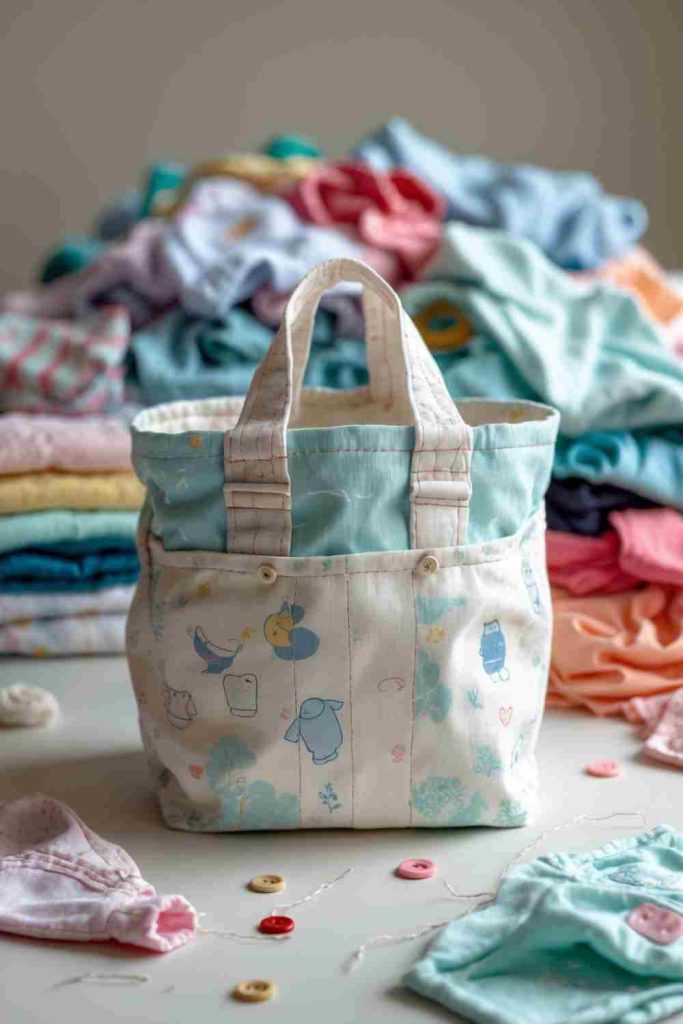
A laundry bag can combine sentimental fabric with something much more practical: sturdy household storage. Because baby clothes are usually small and often stretchy, I would not rely on them alone to carry a heavy load. Instead, use the special fabrics as a patchwork outer panel or decorative front and let a stronger lining take most of the stress.
This is also a useful way to preserve larger printed areas without needing perfect patchwork squares. A pair of pajama legs can become strips, a shirt back can become a broad panel, and small motifs can be appliqued onto a stronger base. The bag can hold lightweight nursery laundry, spare blankets, or soft toys depending on its construction.
Materials and Tools
· Baby clothes for decorative or patchwork panels
· Strong lining fabric such as an old sheet, curtain, or sturdy cotton
· Interfacing if the outer layer is very soft
· Fabric scissors
· Ruler
· Sewing machine and thread
· Pins or clips
· Fabric strips for handles or a short adult-operated closure
· Optional appliques or saved pockets from the original clothes
Steps
1. Build a strong outer panel from the baby-clothes fabric. Decide whether you want a simple feature panel or patchwork surface. Join the clothing pieces into two panels large enough for the front and back of the bag, then stabilize them if they remain very stretchy. Keep thick snaps and bulky seams away from new seam lines because they can make the bag difficult to sew and uncomfortable to carry.
2. Create a lining that can support the contents. Cut matching front and back pieces from a stronger reusable fabric. Sew the lining together along the sides and bottom, reinforcing the lower corners. If the bag will hold anything heavier than lightweight clothing, the lining should be treated as the structural layer and the sentimental outer fabric as the decorative layer.
3. Join the outer bag, lining, and handles. Sew the outer panels together, then place the lining inside with the wrong sides hidden. Finish the top edge neatly and add short, securely stitched handles if the bag will be carried by an adult. I would avoid long cords or dangling drawstrings on storage kept within reach of babies or toddlers because they create unnecessary entanglement risk.
4. Add meaningful details without weakening the bag. A saved pocket can become a label holder, or one embroidered motif can be appliqued to the front. Reinforce every decorative attachment from the back and keep the interior smooth. Check the handles and bottom seams before use, and repair any stretching as soon as it appears instead of waiting for the fabric to tear.
A keepsake project is more useful when the sentimental layer is not forced to do a structural job it was never designed for. Let the lining carry the load and let the baby clothes carry the memory.
A Realistic Variation
Make a smaller hanging bag for clean bibs, socks, or cloths instead of a full laundry sack. The reduced weight makes it easier to use more delicate clothing fabric safely.
Make Cute Soft Fabric Baby Blocks from Adored Outfits
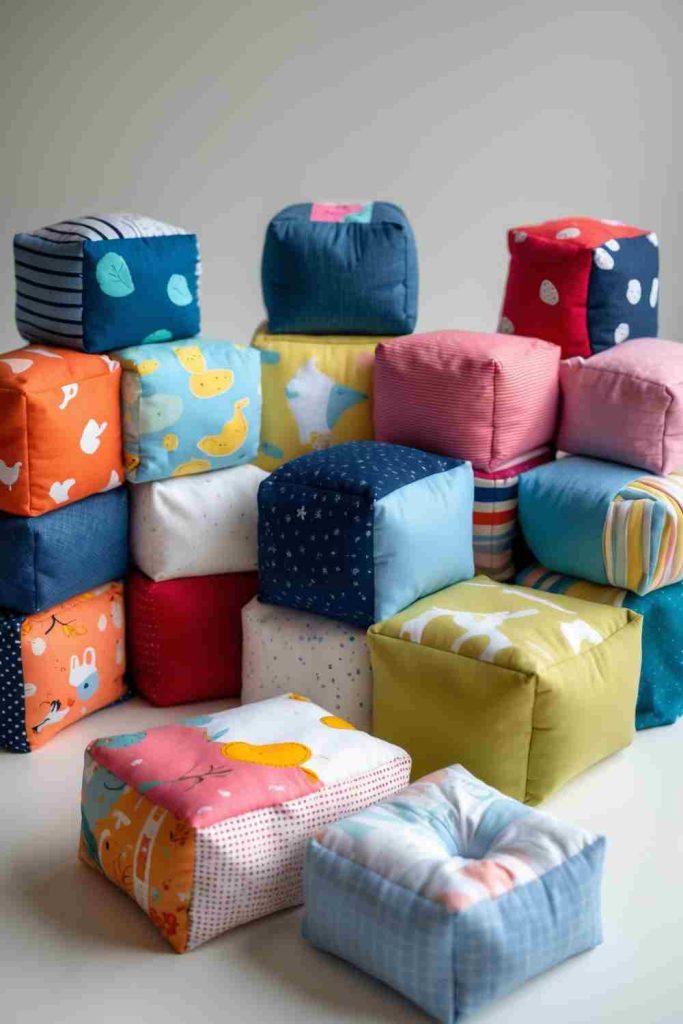
Soft fabric blocks can preserve small squares from multiple outfits, which makes them appealing when only a little usable material remains. Each face can show a different print or texture, and the finished cube can work as a soft keepsake or supervised play object depending on how it is constructed.
Because this project may be handled by a baby, every design decision needs to be simple and secure. I would skip buttons, beads, bows, plastic eyes, or any other detachable decoration. Embroidery, flat applique, or the original printed fabric gives plenty of interest without adding small parts. Seams should also be strong enough to contain the filling even after repeated squeezing and washing.
Materials and Tools
· Six fabric squares per block cut from clean baby clothes
· Paper square template
· Lightweight stabilizer for stretchy pieces, if needed
· Sewing machine or strong hand-sewing thread
· Pins or clips
· Washable soft stuffing or clean fabric scraps suitable for filling
· Optional flat embroidered or appliqued details only
Steps
1. Prepare six strong, even faces. Choose fabric areas without holes, weak seams, or loose decoration. Stabilize very stretchy jersey and cut six matching squares with the grain as consistent as possible. If you want a motif centered on one face, position the template before cutting rather than trying to shift the fabric during sewing.
2. Sew the cube in stages instead of all at once. Join four squares in a row to form the side band, using a consistent seam allowance and stopping accurately at the corners. Attach the fifth square to create the top, then add the sixth as the bottom while leaving a generous turning opening. Backstitch at the ends of the opening because that area will receive extra stress while you turn and stuff the block.
3. Turn and fill the block evenly. Clip excess bulk from the corners without cutting into the stitching, then turn the cube right side out. Push the corners out gently with a blunt tool or your fingers. Add soft washable filling in small amounts, distributing it evenly so the cube has shape without becoming hard or overstuffed.
4. Close and inspect every seam. Fold the raw edges of the opening inward and close it with small, secure ladder stitches or another strong hand stitch. Tug gently at each seam and check for any exposed thread loops, loose applique edges, or original garment hardware. If the block is intended for a young child, use it only when all parts are securely enclosed and retire it if seams begin to open.
I don’t think a baby block needs extra decoration just because the surface looks simple. Familiar fabric, strong contrast, and a safely sewn cube are enough.
A Realistic Variation
For a purely decorative keepsake, make a larger memory cube and display it on a shelf. That version can preserve bigger motifs while avoiding the wear that comes with frequent play.
Craft Adorable Beanies from Precious Outfits
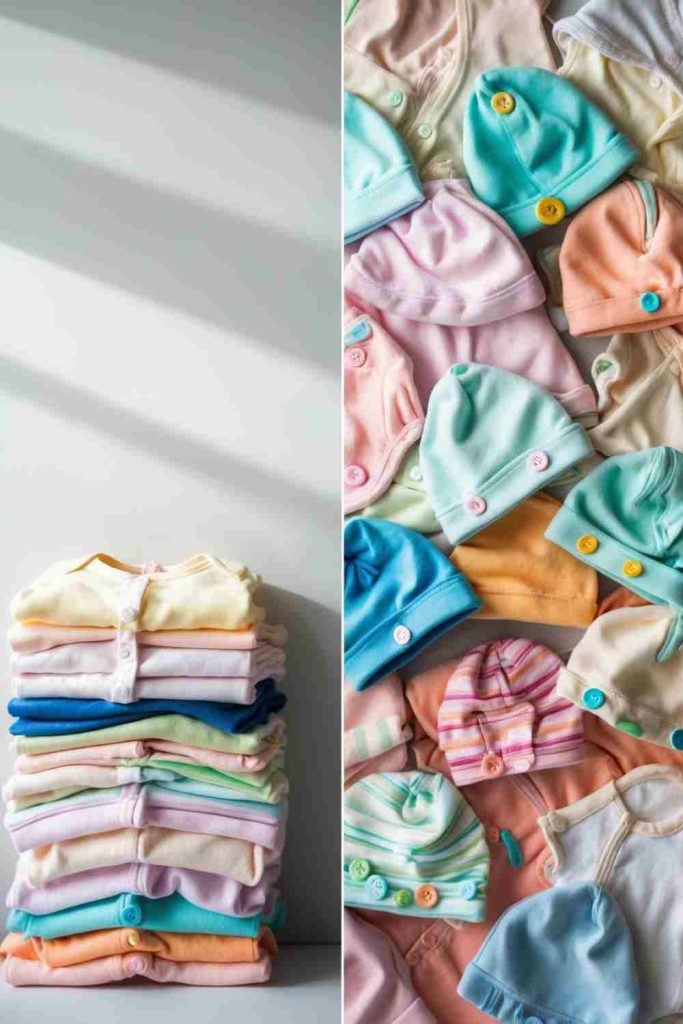
Stretchy onesies, pajamas, and soft T-shirts can provide enough knit fabric for a simple beanie, especially when the original garment has a broad back or front panel. The project makes sense because the fabric already has the softness and stretch associated with baby wear, but the original garment shape is replaced with a cleaner two- or four-panel hat pattern.
Fit is the part I would treat carefully. Knit fabrics differ greatly in stretch and recovery, so copying a pattern from one material and cutting it from another can produce a hat that is too tight or too loose. A beanie made from upcycled fabric should feel comfortable, contain no hard interior seams, and never be used as sleepwear or placed on a sleeping infant.
Materials and Tools
· Soft stretchy baby clothing
· A well-fitting beanie pattern appropriate to the intended wearer
· Paper and pencil for tracing
· Fabric scissors
· Ballpoint or stretch sewing-machine needle
· Stretch stitch or narrow zigzag setting
· Polyester thread
· Pins or clips suitable for knit fabric
· Optional soft fabric band cut from the same garment
Steps
1. Test the fabric stretch before cutting. Hold the garment fabric gently and compare how it stretches across and along the grain. Position the pattern so the greatest stretch runs around the head rather than from forehead to crown. Avoid areas weakened by snaps, worn knees, cracked prints, or thick decorative seams, and cut matching panels without pulling the fabric out of shape.
2. Sew the main curved seams with a stretch-friendly stitch. Place the panels right sides together and sew the crown seams using a stretch stitch or narrow zigzag that can move with the knit. Keep the seam allowance consistent and avoid stretching the edge as it passes under the presser foot. Press seams with low heat if the fabric allows, using a pressing cloth over printed areas.
3. Finish the lower edge softly. Create a folded hem or attach a knit band, depending on the pattern. The finished edge should stretch easily without snapping stitches or creating a firm ridge. Try the hat on the intended wearer only while they are awake and supervised, and make sure the edge does not leave deep pressure marks or slip over the face.
4. Remove unnecessary embellishment and inspect the inside. Trim thread tails and check that no original buttons, snaps, sequins, or labels sit where they could rub the skin. Keep any added decoration flat and securely stitched. A homemade beanie should be treated as daytime clothing, not as a sleep accessory for an infant.
The cutest print in the pile is not automatically the best beanie fabric. I would choose stretch, recovery, softness, and fit first, then let the print be a bonus.
A Realistic Variation
If the fabric does not recover well enough for a wearable hat, use the same pattern to make a beanie for a doll or stuffed animal. You still preserve the favorite print without relying on tired knit fabric for a child’s clothing.
Make Sentimental Fabric-Covered Baby Books
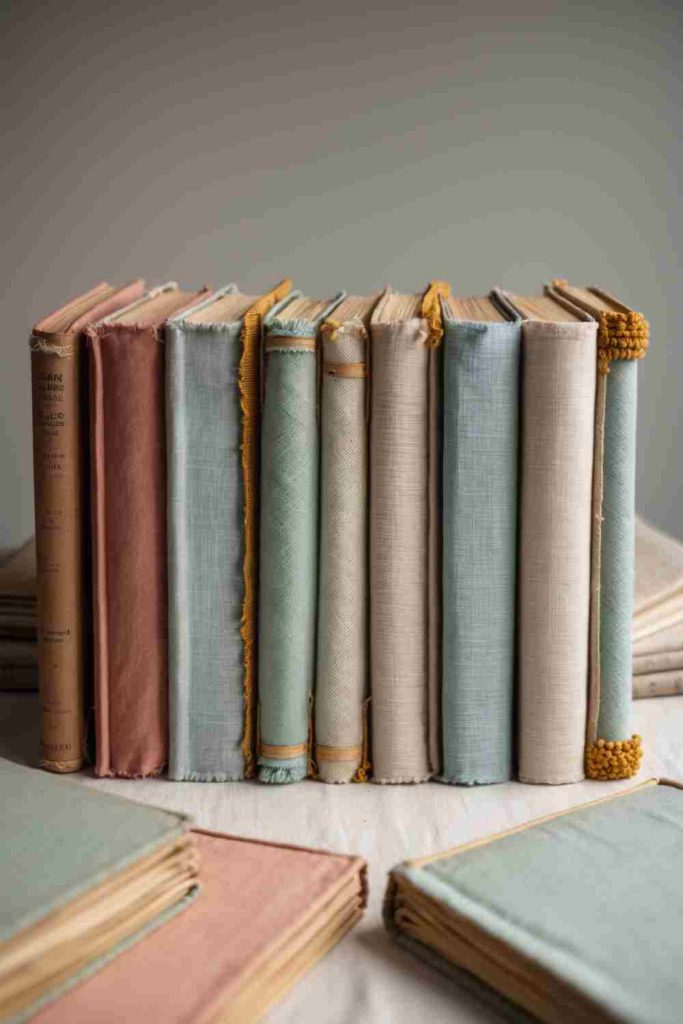
Covering a sturdy book with baby-clothes fabric keeps a recognizable piece of the garment intact and turns it into something that can sit on a shelf rather than inside a storage box. A small floral dress, striped sleeper, or embroidered shirt can provide a soft textile surface that immediately feels more personal than plain paper or printed book cloth.
I prefer this idea for memory books, photo albums, journals, or display books that will be handled by adults. Fabric edges and glue need to stay smooth, and any original buttons or raised trims should be removed or placed where they will not interfere with opening the cover. If the book will be used by a young child, keep the cover simple and avoid loose decorative pieces.
Materials and Tools
· A hardback notebook, album, or book
· Clean baby-clothes fabric large enough to wrap the cover
· Fabric scissors
· Ruler
· Pencil or washable fabric marker
· Suitable fabric or bookbinding adhesive
· Small brush or spreader for adhesive
· Clips or weights for holding folds while they set
· Optional plain paper or fabric for neat inside-cover panels
Steps
1. Choose a fabric section that can wrap without awkward seams. Lay the open book over the garment and identify a section that covers the front, spine, and back with extra fabric around the perimeter. If a meaningful motif should appear on the front, center it now. Press the cloth gently and trim away thick original garment hems that would create lumps under the cover.
2. Apply adhesive in a controlled thin layer. Protect the work surface and spread a light, even coat of suitable adhesive over one section of the book at a time. Smooth the fabric from the center outward so bubbles and wrinkles move toward the edges. Avoid saturating thin fabric because excess adhesive can soak through and leave stiff dark patches.
3. Wrap the edges and shape the corners. Trim bulky fabric at the corners while leaving enough material to cover the board completely. Fold the top and bottom edges inward first, then the sides, pressing each fold flat. Work carefully around the spine so the book can still open freely; too much glue or fabric packed into the hinge can make the cover resist movement.
4. Finish the inside and let the book settle flat. Cover raw folded edges on the inside with a neat paper or fabric panel if needed. Place the closed book under a light, even weight while the adhesive sets according to the product instructions, protecting the outer fabric from marks. Once dry, open the book slowly and check the hinges before adding any flat sewn label or embroidered keepsake detail.
The fabric already brings the memory. I would keep extra decoration minimal so the original print or embroidery remains the reason the book feels special.
Craft Adorable Hand Puppets from Beloved Outfits
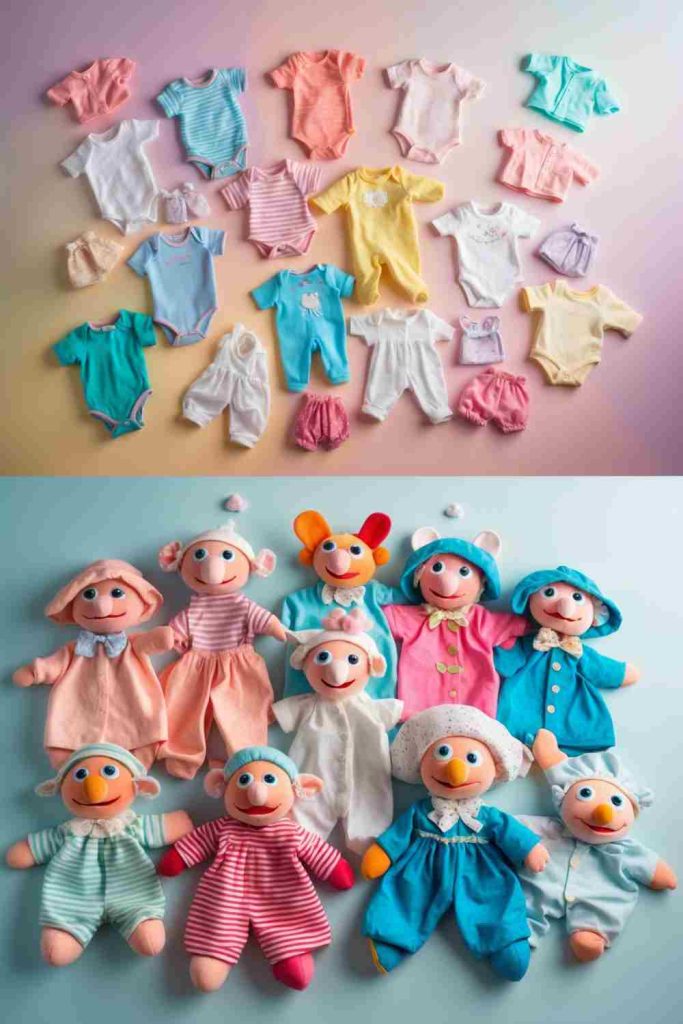
Hand puppets work well with baby clothes because the pieces are small, soft, and easy to combine. A printed shirt can become the puppet body while contrasting scraps form ears, hair, a nose, or other flat details. The original garment does not have to be in perfect condition, since damaged areas can simply be placed outside the puppet pattern.
If the puppet will be used around young children, keep the face entirely sewn or embroidered. Buttons and glued plastic eyes may look convenient, but they are unnecessary small parts. The hand opening also needs to be wide enough for comfortable play without leaving long loose cords or decorations that can catch on fingers.
Materials and Tools
· Soft baby-clothes fabric
· Paper for a simple mitten-style puppet pattern
· Fabric scissors
· Sewing machine or hand-sewing needle
· Thread
· Pins or clips
· Small fabric scraps for flat features
· Embroidery thread or fabric-safe permanent stitching for facial details
· Optional lightweight interfacing for very thin fabric
Steps
1. Draft a simple puppet shape around the user’s hand. Trace loosely around an adult or older child’s hand with enough space for movement, then simplify the outline into a rounded puppet body. Add ears or other extensions to the paper pattern rather than improvising directly on the sentimental cloth. Position the pattern over strong areas of the garment and cut two matching body pieces.
2. Add flat features before sewing the body closed. It is much easier to embroider eyes or stitch on fabric shapes while the puppet panel is flat. Keep every detail soft, flat, and firmly sewn, especially if young children will handle the puppet. Avoid beads, buttons, sequins, or any piece that could detach and become a choking hazard.
3. Sew the puppet perimeter securely. Place the body pieces right sides together and stitch around the sides and top while leaving the lower hand opening completely open. Reinforce tight curves and the base of any ears or extensions. Clip bulky seam allowance, turn the puppet right side out, and gently shape the edges without stretching thin knit fabric.
4. Finish the hand opening and test movement. Fold the raw lower edge inward and stitch a soft hem that will not scrape the wrist. Put the puppet on a hand and make sure fingers can move without straining the seams. Check again for loose threads or lifting appliques, and repair them immediately before the puppet returns to play.
A puppet gets its personality from shape and movement, not from tiny glued-on parts. That makes it easy to keep the project safer and still give each one a different character.
A Realistic Variation
Make a set of simple animal puppets using different clothing prints, or turn one especially meaningful garment into a display puppet for a nursery shelf rather than a heavily handled toy.
Create Stylish Headbands from Outgrown Onesies
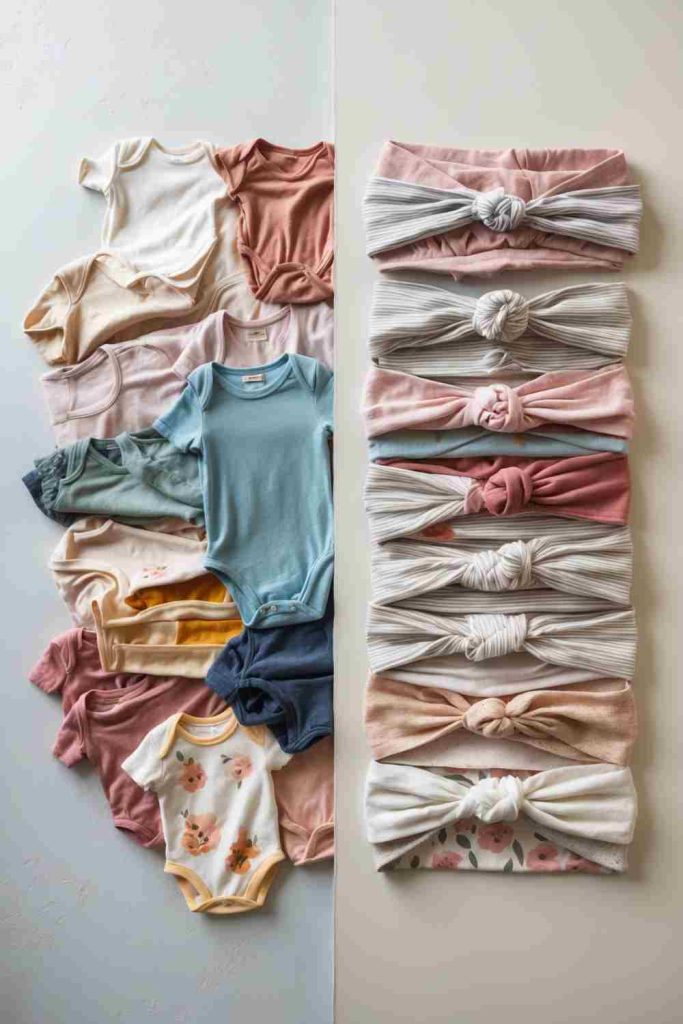
A headband needs only a narrow strip of stretchy fabric, so it can rescue useful sections from onesies that are otherwise too stained or worn to repurpose whole. Soft jersey also rolls and twists easily, which suits knotted or wrapped styles without requiring complicated tailoring.
The challenge is avoiding a band that feels tight, bulky, or unstable. Stretch varies from garment to garment, and decorative knots can shorten the usable circumference more than expected. For babies and young children, headbands should be worn only while awake and supervised, removed for sleep, and checked frequently for comfortable fit.
Materials and Tools
· Soft stretch jersey from an outgrown onesie or T-shirt
· Flexible measuring tape
· Fabric scissors or rotary cutter
· Ballpoint needle
· Stretch stitch or narrow zigzag
· Thread
· Pins or clips
· Optional paper strip for testing the finished width before cutting
Steps
1. Choose fabric with good recovery. Stretch a small section and release it. The fabric should return close to its original shape instead of staying permanently widened. Cut away areas around snaps, worn seams, and heat-damaged prints, then identify the direction of greatest stretch so it will run around the head.
2. Cut and test the band length conservatively. Use an existing comfortable headband as a reference rather than relying on a fixed measurement, because knit fabrics behave differently. Remember that a knot, twist, or center seam will use some of the length. Baste or clip the band temporarily and test the fit while the wearer is awake before making the final seam.
3. Sew a smooth stretch-friendly band. For a simple tube style, fold the strip lengthwise with right sides together, sew the long edge, and turn it right side out. Join the short ends with a secure stretch seam and conceal the join if the design allows. Keep bulky seam allowances away from the forehead and ears.
4. Check comfort every time it is worn. Inspect the band for tightness, twisted seams, loose thread, and any added decoration that has begun to detach. Remove it during naps, nighttime sleep, car-seat sleep, or any situation where an adult is not actively supervising. If the band leaves deep marks or slips toward the face, adjust or retire it.
I know a dramatic bow can look tempting, but for a baby headband I’d rather keep the knot soft, flat, and easy to monitor than add extra weight at the front.
A Realistic Variation
Use the same fabric-strip technique to make an adult or older-child hair band instead. It keeps the sentimental cloth in use while avoiding the fit concerns that come with infant accessories.
Sew Adorable Quilted Baby Bibs from Precious Fabrics
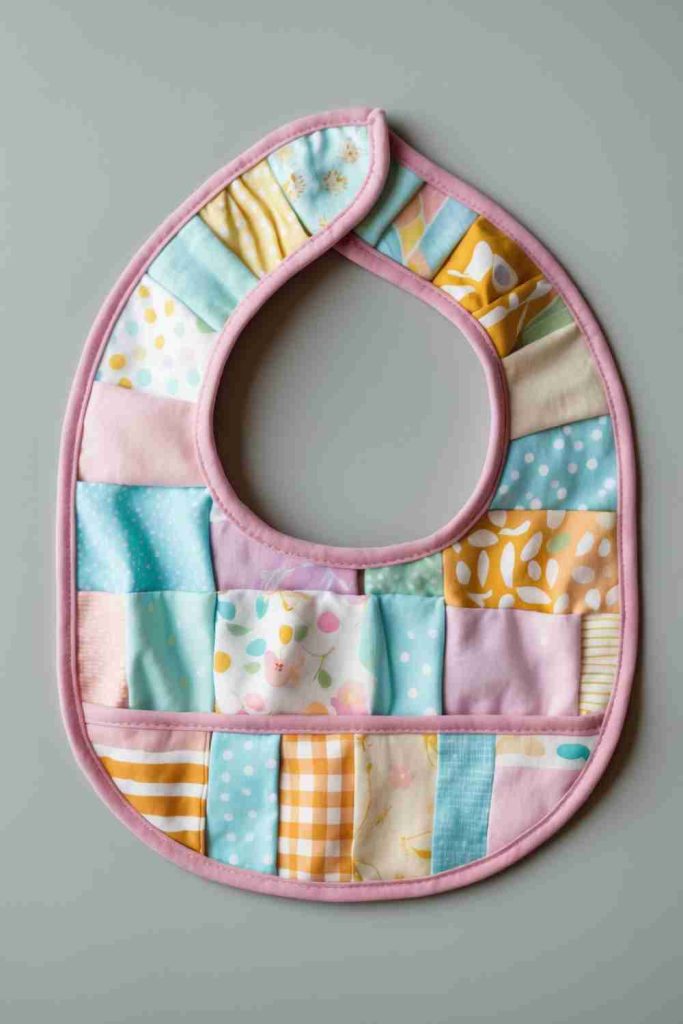
A quilted bib lets you combine several small clothing scraps in one compact project. This is useful when the garments contain tiny motifs you want to keep but no single piece is large enough for the whole bib front. The patchwork can be arranged like a miniature quilt, then backed with an absorbent layer so the finished item remains practical.
Because the bib sits close to the neck and may be washed frequently, I would keep the patchwork flatter than a decorative wall quilt. Avoid bulky seams, raised trim, and loose original embellishments. A soft backing and secure closure matter much more than squeezing in every possible fabric memory.
Materials and Tools
· Small clean baby-clothes scraps
· Paper bib template
· Soft absorbent backing fabric
· Lightweight batting only if a thin quilted feel is wanted
· Fabric scissors or rotary cutter
· Sewing machine and thread
· Pins or clips
· Bias binding or fabric strips for edge finishing
· Secure sew-on snaps or another suitable closure
Steps
1. Piece a small patchwork panel first. Cut the baby-clothes fabrics into manageable rectangles or squares and stabilize stretchy pieces when necessary. Arrange the motifs so the most meaningful sections sit away from the bib’s edge where they would be trimmed. Sew the patches into one flat panel, pressing seams gently to reduce bulk.
2. Cut the bib shape from the finished panel. Place the paper template over the patchwork and trace the bib front. Cut a matching shape from the backing and, if desired, a very thin inner layer. This method is easier than trying to arrange tiny patches directly inside a curved bib outline.
3. Join the layers with flat, washable construction. Layer the front and backing according to your preferred edge finish. Quilt a few simple lines through the layers if needed, keeping the surface flexible. Bind the perimeter or sew and turn the bib, making sure the neck curve remains smooth and no thick seam lands where it could rub sensitive skin.
4. Add the closure and perform a safety check. Attach a secure snap or other suitable closure and reinforce its attachment area. Remove any loose buttons, beads, bows, or original decorative hardware from the patchwork. Use the bib only while the child is awake and supervised, and inspect the closure and seams regularly as the fabric ages.
Patchwork gives you plenty of visual interest already, so I would not add extra trim around the neck. The flatter the bib stays, the easier it is to wash and the more comfortable it is likely to feel.
A Realistic Variation
If the precious scraps feel too delicate for regular bib washing, use the same patchwork panel to make a framed bib-shaped keepsake instead. You preserve the idea without asking fragile fabric to perform like everyday baby gear.
Frame Precious Outfits for Charming Nursery Wall Art
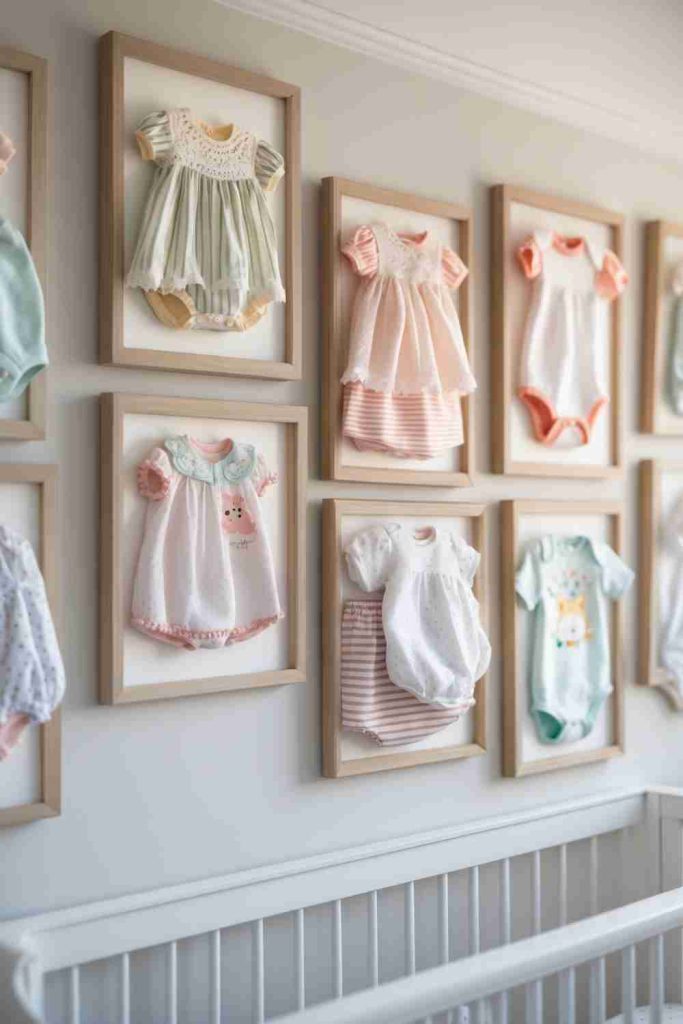
Framing is the gentlest option in this collection because it can preserve a favorite outfit with almost no cutting. A tiny dress, sleepsuit, cardigan, hat, or pair of booties can be arranged in a shadow box so the garment remains recognizable. If you are hesitant to cut a deeply sentimental piece, this is the project I would choose first.
The best display does not need to flatten the outfit completely. Soft folds can show its shape, while a neutral backing helps patterned fabric stand out. I prefer reversible mounting methods where possible, especially for heirloom clothing, because permanent glue can stain fabric and makes it difficult to remove later.
Materials and Tools
· Clean pressed baby outfit or small group of garments
· Deep shadow-box frame
· Acid-free or clean fabric-covered backing board
· Fine rust-resistant sewing pins, archival mounting strips, or hand stitches to backing fabric
· Needle and neutral thread
· Ruler and level
· Optional small printed label placed separately from the garment
Steps
1. Decide what the display should remember. Choose one outfit or a small coordinated group rather than crowding the frame. Lay the pieces on the backing outside the frame and experiment with sleeves, collars, pockets, and accessories until the shape reads clearly. Photograph your preferred arrangement before moving anything so you have a reference while mounting.
2. Prepare a stable backing surface. Cover the backing board with plain fabric if desired, pulling it smooth and securing it on the reverse. The backing should contrast enough with the garment that small details remain visible. Avoid strongly textured materials that can snag knitwear or lace when the outfit is removed later.
3. Mount the clothing with as little permanent alteration as possible. Use discreet stitches through strong seam allowances, fine pins placed where they will not tear the cloth, or other reversible mounting methods suitable for the fabric. Support heavier areas so the garment does not hang from one shoulder or narrow strap. Keep adhesive away from irreplaceable textile whenever a non-permanent method will work.
4. Close and hang the frame securely. Check that no part of the outfit is trapped against the glazing and that the frame closes without crushing bulky fabric. Hang the shadow box using hardware rated for its weight and place it where it cannot be pulled down by a child. Avoid damp or strongly sunlit locations if you want the fabrics to stay looking consistent for longer.
Not every upcycling project needs to change the object beyond recognition. Sometimes giving the original outfit a new role as wall art is enough of a second life.
A Realistic Variation
Frame only a pocket, embroidered motif, bonnet, or tiny pair of socks if the full garment is too large. A smaller shadow box can still hold a clear memory without dominating the room.
Sew a Colorful Small Toy Bag from Special Fabrics
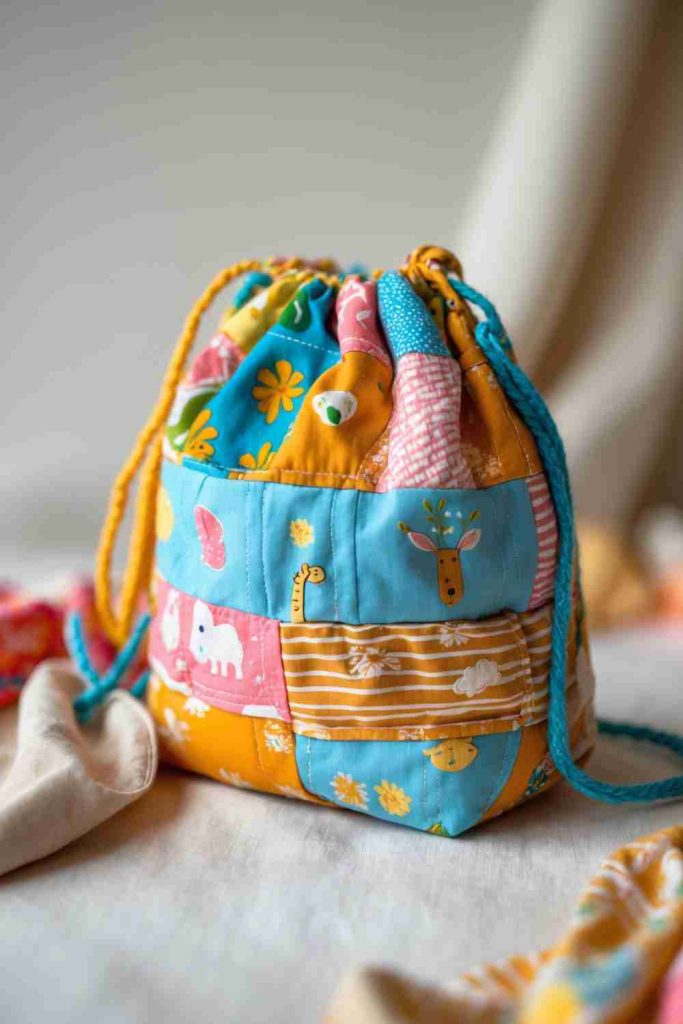
A small toy bag can use patchwork pieces from several garments while keeping the finished object light enough for soft baby-clothes fabric. The most practical version has a strong lining and a simple opening, so the sentimental outer layer is not forced to carry all the strain from blocks, soft toys, or travel items.
I would be cautious with long drawstrings. They are common on storage bags, but a bag stored where babies or toddlers can reach it should not have long cords or loops that invite entanglement. For child-accessible storage, short handles, a fold-over top, or an adult-operated closure is a better choice.
Materials and Tools
· Baby-clothes scraps for the outer panel
· Sturdy lining fabric
· Optional lightweight interfacing
· Fabric scissors
· Ruler or template
· Sewing machine and thread
· Pins or clips
· Short fabric handles, hook-and-loop tab, or other simple closure
· Optional saved pocket for the exterior
Steps
1. Create two strong outer panels. Piece baby-clothes scraps into front and back panels, using a stable base fabric if the scraps are very stretchy. Keep special motifs away from the lower corners where they may be hidden in seam shaping. Add interfacing only if the panel needs more body; the finished bag should still remain easy to fold and wash.
2. Construct the lining separately. Cut matching lining panels and sew the sides and bottom with reinforced seams. Box the lower corners if you want the bag to stand more easily, but keep the shape simple if you are new to bag construction. A washable reused sheet or sturdy shirt fabric can make a good lining without adding much bulk.
3. Join the layers and choose a safe opening style. Place the lining inside the outer bag and finish the top edge neatly. Add short adult-sized handles or a flat closure rather than long cords if the bag will be stored around young children. If you do choose a drawstring for adult-controlled storage, keep the bag and cord completely out of reach when not in use.
4. Load the bag lightly and inspect the stress points. Use the bag for soft toys, spare clothes, or lightweight travel items rather than heavy wooden objects unless the structure is designed for them. Check the base seams, handles, and saved clothing patches after use. Reinforce stretching early so a small repair does not become a torn sentimental panel.
The bag should suit the fabric you actually have, not the amount of storage you wish it could carry. A small, well-supported bag is a better use of thin baby jersey than an oversized sack under constant strain.
A Realistic Variation
Turn the same construction into a soft travel pouch for spare baby clothes, wipes, or changing-table supplies. A zipper-free fold-over version can be especially straightforward for beginners.
Craft Cute Soft Bookshelf Bins from Old Outfits
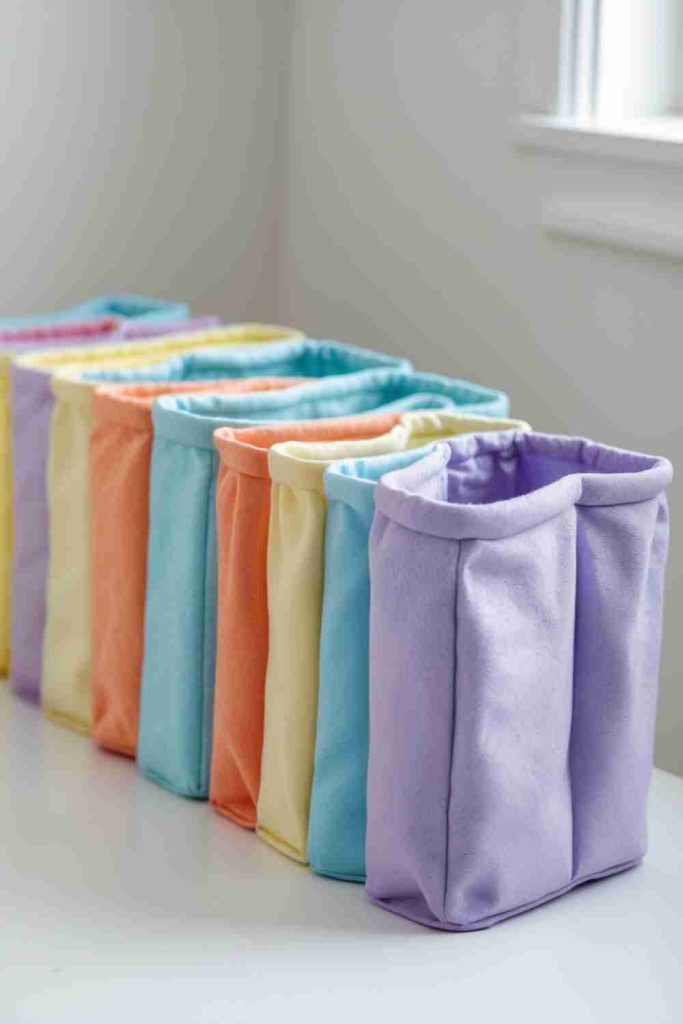
Soft bookshelf bins use a surprising amount of fabric, which makes them useful for combining several baby garments into one visible storage piece. Patchwork clothing can form the outside while a plain lining and internal stabilizer give the bin enough shape to hold books, cloths, or lightweight toys.
The trick is keeping the bin soft without letting it collapse completely. Baby-clothes fabric alone is rarely stiff enough, especially when it is jersey, so the outer layer needs support from interfacing, quilted batting, a sturdy lining, or a removable base insert. The finished bin should be treated as storage, not as a seat or climbing object.
Materials and Tools
· Several baby garments for the outer patchwork
· Sturdy lining fabric from a reusable household textile
· Interfacing, batting, or other washable stabilizer
· Paper or cardboard pattern for side and base panels
· Fabric scissors
· Sewing machine and thread
· Pins or clips
· Optional fabric-covered removable base insert
· Short fabric handle if desired
Steps
1. Build enough patchwork fabric for the outer shell. Join clothing pieces into larger panels, distributing thick seams and bold prints across the surface. Stabilize the patchwork after piecing if it still stretches easily. Square the finished panels before cutting the bin pieces so the box shape is based on straight edges rather than the irregular edges of the original garments.
2. Cut matching outer, lining, and stabilizing pieces. Use a simple rectangular-bin pattern with four sides and a base, or a one-piece wraparound body plus bottom. Cut matching pieces from the lining and stabilizer. If you want a removable firm base, cut that separately and cover it with washable fabric so it does not rub directly against the sentimental outer layer.
3. Assemble the outer shell and lining. Sew the outer side seams and attach the base, reinforcing corners where several layers meet. Construct the lining in the same way and place it inside the outer shell. Join the top edges neatly, adding a short fabric handle only if it is securely anchored and will not create a long loop within a young child’s reach.
4. Shape the bin and assign it a realistic job. Insert the stabilizer or removable base and smooth the corners so the bin stands evenly. Fill it with books, folded cloths, or lightweight toys rather than items heavy enough to distort the fabric. Keep the bin on a stable low shelf, and do not allow children to climb or sit on a soft storage container that is not designed to support body weight.
A slightly relaxed fabric bin can look lovely; it does not have to imitate a rigid plastic box. I would reinforce the base and corners, then let the upper sides keep a softer handmade shape.
A Realistic Variation
Make a narrow bin for board books or a small basket for rolled washcloths. Smaller proportions reduce the amount of stabilizer needed and make the patchwork easier to keep square.
Baby-Clothes Upcycling Choices That Can Waste Good Fabric or Create Safety Problems
Sentimental material tends to make us rush in two opposite directions: either we are afraid to cut anything, or we become so determined to use every scrap that the finished project gets more complicated than it needs to be. Neither approach is especially helpful. The following mistakes are worth checking before you commit the clothes to a new form.
Cutting the most meaningful garment before testing the pattern
Patterns for hats, bibs, blocks, and bags often need small adjustments for stretch, seam allowance, or scale. Make the first version from an ordinary scrap or less important garment. Once you know the shape works, move to the fabric you would be genuinely upset to waste.
Mixing stretchy and stable fabrics without controlling the stretch
Jersey can pull a patchwork seam out of shape when it is stitched directly to firm woven cotton. Stabilize the stretchier piece, reduce handling, and press instead of dragging the fabric. That one change can make quilts, pillow fronts, bibs, and storage panels look far more even.
Leaving original small decorations on child-use projects
Old baby clothes may contain buttons, bows, beads, sequins, snaps, decorative labels, or tiny appliques that have already been through many washes. If the new project will be handled by a baby or toddler, remove anything that is loose or not appropriate for that use. Flat stitched or embroidered details are usually easier to inspect and maintain than glued-on pieces.
Using long cords or loops on accessible storage
A drawstring may be convenient for an adult, but a long cord is not a detail I would add to a toy bag or laundry sack left within reach of a young child. Choose short handles, a fold-over top, or another simple closure, or keep corded storage completely out of reach and under adult control.
Treating handmade headwear as sleepwear
A soft beanie or headband can be a daytime accessory, but it should not become part of an infant’s sleep setup. Remove headbands and hats for sleep and check fit while the child is awake and supervised. This is true whether the fabric is new or upcycled.
Forcing fragile keepsake fabric into an everyday-use item
A thirty-times-washed onesie may still look lovely but have very little strength left. If the fabric is thinning, pilling heavily, or tearing around old seams, use it in framed art, a protected book cover panel, or another low-stress keepsake rather than asking it to carry weight or survive constant washing.
Overfilling the design with every saved detail
One pocket, one embroidered motif, or a few recognizable patches can communicate the memory more clearly than a surface crowded with every label and trim. I’d rather keep the strongest details visible and save the remaining scraps for a second project than make the first piece difficult to use or wash.
Frequently Asked Questions
Do baby clothes need to be washed before upcycling?
Yes, especially if the finished project will be sewn, glued, or washed again later. Clean fabric is easier to handle, and washing first lets the cloth settle into its normal size and texture before you cut it. Follow the care method appropriate to the garment rather than using a harsher process simply because it is being repurposed.
What is the easiest project if I have never sewn before?
Framed nursery wall art is the simplest because it can preserve an outfit with almost no sewing. A fabric-covered book is another approachable option if you are comfortable working with adhesive. For a first sewing project, a simple envelope pillow cover usually involves fewer curves and fitting issues than a bib or beanie.
How can I sew stretchy onesie fabric without it becoming wavy?
Handle the knit as little as possible, use a ballpoint or stretch needle, and avoid pulling the fabric while stitching. Lightweight stabilizer can help when a jersey piece is being used in patchwork or a structured panel. A narrow zigzag or suitable stretch stitch also allows the seam to move without breaking.
Can I use stained baby clothes in keepsake projects?
Often, yes. You can cut around the stain, hide it in a seam allowance, place it on the inside of a project, or use the unaffected fabric in small patches. If the stain covers the only meaningful motif, framing the garment as-is may be more sensible than trying to disguise the mark with heavy decoration.
Are old buttons and snaps safe to reuse on baby projects?
I would not automatically reuse them just because they were part of the original garment. Hardware can loosen with age, repeated washing, or cutting around the old seam. For anything a baby or toddler will handle, use only components that are appropriate, securely installed, and easy to inspect, and avoid unnecessary small detachable decoration.
What can I do with very small scraps left after these projects?
Keep the strongest scraps for flat applique, patchwork labels, small quilt patches, doll accessories, or a future memory collage. Thin trimmings can sometimes become stuffing for a decorative keepsake, provided the outer item is securely closed and the scraps are clean. You do not need to use every thread immediately to make the upcycling worthwhile.
How do I decide which baby clothes should not be cut?
If a garment has strong emotional value, is rare, handmade, inherited, or something you may want to pass on intact, set it aside before starting. Photographing the full collection can also help you decide. There is no rule that says successful upcycling requires cutting every sentimental object; sometimes preservation is the better second use.
Let the Clothes Keep Their Story in a More Useful Form
The most satisfying ways to upcycle baby clothes do not erase what made the garments meaningful. A pocket can still look like the pocket you remember, a familiar print can become one patch in a quilt, and a tiny outfit can stay almost completely intact inside a shadow box. The change is simply that the fabric stops living only in storage and begins doing something again.
Start with the project that matches both the condition of the fabric and your comfort level. Strong knit scraps can become a beanie or headband, sturdy mixed fabrics can support storage projects, small pieces can join a patchwork quilt, and the truly irreplaceable outfit can be framed instead of cut. If the finished item will be used by a baby or toddler, keep the construction simple, secure, and easy to inspect. That matters more than adding one more decorative detail.
For me, that is the useful heart of upcycling baby clothes: keep the memory, respect the material, and choose a new purpose that makes sense. Which tiny outfit in your own keepsake box would you most like to see outside the drawer again?