
A bed frame takes up more visual and physical space than almost any other piece of bedroom furniture, so even a simple change can alter how the whole room feels. Reclaimed timber, an existing metal frame, spare shelving, old drawers, slatted boards, and sound second-hand furniture parts can all become useful starting points. The finish matters, but the hidden structure matters more because the frame must support the mattress evenly and remain stable through everyday movement.
I’m always interested in ways to reuse sturdy materials without pretending every old board is automatically suitable for furniture. I don’t think a bed needs complicated carving or expensive hardware to feel considered. Clean proportions, a secure base, enough floor clearance, and one thoughtful detail such as shelving, drawers, a padded headboard, or visible timber grain can do far more than layers of decoration.
I know it can feel tempting to begin cutting as soon as an idea looks achievable, but a bed frame is not the place to improvise around weak joints or uncertain measurements. Check the mattress size, room access, wall position, and support system first. Then you can decide which reclaimed materials are genuinely useful and where new structural components are the safer choice.
Measure the Mattress, Room, and Access Route
The frame has to fit more than the mattress. It must also clear doors, skirting boards, radiators, sockets, drawers, wardrobes, and the route used to carry each component into the room. Measuring the complete space first helps prevent a frame that looks correct on paper but cannot be assembled, opened, cleaned around, or safely used where intended.
· Measure the actual mattress length, width, and depth rather than relying only on a size label, especially when reusing an older or custom mattress.
· Record the room dimensions, ceiling height, skirting depth, window position, radiator location, sockets, switches, vents, and door swing.
· Check the staircase, corridor, lift, doorway, and turning space before designing large one-piece headboards or long side rails.
· Allow practical clearance for bedside tables, drawer travel, under-bed boxes, cleaning tools, and access to both sides where possible.
· Mark the proposed frame outline on the floor with removable tape and test walking routes before cutting any material.
· Confirm that a tall headboard, canopy, shelf, or wall-mounted feature will not interfere with lights, windows, ceiling fans, curtains, or alarms.
· Plan how the frame can be dismantled later; reusable furniture is far more useful when it can leave the room without being destroyed.
Inspect Reclaimed Wood, Metal, and Existing Furniture Parts
Old materials can give a bed character, but they need a stricter inspection than decorative craft supplies. A scratched board may be perfectly usable after cleaning, while a polished-looking rail can still hide rot, loose joints, pests, or damaged fixings. Separate decorative pieces from structural components and reject anything that cannot be made reliably sound.
· Reject timber with active pests, deep rot, extensive mould, major splits, severe warping, crumbling edges, or an unknown treatment that makes indoor use questionable.
· Remove or safely deal with hidden nails, staples, screws, sharp brackets, splinters, flaking finishes, and metal burrs before measuring or cutting.
· Check reclaimed metal frames for cracks, bent joints, unstable welds, corrosion around fasteners, missing feet, and sharp open tube ends.
· Inspect old drawers, shelving units, doors, cabinet panels, and headboards for loose joints and confirm that they can be reinforced without weakening the original structure.
· Keep decorative pallet boards, thin cladding, and lightweight panels out of load-bearing positions unless a qualified person confirms their suitability.
· Clean materials before sanding, and use appropriate dust control, eye protection, hearing protection, and ventilation for the surface being worked.
· Preserve valuable, antique, or culturally significant furniture until its history and repair needs are understood; irreversible cutting is not always the best form of reuse.
Plan the Support System Before the Decorative Finish
A bed frame succeeds when the mattress is supported evenly, the joints resist movement, and the load reaches the floor through stable components. Paint colour and headboard styling can wait until the rails, legs, centre support, slats, platform, and fixings have been planned. The exact requirements depend on the mattress and frame design, so follow the mattress maker’s guidance and seek qualified help when the structure is uncertain.
· Decide whether the mattress needs closely spaced slats, a ventilated platform, an existing box base, or another approved support arrangement.
· Use structural-grade components for rails, legs, cleats, centre beams, brackets, and fasteners rather than relying on decorative boards or adhesive alone.
· Provide centre support and additional floor contact where the span, mattress, or frame design requires it; do not assume two side rails can carry every arrangement.
· Plan ventilation beneath the mattress and avoid sealing it against a damp wall or non-breathable base without checking the mattress requirements.
· Keep screw heads, brackets, staples, and rough edges away from the mattress fabric, bedding, hands, and areas where feet may contact the frame.
· Use wall anchoring only where the design genuinely requires it, and choose fixings suited to the wall and the real load rather than the visible size of the headboard.
· Dry-assemble the frame, test it progressively, and correct wobble or racking before adding paint, upholstery, drawers, shelves, or decorative trim.
Easy to Make Bed Frame
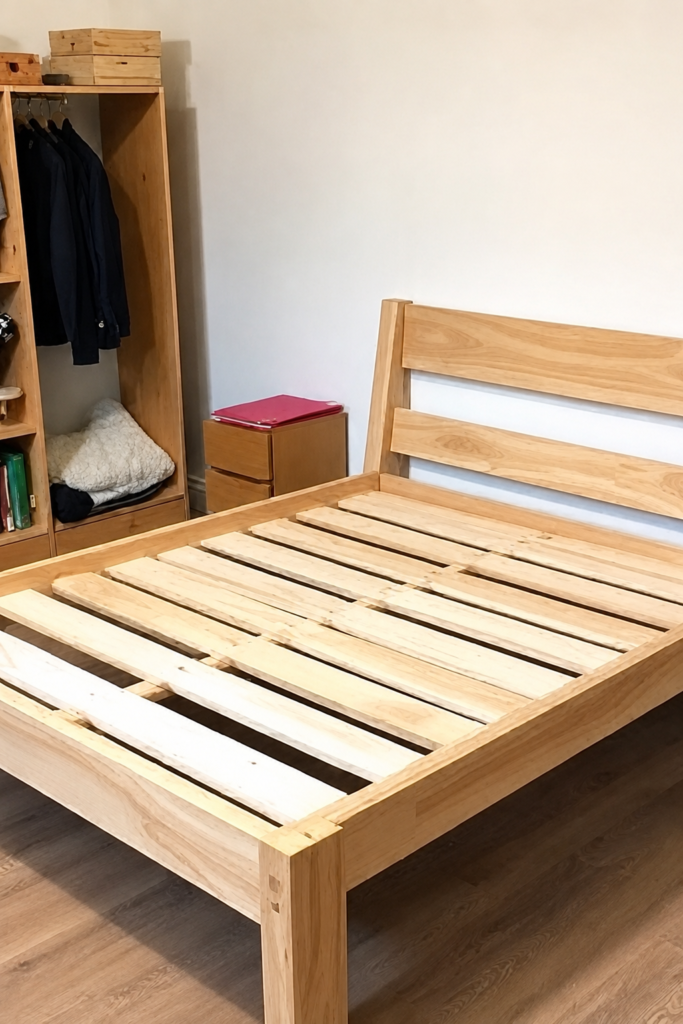
A straightforward timber frame with a slatted base and simple headboard can reuse sound boards without turning the project into a complicated piece of joinery. The clean outline suits rooms where storage and decoration are handled by separate furniture, and the frame can often be dismantled into side rails, end rails, slats, and a headboard for easier moving.
What makes this idea approachable is not a lack of structure but a limited number of well-planned parts. Use reliable bed connectors or properly designed joints, support the slats along both sides, and add centre support when the span or mattress requires it. Decorative cladding can hide the structure later, but it should never replace it.
Materials and Tools
· Sound structural timber for rails, legs, and headboard supports
· Slats or a ventilated mattress-support system suited to the mattress
· Bed-rail brackets, bolts, screws, or joinery chosen for repeated load
· Centre beam and support legs where required
· Tape measure, square, level, pencil, and straightedge
· Saw, drill or driver, clamps, and appropriate safety equipment
· Sandpaper and a low-odour finish suitable for indoor furniture
Steps for This Bed Frame
1. Confirm the complete dimensions. Measure the mattress and decide the small working clearance needed around it without creating large gaps. Mark the finished height, rail positions, and headboard width, then prepare a cutting plan that shows every structural component before any board is shortened.
2. Prepare the frame parts. Cut rails, legs, cleats, centre supports, and headboard pieces from sound material. Square the ends, remove splinters, and pre-drill where appropriate. Lay everything flat and compare opposite pieces so a small measuring error does not become a twisted frame.
3. Assemble the load-bearing structure. Join the rails to the legs with suitable hardware or proven joinery, fit the cleats and centre support, then check both diagonals. Tighten gradually while keeping the frame square. Add slats according to the mattress requirements and secure them against shifting without damaging the mattress.
4. Test before finishing. Place the frame on a level floor, apply weight progressively, and listen for movement or creaking at each joint. Correct wobble, rough edges, or exposed hardware first. Then disassemble if needed, apply the chosen finish, let it cure as directed, and rebuild the frame for use.
For me, the most useful version is one that comes apart cleanly. A frame that can be moved and repaired is easier to keep in use than a design permanently trapped inside one room.
Variation: Use matching reclaimed boards only on the visible outer faces, keep new structural timber inside, or add a narrow ledge to the headboard after the frame has been proven stable.
Bed Frame with Shelves

Shelving beside or behind a bed can replace separate nightstands and give books, a clock, glasses, and small personal items a defined place. Reused bookcases or cabinet sections may form the visual surround, while a newly built structural frame supports the mattress independently. Keeping those two functions separate makes the project safer and easier to repair.
The shelves should not become heavy towers that depend on the bed rails for balance. Anchor tall units as appropriate, leave clearance around sockets and lamps, and avoid open shelves directly above pillows where objects could fall. A shallow, continuous headboard shelf works well only when its fixings and edge details are carefully planned.
Materials and Tools
· Sound bed-frame structure or timber for a separate new frame
· Two compatible shelving units, reclaimed cabinet sections, or boards for shallow shelves
· Wall fixings suitable for the shelving and wall type
· Anti-tip hardware where appropriate
· Screws, brackets, cleats, and shelf supports
· Level, tape measure, stud or service detector, drill, and safety equipment
· Low-voltage lighting or cable clips only when installed according to product instructions
Steps for This Bed Frame
1. Map the bed and shelves together. Measure the mattress, frame, shelving depth, door swing, sockets, and walking space. Decide whether the shelves will sit beside the frame, behind the headboard, or as a separate wall-mounted feature. Avoid creating narrow gaps that trap dust or bedding.
2. Restore and reinforce the shelving. Check joints, backs, shelves, feet, and wall brackets. Repair loose units, remove unstable trim, and close sharp or unfinished edges. If two second-hand units differ slightly, align their visible heights rather than forcing the bed frame out of square.
3. Install the bed structure and storage separately. Build or place the frame first, then position the shelving with a small service gap where needed. Anchor tall units using appropriate fixings and confirm that the mattress, bedding, and pillows cannot push against loose shelves or cables.
4. Load the shelves thoughtfully. Keep heavier objects low, use bookends, leave the area over the sleeper clear of breakables, and route charging cables without pinch points. Test every drawer, shelf, and access route, then remove anything that makes the arrangement feel crowded or difficult to clean.
The part I would protect most is the clear space around the pillow. Storage is useful, but it should never make the sleeping area feel like a shelf is leaning over it.
Variation: Use one low cube unit at the foot of the bed, mount narrow picture ledges beside the headboard, or repurpose two small cabinets as freestanding bedside towers.
Budget-Friendly Bed Frame
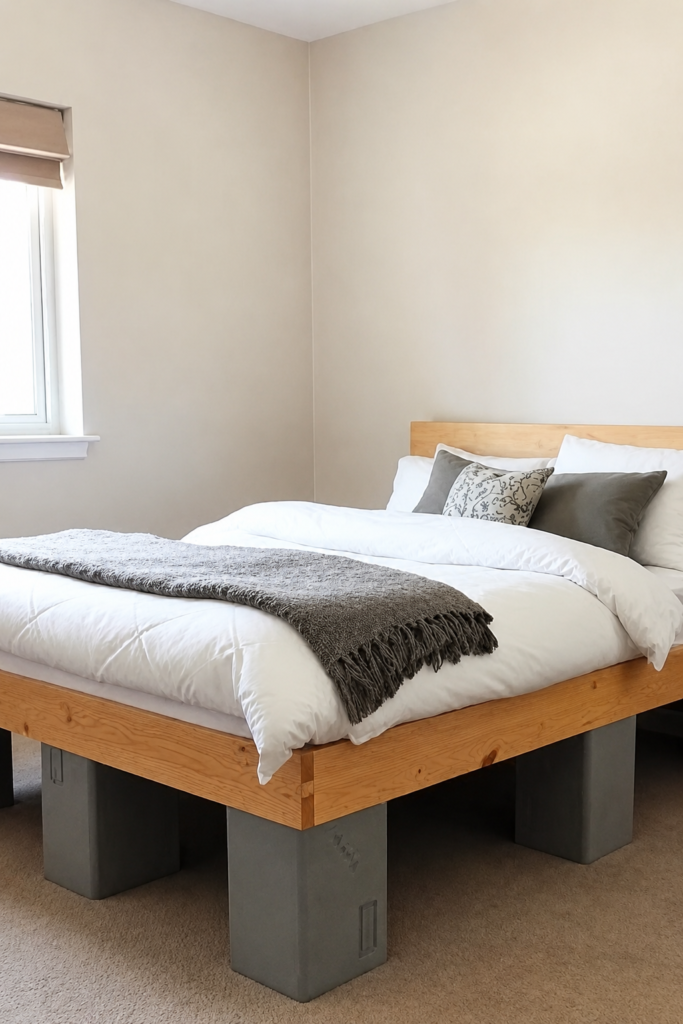
A lower-cost frame can combine reused timber with simple, readily available structural components, but saving money should come from reducing decoration and using materials wisely—not from removing essential support. Concrete blocks, crates, or stacked objects may look inventive, yet they can chip, shift, damage floors, or create unstable point loads when they are not designed as furniture supports.
A safer budget approach is often a basic timber rectangle with dependable joints, a proper centre support, and an uncomplicated slatted base. Reuse sound boards for visible surfaces, buy new fasteners where their condition matters, and spend time on careful measurement rather than trying to make every component free.
Materials and Tools
· Sound reclaimed and new structural timber as required
· Approved slats or mattress-support components
· Reliable bed connectors, bolts, screws, and washers
· Centre support and stable feet
· Floor-protection pads
· Basic measuring and cutting tools
· Indoor furniture finish or retained natural surface after safe preparation
Steps for This Bed Frame
1. Set a functional budget. List the non-negotiable structural parts first: rails, support, fasteners, slats, and stable floor contact. Then identify which visible pieces can be reclaimed. This prevents decorative bargains from using the money needed for reliable hardware.
2. Standardize the material. Select boards with compatible thicknesses for each structural role and trim damaged ends. Remove nails and check for warp before cutting. Keep thin pallet slats, crates, and decorative panels for cladding or storage rather than asking them to carry the mattress.
3. Build the simplest sound structure. Assemble a square frame with suitable joints, fit the centre support and slats, and keep the number of decorative projections low. Use floor pads under each contact point and make sure every foot bears evenly instead of rocking on an uneven board or block.
4. Test and refine without unnecessary extras. Load the frame gradually, tighten hardware, and correct movement. Sand only the areas that need it and finish the visible surfaces consistently. A plain frame that remains quiet and stable is a better result than a dramatic low-cost design that needs constant adjustment.
I’d rather spend the small remaining budget on reliable connectors than on trim. The best-looking frame quickly loses its appeal when it shifts every time someone turns over.
Variation: Paint mismatched but sound boards one colour, use reclaimed timber only for the headboard, or build a simple base now and add storage modules later.
Creative Bed Frame Plan

A creative frame can make the headboard the main artwork through geometric timber patterns, reused moulding, woven panels, painted shapes, or a patchwork of carefully prepared boards. The expressive surface sits above a conventional structural frame, allowing colour and texture to change without compromising the mattress support.
Complex pattern does not require a complex load path. Build the frame first, then treat the decorative headboard as a separate panel with a secure backing. Keep heavy carved pieces away from weak rails, remove sharp projections, and make sure the design can be dusted without loose pieces falling onto the bed.
Materials and Tools
· Sound structural bed frame or timber for a new frame
· Plywood or another appropriate headboard backing
· Reclaimed trim, thin boards, veneer offcuts, fabric, or paint
· Adhesive suitable for the materials plus mechanical fixing where needed
· Straightedge, square, template material, and pencil
· Saw, clamps, drill or driver, and safety equipment
· Wall or frame fixings designed for the completed headboard weight
Steps for This Bed Frame
1. Separate the structure from the artwork. Confirm the frame dimensions and choose whether the headboard will attach to the frame or wall. Make a full-size paper plan of the pattern, leaving clear zones for bolts, brackets, switches, and any bedside lighting.
2. Prepare the decorative components. Clean and flatten reusable materials, cut the geometric pieces, and sand sharp edges. Arrange everything on the backing before applying adhesive. I know it can feel tempting to fix each piece immediately, but the complete dry layout usually reveals awkward gaps and heavy areas.
3. Build the headboard panel. Attach pieces from the centre or another clear reference line, using spacers where consistent gaps are intended. Combine adhesive with suitable mechanical fixing when weight or movement requires it. Finish the perimeter so bedding and hands cannot catch on raw edges.
4. Mount and inspect. Fit the headboard to sound frame points or appropriate wall fixings, then test for rocking and flex. Sit against it gently before normal use and check that no part touches the mattress improperly. Add colour or a clear finish only after the panel is secure and easy to maintain.
The first arrangement rarely needs every leftover piece. Removing one or two competing patterns often makes the reused materials look more intentional.
Variation: Create a removable fabric panel, paint a geometric mural behind a plain frame, or use narrow offcuts in a simple chevron rather than a dense carved design.
Platform Bed Frame with Storage
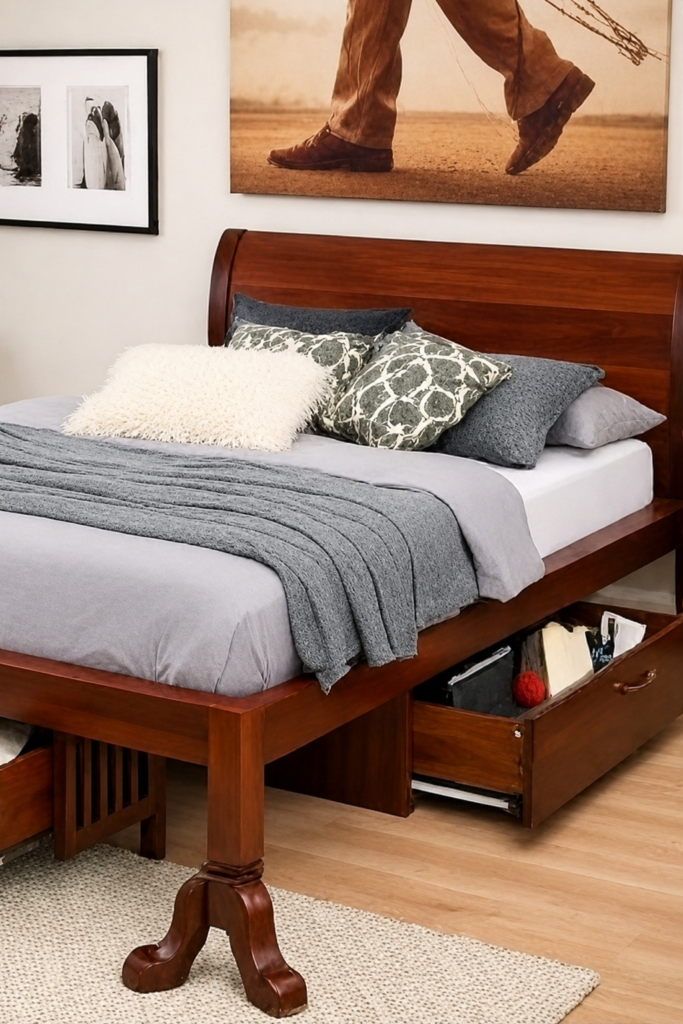
A raised platform can hold drawers or open compartments beneath the mattress, turning unused floor area into storage for bedding, clothing, or lightweight household items. Reclaimed cabinet boxes and drawers may be useful modules, but the mattress support should span over a stable, planned structure rather than resting randomly on mismatched units.
Storage adds weight, moving parts, and access requirements. Drawer runners need clearance, handles should not catch ankles, and the platform must remain ventilated according to the mattress guidance. Keep emergency access and room circulation in mind; a bed that stores everything should still be easy to move around and clean.
Materials and Tools
· Structural platform frame and support components
· Ventilated slats or platform panels suited to the mattress
· Sound reclaimed drawers, cabinet boxes, or new drawer components
· Drawer runners, stops, handles, and screws
· Centre supports and stable feet or plinth
· Tape measure, square, level, drill, saw, and safety equipment
· Edge trim, floor protection, and suitable finish
Steps for This Bed Frame
1. Plan the storage around access. Measure the room, mattress, bedside furniture, and drawer travel. Decide which side can open fully and which items need frequent access. Leave closed or fixed panels where a wall, radiator, or narrow passage makes drawers impractical.
2. Build the structural platform. Assemble a square, supported base with clear load paths to the floor. Fit centre supports, cross members, and the approved mattress-support layer. Do not rely on drawer boxes alone unless they were specifically designed and reinforced for the structural role.
3. Fit the storage modules. Repair drawer joints, align runners, add stops, and position handles away from walking routes. Use dividers or shallow boxes to prevent overloading. Check that every drawer can be removed for cleaning and that no screw end projects into the storage space.
4. Test the full system. Load the frame and drawers gradually, open each drawer with the mattress in place, and watch for racking or floor movement. Correct rubbing, sagging, or uneven feet. Then finish the visible surfaces and label hidden storage if that will make it genuinely useful.
The most practical drawers are often shallower than expected. Deep spaces invite heavy piles that are difficult to reach and harder on the runners.
Variation: Use rolling under-bed boxes inside a simple open platform, add one drawer only on the accessible side, or create lift-out storage lids at the foot of the bed.
Industrial Bed Frame Design

An industrial frame often combines dark metal, exposed fasteners, reclaimed timber, and a deliberately simple outline. An existing metal bed can be refreshed with cleaned timber panels or a new headboard, while a professionally fabricated frame may use steel components designed for repeated furniture loads. Decorative plumbing pipe should not automatically be treated as a structural bed system.
Metal edges, welds, tube ends, and heavy headboards need careful inspection. Keep the frame clear of electrical cables and damp walls, cap open ends, and isolate metal from vulnerable flooring. If cutting, welding, or altering a load-bearing metal frame is required, use a qualified fabricator rather than learning on the finished bed.
Materials and Tools
· Sound existing metal bed frame or professionally designed metal structure
· Reclaimed timber for non-structural panels or approved structural use
· Bed bolts, brackets, and fasteners compatible with the frame
· Protective caps, floor pads, and edge trim
· Wire brush or suitable cleaning tools for stable surfaces
· Metal-appropriate primer or finish when needed
· Measuring tools and appropriate professional fabrication support
Steps for This Bed Frame
1. Assess the existing metalwork. Check welds, joints, bolt holes, feet, corrosion, and straightness. Tighten only hardware intended to be serviced and reject cracked or severely weakened components. Clean stable surface rust safely, but do not grind into uncertain structural areas.
2. Design the timber and metal relationship. Decide which pieces are structural and which are decorative. Keep timber away from sharp edges and provide slots or brackets that allow secure attachment without drilling random holes into critical metal members. Protect the mattress from all fasteners.
3. Assemble on a protected level floor. Fit the metal frame, centre support, and mattress base first. Add timber panels or the headboard after stability has been confirmed. Use pads beneath metal feet and check that no tube end, bracket, or bolt creates a pinch or cutting hazard.
4. Finish and maintain. Apply compatible coatings according to their instructions and allow full curing before bringing bedding into contact. Recheck bolts after initial use, listen for metal-on-metal movement, and keep the frame dry. Address new corrosion or looseness early rather than hiding it with another coat of paint.
The industrial look is strongest when the structure is honest. Adding fake pipes and extra brackets can create more sharp points without making the frame any better.
Variation: Refinish an existing black metal frame and add a removable timber headboard, use dark-painted timber to suggest an industrial outline, or keep the metal base plain and introduce the style through lighting and shelving.
Minimalist Bed Frame

A minimalist frame uses restrained proportions, clean joints, and limited visible hardware so the timber, bedding, and surrounding space remain the focus. Reused boards can work well when they are carefully selected for consistent thickness and the damaged areas are either removed or placed where they do not weaken the structure.
Minimal does not mean unsupported or extremely low without thought. The mattress still needs the correct base, the frame needs enough stiffness, and floor clearance should suit cleaning, ventilation, and the user’s mobility. A slightly thicker rail can be more successful than a visually delicate member that flexes.
Materials and Tools
· Straight sound timber for the structural frame
· Approved slats or ventilated platform components
· Concealed or low-profile bed connectors
· Centre support and stable feet as required
· Tape measure, square, level, and marking tools
· Saw, drill or driver, clamps, and safety equipment
· Simple clear, natural, or single-colour furniture finish
Steps for This Bed Frame
1. Set the proportions. Decide the mattress inset, visible rail depth, floor clearance, and whether the headboard is necessary. Draw the frame from the side as well as above so a clean outline does not hide inadequate support or an uncomfortable height.
2. Prepare uniform components. Mill or select boards to compatible dimensions, square the ends, and remove defects from structural zones. Test the finish on an offcut because pale timber and clear coatings can show every glue mark, sanding scratch, and mismatched repair.
3. Assemble with controlled joints. Fit connectors, cleats, centre supports, and slats while keeping hardware concealed but still accessible for maintenance. Check the diagonals and floor contact. There is no need to bury useful bolts beneath permanent trim if the frame may need to be dismantled later.
4. Refine the small details. Ease the exposed edges, close gaps that could catch fabric, and apply the finish evenly. Load-test the frame, then place it with enough clearance from the wall for bedding and airflow. Keep styling simple so the structure remains easy to inspect and clean.
Minimal furniture exposes every proportion. One uneven overhang is more noticeable here than it would be on a heavily detailed frame, so dry assembly is worth the time.
Variation: Omit the headboard, add one narrow floating bedside ledge, or use reclaimed timber only as a calm perimeter around a new internal support structure.
Modern Bed Frame with Drawers
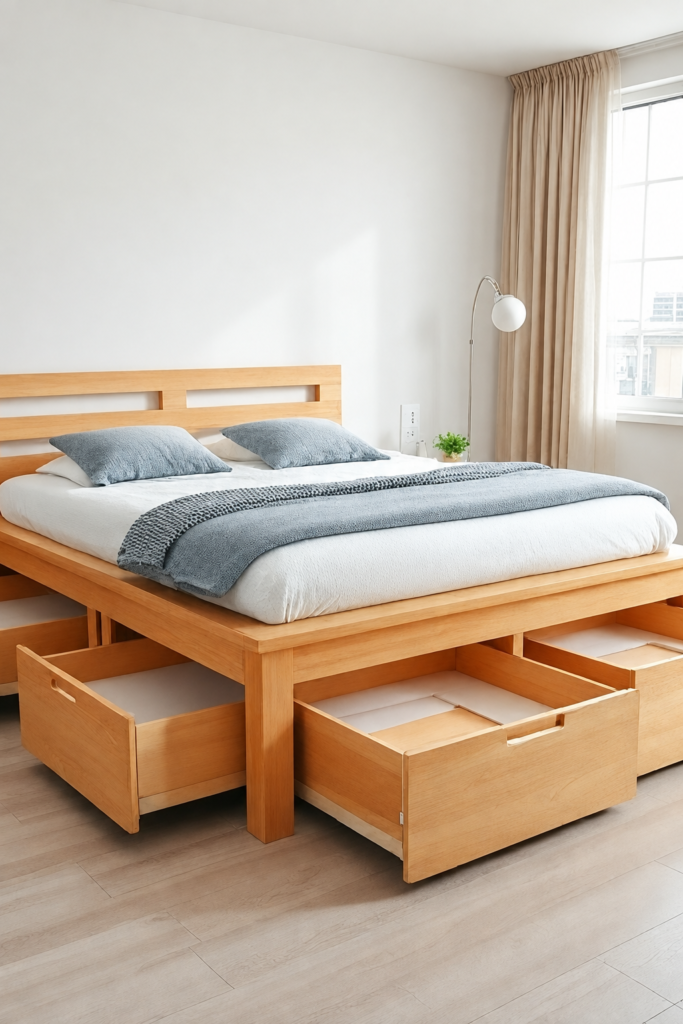
A modern drawer bed uses flush fronts, repeated lines, and integrated handles to keep storage visually quiet. Reused dresser drawers can provide useful boxes and fronts when their dimensions are compatible, while new runners and a purpose-built platform help the moving parts operate reliably under the bed.
The clean appearance depends on accurate alignment. Drawers need equal gaps, removable access, and enough clearance above rugs and uneven floors. Keep heavy items near the centre or lowest positions, follow the runner limits, and make sure the frame remains stable even when several drawers are open.
Materials and Tools
· Structural platform bed components
· Compatible reclaimed drawers or material for new drawer boxes
· Drawer runners, stops, and low-profile pulls
· Ventilated mattress-support system
· Centre supports, cross members, and floor pads
· Square, level, tape measure, spacers, drill, and saw
· Durable indoor finish suited to frequent handling
Steps for This Bed Frame
1. Design the drawer grid. Measure the accessible sides and decide the number, width, and depth of drawers. Leave structural zones for legs, centre supports, and cross members. Use repeated dimensions where possible so runners, fronts, and gaps can be adjusted consistently.
2. Restore or build the boxes. Repair loose corners, square each drawer, and replace weak bottoms. Fit runners to a level reference rather than following an uneven reclaimed edge. Test every box outside the bed before attaching decorative fronts or handles.
3. Build and align the platform. Assemble the frame with its full support system, then install the runners and drawers. Use temporary spacers around the fronts, check floor clearance, and open neighbouring drawers together. Add stops so a drawer cannot be pulled unexpectedly onto someone’s feet.
4. Finish for daily use. Ease handles and corners, seal frequently touched surfaces, and line drawers only with removable material. Load them gradually and check that the frame remains square. Re-adjust runners after initial use if the timber settles or the floor is not perfectly level.
Flush drawer fronts look calm, but tiny finger gaps can be frustrating. I would test the handle position with the bedding hanging naturally before final drilling.
Variation: Use push-to-open hardware only when it suits the floor and maintenance needs, mix two wide drawers with smaller compartments, or add drawers on one side and open bins on the other.
Platform Bed for Small Rooms
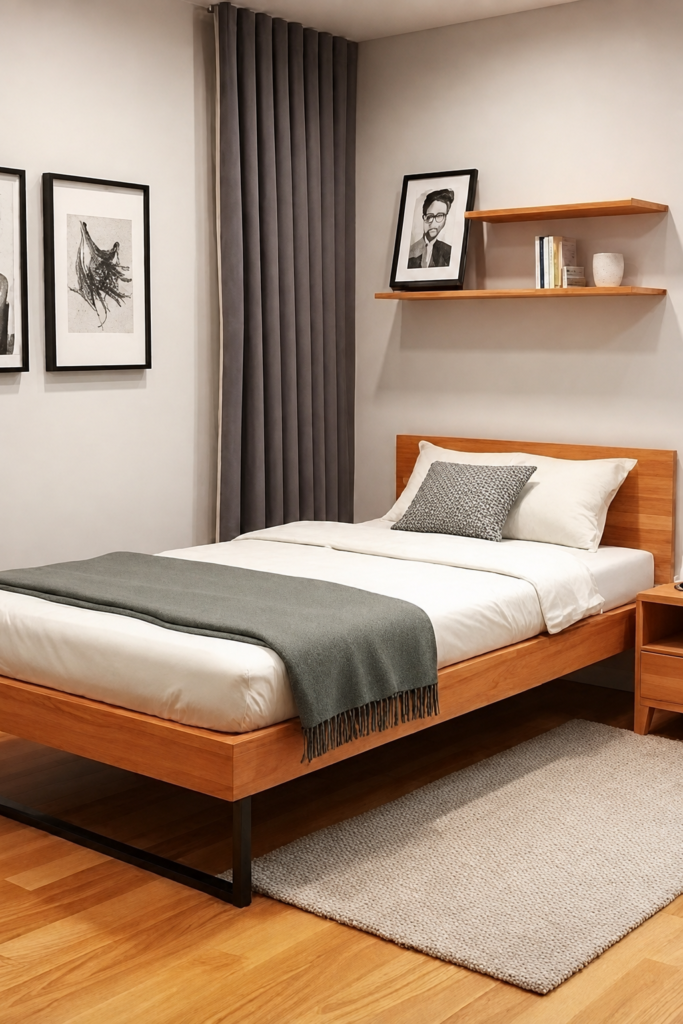
A compact platform bed can sit against one wall and keep its outline low, leaving the remaining floor area clear. The design may include a narrow shelf, wall-mounted light, or one accessible storage zone instead of surrounding the mattress with furniture. Reusing a sound single bed base or shortening only non-structural trim can be more practical than building from scratch.
Small rooms make every clearance important. The frame should not block the door, radiator, window, wardrobe, or route to an exit. Avoid deep shelves over the pillow and check whether the mattress can still be lifted, rotated, and removed without dismantling the room.
Materials and Tools
· Compact structural frame or sound existing base
· Mattress-support components suited to the mattress
· Low-profile legs, plinth, or stable floor support
· Optional shallow shelf or ledge installed independently
· Wall fixings and cable management for bedside accessories
· Measuring tape, removable floor tape, level, and drill
· Rounded edge trim and suitable indoor finish
Steps for This Bed Frame
1. Test the footprint before building. Tape the mattress and frame outline on the floor, open every door and drawer, and walk the normal route through the room. Check sitting height, window access, and whether bedding can be changed from the exposed side.
2. Choose a restrained frame structure. Build only the perimeter and support system needed for the mattress, keeping projections and wide corner blocks out of walking routes. If the bed touches a wall, allow for skirting and prevent the mattress or bedding from staying pressed against damp surfaces.
3. Add storage or a ledge selectively. Fit one accessible drawer, rolling box, or wall-mounted shelf where it will not narrow the passage. Secure wall features independently with suitable hardware. Keep lamps, charging cables, and breakable objects away from the sleeping area and floor path.
4. Live-test the room. Place the mattress, make the bed, open storage, and clean around the frame. Sit and stand from the usual side, then adjust anything that catches feet or makes the room difficult to use. A smaller, simpler addition often performs better than filling every available gap.
In a small room, the best space-saving feature may be an empty strip of floor. Not every centimetre needs a drawer or shelf attached to it.
Variation: Use a daybed-style frame, add rolling boxes rather than fixed drawers, or mount one narrow bedside shelf so the floor remains clear.
Vintage Bed Frame Project

A vintage timber or metal bed can become the centre of a room through careful repair, gentle cleaning, and a finish that respects its original details. Carved posts, iron scrollwork, old bolts, and decorative rails may be worth preserving when the structure remains sound. A reproduction or ordinary second-hand frame can also take inspiration from the period without pretending to be antique.
Older furniture may contain fragile joints, missing parts, unstable coatings, or dimensions that do not match modern mattresses. Before sanding or repainting, identify the material and consider whether the piece has historical or financial value. Structural repair, unknown old finishes, and metalwork may require a conservator, carpenter, or fabricator.
Materials and Tools
· Sound vintage or second-hand frame
· Replacement hardware matched carefully to the original system
· Appropriate cleaning materials and soft brushes
· Repair timber, metal parts, or professional restoration support
· Mattress support adapted without damaging valuable original components
· Protective floor pads and edge caps
· Finish or wax only when suitable for the identified surface
Steps for This Bed Frame
1. Document the frame before taking it apart. Photograph joints, hardware positions, labels, and decorative details. Measure the internal mattress area and note missing or altered components. Keep every original bolt and fitting in labelled containers even when replacements may be needed.
2. Clean and assess gently. Remove loose dust, inspect timber joints and metal connections, and look for pests, rot, cracks, corrosion, and previous repairs. Do not aggressively sand an unknown or valuable finish. Ask for specialist advice when the surface, age, or structural condition is uncertain.
3. Repair the support system respectfully. Tighten or replace compatible hardware, reinforce hidden structural areas where appropriate, and create a safe mattress base that does not force the old rails apart. Avoid drilling new holes through decorative or significant sections merely to fit modern accessories.
4. Reassemble and monitor. Build the frame on a level protected floor, test it gradually, and check tall posts or metal scrollwork for movement. Add the mattress only after sharp edges and unstable joints have been corrected. Reinspect periodically because older joints may loosen as the piece returns to daily use.
The scratches and softened edges may be part of the appeal. I wouldn’t erase decades of character just to make an old frame look newly manufactured.
Variation: Use only a restored vintage headboard with a separate modern support frame, reproduce the colour palette on a plain second-hand bed, or display an unsafe antique frame decoratively rather than using it for sleep.
Rustic Bed Frame Design
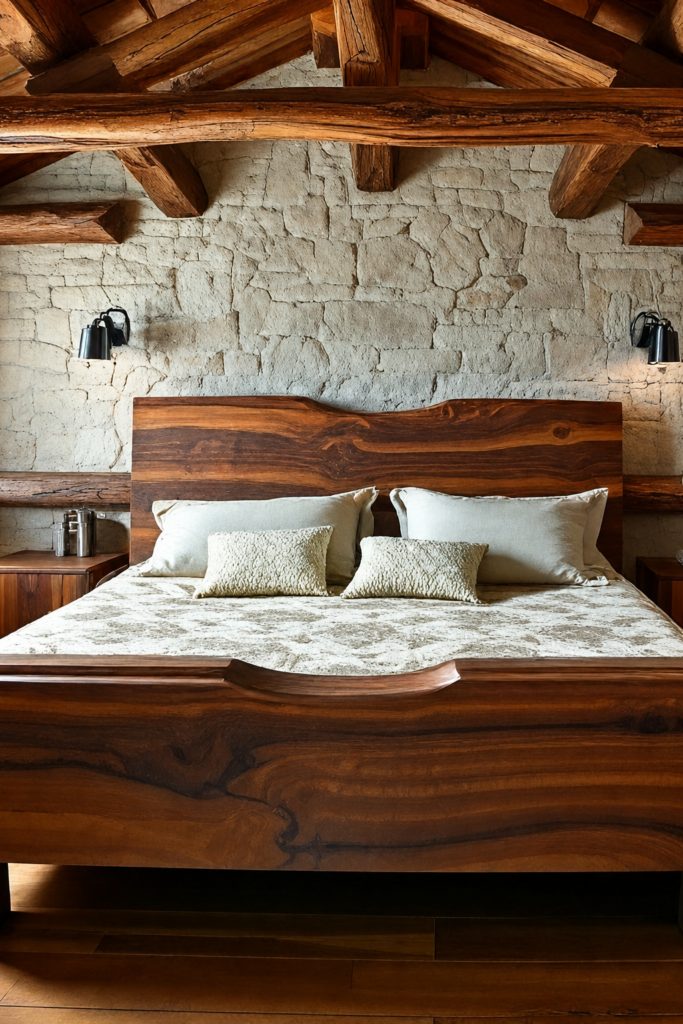
A rustic frame emphasizes visible grain, broad rails, simple joinery, and timber that still shows knots or previous wear. Reclaimed beams and boards can provide that character, but their age and thickness do not guarantee structural quality. Use the most dependable pieces for support and reserve irregular live edges or heavily marked boards for non-contact decorative faces.
Rough texture should remain visually rough, not physically hazardous. Remove splinters, protruding fasteners, bark that continues to shed, and deep dirt traps. Avoid unknown treated wood indoors, and make sure oversized headboards or posts are securely connected without creating heavy unstable leverage on the frame.
Materials and Tools
· Sound structural timber with visible grain
· Reclaimed boards for decorative rails or headboard panels
· Approved slats, centre support, and stable feet
· Heavy-duty bed connectors or proven joinery
· Metal detector or careful nail inspection tools for reclaimed wood
· Saw, drill, clamps, sanding tools, and safety equipment
· Low-sheen indoor finish compatible with the timber
Steps for This Bed Frame
1. Grade the timber by function. Set aside the straightest, soundest material for rails and supports, then use more irregular boards for the headboard or outer cladding. Cut away rot, large splits, and embedded metal zones rather than trying to preserve every weathered mark.
2. Prepare touch points carefully. Flatten joint areas, ease corners, and sand the places that contact bedding, hands, and feet. Leave saw marks or texture only where they cannot snag fabric. Test the finish on reclaimed grain because old boards can absorb colour unevenly.
3. Build the structural frame first. Assemble the square base, fit the centre beam and slats, and confirm stable floor contact. Add thick-looking rustic panels as cladding where possible instead of making every visible board carry the mattress. Secure tall headboard parts at several sound points.
4. Finish without hiding the material. Apply a low-sheen coating, wipe away excess from deep texture, and allow it to cure fully. Test the frame under load and check again for splinters after the timber moves. Keep the area beneath the bed accessible rather than sealing rustic boards against dust and damp.
Rustic does not need to mean bulky. One strong headboard board and a calm frame can show the material better than stacking heavy timber on every side.
Variation: Add reclaimed boards only to a conventional frame, use a simple plank headboard, or create the rustic effect with warm stain and woven textiles on a cleaner structure.
Space-Saving Bed Frame
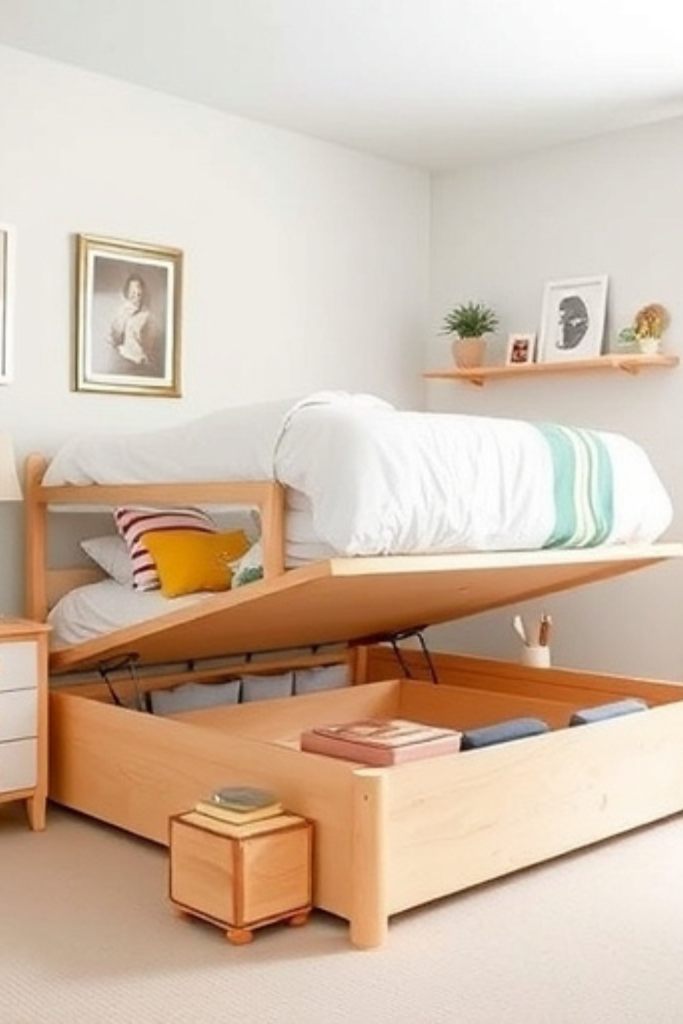
A space-saving frame can hide storage beneath a lifting mattress platform, combine a bed with a raised deck, or reduce the footprint through built-in compartments. The most manageable version for many homes is a hinged or assisted lift-up base designed with appropriate hardware, ventilation, and safe access rather than a heavy loose panel that must be held by hand.
Lift mechanisms, elevated platforms, and enclosed storage introduce pinch, fall, and entrapment risks. Use hardware intended for the mattress and platform weight, follow the supplier’s installation details, and seek experienced help when the moving structure is unfamiliar. Children and pets should not be able to enter or operate hidden storage unsupervised.
Materials and Tools
· Structural base and ventilated lifting platform
· Lift mechanism or hinges designed for the intended load
· Safety stays, stops, and handles supplied for the system
· Centre supports and secure floor contact
· Storage lining or removable boxes
· Tape measure, square, drill, spanners, and safety equipment
· Professional installation support where the mechanism requires it
Steps for This Bed Frame
1. Choose the safest storage method. Compare lift-up access with drawers or rolling boxes and consider who will operate it. Measure ceiling and wall clearance for the raised platform, confirm the mattress weight, and select hardware intended for that movement rather than adapting ordinary cabinet hinges.
2. Build the fixed base accurately. Assemble a rigid, square structure with a clear load path to the floor. Keep storage partitions away from the mechanism and provide ventilation. Finish internal surfaces smoothly so stored textiles do not catch on screws or rough timber.
3. Install the moving platform according to the system. Fit paired hardware symmetrically, use all required fasteners, and support the platform safely during installation. Add handles and stops where specified. Never test the lift by placing hands near an unprotected hinge or relying on another person to hold the weight.
4. Test through the full movement. Operate the empty platform first, then add the mattress and repeat while standing clear. Check that it stays in the intended positions, closes without trapping bedding, and cannot fall unexpectedly. Label the storage limits and keep the mechanism accessible for inspection.
Hidden storage is only helpful when opening it feels routine. A platform that is too heavy or awkward will simply turn useful space into a compartment nobody wants to reach.
Variation: Use low rolling boxes, shallow drawers, or removable storage panels at the foot of the bed instead of a full lifting mechanism.
Stylish DIY Bed Frame

A stylish DIY frame often combines a reliable timber base with one softer or more refined feature, such as a padded headboard, curved corner detail, contrasting timber border, or carefully painted panel. Reusing sound fabric, curtains, blankets, or upholstery offcuts can add texture, provided the material is clean and the padded section remains securely attached.
Upholstery should stay separate from structural joints and electrical fittings. Use a firm backing, fire-conscious materials appropriate to the setting, and a removable or inspectable design where possible. Avoid thick padding around floor-level corners where feet can catch, and keep buttons or trim secure and away from young children or pets.
Materials and Tools
· Sound structural frame and approved mattress support
· Plywood or another suitable headboard backing
· Clean upholstery fabric or reusable textile
· Firm padding or batting suited to the project
· Staples, upholstery tacks, adhesive, or sewing materials as appropriate
· Bed or wall fixings for the completed headboard weight
· Measuring, cutting, stapling, drilling, and safety tools
Steps for This Bed Frame
1. Design one focal feature. Decide whether the style comes from upholstery, colour, timber shape, or trim. Keep the bed base structurally simple and draw the headboard at full width. Check socket, lamp, window, and pillow positions before adding curves or projecting side panels.
2. Prepare the headboard layers. Cut the backing square, soften only the intended edges, and test the fabric for stains, odour, weakness, and stretch. Lay out padding and textile on a clean floor, then mark the centre lines so the pattern does not drift while fastening.
3. Upholster evenly. Secure opposite sides in stages, smoothing rather than pulling the fabric excessively. Fold corners neatly and keep staples or tacks on the back. Add buttons or trim only with reliable fixings, and avoid hard projections where someone may lean against the headboard.
4. Attach and inspect. Mount the finished panel to the bed or wall using hardware suited to its weight. Test it by leaning gradually, check for movement, and keep the lower edge clear of mattress ventilation. Vacuum or brush the textile periodically and repair loose trim before it becomes a snag.
One well-finished fabric panel can make a plain frame feel complete. I don’t think extra studs, piping, and tufting are necessary unless each detail is secure and easy to maintain.
Variation: Make a removable slipcover, stretch a vintage textile over a lightweight panel without cutting it, or paint the headboard shape directly on the wall behind a simple bed.
Wooden Slat Bed Frame
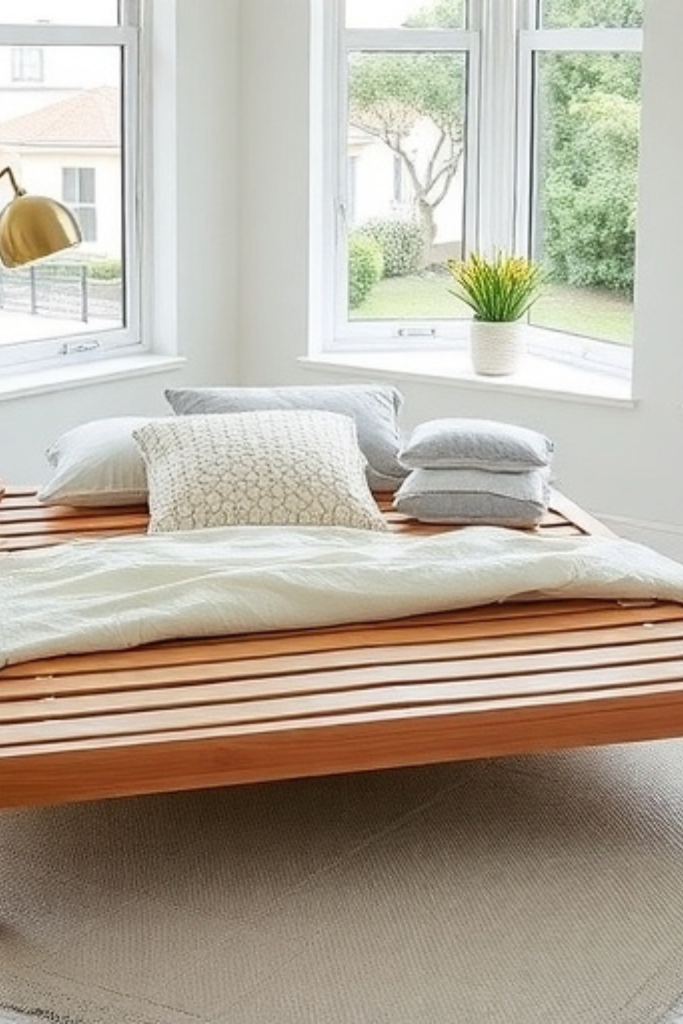
A wooden slat frame shows its construction through repeated rails or closely arranged support boards. The rhythm can continue into the headboard, where vertical slats allow light and wall colour to remain visible. Reclaimed boards are useful when they can be brought to consistent thickness and checked individually for cracks, knots, and old fasteners.
Mattress-support slats and decorative headboard slats perform different jobs. Follow the mattress guidance for support spacing and strength, secure each piece against movement, and provide centre support where required. Decorative gaps should not trap fingers, bedding, cables, or a child’s head; keep the design simple and suitable for the household.
Materials and Tools
· Structural side rails, end rails, legs, and centre support
· Straight slats suited to the mattress-support role
· Separate lighter slats for the headboard if desired
· Cleats, brackets, screws, bolts, and slat-retaining method
· Spacer blocks and a long straightedge
· Saw, drill or driver, clamps, sanding tools, and safety equipment
· Indoor furniture finish and floor-protection pads
Steps for This Bed Frame
1. Sort and size the slats. Inspect every board, remove embedded metal, and reject pieces with splits in critical areas. Bring support slats to consistent dimensions and cut matched lengths. Keep decorative headboard pieces in a separate labelled stack so they are not confused with load-bearing parts.
2. Build the supporting frame. Assemble the perimeter, fit cleats, centre beam, and support legs, then check square and floor contact. Confirm the intended slat spacing against the mattress requirements. Mark the positions along both sides rather than judging the gaps by eye.
3. Fit the slats consistently. Use a spacer block, keep each slat flat, and secure them with a method that prevents sliding or lifting without leaving hardware proud. Inspect from above and below for sharp edges. Then build the headboard slats on a sound frame with safe, deliberate gaps.
4. Finish and test the complete bed. Ease every exposed edge, coat all sides where the chosen finish requires it, and allow curing. Load-test the frame, check for noise, and re-tighten accessible hardware. Lift the mattress periodically to inspect slats and airflow rather than covering the system permanently.
Repeated slats make small inconsistencies visible, so a simple spacer block is one of the most useful tools in this project.
Variation: Use a solid timber base with a slatted headboard only, alternate two reclaimed wood tones, or create removable slat panels that can be replaced individually.
Bed Frame Building Choices That Can Cause Wobbling, Sagging, or Unsafe Support
A bed frame can appear finished while still hiding problems that show up only after the mattress, bedding, storage, and everyday movement are added. The safest approach is to treat stability, support, access, and maintenance as part of the design rather than as repairs to make later.
· Designing from a mattress label instead of measuring the actual mattress can create large gaps, crushed edges, or a base that does not support it as intended.
· Using decorative reclaimed boards as rails, centre beams, legs, or slats without checking their condition can lead to splitting, sagging, and sudden joint failure.
· Relying on adhesive, nails, crates, loose blocks, or stacked objects instead of suitable connectors and stable floor contact creates movement that finishes cannot hide.
· Skipping centre support or using slats that do not suit the mattress can concentrate the load, damage the mattress, or make the frame feel uneven.
· Fitting drawers before confirming the structural frame is square leads to rubbing fronts, uneven gaps, overloaded runners, and storage that cannot be removed for cleaning.
· Building shelves, mirrors, heavy headboards, or lighting over the pillow without reliable independent fixing creates unnecessary risk in the sleeping area.
· Sealing a mattress onto a poorly ventilated platform or against a damp wall can trap moisture; follow the mattress guidance and keep inspection access.
· Leaving protruding screws, sharp brackets, rough timber, open metal tubes, or low handles near walking routes causes snags and injuries even when the frame itself remains strong.
· Applying paint or upholstery before dry assembly makes it harder to correct twist, movement, poor clearances, and inaccessible hardware.
· Making the frame permanently inside the room may prevent future moving, repair, recycling, or reuse; plan dismantling points while the design is still simple.
Frequently Asked Questions
Can a beginner build a bed frame safely?
A beginner can manage a simple frame when the design is well documented, the tools are familiar, and the materials are sound. Keep the first version uncomplicated, follow the mattress-support guidance, and ask an experienced carpenter or other qualified person to review uncertain joints, spans, or load-bearing details.
Can pallet wood be used for a bed frame?
Pallet boards vary widely in condition, treatment, thickness, and previous use. Use only material whose history and markings are understood, reject contaminated or damaged boards, and keep thin or irregular pieces out of structural positions unless their suitability has been properly confirmed. Pallet wood is often better as decorative cladding than as the main frame.
How do I stop a wooden bed frame from squeaking?
First locate the movement rather than covering the sound. Check loose bolts, slats rubbing against supports, uneven floor contact, dry wood-on-wood joints, and a centre leg that is not bearing properly. Tighten or adjust the correct component and use pads or separators only where they do not interfere with the designed joint.
Does every bed frame need a centre support?
The answer depends on the frame span, mattress, support system, and manufacturer guidance. Many wider frames and slatted systems require a centre beam and floor-contact supports, but the exact arrangement should be designed for the specific bed. Do not guess from appearance alone.
Can I attach a headboard directly to the wall?
A wall-mounted headboard can work when the wall type, completed weight, fixing method, and installation height have been checked. Use hardware suited to the wall and keep the panel clear of sockets, hidden services, and places where it could trap bedding. Heavy or uncertain installations deserve qualified help.
What finish is suitable for reclaimed timber in a bedroom?
Choose an indoor furniture finish compatible with the identified timber and any previous coating. Clean the material first, test a hidden area, use ventilation and protective equipment as directed, and allow the finish to cure fully before it touches bedding. Unknown old coatings may need specialist assessment rather than sanding.
How can I add storage without making the bed too bulky?
Use storage only on the accessible side, choose shallow drawers or rolling boxes, and keep the structural support independent. Mark drawer travel on the floor, allow removal for cleaning, and avoid filling every gap. A smaller amount of storage that opens easily is usually more useful than a deep compartment that is difficult to reach.
Build the Bed Around Strength, Comfort, and What You Already Have
The most successful bed frame ideas begin with a sound support system and then use reclaimed materials where they genuinely improve the design. An old drawer can become useful storage, a worn board can give a headboard character, and an existing metal frame can be refreshed instead of replaced. None of those changes need to hide the joints, block ventilation, or make the bed difficult to move.
Start with the version that matches your tools and room. A simple frame, slatted headboard, or separate shelf arrangement may be a better first project than a lifting platform or a large integrated storage wall. Measure carefully, dry-assemble everything, test the load progressively, and ask for experienced help when the structure is uncertain.
A thoughtfully built frame should make the bedroom easier to use for years, not just look impressive on the day it is finished. Which unused timber, sound furniture part, or existing bed could you adapt into a safer and more useful starting point?