Preschool flower crafts work best when children can recognize the idea quickly but still have room to make it their own. A flower does not need perfectly even petals, matching colors, or a straight stem to feel complete. In fact, the wobbly circles, unexpected color choices, and oversized leaves are often the details that make a young child’s work feel personal. I’m Stella Eve Louise, and I especially like projects that reuse simple materials because they let children focus on making rather than on getting everything ‘right.’
The most useful flower activities also give small hands a real job: pressing, stamping, tearing, sticking, dabbing, sorting, or arranging. Those actions make the craft more engaging than a page that an adult has already prepared almost completely. I don’t think preschool art needs to look polished to be successful. What matters is that the materials are manageable, the process is safe, and the child can make meaningful choices along the way. These flower craft ideas use ordinary paper, printing materials, natural finds, tissue, pasta, cotton swabs, and stickers in ways that can suit a home craft table, preschool room, or small group activity.
Set Up the Craft Space Before Small Hands Get Busy
A few minutes of preparation usually makes preschool crafting calmer for both children and adults. I’d rather put the right amount of paint, glue, and loose pieces on the table at the start than keep interrupting the activity to solve avoidable messes. Keep the setup simple enough that children can see what is available without being overwhelmed by too many choices.
· Cover the table with a reusable mat, old newspaper, or scrap paper so children can work freely without worrying about every drip.
· Pour small amounts of washable, child-safe paint into shallow trays or plates instead of placing full containers on the table.
· Put glue into a small dish or use glue sticks where possible; a little glue is much easier for preschoolers to control than a large squeeze bottle.
· Pre-cut any difficult shapes that require precise scissor work, but leave easy tearing, arranging, stamping, and decorating tasks for the children.
· Keep a damp cloth, wipes, and a dry towel nearby so hands can be cleaned before paint or glue reaches faces, clothing, or other projects.
· Give each child enough elbow room. Flower crafts often spread outward, especially when petals, leaves, stickers, and printed shapes are being arranged.
Choose Materials That Match Preschool Skills
Preschoolers develop hand control at different speeds, so the easiest way to keep a project enjoyable is to match the materials to the child rather than expecting the child to adapt to a fiddly material. Bigger pieces, broad markers, thick stems, and easy-to-grasp printing tools usually work better than tiny decorative parts. You can still keep the finished craft interesting without making it complicated.
· Use sturdy paper or light cardstock when children will be gluing heavier items such as pasta, twigs, or several layers of tissue.
· Choose washable, non-toxic art materials that are intended for children, especially for paint, markers, glue, and stamp pads.
· Swap very small decorations for paper circles, large foam shapes, or drawn details when working with children who still put objects in their mouths.
· Offer two to four colors at a time for younger preschoolers; too many open paint pots can turn a clear activity into a muddy color-mixing session very quickly.
· Use child-safe scissors only when children are ready for them, and let an adult handle cutting that involves thick cardboard, plastic, wire, or tight curves.
· Keep natural materials clean and dry, and check leaves, sticks, and petals for sharp points, insects, mold, or sap before bringing them to the table.
Keep the Flower Crafts Open-Ended Without Losing the Plan
A clear example can help a preschooler understand the basic idea, but the goal is not to reproduce an adult sample exactly. I know it can feel tempting to reposition every petal or correct every stem, especially when the child is working slowly. Giving them a few simple boundaries instead usually creates a better experience and a more individual result.
· Explain the main action first: for example, ‘press the bubble wrap to make flower heads’ or ‘use the leaf like a stamp.’
· Let children choose the flower colors, number of petals, stem shapes, and placement whenever those choices do not affect safety.
· Demonstrate one print, dab, or glue placement, then hand the tool back rather than completing most of the craft for them.
· Accept asymmetry. A flower with three petals on one side and five on the other still gives the child practice in arranging and making decisions.
· If a child loses interest, simplify the remaining steps instead of pushing for a fully decorated result. One finished flower can be enough.
· Use conversation lightly: ask what the flower might smell like, where it could grow, or who they would like to give it to, but leave quiet children room to work without constant questions.
How Much Help Should an Adult Give During Preschool Crafting?
Preschoolers often need help with setup, but that does not mean adults need to control the result. I use a simple rule: adults handle the parts that require strength, sharp tools, or tricky preparation, while children handle the choices and actions that are safe for them.
An adult can cut thick cardboard, prepare a cotton-swab bundle, or portion glue; the child can still decide where the flower sits, which color goes first, and whether the petals are close together or spread apart.
It also helps to separate ‘helping’ from ‘fixing.’ Helping means holding a paper steady while a child presses a leaf stamp. Fixing means moving the print afterward because it landed at an angle.
One supports the child’s action; the other replaces the child’s decision. If the craft still works, I’d leave the angled print alone. Children quickly notice when an adult keeps correcting their work, and some stop taking risks because they start waiting for approval before every move.
For group crafting, prepare duplicate tools rather than expecting children to share one paintbrush, one glue bottle, or one tray of petals continuously. Waiting can be harder than the craft itself.
If supplies are limited, divide the activity into stations: one small group can stamp while another draws stems, then they can switch. This keeps hands occupied and reduces grabbing without turning the table into a strict rotation schedule.
Think about the ending before the activity begins too. Young children may finish at very different times. Keep a simple extension ready, such as adding a second flower, drawing a bug, decorating the back of a card, or using a finished puppet for pretend play.
Children who are done should not have to keep adding decorations just because others are still working. Knowing when a project feels finished is a useful creative decision in its own right.
Finally, photograph or display the work in a way that respects the child’s contribution. Write the child’s name and date on the back rather than over the front, and avoid trimming uneven edges unless the child wants that.
A preschool flower made from reused packaging or fallen leaves may not look like a store-bought decoration, but that is exactly the point: the process and the child’s choices are visible in the finished piece.
Paper Bag Puppet Flower
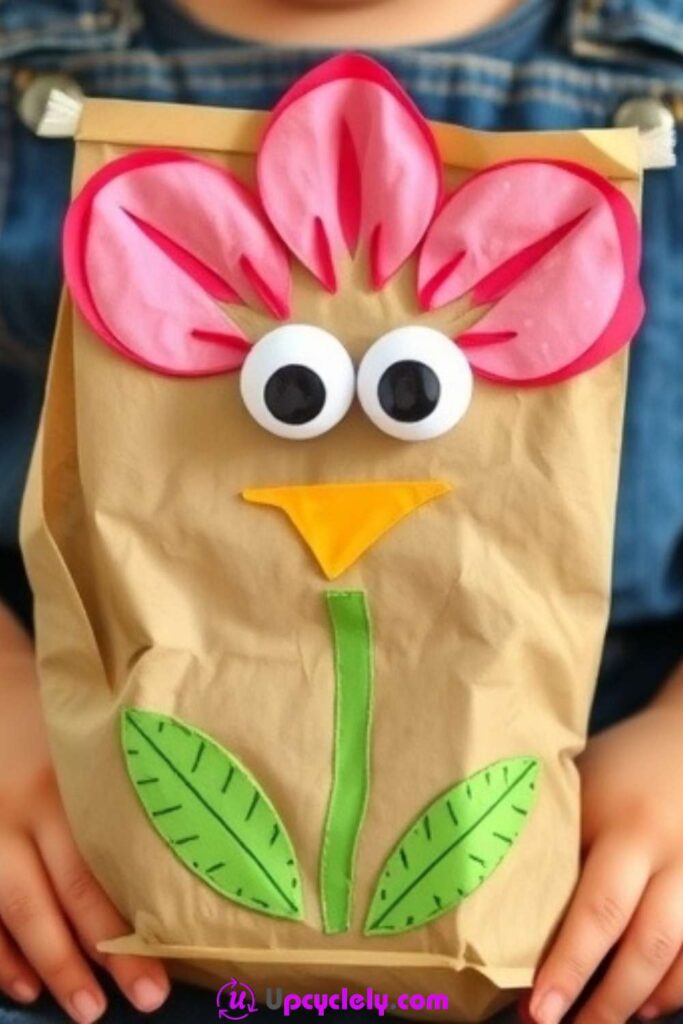
A paper bag puppet flower combines a familiar preschool puppet shape with an oversized flower head, which makes it easy for children to understand and fun to use after the craft table is cleared.
The bag becomes both the body of the flower and the hand pocket for pretend play. Large paper petals can be attached around the folded flap, while simple eyes and drawn details give the flower a face without requiring careful drawing skills.
The part I like most is that the finished project still has a purpose after the glue dries. Children can make the flower ‘talk,’ introduce it during circle time, or use several puppets as a pretend garden.
That second stage of play often matters more than adding extra decorations. For younger children, keep the face simple and avoid tiny loose embellishments. Paper eyes or marker-drawn eyes work just as well as small plastic pieces.
Materials and Tools
· A clean brown or plain paper lunch bag
· Colored construction paper or leftover cardstock for petals, stem, and leaves
· Child-safe crayons or markers
· Glue stick or washable craft glue
· Child-safe scissors for children who are ready, with adult help for curved petals
· Large paper circles or drawn eyes; optional large googly eyes only with close supervision
· Scrap paper for extra facial or decorative details
Steps
1. Prepare the bag and decide where the flower face will sit. Place the paper bag flat with the folded flap facing upward. Show the child how the flap can lift like a puppet mouth, then decide whether the eyes will sit on the flap or just above it. If the bag is wrinkled, flatten it gently so paper pieces will glue down more easily.
2. Make broad petals that are easy to arrange. Cut several large rounded petal shapes from colored paper, or let children snip simple oval shapes if their scissor skills are ready. The petals do not need to match. Arrange them in a loose circle behind the top of the bag before gluing so the child can move colors around and see how the flower head changes.
3. Build the flower face without crowding the puppet flap. Add paper eyes, drawn eyes, and a simple smile, nose, or small paper shape. If the flap opens as the mouth, keep glue away from the fold so the puppet still moves freely. Then secure the petals one at a time, pressing each base firmly onto the bag while leaving the outer petal edges loose.
4. Add the stem, leaves, and child-made details. Cut or tear a long strip of green paper for a stem and one or two broad leaves. Glue them to the lower part of the bag. Children can add marker lines, dots, stripes, or tiny paper shapes to the petals; I’d keep decoration on the front rather than adding bulky pieces that make the puppet harder to hold.
5. Let the puppet dry flat, then use it for play. Place the finished bag somewhere flat until the glued paper feels secure. Before play, check that nothing small is loose. Then let the child slide a hand into the bag and make the flower open and close its mouth, greet another puppet, or tell a short garden story.
For a simpler version, skip the face completely and turn the bag into a tall flower with a petal crown. For a group activity, give each child a different petal color and combine the puppets into a class ‘garden.’ If you want to reuse materials, scraps from old craft paper, clean gift bags, or leftover wrapping paper can become petals as long as they are easy to glue and not coated with loose glitter.
Bubble Wrap Printed Flowers
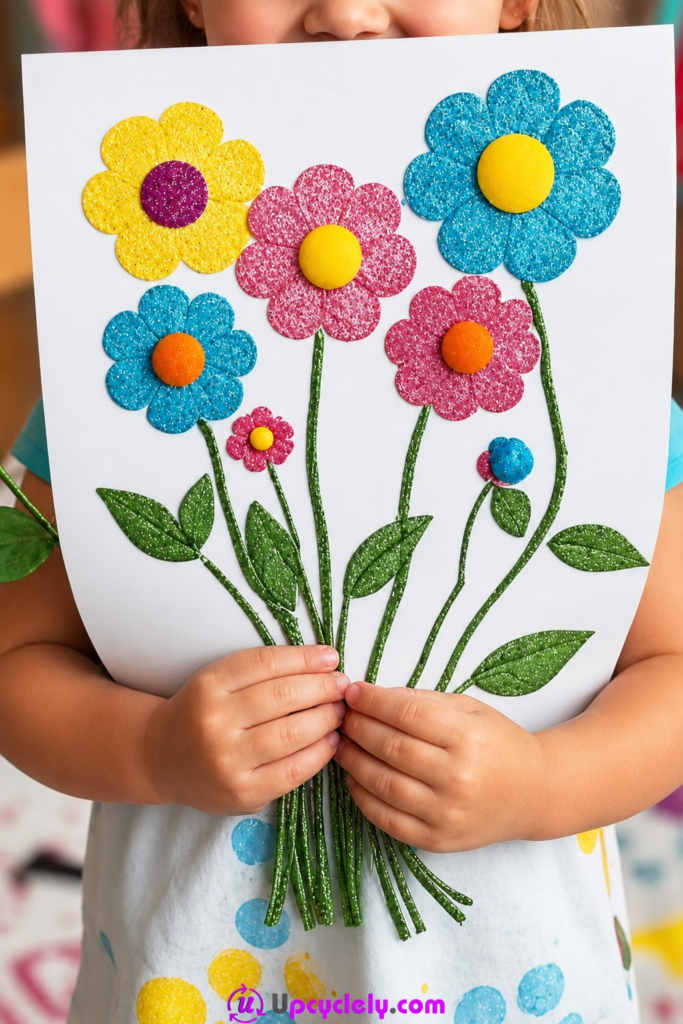
Bubble wrap is one of those packing materials that children immediately want to touch, and its raised bubbles make a naturally interesting printing surface. Instead of popping every bubble and throwing the sheet away, a small piece can become a reusable stamp for dotted flower heads. The printed circles look lively even when the paint coverage is uneven, so preschoolers do not need careful brush control to get a recognizable result.
This activity can become messy if the bubble wrap is overloaded with paint, so less is better. A thin coat across the raised side gives clearer dots and keeps children from sliding the stamp across the paper. You can use one large bubble-wrap circle for a single flower or several smaller pieces for a whole garden. I don’t think every print needs to be perfectly round; overlapping patches often make the picture more interesting.
Materials and Tools
· Clean bubble wrap saved from packaging
· Washable child-safe paint in a few flower colors
· White or light-colored drawing paper
· A shallow tray or plate for each paint color
· A broad paintbrush or sponge for coating the bubble wrap
· Green crayon, marker, or paint for stems and leaves
· Adult scissors for cutting bubble wrap into manageable pieces
Steps
1. Cut and test the printing pieces before the children begin. An adult can cut bubble wrap into hand-sized squares, circles, or simple flower-head shapes. Place the raised bubble side facing upward and press it dry onto scrap paper first so children can see which surface should receive paint. Rounded corners are easier for small hands than narrow strips that curl and twist.
2. Brush on a thin layer of paint. Put a small amount of washable paint in a shallow tray. Let the child brush or dab paint across the raised bubbles, but stop before paint pools between them. If the bubble wrap looks glossy and dripping, press it once on scrap paper to remove excess before making the main print.
3. Press straight down to make the flower head. Turn the painted bubble wrap over and place it on the paper. Encourage the child to press with a flat palm or several fingertips instead of rubbing side to side. Lift one edge and peel the bubble wrap upward slowly; then repeat in another part of the page, changing colors if desired.
4. Connect the prints with stems and leaves. Once the printed flower heads are no longer wet enough to smear, add green stems with a crayon, marker, or brush. Stems can be curved, zigzagged, or short. Let children add leaves wherever they like, and remind them that the garden does not need to look realistic to feel complete.
5. Layer a few final prints only where the page needs them. If a flower head looks too pale, add one lighter second print rather than repeatedly stamping the same spot. A second color can overlap the first to create a fuller center. Then stop before the page becomes so covered in paint that the bubble texture disappears.
A useful variation is to cut one piece of bubble wrap into a long strip and print a border of small flowers around a card or classroom sign. You can also print onto reused paper grocery bags that have been opened flat. If children enjoy the sensory part more than the final picture, make a separate scrap sheet for repeated stamping so they can keep experimenting without turning the main artwork into one large paint patch.
Dot Marker Flowers
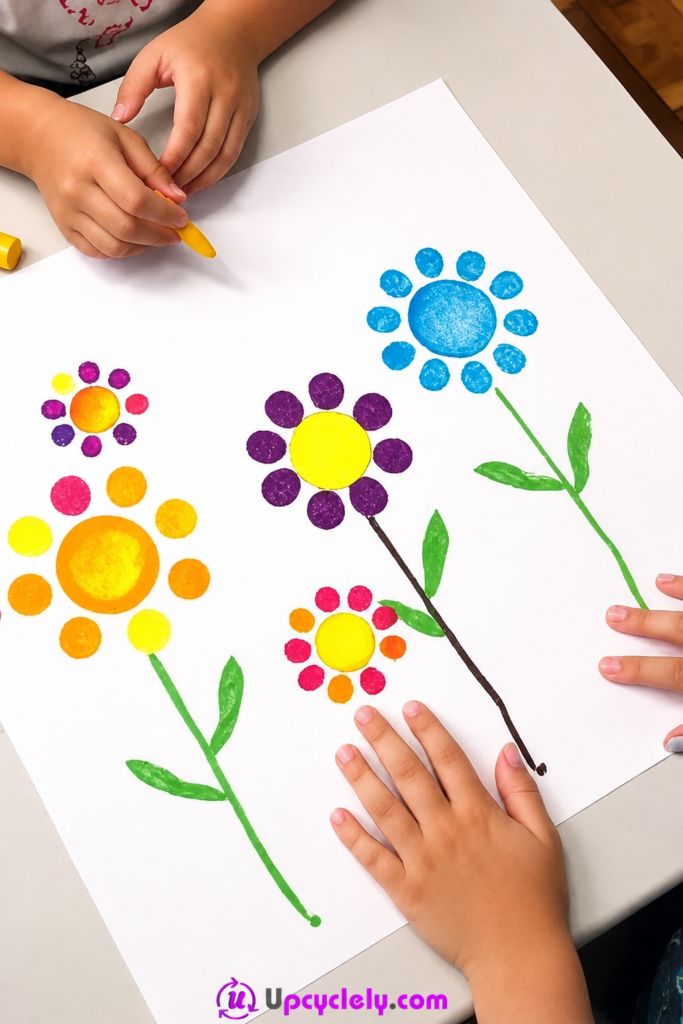
Dot markers are well suited to preschool flower pictures because the action is simple: press, lift, and repeat. Children who are not ready to draw a controlled circle can still create a flower center and a ring of petals with bold dots. The tool also gives quick visual feedback, which helps children stay engaged when a longer brush-painting activity might feel frustrating.
The challenge is usually not making the flower; it is knowing when to stop. A child can happily stamp until every inch of paper is covered. I’d give the page a loose plan first—perhaps one large flower, three medium flowers, or a border—then allow freedom inside that plan. This keeps the child’s choices visible instead of letting all the colors merge into a single dotted field.
Materials and Tools
· White or light-colored paper, preferably sturdy enough for repeated dabbing
· Washable dot markers or bingo-style daubers made for children
· Green dot marker, crayon, or thick marker for stems
· Reusable table mat or scrap paper underneath
· A damp cloth for quick hand and table cleanup
· Optional circular paper shapes for children who want a starting guide
Steps
1. Choose the first flower center and make one strong dot. Place the paper in front of the child and ask where the first flower should grow. Press one dot firmly enough to make a clear center, then lift the marker straight up. If the marker needs repeated pumping to release ink, an adult should test it on scrap paper first so the child is not splashing excess liquid onto the page.
2. Build petals around the center with a second color. Choose another color and place dots around the middle, leaving a little space between them if possible. Younger preschoolers may create only three or four petals, while older children may make a full circle. Let the petals vary in distance and size rather than repositioning the child’s hand.
3. Add stems using the easiest tool for the child. A green dot marker can create a dotted stem, while a thick crayon or marker can make one continuous line. Draw or stamp downward from the flower head, then add leaves as pairs of dots, short lines, or simple oval scribbles. The goal is recognition, not botanical accuracy.
4. Create a small garden with different dot patterns. Repeat the process in two or three areas of the paper. Try a flower with a large center and tiny petals, another with alternating petal colors, or a flower made completely from green and blue if that is what the child chooses. This is a useful place to talk about patterns without turning the craft into a lesson the child must ‘pass.’
5. Add final layers carefully and let the paper rest. If children want more detail, they can add a small contrasting dot inside each petal or a second ring around the flower center. Avoid pressing wet dots directly on top of one another too many times because the paper can soften. Lay the finished sheet flat until the marker ink is dry to the touch.
For children who tire quickly, make one flower on a folded card rather than filling a large sheet. Another option is to place a reused jar lid on the page, trace around it lightly, and let children stamp petals around the circle. The line can stay visible; there is no need to hide every guide mark. Those little process clues are part of what makes preschool art feel genuine.
Leaf Stamp Flowers
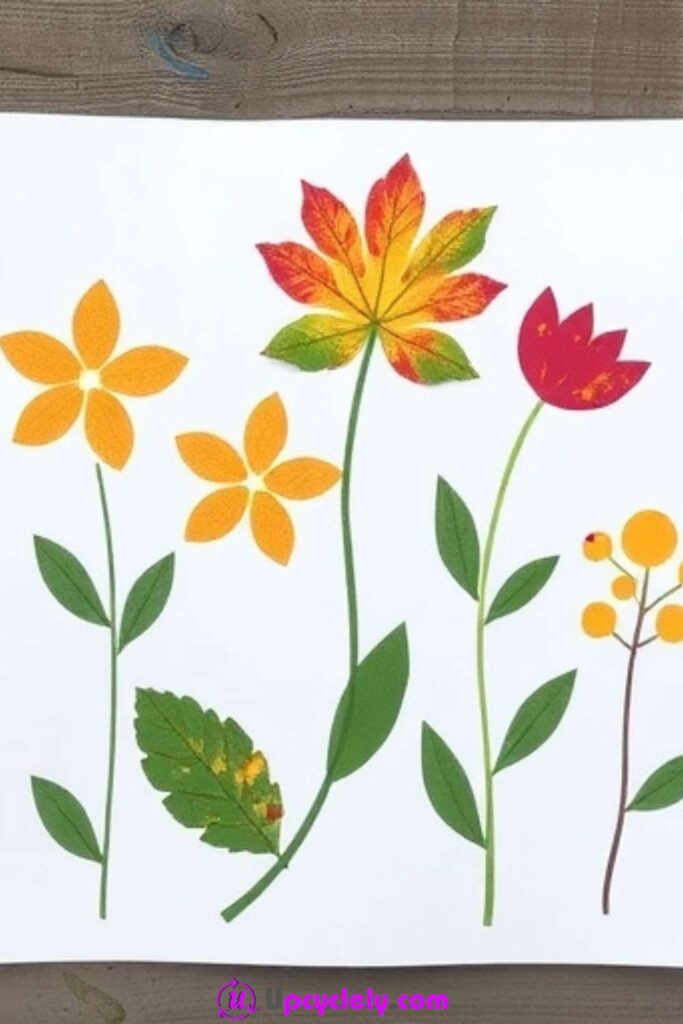
Leaf stamping turns a short nature walk into part of the craft, which is useful for preschoolers who do better when sitting work is broken up with movement. Different leaves leave different marks: broad leaves create large petal shapes, narrow leaves make pointed petals, and textured veins can show through the paint. The same leaf can be rotated around a center to build a flower without cutting a single paper petal.
Choose fallen leaves where possible and avoid picking from plants that may irritate skin. The leaves should be dry enough to handle but not so brittle that they break as soon as a child presses them. I would also avoid leaves with sharp edges or thick, prickly stems. A simple, flexible leaf gives the clearest print and is easier for small fingers to lift from the page.
Materials and Tools
· Clean, non-prickly leaves in a few shapes and sizes
· Washable child-safe paint
· White, cream, or light-colored paper
· Small brushes or sponge pieces for coating leaves
· Shallow paint trays
· Green marker, crayon, or paint for stems
· Scrap paper for testing leaf prints before the final picture
Steps
1. Collect and sort a small group of suitable leaves. Invite children to notice shape, size, and vein patterns while collecting. Back at the table, wipe away loose dirt and set aside damaged or sharp leaves. Let each child choose two or three favorites rather than giving them a huge pile that becomes distracting.
2. Paint the textured side with a light coat. Place one leaf vein-side up on scrap paper. Brush paint across the surface, making sure the edges receive some color but avoiding thick puddles. A thin coat usually reveals more leaf texture than a heavy coat, and the child can always print a second time if the first mark is pale.
3. Press the leaf onto paper and peel it away slowly. Turn the leaf over, place it where a petal should go, and press across the back with flat fingertips. Lift from the stem end or one corner and peel upward rather than sliding. Show the child the print before repeating so they can decide whether to use the same leaf again or choose a new shape.
4. Rotate prints around a center to form the flower. Make several leaf impressions pointing outward from one central area. The prints can overlap slightly, and gaps are fine. Add a painted or drawn center when the petals are in place, then create a stem and simple leaves below the flower using green paint or crayon.
5. Use leftover paint for a second, lighter print. Before repainting a leaf, try making a ‘ghost print’ beside the first one. The lighter impression often shows more vein detail and creates an interesting layered look. Let the page dry flat, then return the used leaves outdoors or compost them if appropriate rather than storing damp painted leaves with craft supplies.
For a group mural, use one long sheet of reused packing paper and let each child add a stamped flower. The result does not need equal spacing. Another beginner-friendly variation is to stamp only one leaf several times in a row, then draw a stem underneath so the prints become a tall flower spike. This reduces choices while keeping the stamping experience intact.
Nature Glue Collage
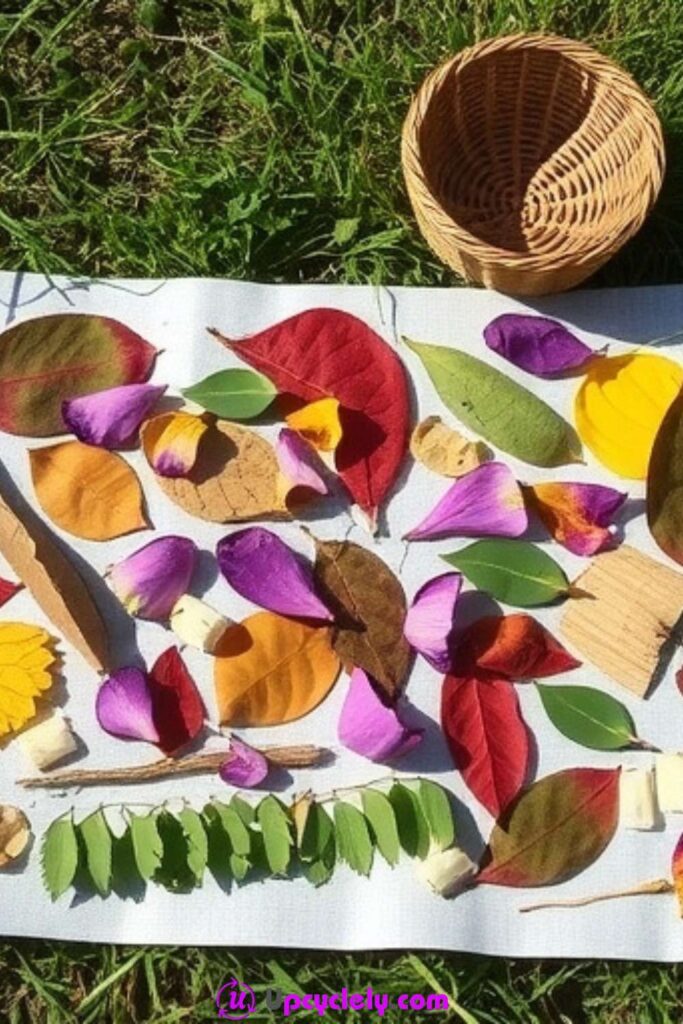
A nature glue collage gives children a chance to arrange real plant shapes rather than drawing or painting them. Small leaves can become petals, thin twigs can become stems, and fallen flower petals can fill the center of a collage. The activity feels especially satisfying after an outdoor walk because children can use the items they selected themselves instead of receiving a pre-made craft kit.
Natural materials can be heavier and less predictable than paper, so the base matters. Light cardstock or the clean inside of a cereal box works better than thin printer paper. I’d also keep the collection modest. A small tray of safe leaves, petals, and short twigs gives children enough variety without bringing an entire garden onto the table—and possibly half the soil with it.
Materials and Tools
· Clean fallen leaves, petals, grasses, or small smooth twigs
· Sturdy cardstock or clean recycled cardboard
· Washable white craft glue or glue in a small dish
· Cotton swab, small brush, or craft stick for spreading glue
· A collection basket or paper bag
· Optional crayons or markers for adding simple background details
· A tray for sorting natural pieces by size or type
Steps
1. Collect only materials that are safe to handle. On a short nature walk, look for items already on the ground. Avoid unknown berries, mushrooms, thorny stems, sticky sap, and plants that may irritate skin. Back indoors, shake off dirt and inspect each piece before it reaches the craft table.
2. Sort the pieces and make a dry arrangement first. Spread a small selection on the cardstock without glue. Invite the child to choose a center, then place leaves or petals around it. A twig can become the stem, but it does not have to sit in the middle; children may create a sideways flower, a whole garden, or an abstract flower shape.
3. Glue the light pieces before the heavier ones. Lift one piece at a time, place a small amount of glue underneath, and press it back into position. Thin petals and leaves usually need less glue than bark or twigs. If a child squeezes too much, use a craft stick to spread it rather than adding more material to hide the puddle.
4. Secure twigs and curled edges with extra support. For a short smooth twig, apply glue along the side that touches the paper and hold it in place for a few moments. Curled leaves may need a small dab near the tip. I know it can feel tempting to coat everything heavily, but large glue blobs can make petals translucent and leave the cardboard wrinkled.
5. Leave the collage flat until every piece is stable. Natural materials shift easily while glue is wet, so place the finished collage somewhere it will not be moved. Once dry, gently lift one corner of the board and check for loose pieces. Reattach only what needs it, then display the collage flat rather than bending or rolling it.
A very simple version uses only leaves: one round leaf or paper circle in the center and several narrow leaves as petals. You can also use dried grass for stems instead of twigs if weight is a concern. Because natural materials continue to dry, the finished collage may change color or curl over time. I think that change is part of the character of the project rather than something that needs to be hidden.
Tissue Paper Poppies
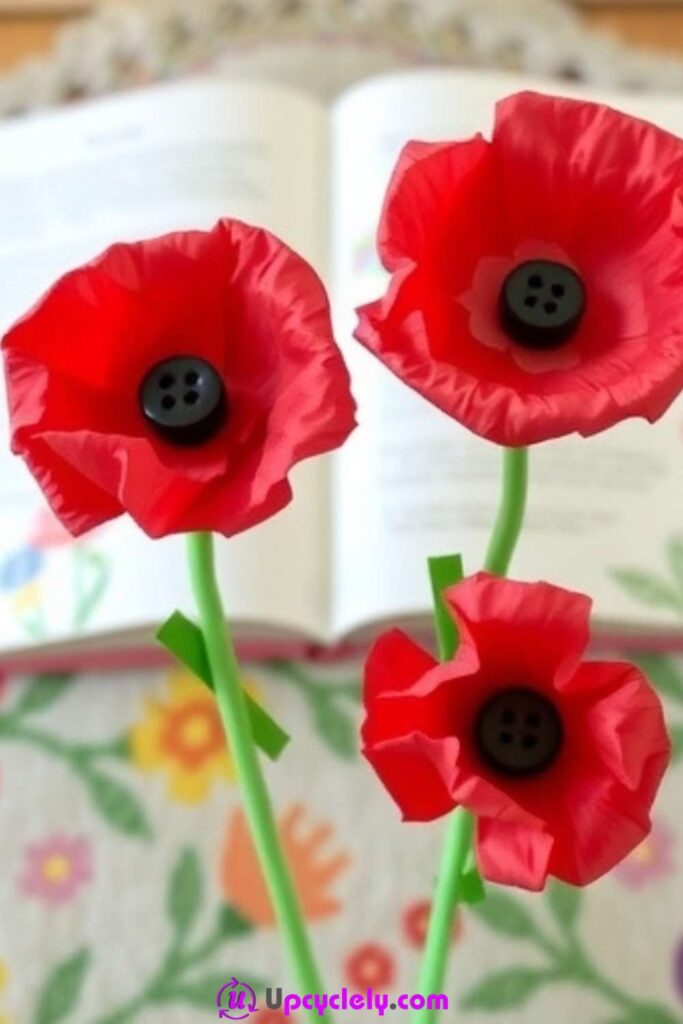
Tissue paper poppies are a good preschool flower craft because the material responds to squeezing, scrunching, layering, and spreading—movements that small hands can manage even if scissor control is still developing. The finished flower gets its shape from loose, uneven layers, so children do not need to cut perfect circles. Red is the familiar poppy color, but the same method can be used with any tissue scraps you already have.
The original idea often uses a dark center and a flexible green stem. For preschool use, I prefer a large paper center rather than a small button when there is any chance of mouthing or when younger siblings are nearby. A green paper strip can replace a pipe cleaner as well. The flower still reads clearly, and the finished project contains fewer small or poky parts.
Materials and Tools
· Red, pink, orange, or other leftover tissue paper
· Black or dark paper circles for the flower center
· Green construction paper strips or child-safe chenille stems with close supervision
· Washable glue
· Child-safe scissors or pre-cut tissue squares
· Light cardstock if the poppies will be mounted rather than held as stems
· Optional crayons for leaf and background details
Steps
1. Layer several tissue pieces loosely. Give the child three or four tissue squares or rough circles in similar sizes. Place them one over another, but do not worry about matching the edges. Gently pinch or crumple the stack once, then open it again so the tissue gains texture without becoming a tight ball.
2. Shape the flower by rotating the layers. Turn each tissue layer slightly so the corners or edges do not all line up. Pinch the middle between two fingers and fan the outer edges outward. If the tissue tears, keep the torn piece in the flower; small irregularities usually make the petals look softer rather than ruining the craft.
3. Add a safe, bold center. Glue a large dark paper circle over the pinched middle. Press gently with one fingertip rather than flattening the whole flower. If you are using a mounted version, glue the entire flower head to cardstock now; if the child will hold the flower, let the center set before attaching a stem.
4. Attach the stem in a way that suits the child. For the simplest option, glue a wide green paper strip behind the flower head and add paper leaves. Older preschoolers working with close adult supervision can use a chenille stem, but bend and cover any sharp wire ends. Do not rely on the child to push a wire stem through tissue layers.
5. Fluff the petals only after the center is secure. Once the glue begins to hold, lift the outer tissue layers gently and separate them with fingertips. The flower can stay flat for a card or become fuller for a bouquet. Arrange several poppies together in a reused jar or paper cup if you want a group display, keeping the container light and stable.
If you have tissue paper left from gift wrapping, smooth it only enough to cut or tear manageable pieces; wrinkles are useful here. For a no-scissor version, adults can tear the tissue into squares in advance and children can focus on layering and shaping. A class could also make one large poppy mural by using oversized tissue pieces and a paper center big enough for several children to press together.
Pasta Flower Collage
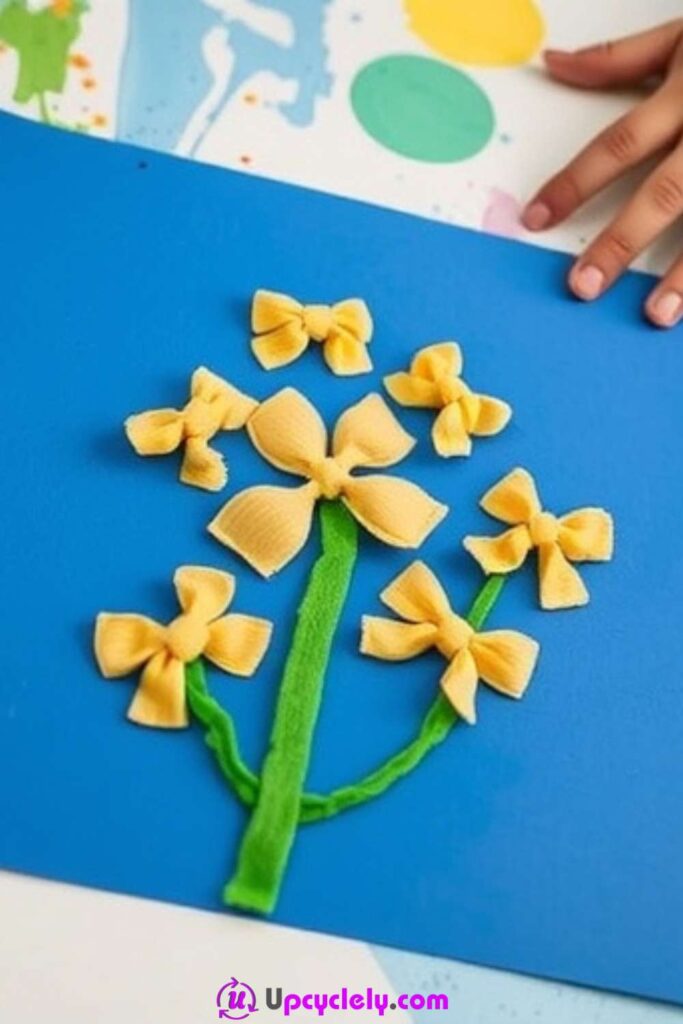
Pasta flower collages use the repeated shapes of dry pasta as petals, centers, or decorative borders. Bow-tie pasta naturally suggests petals, but tube or shell shapes can work too. The collage becomes more interesting when the pasta is treated as a shape rather than as something that must be arranged perfectly. One or two pieces can make a tiny flower; several pieces around a circle can create a larger one.
Because dry pasta pieces are small and are still food-shaped, this activity needs close supervision and is not appropriate for children who are likely to put craft materials in their mouths. If that is a concern, substitute large cardboard shapes cut from clean food boxes. For children ready for the material, use only a small handful at a time and keep the unused pasta away from the edge of the table.
Materials and Tools
· Dry bow-tie, shell, tube, or other medium-size pasta shapes
· Sturdy colored construction paper or cardstock
· Washable craft glue
· Child-safe paint and brushes if the pasta will be colored
· Green markers, crayons, or paint for stems and leaves
· A shallow tray to contain the pasta pieces
· Optional paper circles for simple flower centers
Steps
1. Decide whether to color the pasta before collage time. If you want painted pasta, spread a small number of pieces on scrap paper and let children brush them with washable paint under supervision. Keep the painting simple because pasta can roll and become frustrating. Let the pieces dry fully before the gluing stage so wet paint does not mix into the glue.
2. Draw broad stems first to give the collage a structure. On sturdy paper, make several green lines rising from the bottom of the page. Add simple leaves with crayons or markers. Preschoolers can make the stems short, long, crooked, or even horizontal; the stems simply give them a place to decide where the pasta flower heads will sit.
3. Arrange the pasta without glue for a quick test. Place one paper circle or imagined center above a stem, then let the child move pasta shapes around it. There is no need for perfect symmetry. Four pieces may be enough for one flower, while another child may want eight or ten. Once the arrangement feels good, move one piece at a time rather than sweeping the whole design aside.
4. Glue each piece with a small amount of adhesive. Put a dot of glue where the pasta will sit and press the piece down gently. Heavy pasta needs more drying time than paper, but more glue is not always better. If a shape rocks because of its curved surface, choose the flattest side and press it into the glue rather than trying to fill the gap with a puddle.
5. Add only a few final details and let the collage dry flat. Children can draw a sun, tiny insects, grass, or extra buds around the flowers. Keep loose pasta out of reach once the gluing is finished. Leave the collage horizontal until every piece is firm, then check the surface before hanging it so no pasta falls off.
A lower-mess version uses unpainted pasta against bright paper, which creates enough contrast without an extra drying stage. For a reuse-focused alternative, cut petal shapes from a clean cardboard cereal box instead of using food. The same arrangement and gluing steps still work, and the lighter cardboard pieces are easier to mount on ordinary paper.
Q-Tip Painted Lavender
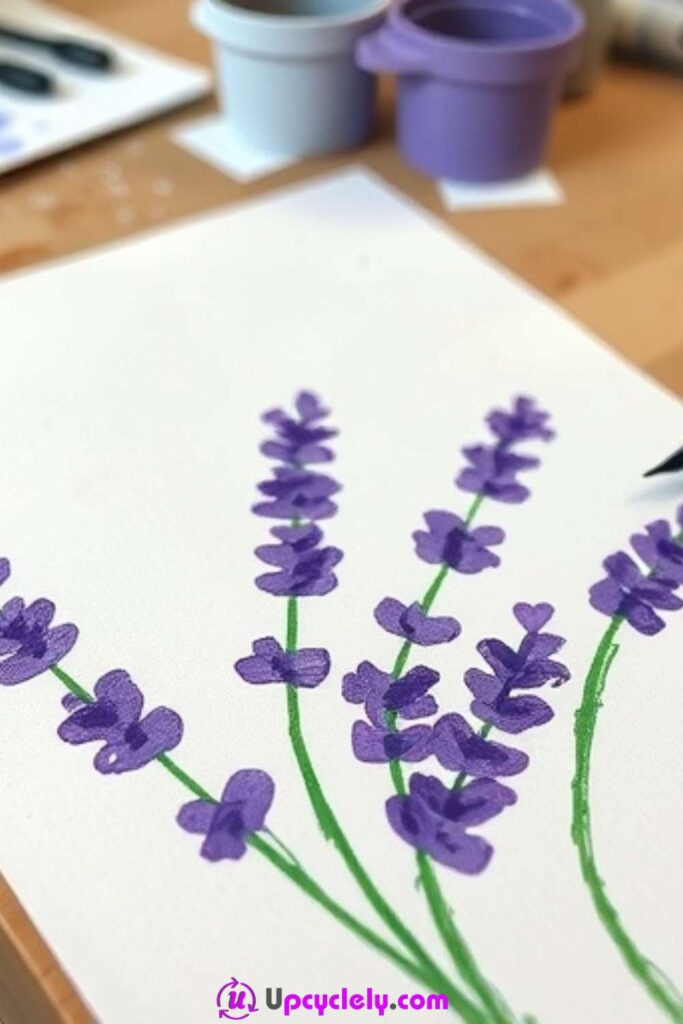
Q-tip painted lavender turns a bundle of cotton swabs into a simple stamping tool. Several rounded tips touch the paper at once, so one press creates a cluster of small marks that resembles a lavender flower head. Preschoolers can repeat the stamping motion up a stem without needing to paint dozens of tiny dots individually. The effect is recognizable, but it still leaves room for uneven spacing and mixed shades.
Treat the cotton swabs only as painting tools and keep them away from ears, noses, and mouths. A rubber band can hold several swabs together, but an adult should prepare the bundle so it is tight and easy to grip. If you would rather avoid a band, tape the swabs around a short piece of cardboard to make a thicker handle.
Materials and Tools
· White or light-colored paper
· Washable purple, violet, pink, or blue paint
· Washable green paint or thick green marker
· Several cotton swabs
· Small rubber band or tape for an adult-made stamping bundle
· Shallow paint tray
· Optional regular brush for stems and leaves
Steps
1. Make a thick, easy-to-hold stamping bundle. Place several cotton swabs side by side and secure them near the middle with a rubber band or tape. Check that none can slide out easily. Let the child hold the bundle over dry paper first and practice the up-and-down dabbing motion before any paint is added.
2. Create simple green stems as a starting point. Paint or draw three to five thin stems rising from the lower part of the page. They can lean in different directions like flowers in a breeze. Add a few narrow leaves, but keep the upper part of each stem mostly clear so the stamped lavender clusters have space.
3. Load the tips lightly with color. Dip only the cotton ends into a shallow layer of paint. Press once on scrap paper if the bundle is dripping. A small amount of paint keeps the separate dots visible; too much paint turns the bundle into one solid blob and removes the texture that makes this method interesting.
4. Stamp upward along each stem. Begin near the top half of a stem and dab the bundle several times, moving slightly upward or sideways with each press. Let some marks overlap and leave small gaps elsewhere. Then repeat on the next stem, adding more paint only when the impressions become too faint.
5. Add a second shade sparingly for depth. After the first layer is no longer very wet, use a lighter or darker purple on just a few areas. Two or three extra dabs are usually enough. Step back with the child and decide whether the picture needs more color; stopping early often keeps the lavender clusters clearer.
For a simpler version, use one cotton swab instead of a bundle and make a tall row of purple dots. Older preschoolers may enjoy creating a vase at the bottom of the page from a scrap of colored paper. You can also stamp on the clean inside of a paper grocery bag that has been cut open, giving the background a warmer, more textured look than plain white paper.
Sticker Flower Cards
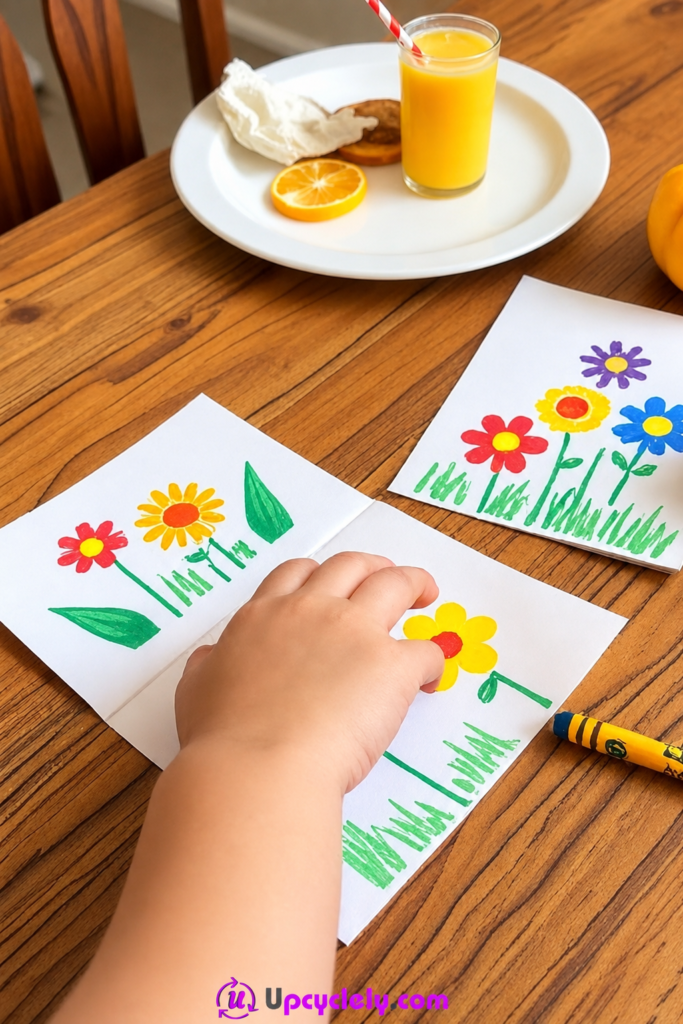
Sticker flower cards are useful when you want a quieter activity with less paint and drying time. Peeling and placing stickers gives preschoolers a fine-motor challenge, while drawing stems and leaves turns scattered flower shapes into a garden or bouquet. The finished card also has an immediate purpose: it can be given to a parent, grandparent, teacher, friend, or anyone the child wants to surprise.
Choose stickers that are large enough for the child to handle and avoid tiny foam or gem pieces if they create a choking risk. If the sticker backing is difficult to peel, an adult can lift one corner before handing the sheet over. I’d rather help with that one frustrating part than watch the child lose interest before the card design even begins.
Materials and Tools
· Blank card, folded cardstock, or a clean piece of sturdy recycled card
· Large flower stickers or other easy-to-peel floral shapes
· Washable crayons or markers
· Optional leaf, butterfly, or circle stickers
· Glue stick only if older stickers need extra help staying attached
· Scrap paper for testing marker colors
· Envelope or reused paper sleeve if the card will be gifted
Steps
1. Fold or prepare a sturdy card base. Use cardstock or another firm paper so the finished card can stand up without collapsing. If children are folding their own cards, show them how to match two edges and press the fold with a flat hand. Do not worry if the fold is slightly crooked; a handmade card does not need factory-straight edges.
2. Place the largest flower stickers first. Invite the child to decide whether the card will show one bouquet, a garden along the bottom, or flowers scattered across the front. Peel and place two or three main stickers before adding anything else. Leaving some open space makes it easier to draw stems and prevents the design from becoming crowded too quickly.
3. Draw stems, leaves, and simple background details. Use green crayons or markers to connect the flower stickers toward the lower part of the card. Add leaves, grass, a sun, a butterfly, or a few dots if the child wants them. Encourage large simple marks rather than tiny decorative work that can become tiring.
4. Add smaller stickers only where they support the scene. A few extra flower buds or leaf stickers can fill awkward gaps. Press each sticker with one fingertip so the edges adhere. If an old or reused sticker begins lifting, use the smallest amount of glue underneath and wipe away excess before it spreads beyond the edge.
5. Finish the inside with a child-led message. Ask who the card is for and what the child wants to say. An adult can write the child’s spoken message while leaving space for the child to add a name, scribble, heart, or drawing. That shared writing keeps the card personal without turning handwriting into a requirement for finishing the craft.
For children who do not enjoy peeling stickers, use pre-cut paper flowers and a glue stick. The design stays the same, but the motor task changes. Another option is to use old address-label sheets or leftover blank stickers and let children color them before placing them on the card. A row of child-decorated circles can become flower centers without buying a themed sticker pack.
Flower Craft Mistakes That Can Make Preschool Projects Harder Than They Need to Be
Preschool crafts can become frustrating very quickly when the adult setup asks for more control than the child has. The biggest problem is usually not a ‘messy’ result; it is a process that leaves the child waiting, watching, or being corrected. A few adjustments can keep the activity child-led while still producing something sturdy enough to display or take home.
· Using too many tiny pieces. Small buttons, beads, miniature stickers, and other loose decorations can be difficult to grasp and may be unsafe for children who mouth objects. Choose larger paper or foam shapes instead.
· Giving children a full bottle of glue for every project. Large glue puddles make paper soggy and cause natural materials or pasta to slide. A glue stick, small dish, or adult-portioned amount gives better control.
· Expecting exact symmetry. Preschool flower crafts become stressful when adults keep moving petals into a circle or straightening stems. Let the child’s placement stay visible unless something is unsafe or prevents the craft from working.
· Overloading printing tools with paint. Bubble wrap, leaves, and cotton-swab bundles show more texture with a thin coat. Heavy paint usually creates smears and removes the pattern children are trying to print.
· Skipping the dry arrangement for heavier collages. Pasta, twigs, and layered leaves are easier to place once children have tried the layout without glue. Gluing immediately can trap a child in a design they no longer want.
· Making every decision before the child arrives. If the adult chooses all colors, cuts all shapes, and decides exactly where each piece goes, the child is decorating someone else’s project. Leave meaningful choices open.
· Rushing the drying stage. Paint and glue need time to settle before a project is moved upright or sent home. Create a safe drying area so children are not tempted to keep touching wet surfaces.
· Using adult-only tools within children’s reach. Hot glue guns, craft knives, aerosol varnishes, wire cutters, and sharp scissors do not belong on a preschool craft table. Adults should complete any necessary preparation away from small hands.
The better approach is usually to simplify rather than to rescue. If a child cannot manage one part of a craft, swap the tool, enlarge the piece, or shorten the process. A flower with three child-placed petals is more meaningful than a twelve-petal flower an adult finished while the child watched.
Frequently Asked Questions
What age are these flower crafts best for?
Most of these ideas can be adapted for preschool-age children, but readiness matters more than a precise age. Children who still mouth objects should not use small pasta pieces, loose buttons, tiny stickers, or chenille stems without very close supervision. Simplify materials and let adults handle difficult cutting whenever needed.
Do preschool flower crafts need to match the example?
No. A sample can show the basic action, but children should be free to choose colors, placement, and many of the decorative details. I don’t think a craft becomes more successful just because every child’s flower looks the same; visible differences are a sign that children made real choices.
What can I use instead of googly eyes or buttons?
Large paper circles, drawn eyes, felt scraps, or foam shapes can replace small plastic pieces. For flower centers, a bold paper circle is often easier to glue and safer for younger children. Choose the largest, simplest option that still gives the child the visual detail they want.
How can I reduce mess during paint activities?
Offer small amounts of paint in shallow trays, use one or two tools at a time, and keep a damp cloth nearby. A reusable mat under the paper helps children work freely without an adult reacting to every drip. For printing, remind children to press and lift rather than rub the tool across the page.
Can I use recycled paper and packaging for these crafts?
Yes, as long as the material is clean, dry, and easy for children to handle. Paper grocery bags, cereal-box cardboard, clean gift tissue, bubble wrap, and plain packaging paper can all become useful craft materials. Avoid packaging with sharp edges, food residue, loose foil, or unknown coatings.
How do I keep preschoolers interested through several steps?
Keep the main action visible and break the craft into short stages. If interest drops, skip optional decoration and move to the part the child enjoys most, such as stamping or pretend play. A shorter child-led project is better than a long activity that an adult has to finish.
What should I do if the finished collage keeps falling apart?
Use a sturdier base and match the amount of glue to the weight of the material. Pasta and twigs need a firm paper or cardboard surface, while tissue and stickers need very little adhesive. Let the project dry flat before lifting it, then reattach only the pieces that are genuinely loose.
Let Preschool Flower Crafts Stay Playful and Personal
The best flower crafts for preschoolers are not the ones with the neatest petals. They are the ones that give children a manageable action, a few real choices, and enough freedom to see their own decisions in the finished work. Printing with saved bubble wrap, stamping with leaves, layering tissue, arranging pasta, or turning a paper bag into a puppet can all support that kind of making without requiring expensive supplies.
These 9 flower crafts preschool ideas can also be adapted around what you already have. Swap colors, reuse clean paper, enlarge small pieces, or shorten a project when a child needs an easier version. I’d begin with the activity that has the simplest action for your group, then notice what the children enjoy most and build from there. Which flower material would your preschoolers reach for first: paint, paper, nature finds, tissue, or stickers?