Small fabric leftovers tend to multiply quietly. One pretty floral square stays because it feels too useful to throw away, then a gingham strip joins it, then a handful of clipped corners from another project settles into a basket or drawer. Before long, the collection is too large to ignore but too mixed to use in one obvious way. I don’t think scraps need to stay trapped in that awkward in-between stage.
I like projects that make use of materials already at hand. Fabric scraps are especially satisfying because even small pieces can become something practical, decorative, or giftable without requiring a full day at the sewing machine. The trick is choosing projects that suit the size and shape of the leftovers instead of forcing every scrap into the same pattern.
Some scraps work best in patchwork, others in stuffing, strips, ties, or covered surfaces. Once you sort them honestly, the pile becomes much easier to use. That is usually the point when scrap fabric stops looking like clutter and starts looking like possibility.
Sort the Scraps Before You Start Cutting Anything
Fabric scraps are easier to reuse when they are grouped by size, weight, and fibre rather than by how pretty they look. Press wrinkled pieces, trim badly frayed edges, and discard scraps that are too weak, stained, or distorted to sew cleanly. I know it can feel tempting to keep every tiny offcut just in case, but some pieces only create decision fatigue.
· Separate quilting cottons, lightweight blends, linen scraps, and thicker fabrics rather than mixing every weight together.
· Set aside very small trimmings for stuffing, braided projects, or testing stitches instead of patchwork.
· Wash and dry scraps in the same way you would prepare finished fabric, especially when they come from different sources.
· Press scraps flat before measuring so pieces line up more accurately.
· Use a rotary cutter only on a suitable mat, and keep sharp scissors for fabric rather than paper.
· Choose projects that suit the amount of fabric available instead of enlarging patterns awkwardly.
Sew a Patchwork Cushion Cover
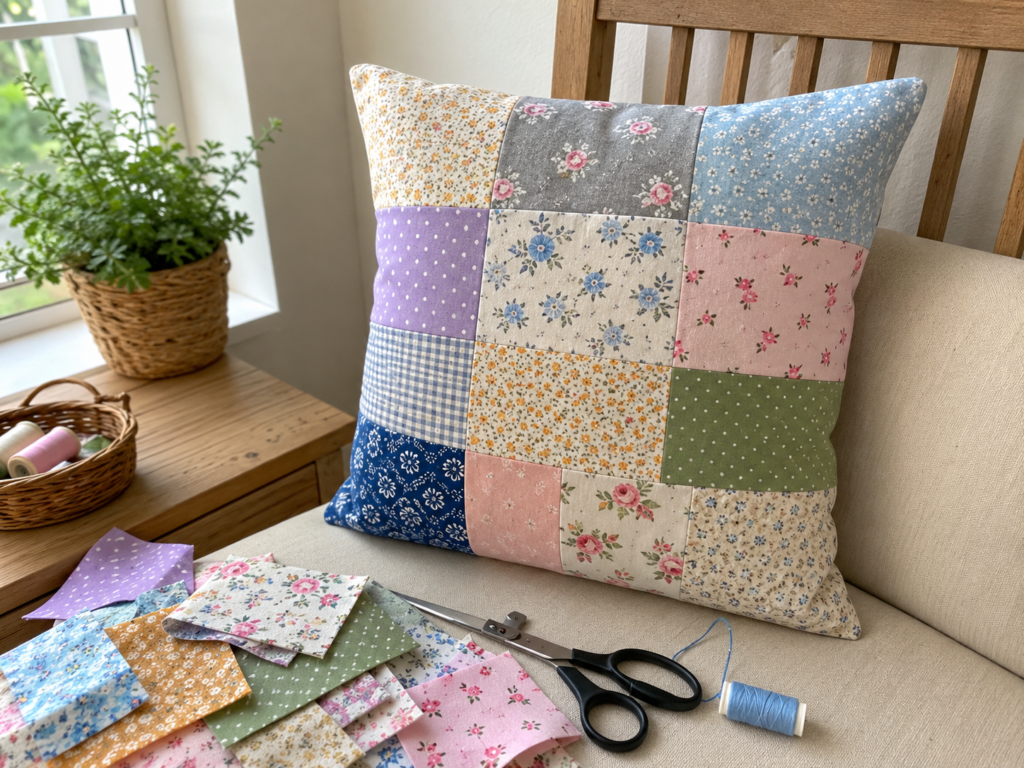
A cushion cover is one of the most forgiving ways to reuse fabric scraps because the front can be built from many small pieces while the back stays simple. Squares and rectangles are particularly beginner-friendly, and the finished cover makes the variation look intentional. The design works well when the colours relate loosely rather than matching perfectly.
Materials and Tools
· Medium-sized cotton or lightweight home décor scraps
· Plain backing fabric or a larger coordinating scrap
· Cushion insert or an existing cushion to measure against
· Thread, pins or clips, and an iron
· Rotary cutter or fabric scissors
· Sewing machine or hand-sewing needle
· Optional zipper, envelope-back overlap, or buttons
Steps to Sew a Patchwork Cushion Cover
1. Choose the scraps that will sit together comfortably. Spread them out and look for a mix of light, medium, and darker prints rather than using every floral in one corner. Cut the pieces into squares or rectangles of one size if you want the sewing to stay simple, then trim them accurately so the seams line up more easily.
2. Sew the patchwork front in rows. Join small pieces into short rows first, press the seams to reduce bulk, and then sew the rows together. Keep checking the overall size against the cushion insert because patchwork can shift slightly as it grows. If the front ends up a little small, add a narrow border instead of forcing the seams.
3. Prepare the back and assemble the cover. Use a plain fabric back for a calmer finish or make an envelope closure if you want to avoid a zipper. Place the front and back right sides together, pin carefully at the corners, and sew around the edge while leaving the chosen opening method in place.
4. Turn, press, and test the fit. Clip the corners lightly, turn the cover through the opening, and push the corners out gently with a blunt tool. Press the finished cover and insert the cushion. One detail I wouldn’t skip is testing the fit before topstitching, because a cover that is too loose can make even lovely patchwork look tired.
If you have only a few coordinated scraps, make a small patchwork panel for the front centre and use plain fabric around it. That keeps the project manageable while still using the most attractive pieces.
Braid Narrow Strips Into Coasters or a Small Table Mat
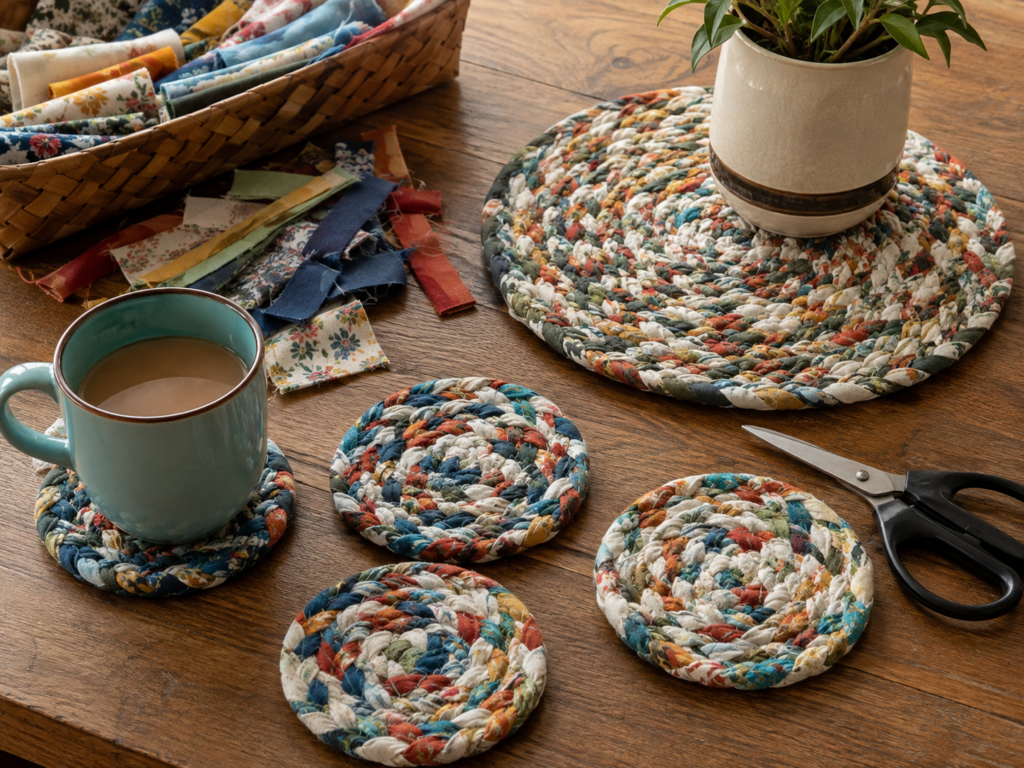
Long narrow leftovers are awkward in patchwork but ideal for braided pieces. Coasters and small mats are practical because they do not require perfect colour matching, and the twisted fabric creates natural visual texture. This is also a useful option for scraps that are slightly too small for garment work but still strong.
Materials and Tools
· Long fabric strips, especially cotton or similar lightweight fabrics
· Safety pin or clip to anchor braids while working
· Needle and thread or a sewing machine with zigzag stitch
· Fabric scissors
· Optional light batting scrap for extra thickness in a mat
Steps to Make Braided Fabric Coasters
1. Turn the scraps into usable strips. Cut or tear cotton scraps into strips of similar width, then join shorter pieces end to end so you are not stopping every few inches. Press the joined strips if they are very wrinkled. At this point, consistency matters more than perfection because the braid will soften small irregularities.
2. Make a firm, even braid. Group three long strips together and secure one end under a clip, pin, or heavy object. Braid with steady tension, not a hard pull, so the finished piece lies flat instead of curling. When one strip ends, join another and keep braiding until you have more length than you think you need.
3. Shape the braid into a coil. Start from one end and wrap the braid into a flat spiral, checking after each turn that it is not cupping upward. Stitch the braid to itself by hand or with a wide zigzag stitch, working gradually so the circle stays flat. For a larger mat, continue adding rounds until the size feels useful.
4. Secure the end and flatten the finish. Tuck the final end underneath or fold it neatly before stitching it down. Then press the piece lightly with steam if the fabric allows. I’d keep one thing in mind here: if the coaster begins to rise in the centre, the braid is probably being pulled too tightly while coiling.
This same method can become mug rugs, placemats, or a trivet-sized pad for decorative use. Very slippery or stretchy knits are harder to control, so woven cotton scraps usually give cleaner results.
Turn Bright Scraps Into Fabric Bunting
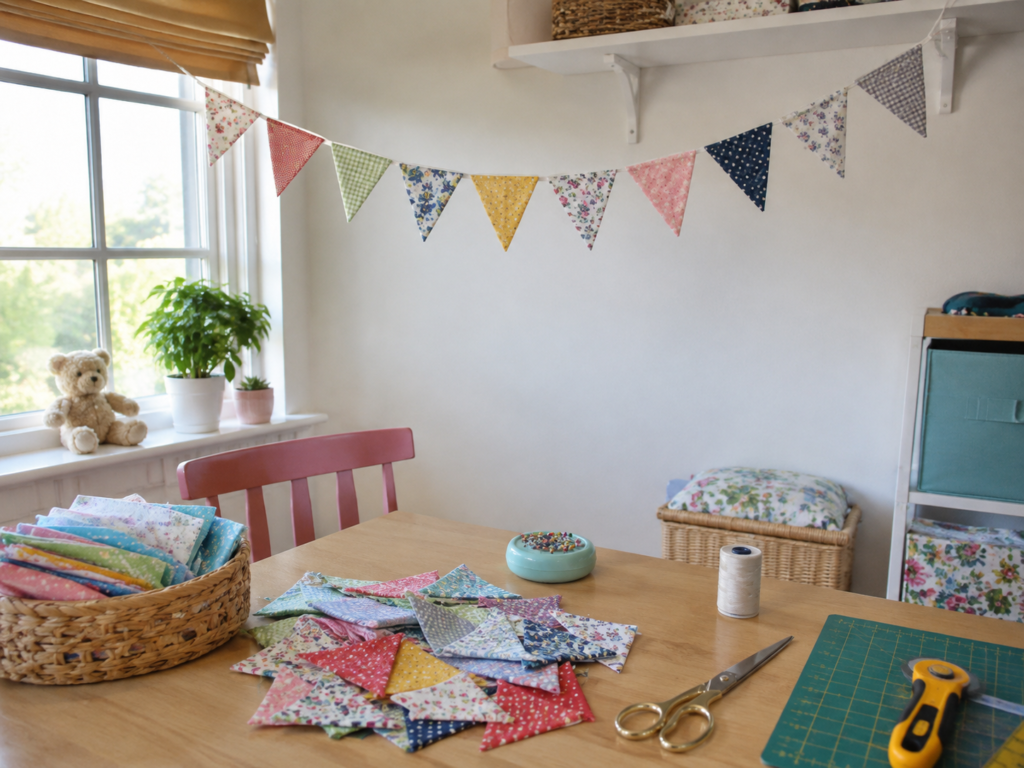
Fabric bunting is a good solution for smaller, colourful scraps that may not be large enough for bags or covers. Each flag uses only a little fabric, and the finished strand can decorate a window, shelf, craft room, or party corner. Because the pieces repeat, the project also helps beginners practise clean cutting and straight sewing.
Materials and Tools
· Small cotton scraps in mixed colours or prints
· Bias tape, ribbon, or a folded fabric strip for the top band
· Paper template for the flags
· Pins or clips
· Thread and iron
· Sewing machine or hand-sewing needle
Steps to Create Colourful Fabric Bunting
1. Choose a flag size that suits your scraps. Make a simple paper triangle template and test it against the smallest pieces you want to use. Cut either single-layer flags for lightweight decorative bunting or pairs of triangles if you want a neater double-sided finish. Lay them out in a rough colour order before sewing anything together.
2. Prepare the flags so they behave well. If you are using paired triangles, sew around the two sides and turn them right side out, or place raw-edged single layers between folded bias tape for a quicker version. Press the finished shapes so they lie flat, because wrinkled flags can make the whole strand look uneven.
3. Attach the flags to the top band. Mark the spacing lightly so the gaps remain consistent, then sandwich the top of each flag inside bias tape or pin them to a folded fabric strip. Sew slowly across the full length, reinforcing the start and end because these points take the most strain when the bunting is hung.
4. Check the drape before trimming the ends. Hang the strand temporarily and see whether the spacing feels balanced. Then trim any extra threads and create small loops or leave longer ties at each end. For me, the layout matters more than using every colour in equal amounts.
A seasonal version can use only one palette, while a children’s room version can mix playful prints. If sewing double-sided flags feels too time-consuming, a single-sided strand is perfectly fine indoors.
Make Simple Lavender Sachets
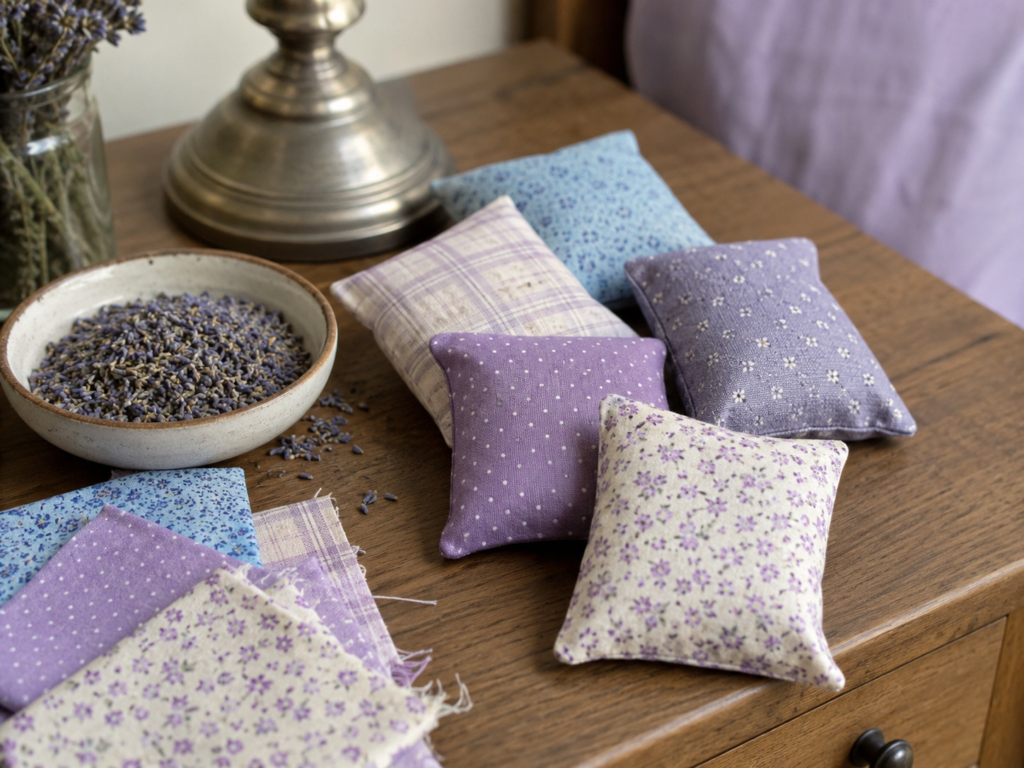
Very small fabric pieces often struggle to become visible projects, but sachets make good use of them. The finished size is modest, the stitching is simple, and the result is practical for drawers, wardrobes, or gifting. This is also a comfortable project for using delicate-looking prints that might disappear in a larger patchwork layout.
Materials and Tools
· Small cotton or linen scraps
· Dried lavender or another suitable dry filling
· Thread and needle or sewing machine
· Pins or clips
· Small funnel or spoon
· Optional pinking shears, ribbon, or hand-stitched label
Steps to Sew Lavender Sachets
1. Cut matching front and back pieces. Squares and small rectangles are easiest, and there is no need to make them large. Pair prints that work together or keep the front and back the same. If the fabric frays heavily, trim the edges neatly and keep the pieces large enough to hold a secure seam allowance.
2. Sew the sachet almost completely closed. Place two fabric pieces right sides together and stitch around the edge, leaving only a small gap for turning and filling. Clip the corners lightly, turn the shape right side out, and press it if needed. A crisp little shape is easier to fill neatly than a twisted one.
3. Fill the sachet lightly rather than firmly. Use a spoon or small funnel to add dried lavender, but stop before the sachet becomes stiff. It should still feel soft and flat enough to sit inside a drawer. Then hand-stitch the opening closed with small secure stitches.
4. Use and refresh the sachets thoughtfully. Place them where air can move gently, not in damp spaces, and squeeze them lightly now and then to refresh the scent. I know it can feel tempting to overfill these, but a sachet that is packed too tightly often looks bulky and stresses the seams.
If lavender is not your preference, the sachets can hold cedar chips or remain lightly stuffed as decorative mini pillows. Keep any filling dry and suitable for the place where the sachets will be stored.
Use Neat Squares to Sew a Zipper Pouch
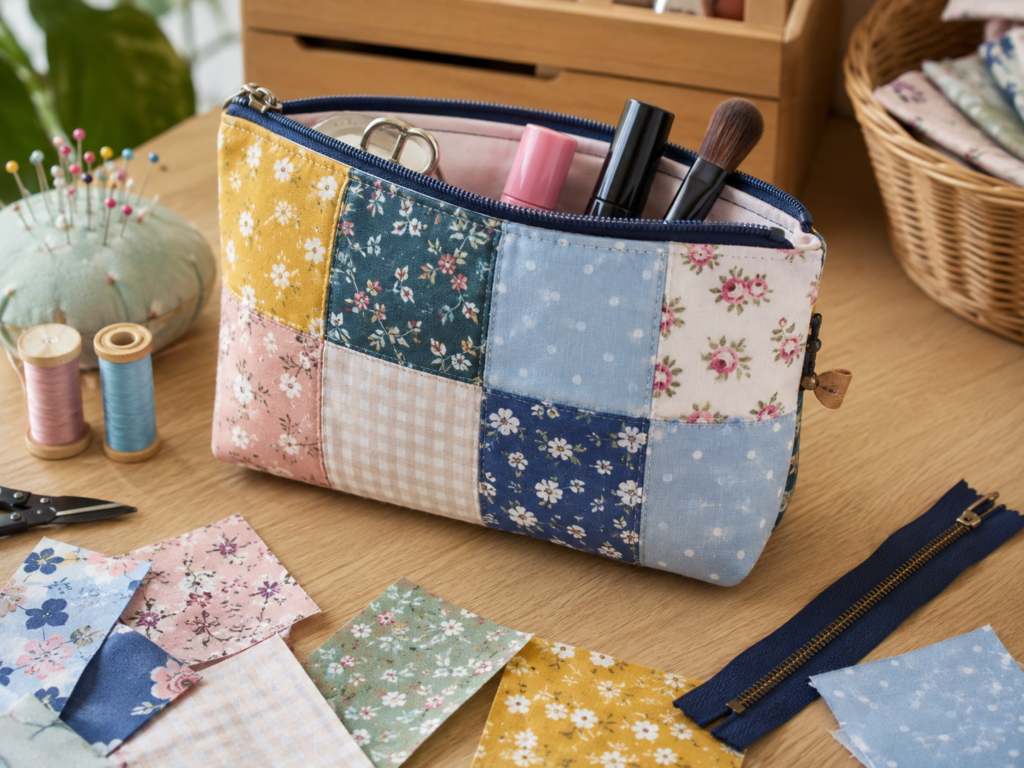
A zipper pouch makes sense when your scraps are attractive enough to deserve daily use. The patchwork front keeps small pieces relevant, while lining and interfacing give the project the structure that many scrap-sewing ideas lack. The finished pouch can store makeup, sewing notions, pens, receipts, or chargers.
Materials and Tools
· Cotton scraps for the outer patchwork
· Lining fabric
· Light or medium interfacing
· Zipper of a suitable length
· Thread, pins or clips, and iron
· Sewing machine and zipper foot
· Optional small loop tab
Steps to Make a Patchwork Zipper Pouch
1. Build the outer patchwork first. Cut small rectangles or squares and sew them together into a panel slightly larger than the pouch size you want. Press the seams carefully and trim the panel square so the pouch pieces will match later. Then fuse or baste interfacing to the back for extra body.
2. Cut the pouch layers and prepare the zipper. Use the finished patchwork panel as a template for the lining so both sides match. Place the zipper between the outer fabric and lining on one side, sew that seam, and then repeat for the second side. Take your time here because a tidy zipper changes the whole look of the pouch.
3. Form the pouch shape with the zipper partly open. Open the zipper halfway before sewing the outer and lining seams, or you may trap the pouch shut. Match the patchwork seams as neatly as possible, then sew around the outer edges, leaving a gap in the lining if you need to turn the pouch through it.
4. Turn, shape, and finish the lining. Pull the pouch right side out through the opening, push the corners out gently, and close the lining gap with a neat seam. After that, ease the lining back inside and press the pouch. One practical way to keep the patchwork from looking busy is to use a simple lining and zipper colour.
If adding a zipper feels intimidating, a snap pouch or drawstring bag is an easier starting point. You can still use the same scrap-patchwork idea for the outer layer.
Cover a Small Storage Basket With Scrap Fabric Panels
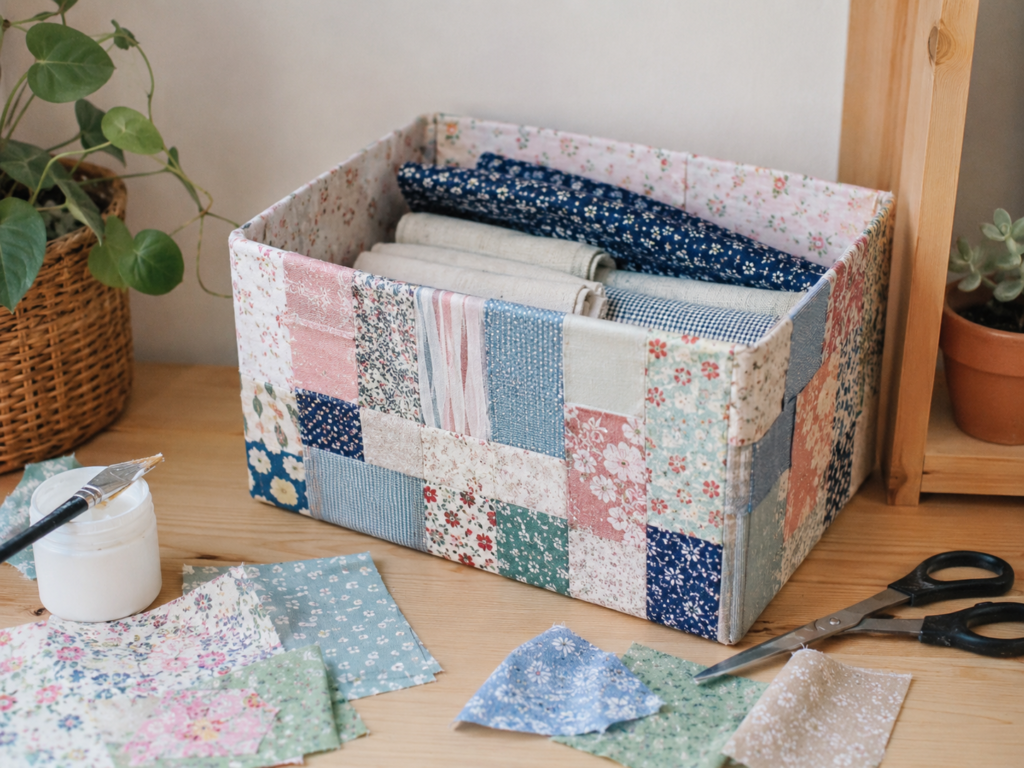
Some scraps are too irregular for garments but still large enough to cover surfaces. A storage basket is a good candidate because the patchwork can turn a plain box or basket into something that matches the room while also using many medium-sized pieces at once. This kind of project works especially well in craft rooms, bedrooms, or shelves where soft storage looks more inviting.
Materials and Tools
· Medium-sized fabric scraps
· Plain cardboard or fabric-covered storage basket
· Lining fabric if the inside also needs covering
· Craft glue suitable for fabric, or sewing tools for a removable cover
· Scissors, ruler, and iron
· Optional interfacing for a more structured fabric panel
Steps to Cover a Storage Basket with Fabric Scraps
1. Measure the basket carefully before arranging the scraps. Note the height, width, depth, and whether the basket has a lip, handles, or rounded corners. Then decide whether you want a glued outer wrap, a loose fabric sleeve, or a more complete fitted cover. The straighter the basket shape, the easier the fitting process will be.
2. Create patchwork panels to match the basket sides. Sew the scraps into larger panels rather than trying to attach tiny individual pieces directly to the basket. Press the seams, trim the panels to size, and test each one against the basket before attaching anything. If the fabric feels too soft, add a light interfacing layer.
3. Attach or fit the panels one side at a time. For a permanent cover, spread glue evenly and smooth the fabric from the center outward to prevent bubbles. For a removable version, sew the side panels together into a sleeve and slide it over the basket before securing the top edge or base. Then cut around handles neatly if the basket includes them.
4. Finish the edges and test the function. Fold the top raw edge under, line the inside if needed, and check that the basket still sits flat and can be lifted comfortably. The part I would check carefully is bulk at the corners, because too many layers there can make a small basket look lumpy.
This idea also works on fabric bins, drawer organizers, or plain cardboard magazine holders. If the basket will hold heavy items, keep the decoration mainly on the outside so the inside remains smooth and usable.
Fabric Scrap Sewing Habits That Often Create More Mess Than Use
Keeping every offcut without sorting it. Scraps become much harder to reuse when the useful pieces are buried under worn trimmings, tiny triangles, and fibres that no longer suit sewing. Sort by size and quality first, then choose projects accordingly.
Mixing incompatible fabrics in one project. Stretch knits, slippery synthetics, stiff canvas, and quilting cottons do not always behave well together. If the pieces fight each other, the finished project can twist, pucker, or wear unevenly.
Skipping the pressing stage. Small pieces may look harmless, but crooked seams multiply quickly in patchwork or bunting. Pressing after each stage usually saves more frustration than any attempt to force the finished project flat at the end.
Choosing a project that is too small for the scraps or too ambitious for the quantity available. A zipper pouch or cushion cover needs enough coordinated pieces to feel balanced, while tiny scraps may be better for sachets or stuffing. Matching the project to the pile is half the success.
Overstuffing items like sachets or cushions made from delicate patchwork. Too much fill stresses seams and makes the fabric bulge awkwardly. A softer fill often looks better and lasts longer.
Using glue where stitching would be more durable, or sewing when glue would keep the process simpler. Covered baskets may suit adhesive, while pouches and cushion covers need reliable seams. The better method depends on how the finished item will be handled.
Forgetting that scrap projects still need a clear finish. Trim threads, check corners, test closures, and remove anything that makes the project harder to use. Small projects deserve the same care as larger ones.
Frequently Asked Questions
What is the easiest beginner project for fabric scraps?
Lavender sachets and fabric bunting are usually the most approachable because they need only small pieces and simple sewing. A patchwork cushion is also beginner-friendly if you keep the shapes square and the colour palette limited.
Do fabric scraps need to be washed before using them?
It is usually a good idea, especially when the scraps come from different projects or unknown sources. Washing helps remove dust and reduces the chance that one fabric will shrink later while another stays the same.
Can I mix different prints in one scrap project?
Yes, and that is often part of the charm. Try to balance scale and colour so every print does not compete equally. A few quieter pieces can help busier florals and checks sit together more comfortably.
What should I do with scraps that are too tiny to sew?
Very small pieces can be saved for stuffing, braided items, testing stitches, or tiny embellishments. If they are frayed, weak, or dusty, it may be better to let them go rather than storing fabric you are unlikely to use.
Do I need a sewing machine for these projects?
Not always. Sachets, simple bunting, and even some patchwork can be sewn by hand if you work patiently. A machine makes pouches and larger patchwork projects faster, but it is not the only option.
How can I make scrap projects look less cluttered?
Limit the palette, repeat a few colours, and give busy patchwork a plain backing, lining, or border. I’d rather leave out one pretty print than force it into a project where it makes the whole piece feel crowded.
Which fabric types work best for scrap sewing?
Woven cotton is the easiest starting point because it cuts, presses, and sews predictably. Linen blends and light home décor fabrics can also work well, but slippery or stretchy fabrics are better used once you are more confident.
Let the Scrap Basket Become Part of the Plan
Learning how to reuse fabric scraps really comes down to noticing what each leftover piece is still good for. Some pieces want to become patchwork, some work better as strips, and some only need a small useful role to stop feeling like clutter. That is why scrap sewing can be so satisfying: it asks for attention more than expense.
Start with one manageable project and use the most suitable scraps rather than the entire pile at once. Once that’s done, the remaining pieces usually make more sense. A cushion cover, braided coaster, bunting strand, sachet, pouch, or covered basket can all give the scrap basket a proper purpose.
Which fabric scrap project would you try first: something practical for everyday use, or something small enough to finish in one afternoon?