Baseboards are easy to overlook until fresh wall paint makes every scuff, brush mark, and dusty edge suddenly obvious. They sit close to shoes, vacuum cleaners, furniture, pet hair, and floor-cleaning products, so even a well-painted room can feel unfinished when the trim has been left behind.
I don’t think painting baseboards needs to become a complicated decorating project. Most of the result comes from ordinary preparation: cleaning the surface properly, repairing damaged edges, protecting the floor, and using a brush that can follow the profile without leaving a heavy ridge. The painting itself is usually the calmest part once those jobs are done.
A bright white finish can sharpen the boundary around a room, while a wall-matched colour can make a column or small space feel more continuous. Older timber may need filling and priming before it accepts a neat coat, and detailed moulding needs lighter brushwork than a plain flat board. The right approach depends on the condition and shape of the trim already in the room.
Before You Start: Inspect the Trim and Protect the Room
Run your hand along the baseboard before opening the paint. Look for loose sections, exposed nail heads, cracked caulk, chips, dents, peeling coatings, and gaps where the trim meets the wall. Paint can cover a colour difference, but it cannot make a loose board secure or stop a cracked edge from breaking further.
Identify the surface as closely as you can. Previously painted wood, bare timber, MDF, and coated composite trim may need different primers or preparation. If the existing coating is glossy or uncertain, make a small adhesion test in a hidden place before committing to the whole room.
Protect the flooring with sturdy paper, a drop cloth, or another covering suited to the surface. Tape the covering to itself or to an appropriate protected edge rather than placing aggressive tape on delicate flooring. Work with ventilation, follow the product label, and wear suitable protection when sanding old paint or using strong cleaners.
Useful supplies to gather first
· Vacuum with a crevice attachment and clean lint-free cloths
· Cleaner suitable for the existing paint and surrounding floor
· Fine sanding sponge or fine abrasive paper
· Flexible filler or paintable caulk for appropriate gaps and small defects
· Primer suited to the baseboard material and existing coating
· Durable trim paint in the chosen colour and sheen
· Quality angled synthetic brush and a small paint container
· Painter’s tape, floor-protection paper, and a putty knife or paint shield
· Gloves, eye protection, and a dust mask when the preparation requires them
Clean, Mask, and Protect the Edges Before Painting
@refreshhomeimprovements @dapcanada
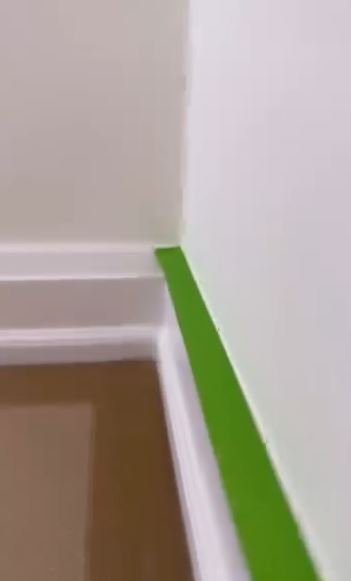
This preparation stage shows why a clean finish begins before the brush reaches the paint. The floor is covered with heavy protective paper, green tape follows the wall and floor edges, and the baseboard is being wiped with a cloth. That simple wipe matters because baseboards often collect a thin layer of dust, grease, shoe marks, and residue that sanding alone will not remove.
The tape also creates a clear working boundary, but it should not be treated as a substitute for careful brushing. Paint can creep beneath tape placed over dust, textured walls, uneven caulk, or a rough floor joint. Pressing the edge firmly and keeping the paint layer light gives a much cleaner result than flooding the tape line.
I’d spend more time on the corners than the long straight runs. Dust tends to settle where two walls meet, while old paint and caulk often build up around the ends of the board. Those small areas are exactly where a rushed coat begins to look untidy.
Materials and Tools
· Floor-protection paper or a clean drop cloth
· Painter’s tape suitable for the wall and floor surfaces
· Vacuum, soft brush, and lint-free cloths
· Mild cleaner appropriate for the existing coating
· Fine sanding sponge
· Small filling knife and suitable filler when needed
· Angled trim brush
· Primer and trim paint compatible with the surface
Prepare a Sharp Working Area
1. Clear and vacuum the edge. Move furniture far enough away to work comfortably, then vacuum along the top ledge, floor joint, corners, and nearby wall. Use the crevice tool carefully so it does not scratch a soft floor or knock loose trim.
2. Wash away surface residue. Wipe the baseboard with a cleaner suitable for the existing finish, paying attention to shoe marks and handprints near doorways. Follow with a clean damp cloth when the product requires rinsing, then allow the trim to dry fully before sanding or taping.
3. Smooth only what needs attention. Lightly dull glossy paint and level small raised defects with a fine sanding sponge. Remove the dust thoroughly afterwards; tape applied over sanding dust will not seal well, and fresh paint can develop small gritty marks.
4. Protect the floor and wall edges. Lay the floor covering flat and secure it so it cannot slide under your feet. Apply tape in manageable lengths, press the paint-side edge firmly, and avoid stretching it around corners because stretched tape often lifts back as it relaxes.
5. Inspect the line before painting. Look along the complete run at floor level and from standing height. Repair any lifted tape, uncovered flooring, or trapped dust now, then keep a clean cloth nearby for quick drips and smudges.
A beginner can simplify this by working on one wall at a time. There is no prize for taping an entire house in one afternoon, especially when dust finds its way back onto the first room before the paint arrives.
Build a Smooth Finish on Detailed Baseboards
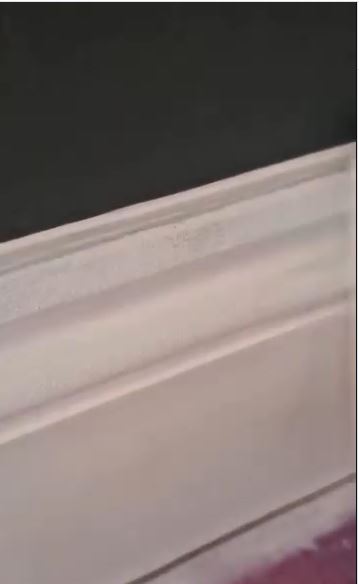
Detailed baseboards need a different rhythm from flat boards. The grooves, curved mouldings, and raised edges can collect too much paint, while the flatter centre sections may show every brush mark. A small angled brush gives better control than a large loaded brush that pushes paint into the lower channel.
The fresh coating here has a slight sheen, which is common on trim because a washable finish handles everyday marks better than a very flat wall paint. The exact product still needs to match the material and the existing coating. A paint designed for trim usually levels more neatly and remains more practical around floors and doorways than leftover wall paint.
What matters here is keeping a wet edge without repeatedly brushing paint that has begun to set. I know it can feel tempting to correct one final line, but that late pass is often the one that leaves a drag mark through an otherwise smooth section.
Materials and Tools
· Quality angled synthetic brush in a comfortable trim size
· Small paint kettle or handled container
· Trim paint in a washable finish
· Compatible primer if the old surface requires it
· Fine abrasive paper or sanding sponge
· Clean cloth and small paint shield
· Good task lighting for viewing the profile from different angles
Paint the Moulding Without Heavy Ridges
1. Prime difficult areas first. Spot-prime bare repairs, stains, exposed timber, or sections where the previous coating has been removed. If the complete baseboard needs primer, apply it thinly and brush out any pools in the grooves before they begin to dry.
2. Load only part of the brush. Dip the lower portion of the bristles rather than covering the whole brush, then tap off excess paint inside the container. A controlled brush carries enough paint to flow while making it easier to avoid runs along the lower edge.
3. Paint the shaped areas before the broad face. Work paint into the upper lip, curves, and recessed lines with light strokes. Then spread the remaining paint across the wider face of the board, keeping each section short enough to finish while the coating remains workable.
4. Lay off in one direction. Once the paint is distributed, use the tips of the brush to make a final light pass along the length of the trim. Do not press hard or keep returning to the same patch; the aim is to align the surface, not remove all visible wet brush lines immediately.
5. Check the grooves and lower edge. Use side lighting to spot sags or paint gathered in the profile. Correct them while the coating is still wet, then leave the section alone and follow the product guidance before deciding whether another coat is needed.
For a very plain board, a small fine-finish roller may help on the broad face, followed by a light brush pass. On ornate trim, the brush is usually simpler because it reaches the profile without leaving roller texture in the grooves.
Paint Baseboards the Same Colour as the Wall
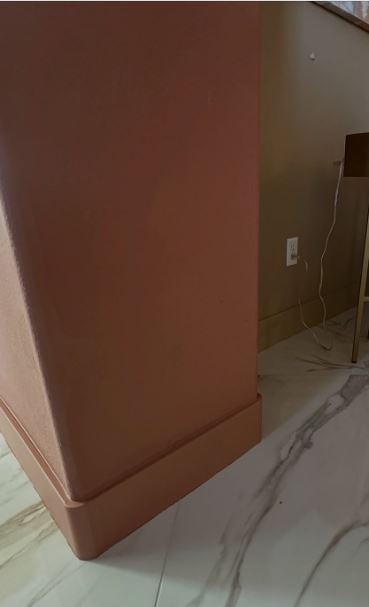
Baseboards do not have to be white. Painting the trim the same terracotta colour as the wall turns this column into one continuous block, while the shaped baseboard still gives the bottom edge a finished architectural line. The pale tiled floor provides enough contrast, so a white strip is not needed to separate the surfaces.
A colour-drenched finish can be especially useful around columns, narrow hallways, small rooms, or walls with several short trim sections. It reduces visual interruption and lets the shape of the room carry more attention than the border. Even so, the wall paint and trim paint may need different formulations or sheens, despite sharing the same colour.
I don’t think the sheen needs to match perfectly. A slightly tougher, softly reflective trim finish can sit beside a flatter wall finish without looking accidental, provided the colour is consistent and the edges are clean.
Materials and Tools
· Wall colour information or a matching colour sample
· Trim paint suitable for the baseboard material
· Wall paint for nearby touch-ups
· Fine sanding sponge and clean cloths
· Painter’s tape or a paint shield for the tiled floor
· Angled brush and small paint container
· Compatible primer when the old trim colour may show through
Create a Continuous Colour-Wrapped Finish
1. Compare colour and sheen before starting. Confirm whether the trim colour will be mixed from the wall formula or matched separately in a more durable product. Paint a small sample and view it beside the wall in daylight and evening light, because sheen can make one colour appear lighter or deeper.
2. Prepare the baseboard as its own surface. Clean, sand, repair, and prime the trim according to its material rather than assuming the wall-paint method will be enough. Protect the tile carefully, especially around grout lines where paint can settle into texture.
3. Cut the wall and trim edges neatly. Touch up the wall first if the lower edge is uneven, then paint the baseboard after the wall coating is ready. Use the angled brush to follow the top profile, keeping the line consistent even though both surfaces share a colour.
4. Brush the trim in thin complete sections. Work around one side of the column or from one corner to the next, distributing paint across the moulding before laying it off along the length. Watch the rounded outer corners, where excess paint can gather and form a visible thick edge.
5. Remove protection and inspect the floor line. Lift tape according to the paint and tape guidance, then check for small marks on the tile while they are still manageable. Allow the coating to settle before replacing furniture or cleaning close to the newly painted edge.
A quieter variation is to use the wall colour on the trim in a deeper sheen. Another option is a shade slightly darker than the wall, which keeps the continuous feeling while making the moulding easier to see.
Choose Paint and Tools That Suit the Trim
Use a coating intended for regular contact
Baseboards are touched by shoes, vacuum heads, mops, furniture, and hands near corners. Choose a paint that the manufacturer recommends for interior trim and for the baseboard material. Wall paint may share the right colour, but it is not always the best choice for a frequently cleaned lower edge.
Match the brush to the profile
An angled synthetic brush is useful for water-based trim coatings and for following a shaped upper edge. The brush should feel large enough to carry paint across the face but small enough to turn into corners without touching the wall or floor. A tired brush with splayed bristles makes a simple job much harder than it needs to be.
Decide whether the complete board needs primer
A sound, clean, dull, compatible coating may need only the preparation stated by the paint manufacturer. Bare timber, exposed MDF, filler, staining, glossy finishes, and uncertain older coatings often need a suitable primer. Test the full system in a hidden area when you are unsure.
Plan a sensible route around the room
Start at a doorway or corner and paint one continuous run at a time. Keep the container, cloth, and brush on the side of your working hand so you are not reaching across wet trim. Then stop at a natural break instead of leaving a half-dried join in the middle of a long wall.
Baseboard Painting Problems That Leave a Rough Finish
Painting over dust and cleaning residue
Dust creates gritty bumps, while grease and polish can interfere with adhesion. Vacuum first, clean with a suitable product, and let the surface dry before sanding, taping, priming, or painting.
Using tape as the only source of control
Tape can help, but paint pushed heavily against its edge may bleed underneath. Apply tape to a clean surface, press the edge firmly, and brush away from the line with a controlled amount of paint.
Loading the brush too heavily
Excess paint gathers in grooves, sags on vertical sections, and forms a thick lower lip. Load only part of the bristles and spread the coating before making a light final pass.
Ignoring chips, gaps, and loose trim
Fresh colour makes damaged edges more noticeable rather than less. Repair firm cosmetic defects, use suitable caulk only where it belongs, and secure or replace unstable boards before painting.
Overworking paint that has begun to set
Repeated late brush strokes can leave drag marks and uneven sheen. Finish a manageable section, lay it off once, and then leave it to level according to the product guidance.
Pulling protection carelessly
Tape removed at the wrong stage or pulled sharply across the paint line can tear the edge. Follow the tape and paint instructions, pull slowly back on itself, and use a clean blade only where a coating has bridged heavily.
Returning furniture too soon
A surface can feel dry before it is ready for rubbing, washing, or furniture contact. Give the coating the full time stated by the manufacturer before pushing beds, cabinets, or vacuum tools against the baseboard.
Frequently Asked Questions
Do I need to sand baseboards before painting?
Not every baseboard needs heavy sanding, but glossy coatings, raised defects, and filled repairs usually benefit from light preparation. Clean first, sand only as needed, remove the dust, and follow the primer and paint guidance for the existing surface.
Should I paint the walls or baseboards first?
Many decorators complete the walls before the final baseboard coats because the trim can then create a clean lower line. The best order depends on the condition of both surfaces and how you plan to mask them, but allow each coating to become ready before applying tape to it.
Can I paint baseboards without using tape?
Yes. A steady angled brush, a clean paint shield, and careful floor protection can produce a neat edge without tape. Tape remains helpful for many beginners, especially beside textured flooring, but it still needs controlled brushwork.
What sheen is best for baseboards?
A washable trim finish is usually more practical than a very flat coating because baseboards receive regular contact and cleaning. Choose a sheen recommended for the product and room, then test it beside the wall because reflected light can change how the colour appears.
How do I stop brush marks from showing?
Use a good brush, keep the coating thin and even, and avoid brushing after it begins to become tacky. Work in short sections, maintain a wet edge, and make one light final pass along the length of the board.
Can I paint baseboards the same colour as the walls?
Yes. Matching trim can make walls, columns, and small rooms feel more continuous. Use a trim-appropriate product in the same colour and accept that a different sheen may create a subtle visual change.
How should I clean painted baseboards later?
Remove loose dust first so it does not scratch the finish during wiping. Use a mild cleaning method allowed by the paint manufacturer, avoid soaking MDF or wall joints, and test stronger cleaners in a hidden area.
Let Careful Preparation Do Most of the Work
Learning how to paint baseboards is mostly a lesson in preparing a narrow surface properly. Clean trim accepts tape and paint more reliably, repaired edges hold a sharper line, and a lightly loaded brush can follow the moulding without leaving thick ridges.
You do not need to repaint every baseboard in the same way. A worn wooden edge may need filler and primer, detailed white trim needs controlled brushwork, and a wall-matched colour can make a column feel calmer and more complete. Let the material, damage, and room design decide how much work the board actually needs.
Begin with one short wall where you can practise the cleaning, masking, and brushing sequence. Then step back in different light before moving into the next room. Which baseboard would you tackle first: a scuffed white run, a damaged timber edge, or trim painted to disappear into the wall colour?