A piece of furniture doesn’t need to be covered in sanding dust before it can look different. A dated colour, glossy laminate surface, dark wooden finish, or worn-looking cabinet may respond well to paint, provided the existing coating is still secure and the new product is designed to grip it.
I prefer to begin by asking what a piece actually needs. Sometimes sanding is necessary because paint is peeling or the surface is damaged. At other times, it adds work without solving the real problem. A thorough clean, a suitable bonding primer, or an all-in-one furniture paint may provide the preparation the surface needs.
A small table, laminate bookcase, bathroom vanity, glossy kitchen unit, leather chair, or dated dresser can all be approached differently. The finishes may vary, but the same rule runs through every successful no-sanding makeover: skipping sanding does not mean skipping preparation.
Before You Paint Furniture Without Sanding
A no-sanding method works best when the existing finish remains firmly attached. Run your hand over the furniture and check for peeling paint, flaking varnish, swollen laminate, loose veneer, deep scratches, grease, wax, and damaged edges.
Do not paint directly over loose or failing material. If the old finish lifts when lightly scratched or rubbed, it must be repaired or removed first. Paint cannot create a strong foundation over a surface that is already separating.
Cleaning matters even more when you aren’t sanding. Kitchen grease, furniture polish, hand oils, dust, and wax can prevent a new coating from bonding. Manufacturers of low-preparation furniture paints still instruct users to clean surfaces thoroughly before application, even when stripping, sanding, and separate priming are not required.
You’ll normally need one of two systems:
· An all-in-one furniture or cabinet paint specifically made for low-preparation surfaces
· A high-adhesion bonding primer followed by compatible furniture paint
A bonding primer can be useful on laminate, glossy finishes, ceramic-like surfaces, and other difficult materials. Some bonding primers are specifically designed to adhere to dense, glossy surfaces without sanding, but you should always follow the instructions for the exact product you choose.
Review a bonding-primer technical guide.
Remove knobs, handles, doors, and drawers where practical. Label cabinet doors and hardware so everything returns to the correct position. Protect the floor, open windows, and follow the paint manufacturer’s ventilation and safety guidance.
Paint an IKEA Laminate Bookcase Without Sanding
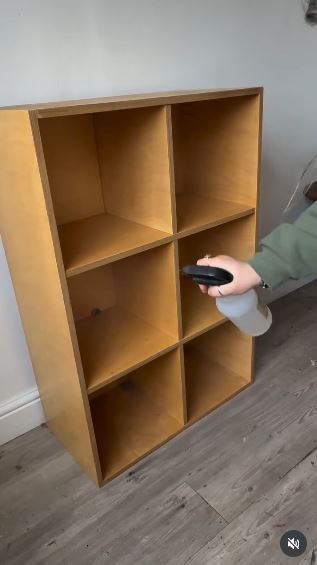
Laminate furniture is often the point where people become nervous about skipping sanding. The surface can feel slick and almost plastic-like, so ordinary wall paint may struggle to grip it. This makeover uses an adhesion primer intended for difficult surfaces before adding the new colour, creating a practical route for updating an IKEA-style bookcase without roughening the entire unit.
The important detail is the primer. No-sanding does not mean applying any leftover paint directly to laminate and hoping for the best. A bonding layer helps connect the smooth furniture surface to the decorative topcoat.
A bookcase is also a sensible first project because most of its areas are flat and easy to reach. The shelves will experience rubbing from books, baskets, and decorations, though, so careful curing matters just as much as appearance.
Materials and Tools
· Laminate bookcase in sound condition
· Degreasing cleaner suitable for the surface
· Clean lint-free cloths
· High-adhesion primer intended for laminate
· Compatible furniture or cabinet paint
· Small foam or microfibre roller
· Soft angled brush
· Paint tray
· Painter’s tape
· Screwdriver
· Drop cloth
· Optional protective topcoat when recommended by the paint system
Paint the Bookcase in Four Steps
1. Empty, inspect, and clean the whole unit. Remove adjustable shelves and hardware, then clean every area you plan to paint. Pay attention to shelf edges and the places where hands usually grip the bookcase, because polish and skin oils can remain there even when the surface looks clean.
2. Apply the adhesion primer carefully. Use a small roller across broad panels and a brush in corners, grooves, and around fixed supports. Keep the coat controlled rather than heavy, then allow it to dry and cure according to the manufacturer’s instructions before adding colour.
3. Build the painted finish gradually. Apply the first coat with light roller pressure and finish each section in the same direction. Let it dry fully, then add another thin coat rather than trying to hide the original finish with one thick application.
4. Reassemble only after the coating has hardened sufficiently. Place the shelves back gently and avoid dragging heavy books or storage baskets across the fresh paint. Add felt pads beneath decorative objects if you are concerned about early scratching.
I know it can feel tempting to put everything back as soon as the paint feels dry, but dry paint and fully hardened paint are not always the same thing. This is where patience may protect several hours of work.
For a simpler update, paint only the back panel or the outside frame. You could also line the back with removable wallpaper after painting, giving the bookcase more depth without covering every laminate surface.
Refresh a Bathroom Vanity With All-in-One Paint
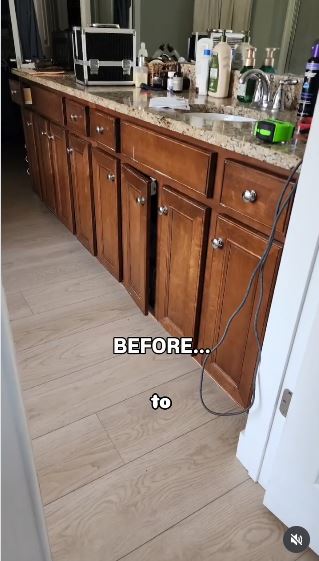
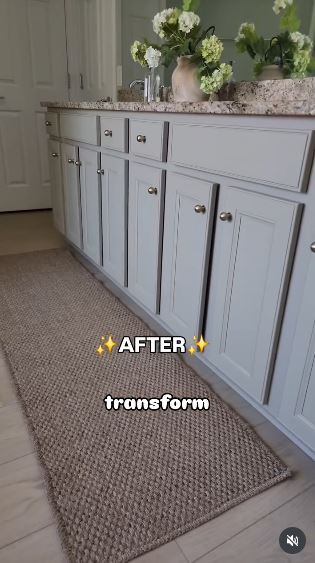
A bathroom vanity has to cope with damp hands, cosmetics, cleaning products, and regular contact, so the paint needs more than an attractive colour. This project uses a low-preparation paint system applied with a microfibre roller, producing a smoother and lighter finish without sanding the existing surface.
The transformation works because the original cabinet structure remains useful. There is no reason to replace sound doors, drawers, and storage simply because the finish feels too dark or dated.
Cleaning is particularly important here. Residue from hairspray, soap, hand cream, furniture polish, and bathroom cleaners may remain around handles and drawer fronts. I’d clean these areas twice rather than discover an adhesion problem later.
Materials and Tools
· Bathroom vanity with a firm existing finish
· Degreasing cleaner
· Clean cloths and fresh water for wiping residue
· Low-preparation cabinet paint or suitable bonding primer and paint
· Small microfibre roller
· Soft brush for corners and moulding
· Paint tray
· Screwdriver
· Painter’s tape
· Drop cloth
· Replacement knobs or pulls, if desired
Repaint the Vanity in Four Steps
1. Remove the doors, drawers, and hardware where possible. Label each part before moving it so hinges and doors return to their original locations. Clean the cabinet frame and every removable piece, including the edges that are normally hidden while the doors are closed.
2. Test the coating on a discreet section. Apply a small amount inside a door or on another hidden area and let it dry as directed. Check whether it grips securely before covering the whole vanity, especially if the original surface is glossy or you don’t know which finish was previously used.
3. Paint detailed areas before rolling the flat sections. Use the brush around panel edges, corners, and mouldings, then lightly roll the centre areas while the brushed paint is still workable. Keep the layers thin and check the lower edges for drips before moving to the next door.
4. Allow the pieces to cure before reassembly. Reattach the hardware carefully and avoid tightening screws so aggressively that they twist against soft paint. Treat the vanity gently during the early curing period and clean it with mild methods recommended for the chosen coating.
One practical detail I wouldn’t skip is placing doors horizontally while painting. It gives the coating time to level and makes it easier to spot paint gathering along the lower edge.
New handles can sharpen the final result, but measure the existing holes before buying replacements. Reusing the original hardware with a careful clean may be enough, particularly when the new paint colour already creates a strong contrast.
Give a Small End Table a One-Day Colour Update
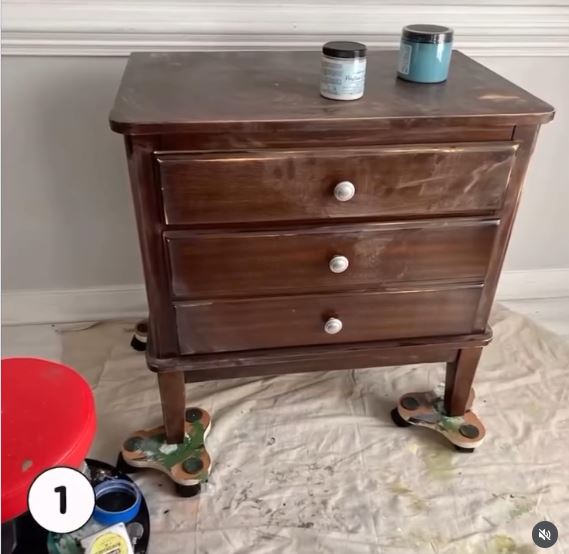
An end table is small enough to finish without taking over the room, yet large enough to reveal whether your preparation and painting technique are working. This project uses an all-in-one furniture paint intended to combine several finishing stages into a simpler application.
Flat tops can be deceptive. They look easy, but light reflects across them and makes heavy roller lines, drips, and missed areas more visible. The legs and lower rails usually need a brush, while the tabletop often looks smoother when painted with a fine roller.
Before choosing a no-sanding route, check the top for water damage, lifted veneer, deep cup rings, and flaking finish. Paint may change the colour, but it will not flatten damaged material underneath.
Materials and Tools
· Small wooden or previously painted end table
· Cleaner and lint-free cloth
· All-in-one furniture paint or bonding primer and compatible paint
· Fine roller
· Small angled brush
· Paint tray
· Screwdriver
· Wood filler for minor dents, when needed
· Drop cloth
· Optional new knob or handle
Update the Table in Three Steps
1. Prepare the surface and make small repairs. Remove the drawer and hardware, clean the table thoroughly, and check that all joints remain stable. Fill only the dents that will remain obvious beneath paint, then smooth the filler locally if the repair product requires it rather than sanding the entire table.
2. Paint the legs and details first. Work from the underside upward so you can reach inner rails and corners without leaning against freshly painted areas. Then roll the top and drawer front in thin, even passes, checking around every edge for paint that has begun to collect.
3. Add another coat and finish the details. Once the first coat is ready for recoating, apply the next layer with the same controlled technique. Let the finish harden before replacing the drawer and styling the top with lamps, books, or other objects.
For me, the top edge is the area worth watching. Paint likes to wrap over it and form a small ridge underneath, so run a nearly dry brush along the lower edge before leaving each coat to settle.
A leftover sample-size amount of suitable furniture paint may be enough for a small table. You could also paint the base while leaving a sound wooden top visible, although any exposed wood may need separate cleaning or refinishing.
Repaint Gloss Kitchen Units Without Sanding
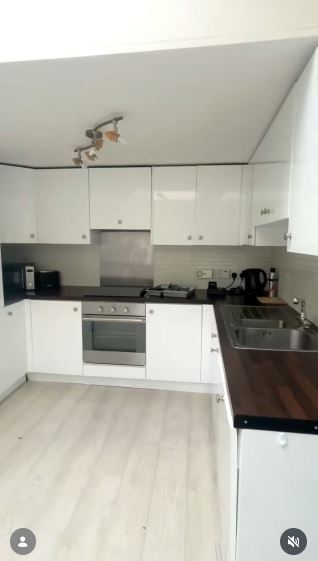
Gloss kitchen units can make a room feel tied to a particular style or decade, even when the cabinets remain strong and useful. This project uses a paint system promoted for glossy units without separate sanding or priming, allowing the existing kitchen structure to stay in place.
Cabinet painting demands careful organisation because you are working with several doors, drawer fronts, hinges, and handles. Label everything. A door that seems identical to the one beside it may hang differently when returned to the wrong opening.
Official instructions for no-sanding cabinet paint still emphasise cleaning away grease, oil, and wax. A small microfibre roller can cover flat sections, while a soft brush helps with corners and detailed areas.
Read a manufacturer’s cabinet-paint application instructions.
Materials and Tools
· Sound kitchen cabinet doors and drawer fronts
· Strong surface cleaner or degreaser approved by the paint brand
· Clean water and lint-free cloths
· Cabinet paint designed for glossy low-preparation surfaces
· Small microfibre rollers and spare sleeves
· Soft brush
· Paint trays
· Painter’s tape
· Screwdriver or drill
· Labels and marker
· Drop cloths
· Containers for hardware
Paint the Units in Five Steps
1. Create a numbering system before removing anything. Mark each door and drawer in a concealed location and place its hardware in a matching labelled container. Photograph hinge positions as a reference, especially when the cabinets use adjustable concealed hinges.
2. Degrease the cabinets thoroughly. Clean the areas around handles, the doors beside the cooker, and the lower cabinets where splashes often settle. Wipe away cleaner residue and allow every piece to dry before testing the paint.
3. Test adhesion on one door. Apply the chosen system to the back of a single door and let it cure as directed. Check the finish before committing to the whole kitchen, because a small test is easier to correct than twenty cabinet fronts.
4. Paint the doors and fixed frames separately. Brush corners and mouldings, then roll the broad sections in thin layers. Work around the room in a consistent order, and check horizontal edges for drips before the coating begins to set.
5. Reassemble carefully after curing. Rehang the doors using the labels and photographs, then adjust the hinges so the gaps remain even. Add the handles last and avoid harsh cleaning while the finish continues hardening.
The part I’d plan most carefully is where the doors will dry. Balancing freshly painted doors against a wall is a reliable way to collect marks, dust, and perhaps one very annoyed fingerprint.
For a smaller change, paint only the lower cabinets and keep the upper units in their existing finish. This reduces the workload and can introduce contrast without making every surface the same colour.
Create a Faux Wood Finish on a Painted Dresser
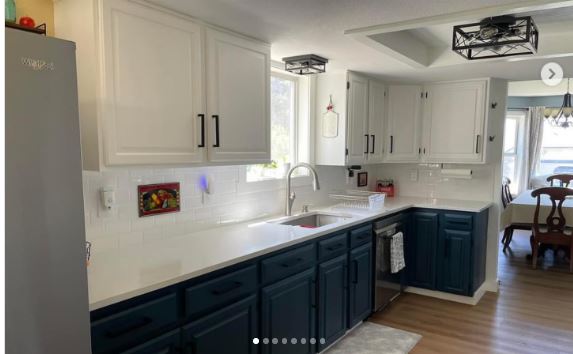
Painting furniture without sanding does not limit you to a flat block colour. This dresser makeover builds a faux wood effect by applying brown antiquing gel over an all-in-one painted base, creating visible depth and grain-like movement.
The success of this finish depends on restraint. If every brushstroke is equally dark and perfectly straight, the surface may look printed rather than naturally varied. A little inconsistency helps, but the grain direction still needs to make sense across drawers, sides, and the top.
This method is helpful when the original wood tone feels too orange or uneven, yet you still want a warmer furniture finish rather than opaque white, grey, or black.
Materials and Tools
· Dresser with a firm existing surface
· Degreasing cleaner and cloths
· All-in-one base paint or bonding primer and furniture paint
· Brown antiquing gel or compatible glazing product
· Chip brush or wood-graining tool
· Fine roller
· Soft brush
· Gloves
· Paint tray
· Screwdriver
· Drop cloth
· Optional replacement hardware
Build the Faux Finish in Four Steps
1. Clean and apply an even base colour. Remove the drawers and hardware, then prepare the entire piece according to the selected paint system. Choose a base shade that can remain visible beneath the brown glaze and allow it to dry fully before adding the faux grain.
2. Practise the grain on a sample board. Brush a small amount of antiquing gel across a painted offcut, varying the pressure and spacing. This gives you time to understand the product before making long marks across the dresser top.
3. Work one furniture section at a time. Apply the gel sparingly, then pull the brush in the direction natural wood grain would usually run. Soften any harsh marks before the product sets, and avoid carrying wet glaze onto an area you have already finished.
4. Let the finish cure before adding hardware. Check whether the selected system requires a separate protective coat and use only compatible products. Reattach the handles carefully so they do not twist through the fresh layers.
For me, this is a project where stopping early often gives the better finish. I know it can feel tempting to add one more dark streak, then another, but too many marks can hide the softer variation underneath.
You could use the faux wood effect only on the top and drawer fronts while painting the frame in a solid coordinating colour. That variation is easier to control and gives the dresser a clear two-tone structure.
Common Mistakes to Avoid
Treating “No Sanding” as “No Preparation”
Even paint designed for minimal preparation needs a clean, dry, stable surface. Grease and furniture polish create a barrier between the furniture and the new finish. Clean thoroughly and follow the exact product directions.
Painting Over Peeling or Chipped Finishes
A new coating cannot permanently secure material that is already lifting. Remove or repair the unstable areas first, even when that means some localised scraping or sanding.
Mixing Products Without Checking Compatibility
A random primer, paint, glaze, and topcoat may react poorly together. Stay within one recommended system or confirm that every layer is compatible before applying it to the whole piece.
Applying Thick Coats
Heavy paint can sag around drawer edges, settle in mouldings, and remain soft for longer. Several controlled coats usually create a neater result than one thick attempt at complete coverage.
Ignoring Cleaner Residue
A strong cleaner may remove grease but leave its own film behind. Follow the product directions and wipe or rinse the surface when required before painting.
Reassembling Furniture Too Soon
Handles, hinges, drawers, and shelf contents can mark paint that feels dry but has not hardened. Give the coating the curing period stated by its manufacturer.
Assuming Every Surface Uses the Same Method
Laminate may need an adhesion primer, while some all-in-one coatings are designed to bond directly after cleaning. Leather needs a flexible compatible coating. Match the system to the material rather than using one method everywhere.
Frequently Asked Questions
Can all furniture be painted without sanding?
No. The existing finish must be secure, and the new coating must be suitable for the surface. Peeling paint, loose veneer, rust, water damage, and unstable coatings usually require repair before painting.
What should I use instead of sanding?
Depending on the furniture, you may use an all-in-one low-preparation paint, a bonding primer, or a manufacturer-approved liquid surface preparation product. Cleaning remains necessary whichever method you choose.
Can I paint laminate furniture without sanding?
Yes, when the laminate remains firmly attached and you use a primer or paint system designed to bond to slick surfaces. Test the method on a hidden area before painting the complete piece.
Does chalk paint always work without sanding?
Not automatically. Some products are marketed for minimal preparation, while others need a primer or additional surface work. Read the manufacturer’s directions rather than relying only on the paint category.
Do I need a protective topcoat?
That depends on the paint. Some all-in-one products include a sealer, while other furniture paints need wax or a clear protective finish. High-contact surfaces such as tabletops may need extra protection when the manufacturer recommends it.
How do I prevent roller marks?
Use the roller type recommended for the paint, apply thin coats, and avoid repeatedly rolling over paint that has started drying. Keep consistent pressure and finish each section in the same direction.
How should I clean painted furniture afterward?
Use a soft cloth and a mild cleaning method approved for the coating. Avoid abrasive pads, harsh solvents, and heavy scrubbing, particularly while the paint is still curing.
Let the Existing Furniture Earn Its Next Finish
Learning how to paint furniture without sanding is really about choosing the correct preparation rather than avoiding work at any cost. A clean, stable dresser may accept an all-in-one paint, laminate may benefit from an adhesion primer, and glossy cabinets need careful degreasing before the first roller touches them.
Begin with a small piece if you’re uncertain. An end table or single bookcase gives you room to practise cleaning, testing, rolling, and waiting for the finish to harden. Once you understand how the chosen paint behaves, larger projects become much less intimidating.
Which piece of furniture would you test a no-sanding makeover on first?