Old envelopes tend to collect in places nobody deliberately chose for them: inside desk drawers, beside the printer, beneath stacks of bills, and in boxes of letters that haven’t been opened for years. Some carry decorative stamps or handwritten addresses, while others are plain business envelopes that seem useful enough to save but never quite find a purpose.
I like envelopes because much of their construction is already complete. The folds, flap, window, and sealed edges can become ready-made pockets, booklet pages, gift-card holders, journal tags, and layered collage pieces.
I don’t think every envelope should be cut apart. An envelope connected to an important letter, a family member’s handwriting, or an unusual postmark may deserve to remain intact. Ordinary junk-mail envelopes, damaged stationery, duplicates, and empty decorative envelopes give you more freedom.
Before choosing a project, look at what the envelope already does well. A clear window can frame a photograph. A long flap can become a closure. A row of opened envelopes can form an expandable folio without requiring complicated bookbinding.
Sort the Mail, Protect the Addresses, and Flatten What You Can
Remove every letter, cheque, receipt, card, photograph, and loose insert before crafting. Run your fingers along the corners because small slips of paper often remain trapped beneath the flap.
Check each envelope for:
- Names and home addresses
- Account numbers
- Barcodes
- Medical or financial information
- Unused stamps
- Meaningful handwriting
- Decorative postmarks
- Torn windows
- Brittle folds
- Sticky adhesive
- Mould or water damage
- Staples, clips, and plastic cards
Shred envelopes carrying personal or financial information when the details cannot be removed completely. The Federal Trade Commission recommends shredding documents containing sensitive information before disposal, and the same caution makes sense before turning identifiable mail into publicly shared crafts.
Cover ordinary addresses with paper, paint, or collage only when the information cannot still be read from the reverse. A marker may not fully hide printed details, especially when held against strong light.
Set sentimental envelopes aside before working. Store important paper items flat, supported, and away from dampness, strong light, and unnecessary handling.
Open reusable envelopes carefully with a letter opener or slim craft knife. Slide the tool beneath the flap rather than tearing through the back panel. Press curled envelopes beneath a few clean books, but avoid using moisture or strong heat to flatten them.
Useful Materials and Tools
- Empty envelopes
- Junk-mail envelopes
- Decorative stationery envelopes
- Envelope windows
- Scissors
- Craft knife
- Cutting mat
- Metal ruler
- Bone folder
- Glue stick
- Paper adhesive
- Double-sided tape
- Decorative paper scraps
- Old book pages
- Fabric and lace scraps
- Washi tape
- Stamps and ink
- Hole punch
- Eyelets
- Ribbon or twine
- Cardstock
- Paper clips
- Small photographs or journaling cards
- Coffee-dyed paper, if already prepared
- Pencil and eraser
Remove staples, plastic cards, magnets, and confidential information before cutting. Keep sharp tools and small embellishments away from children and pets.
Transform Decorative Envelopes Into Layered Journal Tags
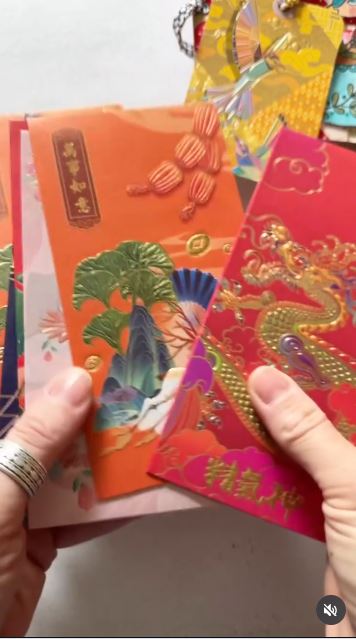
Decorative envelopes often have patterned linings, unusual flaps, embossed paper, or colours that are difficult to find in ordinary cardstock. This project turns those sections into journal tags rather than hiding them inside another envelope.
Some tags can remain flat, while others may use the envelope fold as a tiny pocket for a note. Keeping part of the flap visible helps the finished piece still feel connected to its original form.
Materials and Tools
- Decorative envelopes
- Tag template
- Scissors
- Hole punch
- Cardstock backing
- Glue stick
- Ribbon or thread
- Small paper offcuts
- Corner-rounding punch
Create the Tags in Four Steps
- Identify the strongest decorative area. Open the envelope and compare the front, flap, and lining. Check both sides before cutting so you don’t remove handwriting or a useful contrasting pattern.
- Cut and strengthen the tag. Trace a tag template over the chosen section and back thin envelope paper with cardstock. Leave the flap functional when you want a miniature hidden pocket.
- Add useful layers. Attach a small blank label, torn paper strip, or narrow pocket without covering the original design. Keep the finished tag thin enough to sit comfortably inside a journal.
- Finish the top. Punch a hole through a reinforced area and add ribbon, thread, or a narrow fabric strip. Test the tag inside the intended pocket before adding bulky knots.
For me, the original envelope lining should remain visible whenever it has an interesting print. Covering it completely rather defeats the point of saving it.
These tags can also become gift labels, bookmarks, recipe markers, or small notes tucked into parcels.
Join Several Envelopes Into a Pocket Folio
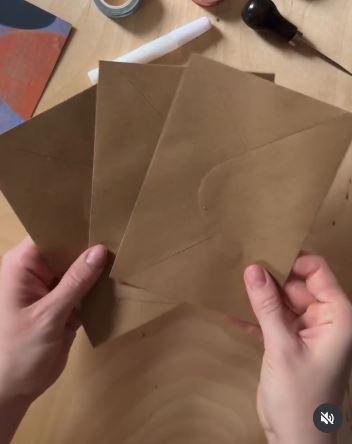
A pocket folio makes use of the complete envelope rather than cutting it into smaller pieces. Several envelopes can be joined by their flaps to form an accordion-style organiser with compartments on both sides.
The selected project creates an envelope pocket folio suited to junk journals and paper storage. Its structure can hold photographs, receipts, seed packets, travel notes, or small pieces of ephemera.
Materials and Tools
- Three to six envelopes
- Paper adhesive
- Bone folder
- Decorative paper
- Cardstock
- Ribbon
- Small labels
- Clips
- Optional cardboard covers
Assemble the Folio in Five Steps
- Arrange the envelopes before gluing. Place them in a row and decide which pockets should open upward, sideways, or toward the centre. Mix sizes only when the differences look deliberate.
- Connect the flaps. Insert or attach one flap to the back of the next envelope, keeping the fold line free. Work gradually and check that the growing folio still closes flat.
- Reinforce the outer sections. Add cardstock or lightweight board to the first and last envelopes when the folio needs firmer covers. Avoid making the covers much heavier than the interior.
- Decorate and label the pockets. Use paper scraps to cover addresses and damaged sections. Add labels only after deciding what each compartment will hold.
- Add a closure. Wrap ribbon around the finished folio or attach a simple paper band. Fill the pockets gradually so one side does not become much thicker than the other.
I know it can feel tempting to add every envelope in the drawer, but a folio that barely closes is simply a paper accordion having a difficult day.
A two-envelope version works as a travel-document holder or gift-card presentation folder. Larger business envelopes can organise sewing patterns or receipts.
Cover Junk-Mail Envelopes for Gift Cards and Happy Mail
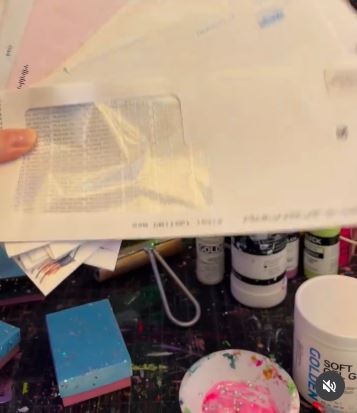
Junk-mail envelopes are useful when their seams remain strong but their printing makes them unattractive. Covering the exterior creates a reusable holder for a gift card, handwritten note, paper samples, or a small exchange of craft materials.
The selected idea turns unwanted mail into decorative envelopes suitable for pockets, gift-card holders, happy-mail swaps, and ephemera storage.
Materials and Tools
- Empty junk-mail envelopes
- Scrap paper
- Old book pages
- Glue stick
- Scissors
- Washi tape
- Blank labels
- Stamps
- Ribbon or stickers
Refresh the Envelope in Four Steps
- Remove confidential sections. Cut away or securely cover names, addresses, barcodes, and account references. Hold the envelope against light to confirm the information no longer shows through.
- Repair the structure first. Reinforce split corners and weak seams from the inside. Do not depend on decorative paper to hold together an envelope that is already falling apart.
- Cover the printed areas. Apply lightweight paper in sections rather than one thick layer over the entire envelope. Keep the flap flexible and leave enough space for it to close.
- Label the new purpose. Add a fresh name panel, sticker closure, or simple stamped design. Let the adhesive dry with an empty card inside so the front and back do not stick together.
I’d rather leave a small section of the original security pattern visible than bury the envelope beneath layers that make it too stiff to use.
A window envelope can become a gift-card holder with the recipient’s name visible behind the window. Narrow envelopes are useful for bookmarks, stickers, or handwritten coupons.
Build a Coffee-Dyed Envelope Collage
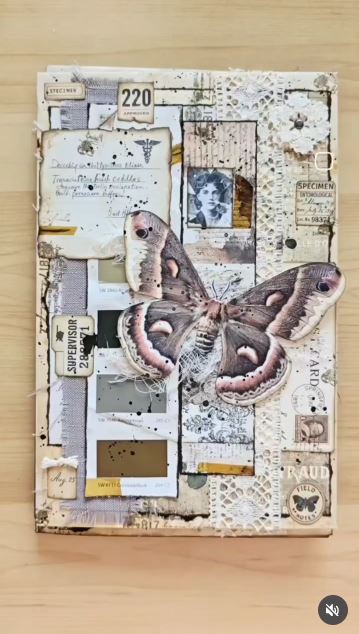
A collage allows you to reuse envelopes that are stained, mismatched, or too plain for display. The envelope remains functional beneath layers of paper, fabric, lace, paint marks, and printed ephemera.
This project uses coffee-toned envelopes with vintage-style paper pieces, fabric, lace, and colour samples to create richly layered journal elements.
Materials and Tools
- Old envelopes
- Prepared coffee-dyed paper
- Fabric scraps
- Lace
- Old book pages
- Glue stick or matte paper adhesive
- Paint
- Scissors
- Stamps
- Small labels
Create the Collage in Four Steps
- Choose a limited colour family. Gather papers and fabrics that share two or three tones. A restricted palette keeps the layers connected even when the materials come from different sources.
- Build from large to small. Attach one main paper layer first, then add fabric, lace, labels, and smaller fragments. Keep the envelope opening clear throughout the process.
- Balance texture with function. Place thicker materials away from folds and flap edges. Open and close the envelope several times before the adhesive dries completely.
- Add the final marks. Use a stamp, painted line, short word, or stitched detail to connect the layers. Then step back and remove anything that hides the strongest original feature.
For me, collage improves when one ordinary part of the envelope remains visible. A postmark, torn edge, or security pattern can stop the piece from looking like newly purchased decorative paper.
The finished envelope can become a journal pocket, wall collage, keepsake holder, or cover element for a handmade notebook.
Why Envelope Crafts Tear, Bulge, or Reveal Too Much
Leaving Personal Information Visible
Addresses, account references, barcodes, and medical details should not become part of a shared craft. Remove or destroy sensitive sections before decorating.
Gluing the Pocket Closed
Place scrap paper or a temporary card inside before applying adhesive. Keep glue away from the opening and check the pocket while it remains adjustable.
Adding Heavy Layers to Thin Paper
Fabric, buttons, thick cardboard, and multiple wet layers can pull an envelope out of shape. Use lightweight decoration or reinforce the back first.
Folding Without Scoring
Old paper often cracks along a new fold. Score the line gently with a ruler and bone folder before bending it.
Ignoring the Original Adhesive
Old gum may become sticky again when exposed to moisture. Cover or remove unreliable adhesive before adding wet paint or glue.
Mixing Too Many Envelope Sizes
Different sizes can work in a folio, but the openings and folds need a clear plan. Arrange everything before attaching the first flap.
Filling Pockets Too Deeply
Bulky contents strain the seams and stop booklets from closing. Match the insert to the envelope rather than forcing the envelope to hold it.
Crafting With Damp or Mouldy Mail
Discard visibly mouldy envelopes instead of brushing them on the craft table. Keep damp paper away from clean journals and stored correspondence.
Assuming Every Envelope Must Be Saved
Usable envelopes can be crafted, while clean unwanted paper may be recyclable depending on local rules. The EPA notes that mail and even many window envelopes can be recycled, although local programmes may differ.
Frequently Asked Questions
What is the easiest project for a beginner?
A decorated gift-card holder or simple journal pocket requires little cutting and no binding. Begin with a strong envelope that already opens cleanly.
Can envelopes with plastic windows be reused?
Yes. The window can frame a photograph, label, fabric scrap, or journaling card. Replace or reinforce it when the plastic has separated from the paper.
How can I hide an old address?
Remove the address section, cover both sides with opaque paper, or destroy the envelope when sensitive information remains readable. Test the covered area against strong light.
Can I paint an envelope?
Yes, but use light layers so the paper does not curl or soften. Place scrap paper inside while painting and allow each side to dry separately.
Are old self-sealing envelopes still usable?
The adhesive may have weakened or become uneven. Add double-sided tape, a sticker, ribbon, or paper closure rather than relying on the original seal.
Can I store seeds inside reused envelopes?
Plain, clean paper envelopes may hold completely dry planting seeds when clearly labelled. Avoid envelopes exposed to unknown substances, strong adhesive residue, or confidential mail that should be destroyed.
What should I do with envelopes I cannot reuse?
Remove non-paper contents and check your local recycling instructions. Acceptance can vary for heavily laminated, glittered, padded, or plastic-lined envelopes.
Let the Envelope Keep Holding Something Useful
Deciding what to do with old envelopes becomes easier once you notice the useful structure already built into them.
A flap can close a journal pocket. A clear window can frame a photograph. Several envelopes can become a folio or booklet, while decorative paper and fabric scraps can disguise unwanted printing without rebuilding the entire object.
Begin with one clean envelope that contains no private information. Turn it into a small tag, pocket, or gift-card holder before moving on to a larger bound project.
Which envelope would you reuse first: a colourful stationery envelope, a window envelope, an old airmail envelope, or the ordinary business envelope that arrived with this week’s post?