Old sweaters often remain in wardrobes long after they stop being worn. The colour may still feel right, the ribbed hem may be perfectly sound, or the knit may be too soft to discard, yet a stretched neckline, damaged cuff, stain, or awkward fit keeps the garment on the shelf. Sweater fabric is already shaped, textured, and finished at many edges, which makes it useful for projects that would otherwise require new knitted material.
I especially like sweater upcycling when the original garment guides the new object. A sleeve can become a hat, cuff, cup sleeve, or small storage handle. A patterned front panel can become wall art or a cushion. Several damaged sweaters can contribute sound squares to one quilt. I don’t think every piece needs to match perfectly; the slightly different knits often make the result feel more thoughtful and less mass-produced.
The fabric still needs careful handling. Knits can stretch while cutting, unravel at raw edges, shrink with unsuitable washing, and become bulky where several seams meet. Wearable and pet projects also need comfort and safety checks. Once the fibre, stretch, damage, and future use are clear, these upcycled sweater projects can refresh a wardrobe while also creating useful home accessories from material already available.
Wash, Inspect, and Stabilize the Sweater Knit
Preparation matters more with knitted fabric than it first appears. Two sweaters that look similar may react very differently to washing, cutting, heat, and stitching. A brief inspection helps preserve the usable areas and prevents weak yarn or hidden damage from becoming part of a high-stress seam.
· Read any remaining care label and clean the sweater by a method suitable for its known fibre; avoid experimenting with hot washing or drying on an irreplaceable garment.
· Check the body, sleeves, cuffs, neckline, underarms, elbows, and side seams for moth damage, thinning, stains, pulls, brittle yarn, or previous repairs.
· Mark the sound sections with removable chalk or safety pins before cutting so damaged areas are not accidentally included in a mitten palm, slipper sole, bag handle, or pet bed seam.
· Repair a small loose loop before handling the fabric, or secure the surrounding knit so the opening does not widen while the project is assembled.
· Test a scrap with the planned needle, stitch, thread, adhesive, interfacing, or backing before using the main panel.
· Keep ribbed hems and cuffs intact whenever they can serve as finished edges on hats, sleeves, socks, plant covers, or storage openings.
· Press only when the fibre and care instructions allow it, using a protective cloth and gentle handling rather than flattening the knit texture.
Match Stretch, Weight, and Seam Method
Sweater fabric moves differently from woven cotton. A loose knit may grow under its own weight, a dense felted knit may behave almost like fabric board, and a chunky cable can create a very thick seam. Choosing the construction method around that behaviour keeps the project comfortable and helps it retain its shape.
· Pair fabrics with similar stretch and weight when making socks, slippers, patchwork clothing, or quilts so one section does not pull harder than the others.
· Use a stretch-capable machine stitch, narrow zigzag, overlock method, or flexible hand stitch when the finished item still needs to expand.
· Stabilize loose or highly stretchy knit with a suitable backing, washable interfacing, tissue support, or stay stitching before cutting intricate shapes.
· Reduce bulky seam allowances at corners and layered junctions, but never trim so close that the knit can escape the stitching.
· Use a ballpoint or stretch needle where appropriate so the needle is less likely to split yarn strands.
· Choose strong woven fabric, felt, fleece, canvas, or non-slip material for parts that need structure, lining, abrasion resistance, or grip.
· Do not depend on fabric glue alone for washable garments, handles, pet beds, footwear, or seams that will be pulled repeatedly unless the product is specifically suitable.
Plan Safe Use, Care, and Final Shape
A sweater project should remain useful after the photograph is taken. Before sewing, think about how the object will be worn, washed, carried, heated, hung, or placed near pets and children. That practical plan determines which decorations, closures, fillings, and reinforcements are appropriate.
· Keep loose buttons, beads, yarn balls, pins, tassels, and pom-poms away from young children and pets unless they are securely attached and appropriate for the intended use.
· Use non-slip soles on sweater slippers and avoid treating plain knit socks as safe hard-floor footwear.
· Keep teapot cozies and coffee sleeves away from flames, hotplates, heating elements, steam openings, lids, and drinking edges; use them only as their construction safely allows.
· Make plant-pot covers removable and keep the knit away from wet soil, standing drainage water, and frequently damp surfaces.
· Choose washable filling and removable covers for cushions or pet beds when possible, then make sure stuffing cannot escape through loose seams.
· Reinforce handles, hanging loops, and wall displays independently of decorative knit so the fabric is not carrying more weight than it can support.
· Write down the care method or attach a small fabric label when the finished project combines several fibres whose cleaning needs may differ.
Cozy DIY Scarf and Mittens from Upcycled Sweaters
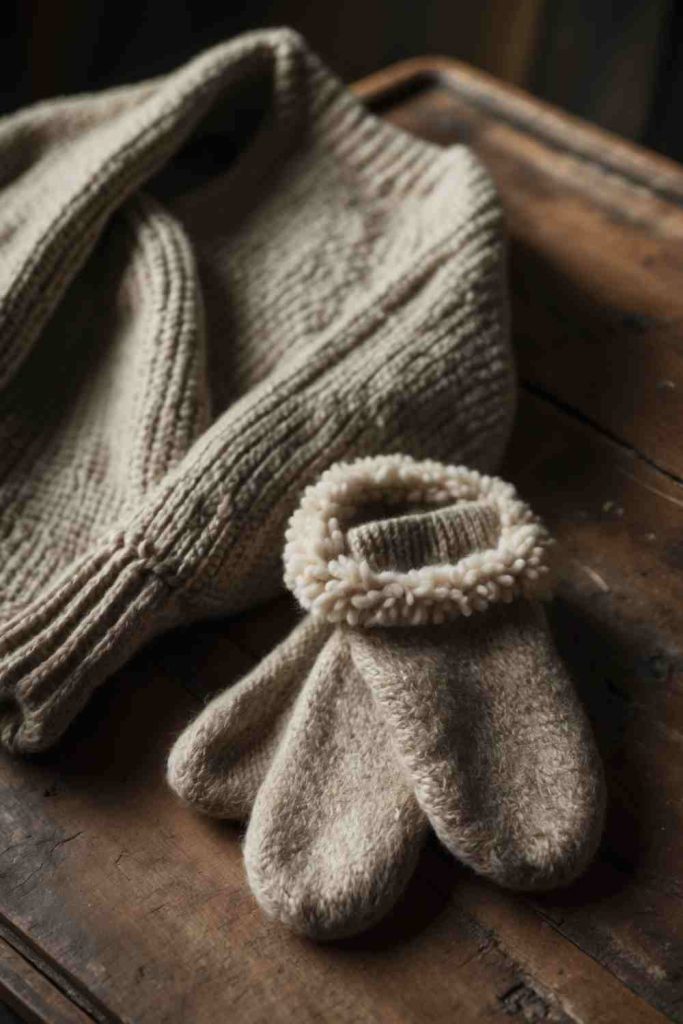
A scarf-and-mitten set makes good use of a sweater with a sound body and sleeves but an unwearable neckline or damaged lower section. The body offers long panels for the scarf, while the sleeves often provide conveniently shaped pieces for mittens. Reusing the same knit keeps the set coordinated without requiring perfectly matching new yarn.
Comfort depends on grain, stretch, and seam placement. The mitten palms need enough room to move without loose fabric twisting around the fingers, and the scarf edges need stabilization if the knit unravels. A soft lining can help when the original sweater feels warm but slightly rough against the skin.
Materials and Tools
· Clean soft sweater with large sound areas
· Well-fitting mitten pattern or a traced hand template with ease
· Scissors or rotary cutter and cutting mat
· Ballpoint needle, strong thread, and sewing machine or hand-sewing needle
· Pins or clips and removable fabric marker
· Optional fleece, jersey, or soft reused lining
· Optional yarn fringe made from secure leftover strands
Steps for This Upcycled Sweater Project
1. Plan the cutting layout before opening any seams. Place the scarf rectangle across the widest sound section, keeping a finished hem when possible. Position the mitten pieces on the sleeves or remaining body so both hands have similar stretch. Mark damaged areas clearly and leave practical seam allowances around the pattern.
2. Stabilize and cut the knit. Stay-stitch or support loose fabric before cutting, then cut matching mitten fronts and backs. For the scarf, cut one long panel or join two balanced sections with a flat seam. Test the raw edge on a scrap and finish it with stitching, binding, or a lining if the yarn begins to release.
3. Assemble the mittens with right sides together. Sew around the outer shape using a stretch-capable stitch, keeping the wrist open. Clip only where needed, turn the mittens carefully, and test the thumb and finger room. Add a soft lining separately if the main knit is open, scratchy, or not warm enough on its own.
4. Finish the set and check comfort. Hem or bind the scarf ends, add restrained fringe only if every strand is secure, and reinforce the mitten wrists. Wear the mittens indoors, flex the hands, and make sure no thick seam presses between the thumb and palm before relying on the set outdoors.
The mitten shape deserves a trial version in scrap fabric. I know it can feel tempting to cut directly into the best cable panel, but a quick test usually reveals whether the thumb angle and wrist opening need more room.
Variation: Make fingerless mitts from the cuffs, create a short neck warmer with a reused button closure, or line only the mitten palms for extra warmth without adding bulk everywhere.
DIY Cozy Sweater and Matching Socks from Upcycled Sweaters
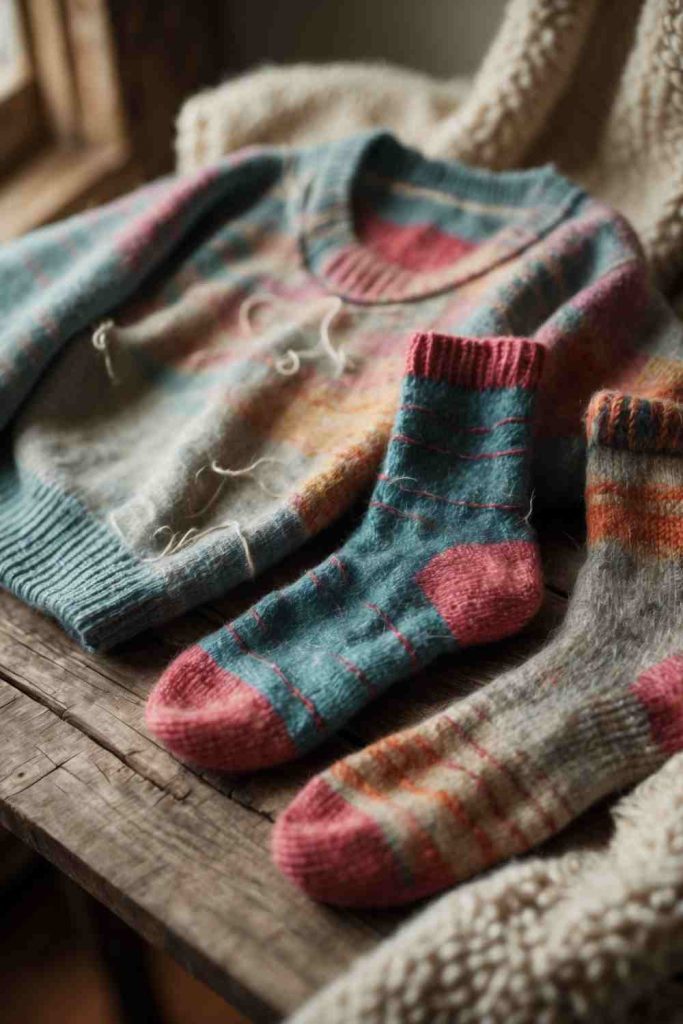
A coordinated sweater-and-sock set can begin with one wearable sweater that needs a small refresh and another damaged sweater that supplies matching knit. The main garment may need patching, reshaping, new cuffs, or a cropped hem, while the sleeves of the donor sweater can become soft indoor socks or boot liners.
Sweater knit alone is rarely suitable as a durable walking sole. Treat the sock element as bed socks, boot cuffs, or carefully constructed indoor socks with a reinforced and non-slip base. The refreshed sweater should remain comfortable after any patch or decorative seam is added.
Materials and Tools
· Wearable base sweater and a compatible donor sweater
· Sock or boot-liner pattern sized for the intended use
· Ballpoint needle, stretch thread or suitable sewing thread
· Scissors, pins or clips, and fabric marker
· Optional jersey or fleece lining
· Non-slip sole fabric or grip material appropriate for indoor footwear
· Optional matching patch, embroidery thread, or ribbed cuff sections
Steps for This Upcycled Sweater Project
1. Assess the base sweater while it is being worn. Pin the desired hem, cuff, or patch position and move the arms to check comfort. Choose donor knit with similar stretch so the new sections do not pull. Finish any repair before decorative work, because a patch should support a weak area rather than simply hide it.
2. Create the sock pattern around the intended use. For boot liners, the sleeve may need only a shaped cuff and foot section. For indoor socks, cut mirrored upper pieces and add a separate reinforced sole. Keep the ribbed sweater cuff at the ankle when possible so the opening already has a flexible finish.
3. Sew the sock pieces with controlled stretch. Join the upper sections first, then add the sole without stretching one layer more than the other. Grade bulky allowances and cover rough seams with lining or soft binding. Add non-slip treatment only according to the selected material’s instructions and let it become fully secure.
4. Coordinate and test the finished set. Repeat one colour, patch shape, embroidery line, or cuff detail on both the sweater and socks. Wear the socks briefly on a safe surface, check for twisting or pressure points, and reserve them for the environment their sole construction can safely handle.
For me, matching does not require identical decoration. One repeated cuff colour or small patch is enough; covering both pieces with embellishment can make a comfortable set feel busy and stiff.
Variation: Turn the donor sleeves into removable boot toppers instead of full socks, or add matching elbow patches and a lined neck warmer to the refreshed sweater.
DIY Matching Sweater and Slippers from Upcycled Sweaters
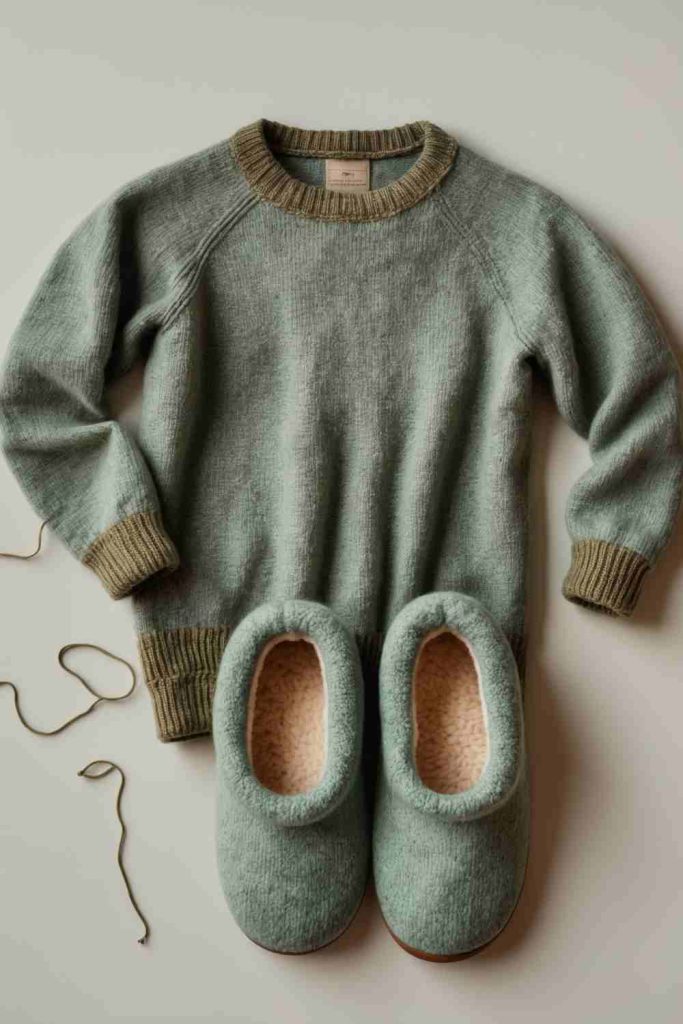
Matching slippers can reuse thick sweater panels while a wearable sweater receives related patches, cuffs, or embroidery. The soft knit gives the upper a relaxed look, but the structure underneath should come from a proper sole, lining, and stable pattern rather than from the sweater fabric alone.
Slippers need particular care because loose stretch, slippery soles, and bulky toe seams can create a fall risk. A reused felt insole, sound commercial slipper sole, or purpose-made non-slip base can support the knit upper. The fit should hold the heel without squeezing the toes.
Materials and Tools
· Base sweater and sound donor sweater knit
· Well-fitting slipper pattern
· Firm insole layer and non-slip outer sole material
· Soft lining such as fleece or felt
· Ballpoint and heavier needle as required by the layers
· Strong thread, scissors, clips, and fabric marker
· Optional matching patches or embroidery for the sweater
Steps for This Upcycled Sweater Project
1. Fit and refresh the sweater first. Decide which donor sections can become cuffs, pocket trim, or patches without making the garment heavy. Secure any weak knit beneath the decoration. Save the strongest and most evenly stretched areas for the slipper uppers, where distorted fabric would affect the fit.
2. Build a test slipper from scrap or inexpensive fabric. Confirm the toe depth, heel height, and opening before cutting the sweater. Then cut mirrored knit uppers, lining pieces, insoles, and outer soles. Stabilize the knit edges and mark left and right components clearly to avoid assembling two identical feet.
3. Assemble the upper and lining, keeping seams away from pressure points. Attach the upper to the firm insole with even tension, then secure the non-slip outer sole using a method suitable for all layers. Reinforce the heel and opening so repeated stepping does not stretch the knit out of shape.
4. Test the slippers on a clear, dry floor. Check that the sole lies flat, the heel stays in place, and no decorative button or seam presses against the foot. Make any fit correction before adding the final matching detail to both slippers and the sweater.
One detail I wouldn’t skip is the sole test. A soft sweater upper can disguise an uneven base until the slipper is walked in, and comfort should not come at the expense of grip.
Variation: Make open-back house mules with reinforced toes, create felted-wool slipper uppers, or use the sweater only as a removable decorative cover over a sound existing slipper.
Framed Sweaters and Pom-Pom Stack Display
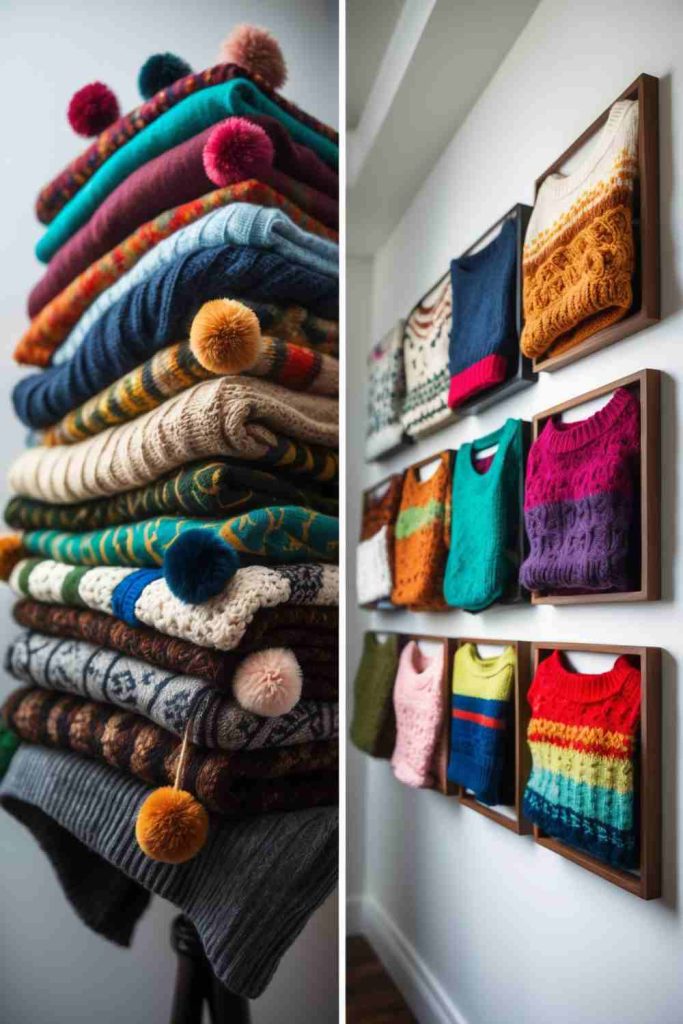
A patterned sweater front can become framed textile art, while folded sweater remnants create a soft shelf display finished with coordinated pom-poms. This works well for garments whose motifs, cables, or colourwork are still attractive even though the shape is no longer wearable.
The framed fabric needs even tension without being stretched so hard that the motif distorts. The stack should remain decorative rather than pretending damaged knits are still usable clothing. Pom-poms and loose yarn need secure attachment and sensible placement away from pets, children, candles, and heat sources.
Materials and Tools
· Patterned sweater panels and clean folded sweater remnants
· Frames, embroidery hoops, or reused canvases with sound backs
· Acid-free or clean backing board as appropriate
· Needle and thread, fabric-safe tape, or suitable stapling method
· Scissors, ruler, and fabric marker
· Yarn or narrow sweater strips for pom-poms
· Wall fixings appropriate for the completed frame weight
Steps for This Upcycled Sweater Project
1. Select the motifs and decide the display scale. Place a paper window over the sweater to test different crops before cutting. Check whether the knit is stable enough to stretch lightly. For a group display, vary frame sizes but keep one repeated colour or texture so the arrangement feels connected.
2. Prepare and mount each panel. Stabilize the cut edges, centre the motif, and secure the fabric to the backing with gentle, even tension. Work from opposite sides in sequence rather than pulling one edge completely tight. Keep frame hardware, glass clearance, and hanging points unobstructed.
3. Make the pom-pom accents from sound leftover yarn or narrow strips. Tie every centre firmly, trim the shape over a washable surface, and attach the pom-poms to a folded display band or separate cord rather than to fragile sweater areas. Avoid leaving loose fibres where they can be swallowed or pulled free.
4. Hang the frames with suitable wall hardware and arrange the folded stack below only where it will remain dry and undisturbed. Step back to check spacing. Dust textile pieces gently and rotate folded layers occasionally so one edge is not compressed indefinitely.
The part I like here is the crop. A small section of fair-isle or cable knit can feel more graphic in a frame than it did across the whole garment, so there is no need to force every usable inch into the display.
Variation: Stretch sweater motifs in embroidery hoops, frame a collection of repaired cuffs as a textile grid, or turn the folded stack into useful guest blankets if the pieces are still sound and washable.
DIY Sweater and Teapot Cozy from Upcycled Sweaters
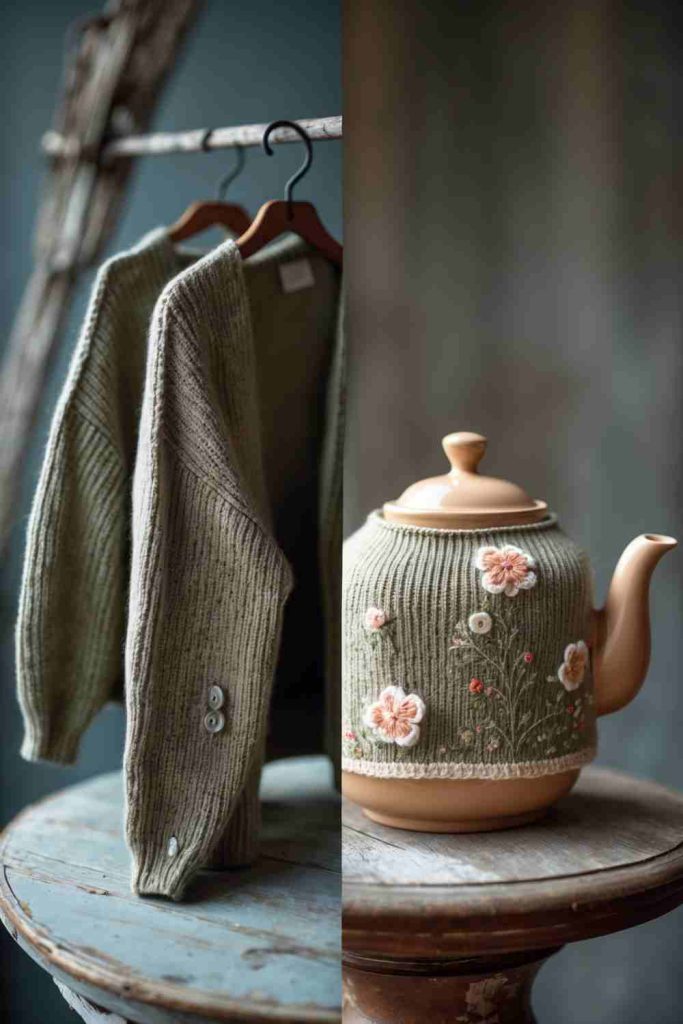
A teapot cozy can reuse the sleeve or body of a sweater after related knit has been used to refresh the garment itself. Ribbing forms a neat lower edge, while a lined double layer helps slow heat loss once the teapot has been removed from its heat source.
The cozy must leave the handle, spout, lid area, and steam path usable. It should never sit over a flame, hotplate, or heating element, and it should be removed if the fabric becomes damp or scorched. A removable washable lining makes the project easier to maintain.
Materials and Tools
· Clean sweater with sound knit and optional matching wearable sweater
· Paper for a teapot template
· Heat-tolerant lining or insulating layer appropriate for the intended use
· Ballpoint needle, strong thread, and sewing tools
· Scissors, pins or clips, and fabric marker
· Optional buttons, loop, or ties placed away from heat and steam
· Measuring tape
Steps for This Upcycled Sweater Project
1. Make a generous paper template around the cool teapot. Mark the handle, spout, lid knob, and the area that must remain open. Add room for lining and seams without making the cozy so loose that it slides. Test the paper shape on and off the teapot before cutting any knit.
2. Cut mirrored sweater and lining pieces. Use a ribbed hem as the lower edge when it sits safely above the base. Stabilize loose knit around the handle and spout openings. If the cozy will open at one side, plan a secure closure that can be released without reaching near hot steam.
3. Assemble the outer and lining separately, then join them with enclosed seams where practical. Keep bulky cable intersections away from the handle grip. Turn the cozy, check that the lining lies flat, and reinforce the openings so repeated removal does not stretch them.
4. Test the finished cozy only on a filled teapot that has been taken away from any heat source. Make sure the lid can be held, the spout remains clear, and steam is not trapped against the fabric. Follow the combined material’s care requirements and stop using it if any heat damage appears.
A coordinated sweater and tea cozy can be playful, but the cozy still has one job. I’d keep buttons and tassels away from the spout and handle rather than letting decoration interfere with pouring.
Variation: Make a removable wrap-style cozy with ties, use a felted wool outer with a washable cotton lining, or create matching mug coasters from the smallest stable scraps.
DIY Cozy Sweater and Matching Coffee Sleeve
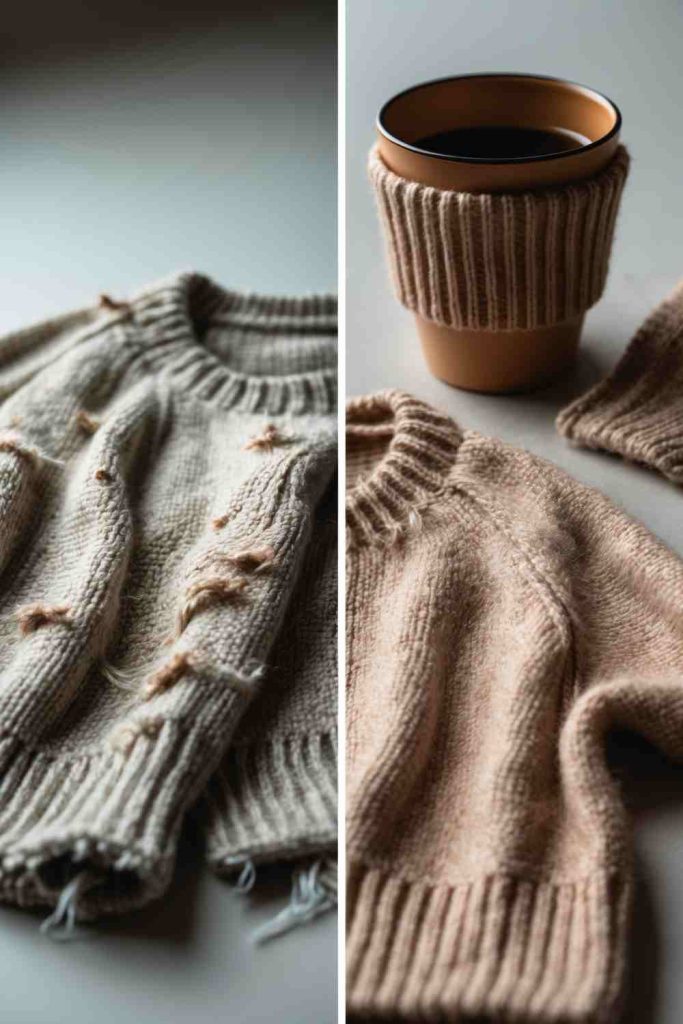
A coffee sleeve needs only a narrow sweater strip, making it useful for a cuff, ribbed hem, or small patterned remnant left after a garment alteration. Repeating the same knit as a pocket patch or cuff detail on the sweater creates a coordinated set without using much fabric.
The sleeve should fit the specific reusable cup securely while leaving the lid, drinking opening, base, and grip clear. It is not a substitute for a safe cup, and the knit should be removed if it becomes wet, loose, scorched, or difficult to hold.
Materials and Tools
· Small sound sweater section or cuff
· Reusable cup used only as a cool measuring form
· Paper strip for a template
· Needle and thread or sewing machine
· Scissors, clips, and fabric marker
· Optional cotton lining or thin insulating layer
· Optional small flat button with secure loop closure
Steps for This Upcycled Sweater Project
1. Wrap a paper strip around the widest useful part of the cool empty cup. Mark the overlap, taper, and areas that must stay clear of the lid and base. Slide the paper on and off to confirm it will not become trapped. Add a modest seam allowance and transfer the shape to the knit.
2. Cut the sweater outer and optional lining. Use ribbing horizontally if its stretch helps the sleeve grip. Stabilize any open knit and avoid placing a thick cable directly beneath the fingers. Sew the lining to the outer with the seams enclosed or finish the raw edges neatly.
3. Join the short ends to form the sleeve, or add a small loop-and-button closure if adjustability is needed. Reinforce the closure through a backing patch rather than pulling directly on loose knit. Keep all hardware flat so it does not press into the hand.
4. Test the sleeve on the cool cup, then check it again during cautious normal use. It should not slide toward the lid or base, twist under the hand, or hide damage to the cup. Wash and dry it according to the combined materials before refitting it.
The best coffee sleeve is usually simpler than the most decorated one. A secure ribbed band with one neat seam is easier to grip than a thick cluster of buttons and yarn ends.
Variation: Make an adjustable wrap sleeve for several cup sizes, use a sweater cuff as a no-waste starting edge, or add a matching patch to a reusable lunch bag.
DIY Cozy Dog Bed from Upcycled Sweaters
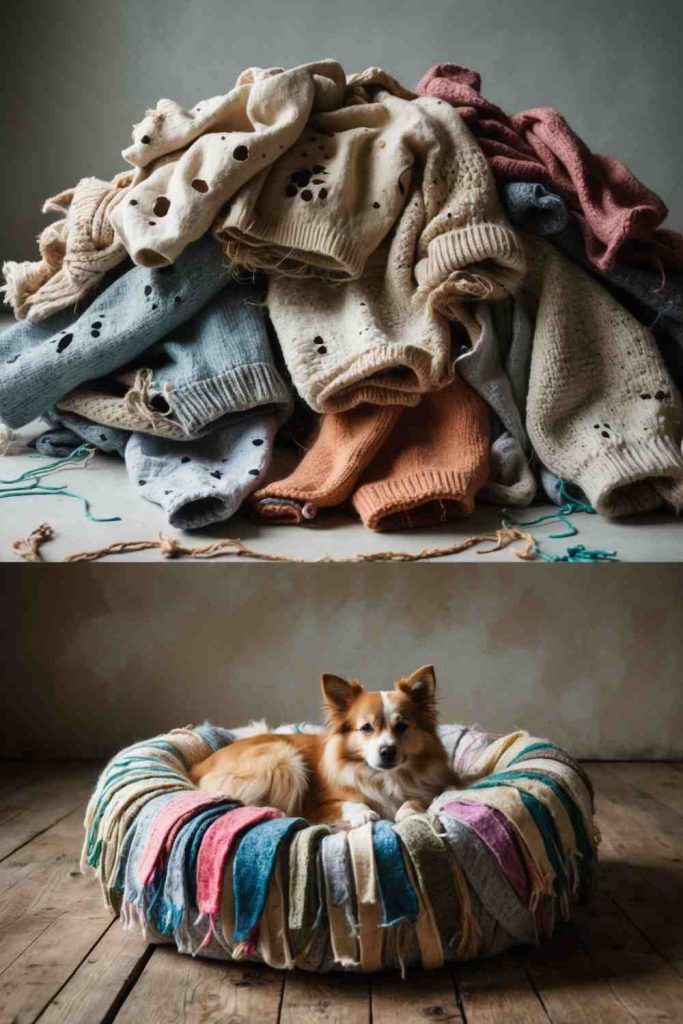
Several soft sweaters can contribute panels, braided strips, or filling covers for a washable dog bed. This project is most practical for sound knits that are no longer wearable but remain clean, colourfast, and free from loose decorations. A removable outer cover makes future cleaning much easier.
Pet safety comes before texture. Buttons, zips, yarn tails, pom-poms, pins, and open loops can be chewed or swallowed. The bed should suit the dog’s size and habits, and any pet that tears fabric or eats stuffing may need a different commercially appropriate bed.
Materials and Tools
· Clean sound sweaters without unsafe loose decoration
· Durable washable backing fabric
· Washable cushion insert or appropriate pet-bed filling
· Strong thread and suitable machine needle
· Scissors, clips, ruler, and fabric marker
· Optional concealed zip or envelope-style removable closure
· Non-slip base fabric if the bed will sit on a smooth floor
Steps for This Upcycled Sweater Project
1. Observe the dog’s usual sleeping position and measure a bed that allows comfortable turning and stretching. Sort sweater panels by strength, placing dense stable sections in the centre and avoiding weak cuffs or open lace. Remove every button, bead, zip pull, and loose trim from the usable fabric.
2. Create the outer patchwork or braided layer. Stabilize stretchy panels and join them with reinforced seams, keeping bulky junctions away from the main sleeping surface. Attach the knit layer to a durable backing so the sweaters provide softness and colour while the backing carries the structural stress.
3. Construct a removable cover around a washable insert. Use an envelope overlap or protected closure that the dog cannot easily reach. Add a non-slip base if appropriate, then inspect the entire interior for trapped pins, loose thread, and openings through which stuffing could escape.
4. Introduce the bed under supervision. Check whether the dog scratches, chews, overheats, or becomes caught in the knit. Wash and inspect it regularly, repairing small damage immediately. Retire the bed if the fabric, seams, filling, or closure no longer remain secure.
I’d rather use the sweaters as a removable decorative top than rely on loose knit for the whole structure. It makes washing easier and gives the bed a stronger layer beneath the softness.
Variation: Sew one stable sweater panel onto an existing washable bed cover, make a flat crate mat without loose filling, or create a small supervised blanket for a pet that does not chew fabric.
DIY Decorative Wall Art from Upcycled Sweaters
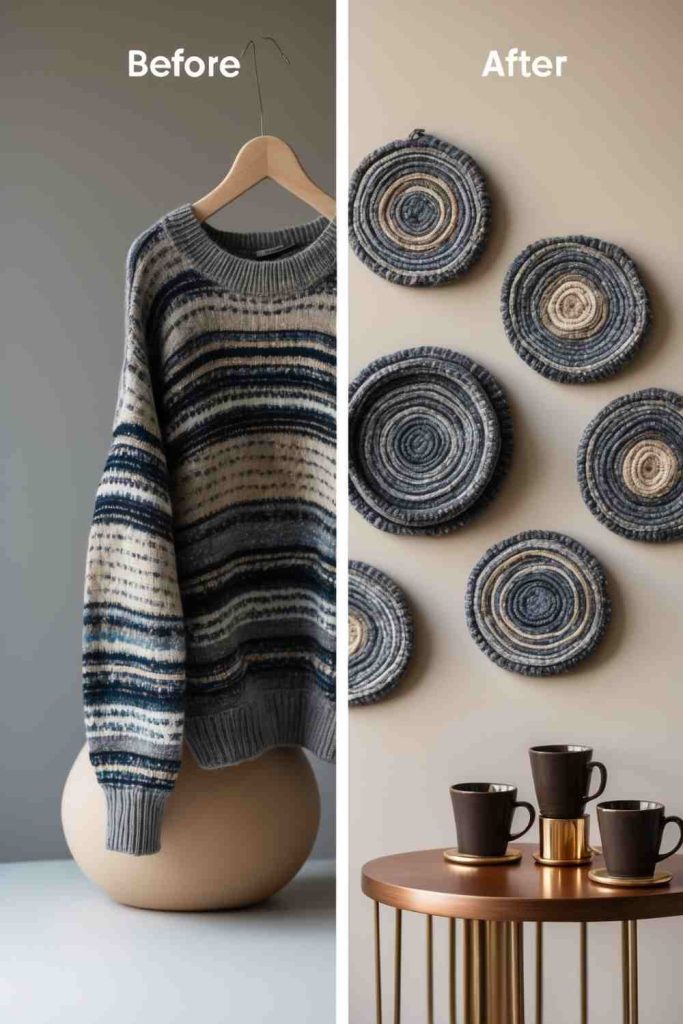
Sweater wall art turns colour, cable, ribbing, and printed motifs into a collection of soft circular or geometric panels. Embroidery hoops, small frames, and reused canvases provide structure, while the knit adds depth that ordinary paper artwork does not have.
The fabric should be supported rather than hung by its own cut edge. Hoops need tight hardware, framed panels need secure backs, and the completed pieces require wall fixings appropriate for their weight. Dust and sunlight exposure should also be considered when choosing the location.
Materials and Tools
· Sweater sections with interesting colour or texture
· Embroidery hoops, frames, or small reused canvases
· Backing fabric or board where needed
· Scissors, fabric marker, needle, and strong thread
· Fabric-safe tape, staples, or other suitable mounting method
· Ruler and paper crop templates
· Wall hardware suited to the completed pieces
Steps for This Upcycled Sweater Project
1. Create paper windows in the sizes of the frames or hoops. Move them across the sweater to compare cable intersections, motifs, and colour changes before cutting. Choose sections that remain stable when gently tensioned and avoid weak holes near the outer mounting area.
2. Cut each panel with enough allowance to wrap or gather at the back. For hoops, place backing fabric beneath a loose knit if necessary. Tighten gradually while smoothing the front, then trim or stitch the excess at the back without cutting so close that it can slip free.
3. For frames or canvases, centre the fabric and secure opposite sides in sequence. Maintain enough tension to remove sagging without flattening the texture. Keep hanging hardware accessible and add a clean backing layer to cover raw edges and prevent fibres from rubbing the wall.
4. Arrange the finished pieces on the floor using paper wall templates before drilling or fixing. Hang them with appropriate hardware, check that each piece is secure, and dust gently with a soft brush. Move delicate colours away from harsh direct sunlight if fading is a concern.
The first crop is rarely the strongest one. Then the hoop moves a few centimetres and suddenly a sleeve cable or colour transition becomes the focal point, so I always test several positions before cutting.
Variation: Combine sweater panels with repaired denim or linen scraps, create one large triptych from a patterned garment, or place small motifs in reused picture frames without glass.
DIY Cozy Pillows from Upcycled Sweaters
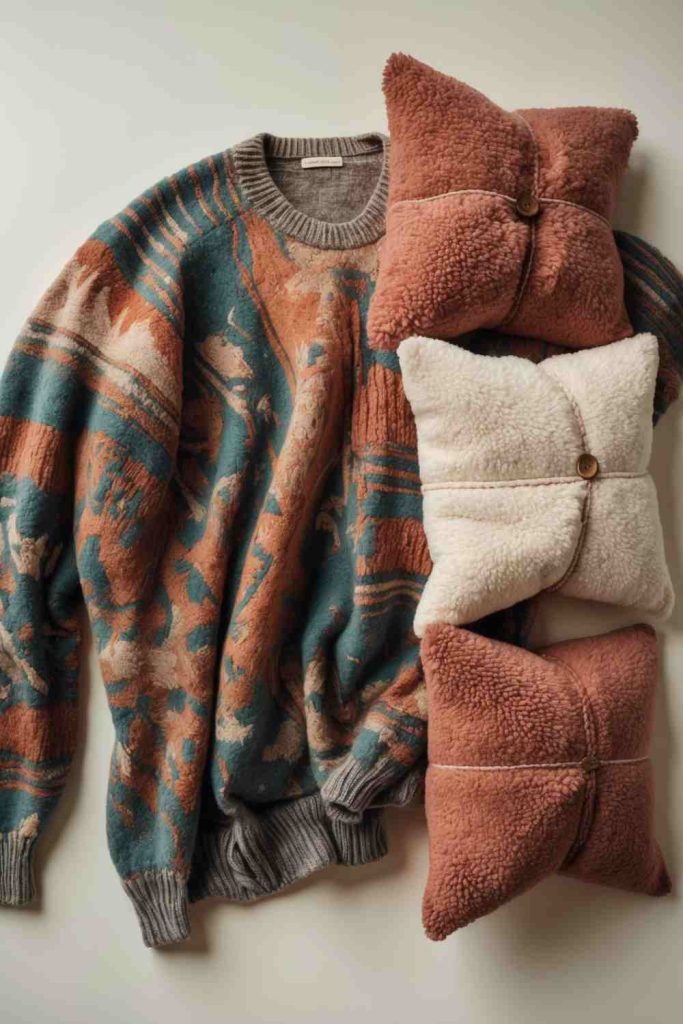
A sweater front or back can become a cushion cover when the knit is sound and the design is centred around the insert. Cable patterns, fair-isle motifs, and ribbed hems make the cover feel finished with relatively little decoration. A woven backing can reduce stretch and keep the pillow square.
A removable cover is usually more practical than sealing stuffing inside the sweater. The closure should stay hidden and secure, and old buttons should be placed only where they will not press into the person using the cushion or detach around children and pets.
Materials and Tools
· Clean sweater with a sound decorative panel
· Pillow insert in a chosen size
· Woven backing fabric or second stable sweater panel
· Ballpoint needle, strong thread, and sewing machine or hand needle
· Scissors, ruler, pins or clips, and fabric marker
· Optional concealed zip or envelope-back pieces
· Optional interfacing for very stretchy knit
Steps for This Upcycled Sweater Project
1. Measure the actual insert and choose the sweater crop. Centre the cable, motif, or neckline detail while checking for thin yarn around the elbows and underarms. Stabilize loose knit, mark the cutting rectangle, and include seam allowance without stretching the fabric during measurement.
2. Cut the sweater front and the chosen back pieces. An envelope back made from woven fabric can improve shape and simplify washing. Finish or stay-stitch the knit edges immediately. If adding a zip, support the opening so its weight does not distort the sweater.
3. Sew the cover with right sides together. Match centres and corners first, use a stretch-compatible stitch on the knit, and avoid pulling it through the machine. Grade bulky seams, reinforce the opening, and turn the cover carefully so the corners do not poke through loose yarn.
4. Insert the cushion and assess the shape. The cover should look full without stretching the knit until the pattern opens. Remove any uncomfortable raised decorations, close the fastening, and record the gentlest care method that suits both the sweater and backing.
A cushion does not need every sweater detail. I’d rather centre one strong cable and leave the rest calm than add buttons, tassels, and a neckline all to the same front.
Variation: Use the sweater only on the front with a sturdy reused curtain-fabric back, make a long lumbar cushion from a sleeve and body panel, or create removable seasonal covers.
DIY Unique Patchwork Sweater
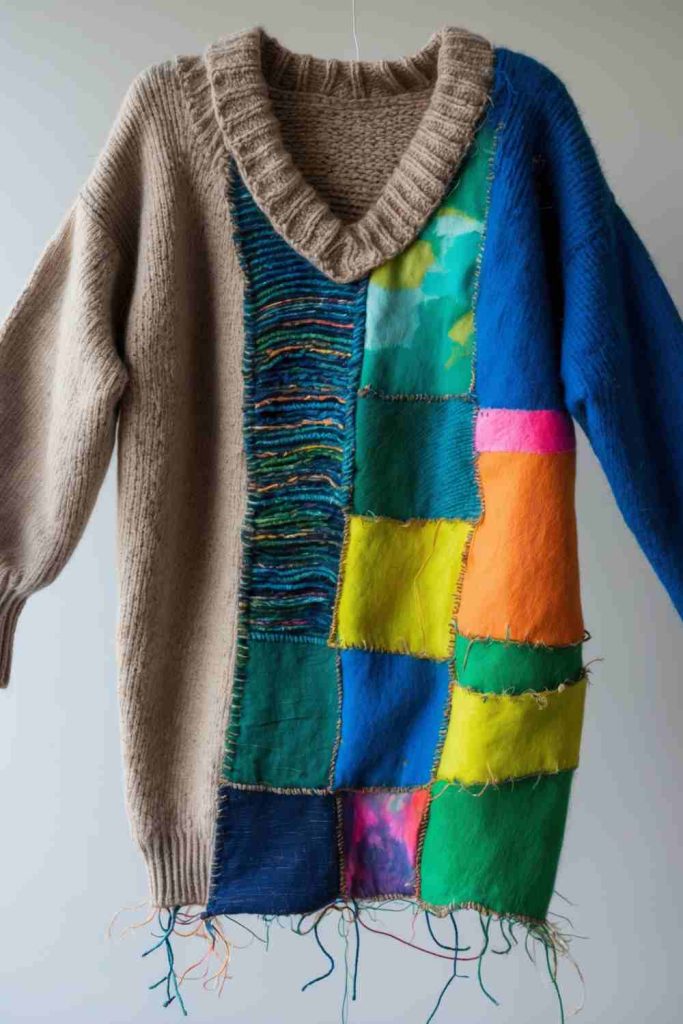
A patchwork sweater can combine sound sections from several damaged garments into one wearable piece. The most reliable version uses a well-fitting base sweater and adds panels, pockets, cuffs, or repaired zones, because the original shoulder and armhole structure remains intact.
Knits with very different stretch may fight each other. Heavy cable panels can pull on fine jersey, and raw edges may grow before they are sewn. A planned colour map, stabilized pieces, and gradual fitting keep the finished garment wearable rather than merely decorative.
Materials and Tools
· Well-fitting base sweater
· Donor sweaters with compatible stretch and weight
· Paper for patch templates
· Ballpoint or stretch needle and suitable thread
· Scissors or rotary cutter, clips, and fabric marker
· Optional lightweight knit interfacing or backing
· Dress form or mirror for repeated fitting
Steps for This Upcycled Sweater Project
1. Try on the base sweater and mark the areas that need repair or visual change. Photograph it flat, then sketch a limited patch layout. Place heavier pieces lower or closer to supported seams rather than hanging them from a fine shoulder. Keep movement zones such as underarms and elbows flexible.
2. Prepare the donor patches. Cut paper shapes first, then position them over sound knit with the intended stretch direction. Stabilize and finish the edges according to the chosen construction. Arrange all pieces on the base sweater and pin lightly before committing to any permanent seam.
3. Attach the main panels one at a time. Use flat stretch-capable seams or appliqué stitching that does not create hard ridges. After each major addition, try on the sweater and move the arms. Correct twisting or pulling immediately instead of hoping the next patch will balance it.
4. Finish cuffs, neckline, pockets, and internal seams. Reinforce weak transitions and trim only safe excess bulk. Wash or steam only as allowed by the most delicate fibre in the garment, then dry it in a way that protects the new shape.
For me, the base sweater should still do most of the fitting work. Rebuilding every panel from unrelated knits is possible, but it becomes garment construction rather than a simple wardrobe refresh.
Variation: Add patchwork only across the lower front, create mismatched repaired sleeves, or use visible mending stitches to connect small areas without covering the whole garment.
DIY Colorful Plant Pot Cover
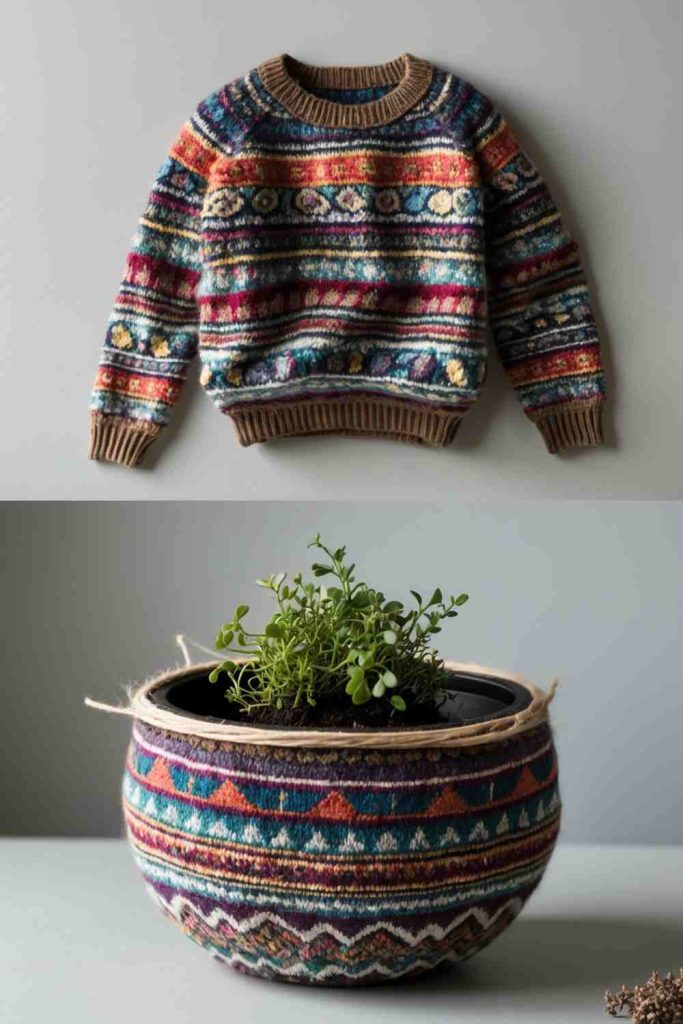
A colourful sweater sleeve or body strip can cover a plain cachepot and add texture to a shelf or windowsill. Ribbing naturally hugs the pot, and a patterned knit can coordinate several reused containers without painting them.
The sweater should remain separate from soil and drainage water. Use it around a dry outer pot or removable cachepot, keep the base accessible, and take the cover off before watering if there is any chance of moisture reaching the knit.
Materials and Tools
· Colourful sweater sleeve or stable body panel
· Clean dry outer plant pot or cachepot
· Measuring tape and fabric marker
· Scissors and needle with strong thread
· Optional lining or washable backing strip
· Optional twine used loosely and away from plant stems
· Clips or safety pins for fitting
Steps for This Upcycled Sweater Project
1. Measure the pot at its widest point and decide whether the cover will slide on, wrap, or close at the back. Include enough ease for removal. Check that the pot has a separate drainage system and that the sweater will not cover holes, sit in a saucer, or touch damp soil.
2. Cut a sleeve section or rectangular panel using the ribbed cuff as the upper edge when possible. If the knit is very stretchy, add a light backing or lining. Finish the cut edge immediately and test the cover around the empty dry pot before sewing the final seam.
3. Sew the side seam with controlled tension, or create a removable wrap using ties or a button loop. Keep bulky knots away from the surface on which the pot sits. Add only lightweight decoration and leave enough room around the rim to lift the inner plant container safely.
4. Fit the cover to the dry outer pot and inspect it after watering. Remove it promptly if moisture reaches the fabric. Dust, wash, and dry the cover according to the fibre, and keep it away from leaves or stems that are easily damaged by rubbing knit.
A removable cover solves most of the practical problems. I don’t want a lovely piece of knit permanently glued to a pot that must be washed or drained.
Variation: Use several coordinated sleeves on recycled tins used only as dry cachepots, create a reversible lined wrap, or add a narrow sweater band around a larger woven basket.
DIY Patchwork Plant Pot Cover
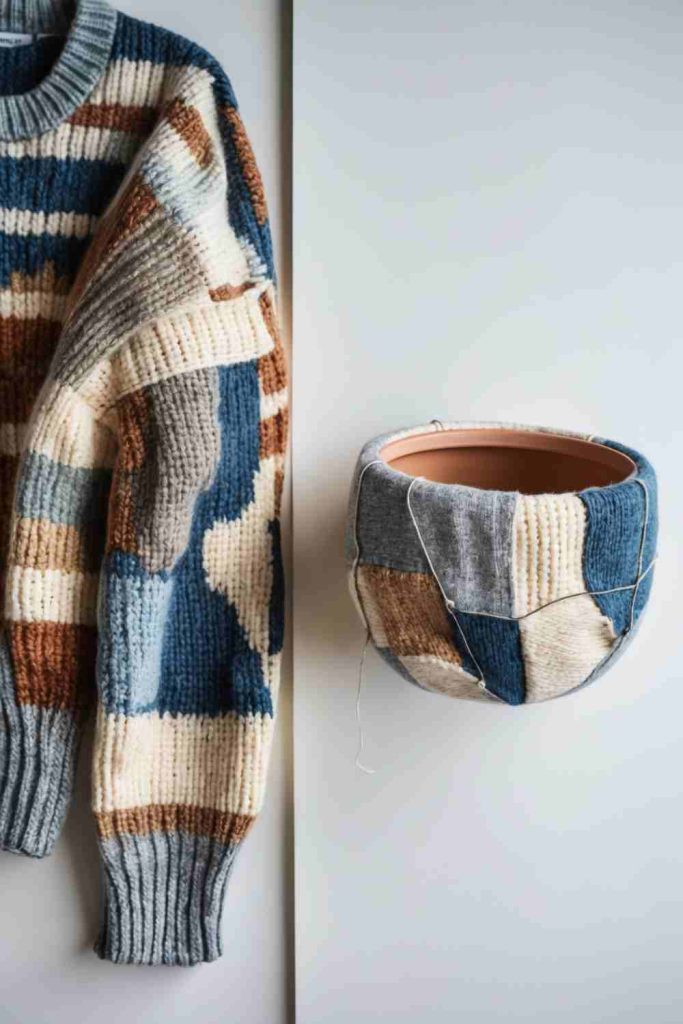
A patchwork pot cover uses small sweater offcuts that might be too narrow for clothing or cushions. Joining them into one panel makes the most of colour transitions, cuffs, and textured stitches while creating a removable decorative wrap.
The joined panel needs more structure than a single sleeve because each seam can stretch differently. A backing fabric helps carry the shape and keeps the patchwork from sagging around the pot. Moisture separation remains essential.
Materials and Tools
· Small sweater scraps with compatible care needs
· Backing fabric or lightweight felt
· Paper pot-wrap template
· Ballpoint needle, strong thread, and sewing tools
· Scissors or rotary cutter, ruler, and clips
· Optional hook-and-loop tape, ties, or flat button closure
· Dry outer cachepot
Steps for This Upcycled Sweater Project
1. Make a paper wrap around the empty dry cachepot, marking the overlap and rim clearance. Divide the template into patch sections that avoid too many seams at one point. Sort scraps by stretch and place the heaviest pieces near the lower area where the backing can support them.
2. Stabilize and cut the patches, then sew them into rows or a planned irregular panel. Press only if the fibres allow it. Grade bulky intersections and attach the completed knit layer to the backing so the backing controls the final dimensions.
3. Finish the top and bottom edges with binding, folded backing, or stable ribbing. Add a removable closure at the back and make sure it can be opened without lifting a heavy planted pot. Keep buttons flat and out of reach of small children or pets.
4. Wrap the cover around the dry outer pot and check all seam lines. Remove it for watering or whenever condensation appears. Wash only by a method suitable for every sweater in the patchwork and dry it flat to protect the shape.
The patchwork looks richer when one or two quiet pieces separate the strongest colours. Without those pauses, every scrap competes for attention around a very small object.
Variation: Make the patchwork as a reversible fabric basket, use it around a pencil pot, or create seasonal wraps that close with ties rather than permanent stitching.
DIY Matching Beanie Hat
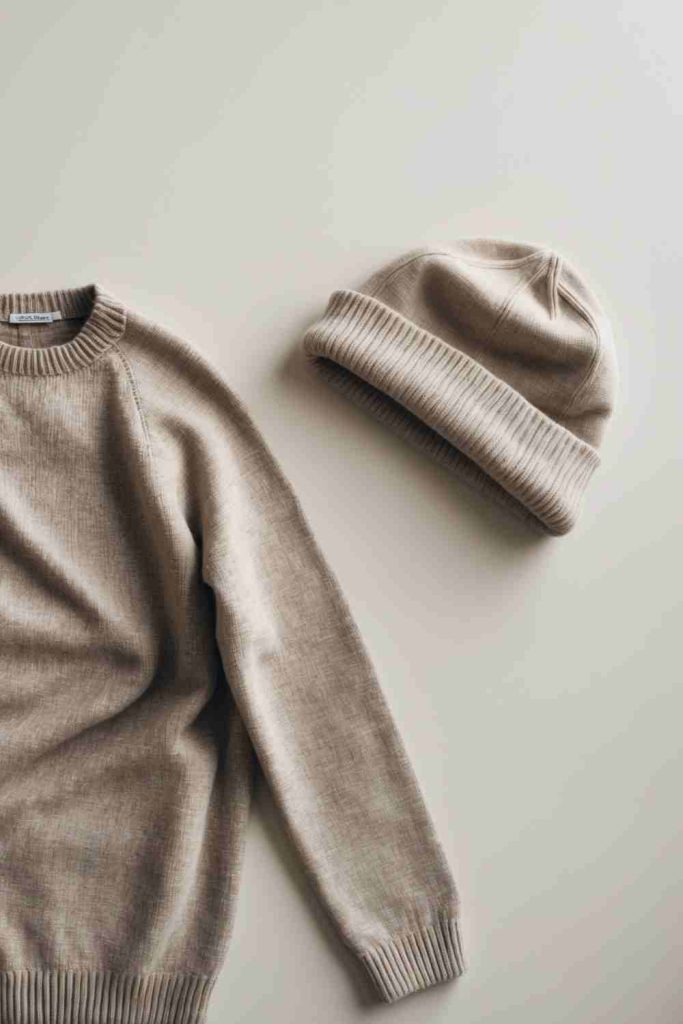
A sweater hem provides an ideal starting edge for a beanie because the ribbing is already finished and stretchy. The hat can coordinate with a refreshed sweater, scarf, mittens, or slippers by repeating the same donor knit or one small patch detail.
The main considerations are stretch direction, head comfort, and crown bulk. A chunky cable may need fewer crown seams than a thin knit, while an open loose sweater may need a lining. Decorative pom-poms must be secured and kept away from young children.
Materials and Tools
· Soft stretchy sweater with a sound ribbed hem
· Well-fitting beanie pattern or existing hat for reference
· Ballpoint needle and stretch-capable thread
· Scissors, clips, measuring tape, and fabric marker
· Optional soft jersey or fleece lining
· Optional securely made pom-pom for suitable users
· Matching patch material for the related sweater
Steps for This Upcycled Sweater Project
1. Measure the head and test the sweater stretch without pulling it to its limit. Position the pattern so the ribbed hem forms the lower band and the knit direction runs around the head. Avoid thin elbow areas and place a cable motif centrally if it will not create excessive crown thickness.
2. Cut the outer pieces and optional lining. Stay-stitch loose edges and mark front, back, and crown points. Sew the main vertical seam with a stretch-capable stitch, then shape the crown using darts or gathered sections appropriate to the knit and pattern.
3. Construct the lining separately and join it around the lower edge without restricting the ribbing. Enclose rough seams and distribute crown bulk evenly. If adding a pom-pom, reinforce the attachment from inside and make it removable for washing when practical.
4. Try on the hat and check the ears, forehead, and crown. It should remain in place without leaving painful pressure. Repeat one subtle detail on the matching sweater, then clean and dry both pieces according to the most delicate material used.
The ribbed hem does a lot of the work here. Keeping that original edge usually gives a neater and more comfortable result than cutting a new band from the middle of the sweater.
Variation: Make a slouchy lined beanie, a simple ear warmer from the hem, or a child-free household version with a removable yarn pom-pom.
DIY Colorful Patchwork Quilt
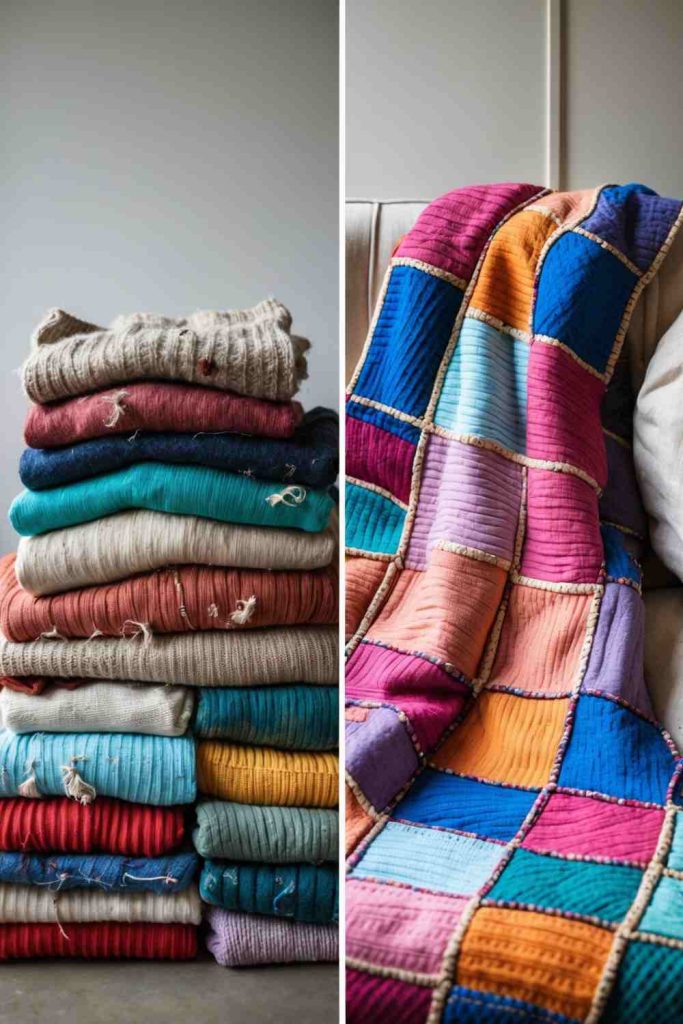
A colourful sweater quilt can combine many garments that are individually too damaged or small to reuse. Equal squares create a lively grid, while a strong backing supports the stretch and protects the seams from carrying the entire weight of the blanket.
Sweater quilts can become heavy. Mixing chunky wool, fine cotton knit, and synthetic jersey without planning may create uneven rows and difficult washing. Limiting the fibre range, stabilizing patches, and making a smaller throw are often more practical than aiming immediately for a full bed-size quilt.
Materials and Tools
· Clean sweater panels in a planned colour palette
· Square template, ruler, and rotary cutter or sharp scissors
· Lightweight washable stabilizer where needed
· Ballpoint needle, strong thread, and sewing machine
· Large flat area for arranging patches
· Durable backing fabric and optional light batting
· Binding fabric or a stable sweater rib border
Steps for This Upcycled Sweater Project
1. Sort the sweaters by weight, stretch, and care method. Choose a manageable finished size and calculate the number of squares before cutting. Make one test row from representative fabrics, wash it as intended, and check whether any knit shrinks, twists, or overwhelms the others.
2. Stabilize loose panels and cut equal squares without stretching them. Preserve motifs deliberately rather than centring every piece by habit. Arrange the full colour layout on the floor, then label rows or photograph the arrangement so it can be reconstructed at the machine.
3. Sew squares into rows with a consistent seam allowance, supporting the fabric so its weight does not pull. Join the rows while matching intersections and reducing bulky points. Press only as the fibres allow, using fingers and careful seam grading when heat is unsuitable.
4. Attach the quilt top to a strong backing and optional light batting. Quilt or tie the layers often enough to control shifting, then bind the perimeter securely. Support the quilt’s weight during washing and drying, and inspect patch seams before the blanket returns to regular use.
A colourful quilt still benefits from repetition. I like to repeat a few quiet neutrals across the grid so the brightest sweater squares feel intentional rather than scattered.
Variation: Make a lap throw, a cushion-sized sampler, or a wall-hung textile panel instead of a heavy bed quilt.
DIY Decorative Knitted Sphere
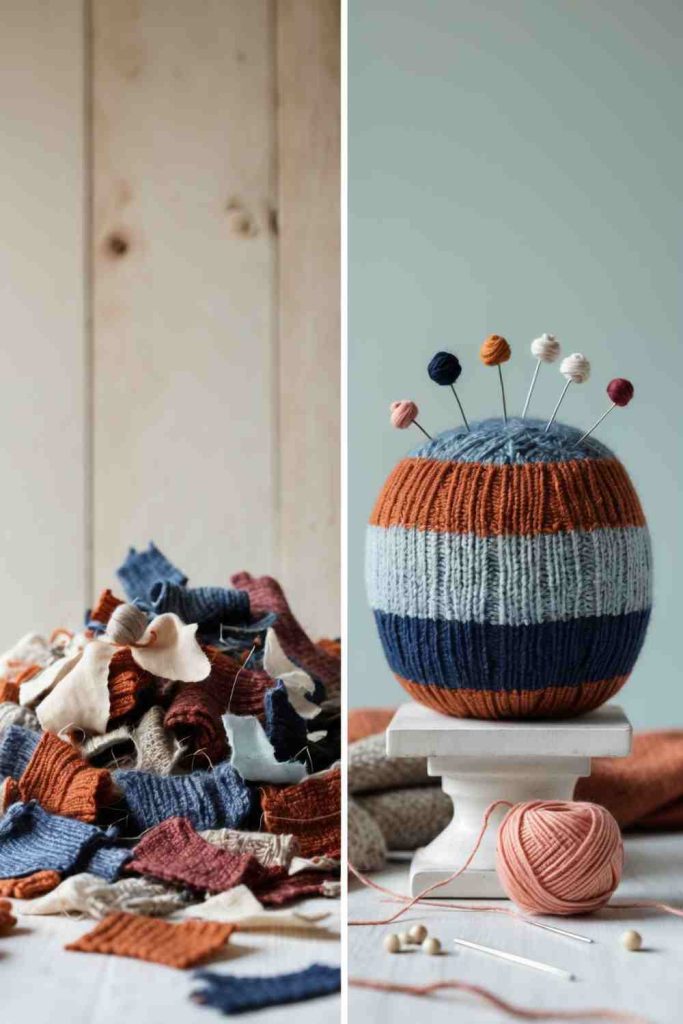
A decorative sphere can reuse a small stretchy sweater remnant over a lightweight ball or padded fabric form. The knit emphasizes cable and rib textures, while tiny yarn elements can turn the sphere into a sewing-room ornament or shelf accent.
Sharp pins and detachable yarn balls create obvious hazards. Use pins only in an adult craft display that remains inaccessible to children and pets, or replace them with sewn decorations. The base should be lightweight and stable enough that the stretched knit does not split or slip.
Materials and Tools
· Small sound sweater section with useful stretch
· Lightweight sphere base or sewn stuffed fabric ball
· Needle and strong thread or suitable fabric adhesive
· Scissors, clips, and fabric marker
· Optional securely sewn yarn balls or felt dots
· Optional pins only for an inaccessible adult display
· Small stable stand or bowl for display
Steps for This Upcycled Sweater Project
1. Measure the sphere and test how the knit stretches around it. Choose a section without holes and position the strongest texture at the visible centre. Cut a generous shape that can wrap to the hidden underside without pulling the yarn open.
2. Gather the fabric gradually around the base. Work from opposite points, smoothing the visible surface while keeping the texture aligned. Stitch the gathered edges together underneath or use a compatible adhesive sparingly, then trim only after the covering is fully secure.
3. Finish the hidden area with a small felt or sweater patch so raw edges cannot release. Add sewn yarn balls, embroidery, or soft appliqué if desired. Avoid loose loops. Pins should be omitted unless the piece will remain in a controlled adult-only display.
4. Place the sphere in a stable shallow bowl or stand and check that it cannot roll from the shelf. Dust it gently and inspect the underside periodically. Store it without heavy pressure so the knit texture does not become permanently flattened.
This is one project where editing matters. The cable texture may already be enough; adding a forest of yarn pins can hide the very knit that made the sphere worth covering.
Variation: Sew a completely soft fabric ball for seasonal décor, make several small spheres from coordinated scraps, or add a hanging loop that is independently reinforced.
DIY Knitted Storage Bag
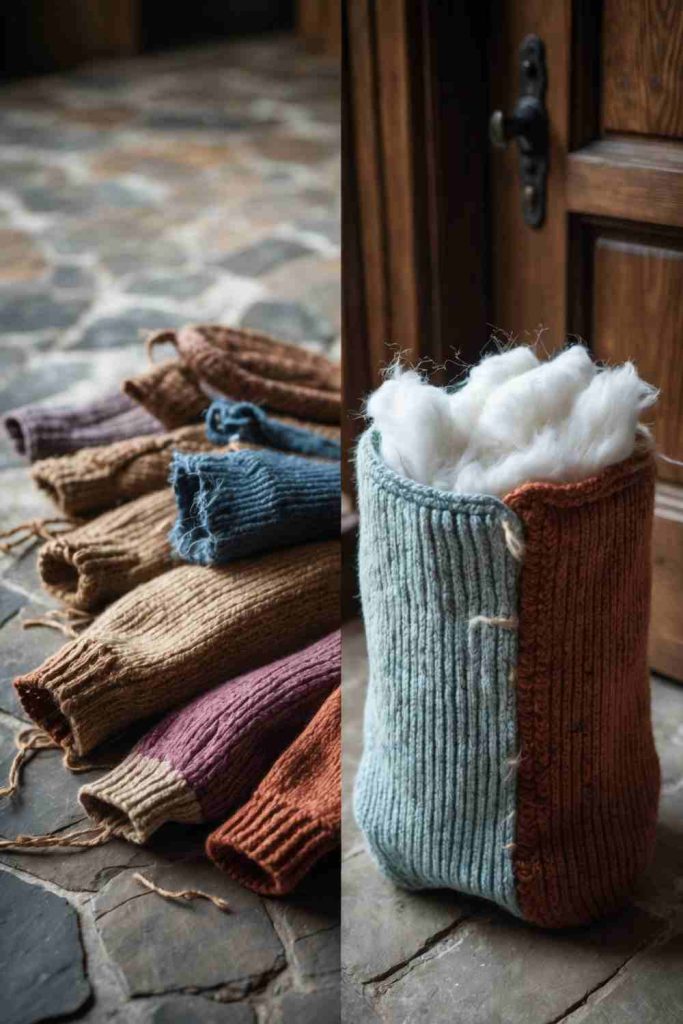
A sturdy sweater can become a soft storage bag for yarn, scarves, lightweight toys, or other dry household items. The knit creates an attractive outer surface, but a woven lining and reinforced base should carry the load and prevent the bag from stretching into a long narrow shape.
Handles require special attention. Sweater straps alone may grow, so reused webbing, leather offcuts in sound condition, woven fabric, or reinforced knit tubes are safer choices. The bag should not be used for heavy or sharp contents unless its construction is designed for them.
Materials and Tools
· Dense sound sweater panels
· Durable woven lining fabric
· Firm base insert enclosed in fabric if needed
· Strong thread, suitable machine needles, and sewing tools
· Scissors, ruler, clips, and fabric marker
· Reused webbing, strong fabric, or reinforced handles
· Optional inner pockets from shirt or trouser scraps
Steps for This Upcycled Sweater Project
1. Decide what the bag will store and measure around that purpose. Cut a paper pattern for the front, back, sides, and base. Keep decorative sweater motifs centred and place the strongest knit near the top edge. Avoid using a fragile neckline or stretched shoulder for a load-bearing section.
2. Stabilize the knit pieces and sew the outer shell, controlling stretch at the corners. Construct the woven lining separately with pockets if useful. Add a covered firm base only when the bag needs to stand, and make it removable if the cover must be washed.
3. Create and attach reinforced handles through the lining and structural layers, not only the sweater surface. Box-stitch or otherwise secure them using a method appropriate to the material. Finish the top edge so the knit, lining, and handle attachments behave as one supported band.
4. Turn the bag, insert the base, and test it with a light load first. Watch for growing handles, sagging sides, and pulling stitches. Increase the contents gradually only within the design’s limits, and keep pointed tools in separate protective containers.
The sweater should provide the character, not carry the entire load. A hidden woven lining makes the bag far more useful while allowing the knit to remain soft and visible.
Variation: Make a small hanging basket with an independently reinforced loop, a project bag with drawstring lining, or a flat tote for lightweight scarves.
DIY Cozy Patchwork Quilt
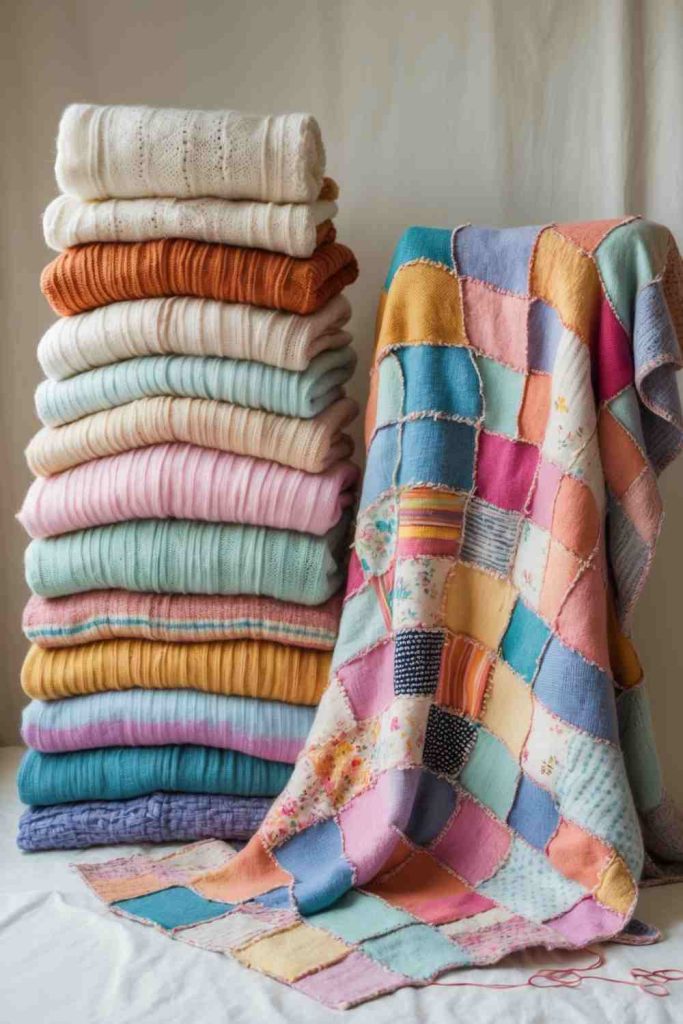
A cozy patchwork quilt can use larger sweater rectangles and a softer, calmer palette than the colourful grid version. Broad pieces preserve cables and fair-isle bands, while a warm backing turns the patchwork into a practical lap blanket or reading-chair throw.
Larger knit panels reveal stretching more clearly, so they benefit from careful stabilization and support. The finished blanket should remain washable within the limits of its most delicate fibre, and excessive weight should be avoided if the quilt will be used by someone with limited mobility.
Materials and Tools
· Sweater panels in a coordinated soft palette
· Large rectangle templates and ruler
· Washable stabilizer for loose knits
· Ballpoint needle, strong thread, and sewing machine
· Soft durable backing such as fleece or brushed woven fabric
· Optional light batting only if the quilt remains manageable
· Binding fabric and large flat layout area
Steps for This Upcycled Sweater Project
1. Choose a finished throw size and select larger panels that preserve the best textures. Group pieces by weight and washing requirements, then make a test seam between the stretchiest and firmest fabrics. Reduce the plan if the assembled sample already feels too heavy or unstable.
2. Stabilize and cut the rectangles, keeping cables straight and colourwork centred. Arrange the panels in staggered rows so several bulky seams do not meet at one point. Include plain pieces between highly textured sections to give the blanket visual and physical balance.
3. Sew the panels into rows while supporting their weight on the table. Join the rows, matching key lines without stretching the knit. Grade thick allowances and secure any yarn ends. Attach the quilt top to its backing with enough internal stitching or ties to prevent large unsupported areas.
4. Bind the outer edge and inspect the entire quilt from both sides. Wash according to the most cautious fibre requirement, supporting the wet weight and drying flat when necessary. Repair any opening promptly so a small loose loop does not grow across a large panel.
This version feels best when it is not oversized. A lap quilt preserves the softness and makes washing realistic, while a very large sweater blanket can become surprisingly heavy.
Variation: Create a neutral reading-chair throw, a narrow bed runner, or a memory blanket using only small panels from meaningful sweaters backed by one stable fabric.
Sweater Upcycling Choices That Can Cause Stretching, Bulk, or Unsafe Results
Sweater projects often fail quietly rather than all at once. A cut edge grows while it is being sewn, a handle lengthens after the bag is filled, or a decorative button becomes uncomfortable only after the garment is worn. Planning around knit behaviour prevents most of these problems.
· Cutting before the sweater is cleaned and inspected can place shrinkage, moth damage, weak yarn, or hidden stains inside the finished project.
· Combining very different stretch and weight without stabilizing the pieces can twist socks, distort patchwork garments, and make quilt rows ripple.
· Leaving raw knit unsupported allows loops to escape and seams to widen. Stay-stitch, bind, line, felt, or otherwise finish the edge in a way suited to the fibre.
· Pulling knit while measuring or sewing creates parts that look correct on the table but shrink or twist when released.
· Using sweater fabric alone for slipper soles, storage handles, heavy bags, or wall-hanging loops asks a soft decorative material to perform a structural job.
· Placing buttons, thick seams, cables, or knots against the palm, sole, ear, wrist, pet sleeping area, or cup grip can make a visually appealing item uncomfortable or unsafe.
· Adding loose pom-poms, pins, yarn tails, beads, or buttons to pet and child-accessible projects creates avoidable small-part hazards.
· Allowing teapot cozies, coffee sleeves, or other knitted items to block lids, spouts, drinking edges, steam paths, flames, or heating elements can create heat and burn risks.
· Gluing a sweater cover permanently to a plant pot prevents proper watering, drainage checks, and washing; removable covers are usually more practical.
· Making a large sweater quilt without considering wet weight and care requirements can produce a blanket that is difficult to wash, dry, carry, or repair.
Frequently Asked Questions
Do sweaters need to be washed before upcycling?
Yes, when the fibre and care label allow it. Cleaning before cutting removes ordinary dirt and reveals shrinkage, colour transfer, holes, and weak areas. Unknown vintage fibres or delicate garments may need cautious testing or professional advice rather than an experimental wash.
How can I stop sweater fabric from unravelling after cutting?
Secure the knit before or immediately after cutting with stay stitching, an overlock method, binding, felting where appropriate, or a stabilizing backing. The best method depends on the fibre, stitch size, stretch, and whether the finished item needs to remain flexible.
Can I sew sweater knit with a normal sewing machine?
Many machines can sew sweater knit with the correct needle, thread, stitch, pressure, and support. Test several layers on scrap first, avoid stretching the fabric, and use tissue, stabilizer, or a walking foot when it helps the material feed evenly.
Are no-sew sweater projects durable?
A no-sew method can suit framed art, removable pot wraps, or lightly handled decoration when the adhesive is compatible. Wearables, handles, pet beds, slippers, quilts, and washable seams usually need stitching or another genuinely structural connection.
Can wool sweaters be felted before reuse?
Some untreated animal-fibre knits may felt, but fibre blends and treated wool can behave differently. Felting is a permanent change, so test a sacrificial scrap and do not use an irreplaceable sweater unless the result is understood.
How should upcycled sweater projects be washed?
Follow the most cautious care requirement among every fibre, lining, filling, trim, and adhesive used. Removable covers are easier to maintain. Support heavy wet items, avoid heat unless the materials allow it, and dry flat when stretching is a concern.
Can sweater scraps be used for baby or pet items?
Only when the materials, construction, cleanliness, and final design are appropriate for that specific use. Remove small parts and loose fibres, enclose filling securely, avoid long loops or cords, and supervise pets that chew fabric. A decorative idea is not automatically safe for unsupervised use.
What can I do with very small sweater scraps?
Small stable pieces can become patches, covered buttons for adult garments, cup-sleeve accents, framed motifs, soft appliqué, or sections in a backed patchwork panel. Keep scraps with loose yarn or tiny decorations away from children and pets.
Let the Best Part of an Old Sweater Keep Working
The most useful lesson in these upcycled sweater projects is that a damaged garment rarely fails everywhere at once. A sound cuff can become a hat band, one patterned panel can become wall art, and several sturdy sections can join a pillow, storage bag, or quilt. Reusing the best areas respects the work already held in the knit while avoiding the need to force a worn sweater back into its original role.
Begin with one manageable project and let the fibre decide the method. Stabilize loose knit, add structure where the object needs strength, and keep comfort, heat, moisture, washing, children, and pets in mind. Then the finished piece can remain useful rather than becoming another delicate object that must be stored away.
Which overlooked sweater in your wardrobe has a cuff, cable, colour, or patterned panel that deserves a practical second use?
13 Upcycled Denim Jacket Ideas