Old sweatpants are usually retired for one small reason rather than complete failure. The knees may be faded, one leg may carry a permanent mark, or the loose shape may no longer feel right. Even when the waistband and fabric remain perfectly usable, the pair can spend months folded at the back of a drawer.
That soft fleece or jersey still has plenty to offer. Sweatpants can be shortened, reshaped, dyed, covered with patchwork, rebuilt into a skirt, or turned into a bag strong enough for everyday essentials.
I don’t think every pair needs a complicated transformation. Sometimes a darker colour or a cleaner cropped length is all that stands between old lounge trousers and something you’ll wear again.
The fabric does need checking before the scissors appear. Thin knees, loose crotch seams, twisted waistbands, and stretched cuffs can affect which project will work. Repair weak areas first, then choose a change that uses the strongest parts of the garment. The aim is to keep useful fabric in circulation, not persuade a badly damaged pair to perform one last heroic act.
Understand the Sweatpant Fabric
Sweatpants may be made from cotton jersey, French terry, brushed fleece, polyester, or a cotton-polyester blend. The care label is the best place to begin because fibre content affects cutting, sewing, dyeing, and pressing.
French terry has small loops on the reverse, while brushed fleece has a softer, raised interior. Both can become bulky where several seams or patch layers meet.
Some sweatpant fabric curls slightly after cutting. Other knits shed small fibres or stretch out of shape. Make a tiny test cut inside an unwanted hem or on a removed scrap before deciding whether a raw edge will remain tidy.
Stretch also matters. Pull the fabric across its width and length, then release it. Material that returns to its shape can usually handle fitted changes more successfully than fabric that remains stretched.
For machine sewing, a jersey or ballpoint needle is normally a better match for knit and stretch-knit fabric than a standard sharp needle because it moves between the knitted fibres instead of cutting through them. Needle size still needs to suit the thickness of the fleece.
Inspect the Sweatpants Before Cutting
Try the sweatpants on and identify why you no longer wear them. Are the legs too wide, the length awkward, the colour uneven, or the shape simply too warm for the season?
Then inspect the areas that will carry stress:
- Waistband and elastic
- Drawstring channel
- Crotch seam
- Inner-leg seams
- Pocket openings
- Knees
- Ankle cuffs
- Side seams
- Printed logos
- Areas with thinning fabric
- Existing repairs
- Stained sections
A permanent stain may suit dye or patchwork. Worn knees may be removed when making shorts, while a strong waistband can become the top of a skirt or bag.
Do not rely on decoration to repair structural damage. Close holes, reinforce thinning fabric, and secure open seams before adding patches, paint, dye, or trim.
Prepare the Sweatpants Properly
Wash and dry the sweatpants before measuring them. Avoid fabric softener when you plan to dye, paint, or glue the material because residue may interfere with the new finish.
Preparation may include:
- Checking the care label
- Washing and drying the garment
- Removing lint
- Repairing loose seams
- Reinforcing thin areas
- Testing the fabric stretch
- Trying on the sweatpants
- Marking the intended length
- Checking both legs for symmetry
- Testing dye on a hidden section
- Testing adhesive on a scrap
- Pressing the fabric when permitted
- Protecting the work surface
- Keeping sharp tools away from children and pets
When dyeing, match the product to the fibre content. Cotton-rich fabric and polyester-rich fabric may require different dye types and application conditions, so check the care label before buying anything.
Gather the Basic Tools
- Sharp fabric scissors
- Small thread scissors
- Flexible measuring tape
- Ruler
- Tailor’s chalk
- Washable fabric marker
- Seam ripper
- Fabric clips or pins
- Hand-sewing needles
- Strong thread
- Sewing machine, if available
- Jersey or stretch needle
- Scrap knit fabric
- Ribbing or elastic
- Fabric adhesive
- Pressing cloth
- Iron, when suitable
- Dye and dye-safe container
- Protective gloves
- Patch fabrics
- Cardboard
- Paper for patterns
A flexible fabric adhesive can help secure appliqués, trims, and selected patch edges, but use a product intended for washable textiles and test it first. Even flexible fabric glue should not automatically replace stitching on crotch seams, waistbands, bag handles, or other areas that carry regular strain.
Combine Old Sweats and T-Shirts Into Patchwork Sweatpants
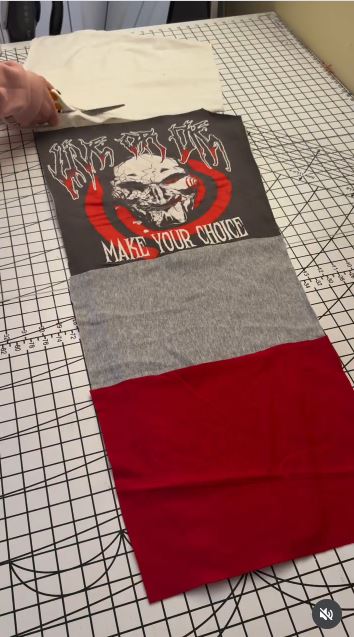
Patchwork works well when one pair of sweatpants has a dependable waistband and general shape but several areas are stained or worn. Instead of covering each problem separately, larger fabric panels can create a deliberate new layout.
Old sweatshirts, T-shirts, knit tops, and fleece offcuts may all contribute material. Try to combine fabrics with similar weight and stretch. A very thin T-shirt panel joined to heavy fleece may sag, while stiff woven fabric can pull against the softer sweatpant leg.
Materials and Tools
- Structurally sound sweatpants
- Old T-shirts or sweaters
- Paper for panel templates
- Fabric scissors
- Tailor’s chalk
- Pins or clips
- Strong stretch-friendly thread
- Jersey or stretch needle
- Sewing machine or hand-sewing needle
- Optional flexible fabric adhesive
Build the Patchwork Layout
- Map the areas that need covering. Put the sweatpants on and mark the stains, worn sections, or plain areas you want to change. Then lay the trousers flat and sketch a panel arrangement that follows the leg shape without crossing every seam.
- Choose compatible fabric scraps. Pull each fabric gently and compare its stretch with the sweatpants. Wash the scraps first, then cut paper templates before making permanent cuts into any favourite old shirt.
- Arrange the largest panels. Place the pieces across the front and back of each leg without attaching them. I’d balance the colour and weight rather than making both legs identical, then remove any small panel that makes the layout feel unnecessarily crowded.
- Secure the patches. Pin the largest pieces first and attach them with a stretch-friendly stitch around stable edges. Where several panels meet, avoid building one very thick intersection that could feel uncomfortable against the leg.
- Check the finished movement. Turn the sweatpants inside out, trim loose thread, and inspect the seams. Try them on and sit, bend, and walk before deciding whether any patch needs reinforcement.
For me, the original sweatpant fabric should remain visible somewhere. It gives the patchwork a base and prevents the trousers from looking like every scrap in the cupboard was invited without supervision.
A beginner can add only two large knee panels or one contrasting section down each outer leg. Old sweatshirt cuffs can also become ankle details.
Turn Long Sweatpants Into Loose Lounge Shorts
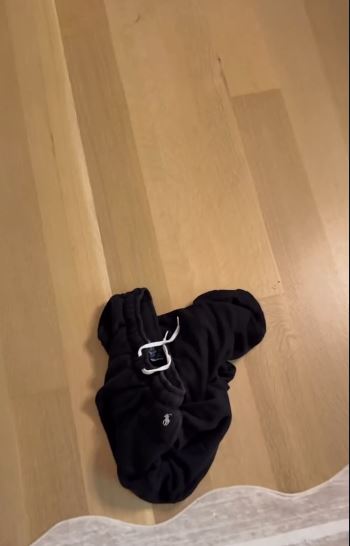
Shorts are a sensible choice when the waistband and upper section still fit but the knees, lower legs, or cuffs have become worn. The original pockets can stay in place, which makes the transformation more practical than beginning with loose fabric.
Length needs checking while the sweatpants are being worn. The fabric may rise while sitting, and thick fleece can curl or roll after cutting.
Materials and Tools
- Old sweatpants
- Well-fitting shorts for reference
- Measuring tape
- Tailor’s chalk
- Fabric scissors
- Pins or clips
- Matching thread
- Hand-sewing needle or sewing machine
- Optional fabric adhesive
Shape the Lounge Shorts
- Mark the length on the body. Put the sweatpants on and choose a point that remains comfortable when sitting. Mark both legs, then add extra fabric beneath that line for a folded hem or later adjustment.
- Align the legs. Lay the trousers flat and smooth them without stretching. Match the inner and outer seams, then use a ruler or an existing pair of shorts to check that the cutting lines sit evenly.
- Make the first cut cautiously. Cut one leg slightly below the final mark. Fold the sweatpants carefully and use the first leg as a guide for the second rather than measuring two completely separate lines.
- Finish the raw edges. Try the shorts on before trimming again. Fold and stitch the hems when the fabric sheds or rolls heavily, or leave a controlled raw edge when the knit remains stable and that suits the intended look.
- Use the leftover legs. Save the removed fabric for patches, a small pouch, cuffs, cleaning cloths, or another clothing repair. Wide lower-leg sections can also become fabric storage sleeves.
I know it can feel tempting to make the shorts very short immediately, but thick sweat fabric tends to rise more than expected. A first fitting saves a surprising amount of regret.
For a sportier finish, add small side notches and secure their upper points with stitching. An old drawstring can become a tie for a matching pouch.
Refresh Stained Sweatpants With a Darker Dye
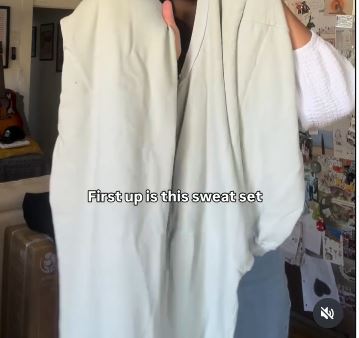
Dye is useful when the fit is still comfortable but the colour has faded unevenly or picked up marks that ordinary washing cannot remove. A darker shade usually offers more realistic coverage than trying to turn dark sweatpants pale.
Check the fibre content first. Cotton-rich fleece and polyester-rich fleece do not always take the same dye in the same way. Thread, elastic, printed logos, and drawstrings may also respond differently from the main fabric.
Materials and Tools
- Clean stained sweatpants
- Dye suited to the fibre content
- Dye-safe container
- Protective gloves
- Stirring tool
- Plastic table covering
- Rubber bands or string for a mottled effect
- Mild detergent
- Colour fixative when directed
- Old towels
Recolour the Sweatpants
- Inspect the stains and fibre label. Dye may blend discolouration into a darker finish, but it will not hide paint, bleach damage, or oily residue equally. Choose the dye method only after confirming what the fabric contains.
- Test a concealed area. Prepare a small amount according to the product instructions and apply it inside a pocket or to a saved offcut. Check the dried colour rather than judging the fabric while it remains wet.
- Prepare the pattern. For an even result, leave the sweatpants open and stir them regularly. For a mottled finish, fold or loosely bind selected areas without compressing the entire garment into one hard bundle.
- Complete the dye process. Wear gloves, protect the surrounding surfaces, and follow the exact temperature, timing, and rinsing directions for the chosen product. Do not use cooking utensils or food containers for textile dye.
- Wash and inspect the result. Complete any fixing process required by the manufacturer and wash the sweatpants separately at first. Once dry, decide whether the uneven areas feel intentional or need a second controlled treatment.
The drawstring may remain lighter than the trousers, and I’d consider keeping it that way. A small contrast often looks more interesting than trying to force every fibre into one identical shade.
You can use a single darker colour, a soft dip-dyed lower leg, or a loose folded pattern. Always follow the dye instructions rather than inventing a universal recipe.
Make a Cropped Track Set and Matching Tube Top
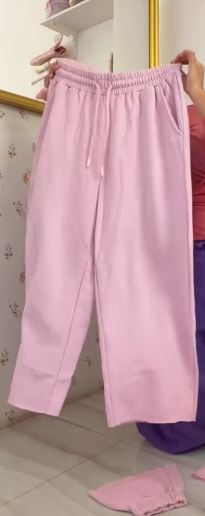
A matching set makes good use of both the upper and lower portions of oversized sweatpants. The waistband and hip section can remain as cropped trousers or shorts, while wider leg fabric may provide enough material for a small tube top.
This project depends heavily on fit. Sweatpant fabric may stretch comfortably around the waist but not offer enough recovery to support a strapless top. Add elastic or internal support where needed rather than relying on optimism and one determined safety pin.
Materials and Tools
- Oversized sweatpants
- Fitted tube top for reference
- Fabric scissors
- Measuring tape
- Tailor’s chalk
- Pins or clips
- Stretch-friendly thread
- Elastic
- Jersey or stretch needle
- Sewing machine or hand-sewing needle
Create the Matching Set
- Plan both pieces before cutting. Measure the desired trouser length and the fabric needed for the top. Mark every section first so the best leg fabric is not accidentally removed as a narrow unusable strip.
- Shorten the trousers. Cut below the intended hemline and test the cropped length. Finish the edges with a stretch-friendly hem or add saved ankle cuffs for a gathered lower edge.
- Cut the tube-top panel. Open one removed leg along a seam and compare it with a well-fitting stretch top. Allow enough width for a seam and enough depth for hems or elastic channels.
- Join and support the top. Sew the panel into a tube with a secure stretch-friendly seam. Add elastic at the upper edge when the fabric does not grip reliably, then finish the lower edge without making it rigid.
- Try the pieces together. Move, sit, and raise the arms to test both garments. Adjust the top before trimming seam allowances, and reinforce any point where elastic or seams carry strain.
The top does not have to use every scrap. I’d rather keep it simple and secure than add three decorative panels that make the fit harder to control.
The leftover cuffs can become arm warmers, wristbands, or hair ties. A beginner can create cropped sweatpants and a simple bandeau-style accessory rather than a fitted top.
Turn Track Pants Into a Pleated Mini Skirt
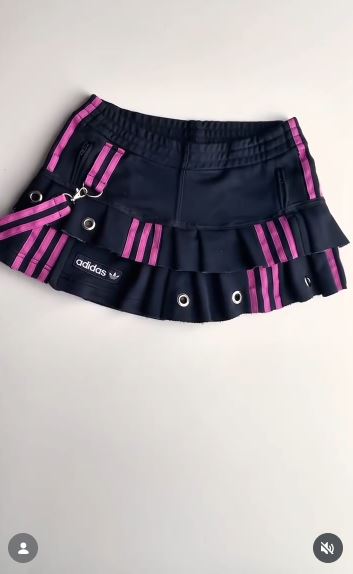
A strong elastic waistband makes sweatpants or track pants a useful starting point for a casual skirt. The upper portion can become the fitted base, while the legs provide long strips for pleats.
Side stripes, logos, and seam details can be repositioned instead of discarded. Arrange them before sewing so the most recognisable details land where they look balanced.
Materials and Tools
- Old sweatpants or track pants
- Fitted skirt for reference
- Measuring tape
- Fabric scissors
- Seam ripper
- Tailor’s chalk
- Pins or clips
- Strong thread
- Jersey or stretch needle
- Sewing machine
- Optional trim or ribbon
Form the Pleated Skirt
- Choose the skirt depth. Try the sweatpants on and mark where the fitted upper section should end. Leave enough length for a seam allowance and check that the waistband still sits securely.
- Separate and open the legs. Cut away the lower sections, then open them along selected seams to create wide fabric panels. Preserve stripes, logos, or pocket details you may want to reuse.
- Plan the pleats. Cut long strips and fold them into even or intentionally varied pleats. Pin the full row before attaching anything so you can adjust the fullness around the skirt base.
- Join the pleated section. Stitch the pleats securely, then attach them to the upper sweatpant section with a stretch-friendly seam. Keep the added bulk away from the waistband casing and pocket openings.
- Check the hem and movement. Try the skirt on and sit carefully before final trimming. Finish the lower edge if the fabric curls or sheds, and reinforce the side joins where the pleated strips meet.
For me, the original side stripe is worth keeping visible. It tells you where the fabric came from without needing a label explaining the transformation.
A simpler version can use one gathered panel rather than individual pleats. Longer legs can produce a knee-length sweat skirt with less exposed movement.
Turn Old Sweatpants Into a Soft Tote Bag
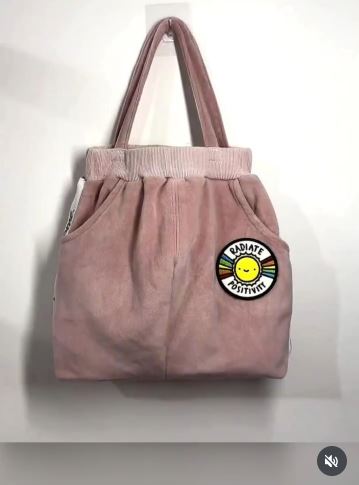
A tote bag is a practical destination for sweatpants that are no longer suitable for clothing but still contain large sections of strong fabric. The legs can provide the main panels, while the waistband, drawstring, or cuffs may be reused as details.
Soft fleece does not naturally hold a sharp bag shape. Add a lining or stabilising layer when you want more structure, and reinforce the handles carefully because they will carry more weight than the original garment seams did.
Materials and Tools
- Old sweatpants
- Fabric scissors
- Measuring tape
- Tailor’s chalk
- Pins or clips
- Strong thread
- Sewing machine or hand-sewing needle
- Fabric for lining
- Old belt, webbing, or strong fabric handles
- Optional magnetic closure
- Cardboard template
Build the Tote Bag
- Select the strongest fabric. Avoid thin knees and badly stretched sections. Cut two matching panels from the legs or use one large opened section folded at the base.
- Add a lining when needed. Cut matching lining pieces from an old shirt, curtain, or other sound fabric. A lining can contain fleece fibres, strengthen the bag, and provide cleaner internal seams.
- Join the bag body. Place the outer panels together and sew the sides and base with strong seams. Box the lower corners if you want more depth, then repeat the shape with the lining.
- Attach dependable handles. Reuse the waistband only if it remains strong and does not stretch excessively. For a heavier-duty tote, use an old belt, webbing, or reinforced fabric straps stitched well below the top edge.
- Finish and test the bag. Insert the lining, secure the top edge, and add a closure or pocket if useful. Test the bag indoors with light items before trusting it with books, groceries, or anything breakable.
One detail I wouldn’t compromise on is the handle attachment. Decorative pockets are lovely, but they become rather irrelevant if the handles leave the bag before you reach the end of the driveway.
For a smaller project, use one lower leg to make a drawstring pouch. A branded stripe or original pocket can become the front detail.
Common Mistakes to Avoid
Cutting Before Planning Every Piece
One pair of sweatpants may need to provide fabric for several sections. Mark the trousers fully before cutting so you do not remove the best material too early.
Ignoring the Fabric Stretch
Sweatpant fabric can stretch differently in each direction. Check the stretch before using scraps as fitted panels, waistbands, or tube tops.
Combining Fabrics With Very Different Weights
Thin jersey may sag beside heavy fleece, while stiff woven material can pull at knit seams. Choose scraps with reasonably similar movement.
Using Weak Fabric Around Handles or Waistbands
Bag straps and clothing waistbands carry regular strain. Reinforce these areas with strong fabric and dependable stitching.
Sewing Knit Fabric With the Wrong Needle
A standard needle may cause damaged fibres or skipped stitches on some knits. Use a suitable jersey or stretch needle and test the stitch on an offcut.
Making Shorts Too Short on the First Cut
Sweat fabric may rise, curl, or need a hem allowance. Cut longer first and adjust after trying the garment on.
Dyeing Without Checking the Fibre Content
Cotton and polyester-rich fabrics may need different dye products and methods. Check the label before choosing the colour system.
Expecting Dye to Hide Every Mark
Bleach damage, paint, grease, and worn fibres may remain visible after dyeing. Test the stain or plan a mottled finish that works with uneven colour.
Building Thick Patch Intersections
Several layers meeting in one place can feel stiff and uncomfortable. Adjust the panel layout so bulky joins do not sit behind the knees or between the legs.
Trusting Fabric Glue on High-Stress Seams
Flexible adhesive can help with trims and patch edges, but it is not automatically enough for waistbands, crotch seams, or loaded bag handles.
Forgetting to Test the Finished Movement
A project may look neat while lying flat and feel completely different when worn. Sit, bend, walk, and move before trimming final seam allowances.
Discarding the Remaining Scraps
Cuffs, drawstrings, pockets, and narrow strips can become ties, patches, cleaning cloths, stuffing, or handles for smaller accessories.
Frequently Asked Questions
What is the easiest way to upcycle sweatpants?
Turning them into shorts is usually one of the simplest options because the waistband and upper construction remain unchanged. Begin with a conservative length and finish the raw edges according to the fabric.
Can I upcycle sweatpants without a sewing machine?
Yes. Simple cuts, dyeing, light appliqué, and selected hand-sewn projects can be completed without a machine. Structural bags, fitted tops, and complex patchwork usually benefit from stronger machine stitching.
Can old sweatpants be dyed?
Many can, but the fibre content determines the appropriate dye and method. Check whether the fabric is mainly cotton, polyester, or a blend before selecting a product.
How can I stop cut sweatpants from curling?
A folded hem, ribbed cuff, binding, or suitable fabric adhesive may control the edge. Test the fabric first because some knit edges remain stable while others roll strongly.
Can I use T-shirt fabric for sweatpant patches?
You can, although thin jersey may stretch or sag beside thick fleece. Use it for decorative areas or support it with another layer when the patch needs more strength.
How do I make an upcycled sweatpant bag stronger?
Choose the least worn fabric, add a lining, reinforce the base, and use dependable handles. Stitch the straps well below the top edge so their load spreads across a larger area.
What can I make from the leftover legs?
Sweatpant legs can become pouches, arm warmers, patches, headbands, cleaning cloths, pet-toy fabric, or small storage sleeves. Avoid using loose textile pieces for pets that may swallow fabric or thread.
Let the Strongest Fabric Choose the Project
Learning how to upcycle sweatpants starts with looking beyond the worn section.
A dependable waistband can anchor a skirt or cropped set. Strong leg fabric can become patches or a soft tote, while stained fleece may only need a darker colour to feel usable again. Even when the lower legs are damaged, the upper section may still produce comfortable lounge shorts.
Begin with the reason you stopped wearing the sweatpants. Remove the damaged section, cover the mark, adjust the shape, or reuse the fabric for something entirely different. Then test the finished item properly before deciding what to do with the remaining scraps.
Which old pair would you work on first: the faded grey sweats, the oversized joggers, the stained lounge trousers, or the pair with enough good fabric left for a bag?