A stiff paintbrush often looks finished long before it is truly beyond saving. Paint collects near the ferrule, bristles dry in the shape of the last stroke, and a brush that once spread paint smoothly begins to feel more like a small broom. Throwing it away is tempting, especially when the bristles will not bend under running water.
I prefer to check what caused the stiffness before deciding that a brush has reached the end of its useful life. A brush stiffened by dried water-based paint needs a different treatment from one loaded with varnish, glue, or an unknown coating.
The bristle material matters too. Natural hair, synthetic fibres, wooden handles, and glued ferrules do not all tolerate heat or cleaning products in the same way.
The best approach is controlled rather than aggressive: identify the residue, loosen it gradually, clean from the ferrule towards the tip, reshape the bristles, and let the brush dry without bending.
I don’t think a hard brush needs the strongest possible treatment first. Starting gently gives you a better chance of restoring the tool without creating a second problem.
Check the Brush Before You Soak It
Spend a minute examining the brush while it is dry. That small check helps you choose a method that matches the residue instead of reaching for heat or solvent by habit.
· Look for the paint type on the tin, jar, or project notes. Water-based paint usually responds to water and soap, while oil-based coatings may require the cleaner recommended for that product.
· Bend a few bristles gently near the tip. A brush that flexes at the ends but stays hard near the ferrule often contains a ring of dried paint at the base.
· Check whether the bristles are natural hair, synthetic, or a blend. If you are unsure, avoid strong heat until you have tested a brief treatment on one less valuable brush.
· Inspect the ferrule and handle for movement, cracks, swelling, rust, or loose adhesive. Cleaning cannot make a structurally weak brush reliable again.
· Separate brushes covered in paint from those used with glue, varnish, texture paste, or other materials. Mixed residue may need more than one careful cleaning cycle.
Gather a Small, Safe Cleaning Kit
You do not need a shelf full of specialist products for every stiff brush. A modest cleaning area and a few simple tools make it easier to work slowly and keep loosened paint out of the sink.
· A glass jar, metal container, or old mug that will not be used for food
· Warm water and mild dishwashing liquid for suitable water-based residue
· Brush soap or a mild soap intended for cleaning artists’ brushes
· A brush comb, old wide-tooth comb, or soft nail brush
· Clean cloths or paper towels for blotting
· A shallow tray or scrap board for working paint out of the bristles
· Protective gloves and good ventilation when a product-specific solvent is required
· A clean sheet of paper or absorbent cloth for drying brushes flat
Keep cleaning containers clearly marked and away from food preparation. Do not pour paint residue or solvent into a drain unless local guidance and the product instructions specifically allow it.
Match the Method to the Paint and Bristle Type
Stiffness is a symptom, not a paint type. Choose the gentlest method likely to soften the actual material on the brush.
· For dried water-based wall paint or acrylic: begin with warm soapy water or brush soap, then work the softened paint out in short cycles.
· For natural-hair artist brushes: use mild soap and controlled reshaping. Brief heat may help in some cases, but prolonged soaking can remove natural oils and weaken the brush.
· For synthetic brushes: avoid assuming that boiling water is safe. High heat may curl, kink, or permanently change some fibres.
· For oil paint, varnish, or solvent-based coatings: follow the coating manufacturer’s cleaner guidance, use ventilation, and keep the cleaning liquid off the handle where possible.
· For glue, texture paste, or mixed modelling materials: soften only with a compatible cleaner. Scraping hardened material aggressively can cut or pull out bristles.
Use Brief Simmering Water to Reshape Suitable Natural-Hair Brushes

The brushes in this method have pointed natural-hair bristles that appear much more orderly after a very brief dip in simmering water. The useful part is not the word “boil”; it is the controlled contact. Only the bristles need treatment, and the exposure should stay short. Submerging the ferrule or leaving the brush in a pan can loosen adhesive, expand a wooden handle, or cook the bristles into a shape you did not want.
This treatment makes the most sense after ordinary soap cleaning has removed loose paint. Heat can soften remaining residue and relax bent natural hair, but it does not replace washing. I know it can feel satisfying to see a crooked brush snap back into a point, yet the safest result comes from using as little heat as necessary.
Materials and Tools
· Stiff natural-hair paintbrushes with secure ferrules
· Small pan or heat-safe container
· Simmering water rather than a rolling boil
· Tongs or a heat-safe grip if needed
· Mild brush soap
· Clean lukewarm rinse water
· Absorbent cloth or paper for flat drying
A Careful Way to Try the Method
1. Clean before applying heat. Rinse away loose colour and massage a small amount of mild brush soap through the bristles from the ferrule towards the tip. If hard lumps remain, repeat the wash rather than forcing a comb through dry fibres.
2. Prepare controlled heat. Bring clean water to a gentle simmer, then reduce the heat so the surface is calm. Keep the handle and metal ferrule completely above the water; only the affected bristle length should approach the heat.
3. Dip for only a few seconds. Lower the bristles briefly, remove them, and check their flexibility. The shared example mentions about ten seconds for natural hair, but brush size and condition differ, so a shorter first dip is the more cautious choice.
4. Wash and shape the softened bristles. Work brush soap through the warm bristles, rinse with lukewarm water, and draw the fibres gently into their original point or flat edge. Do not twist the bundle or pull individual hairs from the ferrule.
5. Dry without pressure. Blot the brush, lay it flat with the bristles extending beyond the edge of the drying surface, and leave the shape undisturbed. Avoid standing a wet brush on its tip or returning it to a closed container while moisture remains.
The detail I would watch most closely is the ferrule. If hot water reaches the metal and the adhesive inside it, the brush may look improved for one session but begin shedding later. A safer variation is to use very hot water in a mug rather than active simmering water, especially when the brush is valuable or its construction is uncertain.
Restore Small Stiff Brushes with Heat, Brush Soap, and Repeated Shaping
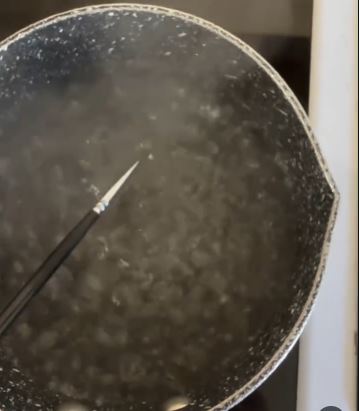
Small brushes used for miniature painting can become stiff for several reasons at once. Acrylic paint may dry close to the ferrule, brush-on varnish can leave a slick film, and glue or basing material can trap grains between fine bristles. One long soak is rarely as useful as several short cleaning cycles because each cycle reveals what still remains.
The visible result is a row of fine brushes with their points brought back into alignment. The caption information mentions brush soap between hot-water treatments, which is a sensible order: soften, wash, rinse, inspect, and then repeat only if needed. For me, the important part is stopping once the brush moves freely. Continuing after that adds risk without adding much benefit.
Materials and Tools
· Small stiff artist or miniature brushes
· Warm or very hot water in a heat-safe container
· Mild brush soap
· A smooth ceramic palette, shallow dish, or clean palm for working soap through the brush
· Soft cloth for blotting
· Optional brush rest or mesh sleeve for storage after drying
A Practical Cleaning Cycle for Fine Brushes
1. Remove what will come away gently. Wipe the bristles on a damp cloth and rinse them in the cleaner that matches the material used. Do not jab the brush against the bottom of a jar, because that bends the centre hairs and pushes residue deeper into the ferrule.
2. Warm only the bristle bundle. Dip the stiff part into warm or carefully controlled hot water for a short moment. Keep the ferrule dry and move the brush rather than leaving it resting in one position.
3. Work in a small amount of brush soap. Draw the bristles back and forth through the soap with light pressure, then roll the brush so every side receives attention. Avoid grinding the point in circles, which can fan out fine hairs.
4. Rinse, inspect, and repeat selectively. Rinse with lukewarm water and feel the bristles between gloved fingers. If one band remains hard near the ferrule, treat that area again instead of repeating the full process automatically.
5. Set the point before drying. Smooth the damp hairs into their intended point, flat edge, or rounded shape. Lay the brushes flat until dry, then store them where the tips will not press against the side of a pot.
A lower-risk alternative for synthetic miniature brushes is repeated warm-water cleaning without near-boiling heat. Give the soap time to reach the hardened area, rinse it out fully, and reshape the point after each cycle. Patience is not the most exciting tool on the desk, but it is often the one that saves the bristles.
Clean a Stiff Water-Based Paint Brush Without Heat
Many stiff decorating brushes respond to warm water and detergent alone, especially when the paint is water-based and has not formed a solid block through the entire bristle bundle. Heat is not the first step here. Extended wetting, soap, and careful mechanical cleaning usually give you more control.
Simple Warm-Water Method
1. Loosen the outer layer. Stand only the bristles in warm soapy water for a short soak, keeping the ferrule joint and handle as dry as possible. Flex the tips gently against the side of the container to see whether the paint begins to soften.
2. Work from the ferrule towards the tip. Apply brush soap and use your fingers or a brush comb to draw loosened paint outwards. Never comb from the tip towards the ferrule, as that pushes debris into the base and can split the bristle bundle.
3. Rinse in several changes of water. Cloudy water can hide how much paint remains, so replace it rather than cleaning in the same dirty mixture. Continue until the rinse stays clear and the bristles separate naturally.
4. Shape and dry flat. Blot rather than wringing the brush, then return the bristles to their original profile. Let air reach all sides while the brush lies flat with no weight resting on the tip.
If the brush remains hard after two or three controlled cycles, stop and identify the coating again. It may not be water-based, or the bristles may have been bonded permanently by cured paint.
Deal with Paint Packed Near the Ferrule
The hardest area to clean is often the first centimetre of bristle below the metal band. Paint dries there because rinsing focuses on the visible tips. Once that ring hardens, the brush spreads into two sections and loses its ability to hold a clean edge.
· Apply soap directly to the stiff band and let it sit briefly rather than soaking the whole brush for hours.
· Use a brush comb parallel to the hairs, beginning below the ferrule and drawing towards the tip.
· Rotate the brush after every few passes so one side does not receive all the pressure.
· Remove softened flakes with a cloth instead of pushing them back into the bristles.
· Stop if hairs begin pulling free or the ferrule moves on the handle.
A narrow gap at the ferrule is not an invitation to insert a knife or metal pick. Sharp tools can cut bristles, scratch the ferrule, or slip into your hand. Soap, time, and repeated outward combing are slower but far kinder to the brush.
Use Solvent Only When the Coating Requires It
Oil paint, some varnishes, and other solvent-based coatings may not respond to water. Use only a cleaner recommended for the coating, read its instructions, and work with ventilation and suitable gloves. Keep the amount small and use a dedicated container with a stable lid.
· Remove as much wet or softened coating as possible on scrap material before washing.
· Dip the bristles rather than soaking the handle and ferrule joint.
· Allow solids to settle so cleaner can sometimes be decanted and reused where product guidance permits.
· Follow with the recommended soap wash if the brush material allows it.
· Store and dispose of used cleaner and paint residue according to local requirements.
Never mix cleaning products in the hope of making them stronger. Unknown combinations may damage the brush and create unsafe fumes. When the coating cannot be identified, it is better to test a small area or accept that the brush may be suitable only for rough work.
Habits That Leave Brushes Stiffer Than Before
Soaking the whole brush overnight. Long soaking can swell wooden handles, loosen the ferrule, and draw dirty water deeper into the brush. Wet only the bristles that need treatment and inspect the brush between short cycles.
Using boiling water as the first response. Strong heat may distort synthetic fibres and weaken adhesive. Begin with warm water and soap, then use brief controlled heat only when the bristle type and brush condition make it reasonable.
Scrubbing the tip in circles. Circular grinding fans out fine bristles and damages the point. Draw the brush in the direction of the hairs and rotate it gently to clean every side.
Combing dried paint without softening it. A comb can tear fibres or pull them from the ferrule when paint is still hard. Soften the residue first, then use light outward passes.
Leaving soap or solvent inside the brush. Cleaner left near the ferrule can affect the bristles and contaminate the next paint job. Rinse thoroughly with the correct final rinse and blot until no residue appears.
Drying brushes upright on their tips. The weight of a wet brush bends the bristles and traps moisture at the base. Reshape the brush and dry it flat with the bristles unsupported.
Frequently Asked Questions
Can a completely hard paintbrush be restored?
Sometimes, but the result depends on the paint, bristle material, and how deeply the coating has cured. A brush with flexible tips and a stiff band near the ferrule has a better chance than one sealed into a single solid block.
Should I boil a stiff paintbrush?
Do not place the whole brush in boiling water. Brief controlled heat may help some natural-hair brushes after cleaning, but it can loosen glue, swell handles, and distort synthetic fibres.
Can dishwashing liquid soften a stiff brush?
Mild dishwashing liquid can help with suitable water-based residue and general grime. Brush soap is often easier to control on artists’ brushes, especially when you need to clean and reshape fine points.
How do I know whether a brush has natural or synthetic bristles?
Packaging or the manufacturer’s information is the most reliable source. When that is unavailable, treat the brush as heat-sensitive and begin with mild soap and warm water rather than guessing.
Why does my brush stay stiff near the ferrule?
Paint has probably dried where the bristles enter the metal band. Work soap into that area, let it soften, and comb outwards carefully instead of pushing the paint deeper.
Can I use the same cleaning method for acrylic paint and varnish?
Not automatically. Acrylic is usually water-based, while varnish formulas vary, so use the cleaner recommended for the specific product that was on the brush.
How should I store a brush after cleaning it?
Dry it flat after reshaping the bristles. Once fully dry, store it horizontally or upright on the handle with enough space around the tip so the bristles do not bend.
Give a Stiff Brush One Careful Chance Before Replacing It
Learning how to clean paint brushes that are stiff is mainly about choosing the right level of treatment. Warm water and soap suit many water-based residues. Fine artist brushes may need several short cleaning cycles, while some natural-hair brushes can benefit from a brief, carefully controlled heat treatment. Solvent belongs only with coatings that genuinely require it.
Begin with the least aggressive method, keep water and heat away from the ferrule joint, and stop when the bristles move freely. A recovered brush may return to detailed work, or it may become a dependable tool for primer, texture, glue, and rough surfaces. Either outcome keeps a useful object working longer.
The next time a brush dries into an awkward shape, set it aside instead of dropping it straight into the bin. Clean one brush slowly, reshape it, and see what remains possible.