Cabinet handles often look tired long before the cabinets themselves need replacing. A scratched silver pull, an uneven brass knob, or a group of mismatched handles can make an otherwise tidy kitchen, bathroom, or dresser feel unfinished.
Replacing every piece of hardware is one option, but a careful spray-paint finish can refresh sound handles without changing the hole spacing or discarding metal that still works well.
I like this kind of small makeover because the result can change the character of a room without turning the whole space into a building site. The handles are removed, cleaned, prepared, painted away from the furniture, and then returned once the coating has properly hardened. That order sounds simple, but each stage matters.
The smooth black hardware, warm brass knobs, dark bronze pulls, brushed-metal handles, and muted green test pieces all show how much the finish affects the furniture around it. I don’t think one colour is automatically best. The right choice depends on the cabinet colour, wood tone, handle shape, and how often the hardware will be touched.
Sort and Inspect the Handles Before Painting
Remove the handles before choosing paint. Once the pieces are laid out together, it becomes easier to see whether they match, which screws belong to them, and whether any item is too damaged to refinish.
· Group matching knobs, cup pulls, bar handles, and screws so pieces are not mixed during reinstallation.
· Check each handle for cracks, deep corrosion, loose posts, stripped screw threads, or sharp damaged edges.
· Look for old wax, grease, polish, soap residue, or cooking film that could prevent paint from bonding.
· Test whether the screws still tighten securely before investing time in surface preparation.
· Decide whether decorative grooves and raised details can be cleaned thoroughly enough for an even coating.
· Replace badly damaged hardware rather than using paint to disguise a structural problem.
· Photograph the original cabinet layout or label the pieces when several handle sizes are used in one room.
Gather Safe Spray-Painting Supplies
Spray paint produces airborne mist and should be used only in a suitable, well-ventilated location while following the product label. A simple cardboard work surface keeps small pieces organized and catches overspray.
· Degreasing cleaner suited to the hardware material
· Clean cloths, a soft brush, and cotton swabs for detailed areas
· Fine abrasive pad or sandpaper for lightly dulling glossy surfaces
· Primer suitable for the handle material and chosen topcoat
· Spray paint intended for the relevant surface and indoor handling
· Cardboard, scrap wood, or a paint-safe support board
· Disposable gloves, eye protection, and respiratory protection recommended by the product instructions
· Wooden skewers, spare screws, or a simple stand for holding knobs upright
· Small bags or labelled containers for keeping screws safe
· A clean, dust-protected area where the painted pieces can remain untouched while curing
Decide Which Hardware Details Should Stay Visible
Paint can unify mismatched hardware, but it can also hide fine details when applied too heavily. Study the original shape before spraying and decide whether the aim is a smooth modern finish, a softly aged look, or a colour change that still keeps the moulding visible.
· Keep thin coats around grooves, edges, screw posts, and decorative ridges so the shape remains crisp.
· Choose a low-sheen or satin finish when you want fingerprints and small surface marks to appear less obvious.
· Use a warmer metallic tone beside cream, white, or warm wood when the room needs softer contrast.
· Consider dark bronze or black hardware against blue, green, gray, or pale cabinetry for stronger definition.
· Keep brushed or softly metallic finishes on natural wood when a flat painted colour would look too heavy.
· Test one spare handle before spraying the full set, especially when the original coating is unknown.
· Avoid painting screw threads, moving joints, or areas that rub tightly against the cabinet surface.
Prepare and Spray the Handles in Thin, Even Coats
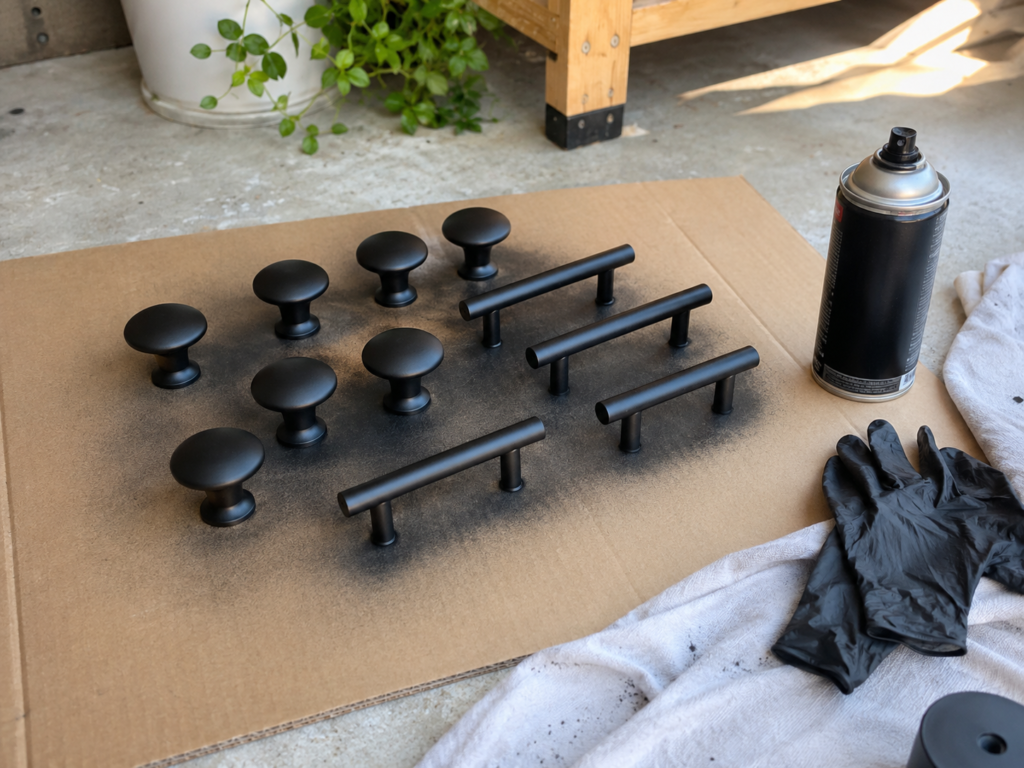
The black hardware arrangement shows the practical part of the job: every knob and pull is removed, spaced apart, and supported before paint is applied. This prevents the furniture from collecting overspray and lets the paint reach the sides of the handles instead of covering only the front.
Round knobs can stand on spare screws pushed through cardboard or a scrap board. Bar pulls may sit on small supports so their lower edges do not stick to the work surface. The aim is not to create a clever display; it is simply to keep the pieces stable while allowing access from several directions.
Materials and Tools
· Removed cabinet knobs and pulls
· Degreaser, clean cloths, and small cleaning brush
· Fine abrasive pad or sandpaper
· Compatible primer and black spray paint
· Large piece of cardboard or scrap board
· Spare screws, small blocks, or supports
· Gloves, eye protection, and suitable respiratory protection
· Clean protected area for curing
Detailed Steps
1. Clean every surface that will receive paint. Wash away grease, polish, dust, and residue, paying attention to the underside and the narrow area around each post. Rinse or wipe as required for the cleaner, then let the pieces become fully dry. Paint applied over invisible grease often fails first around the places fingers touch most.
2. Dull the existing finish and remove loose material. Rub glossy surfaces lightly with a fine abrasive so the primer has a better surface to grip. The goal is not to reshape the handle or grind away all the old coating. Wipe away every trace of sanding dust before moving on.
3. Arrange and prime the pieces. Place knobs upright and support pulls so paint can reach the sides without bonding them to the cardboard. Apply light primer passes from different angles while keeping the spray moving. Avoid filling decorative grooves or creating a heavy wet edge beneath the handles.
4. Apply the colour in several light passes. Begin spraying just before the paint reaches the hardware and continue beyond it before releasing the nozzle. Turn or reposition the support only when the coating can be handled according to the product instructions. Then cover the missed angles rather than flooding the front in one pass.
5. Leave the hardware undisturbed until the coating has properly hardened. Follow the paint instructions rather than judging only by surface dryness. I know it can feel tempting to reinstall everything as soon as it looks finished, but cabinet handles receive immediate pressure from fingers, rings, and cleaning cloths.
Black is useful when the cabinets need clear contrast, but the same method works with other suitable colours. A beginner can practise on one spare knob first and adjust the spray distance or support method before coating the full set.
Use a Warm Brass Finish on White Cabinet Doors
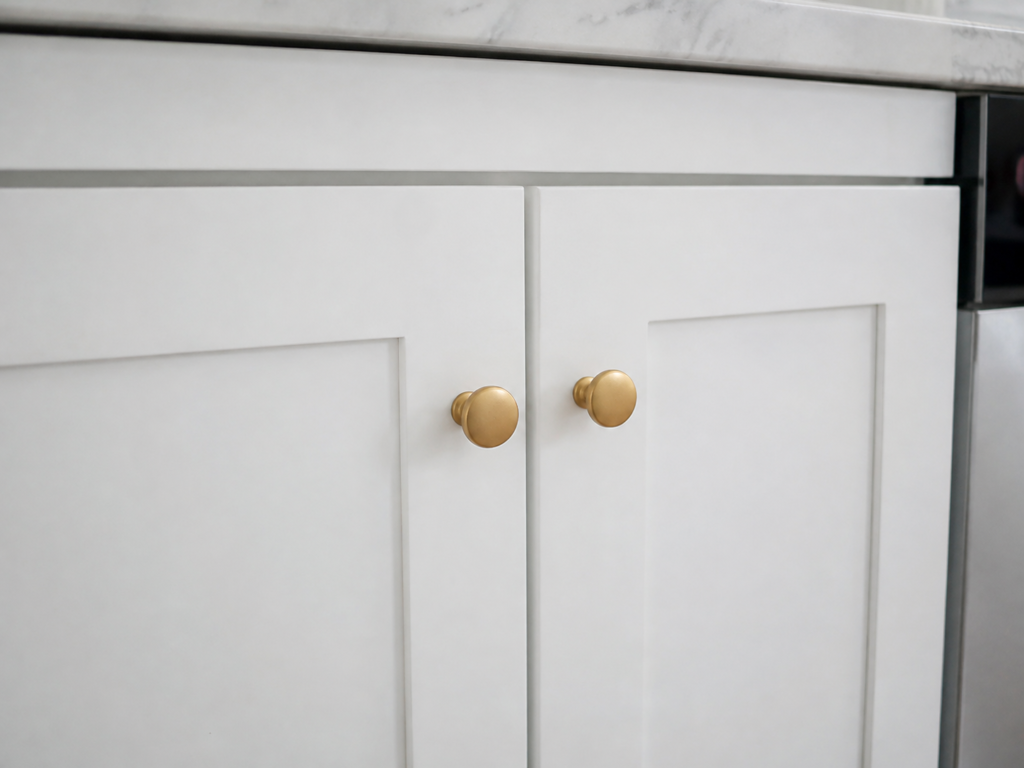
White shaker doors create a quiet background, so the handle finish becomes more noticeable. Warm brass knobs add colour without requiring decorative hardware. This look works particularly well when the cabinet design is simple and the knobs are positioned consistently.
A metallic spray finish will not behave exactly like solid brass, but it can create a similar visual direction when the existing knobs are sound. The most convincing result usually comes from restrained sheen and an even undercoat rather than a very thick, highly reflective layer.
Materials and Tools
· Matching round cabinet knobs
· Cleaner and fine abrasive pad
· Primer suited to the existing hardware
· Warm metallic spray paint
· Cardboard and spare screws for upright support
· Measuring tape or cabinet-hardware template
· Screwdriver
· Soft cloth for final cabinet cleaning
Detailed Steps
1. Prepare one test knob first. Clean, abrade, prime, and spray it using the same method planned for the full set. Hold the finished sample beside the white door, worktop, tap, and nearby lighting. Metallic colours can look quite different once they leave the workshop and enter the room.
2. Spray the remaining knobs with the same orientation and coat sequence. Keep them upright so the rounded faces receive even coverage and the paint does not pool around the bases. Rotate the support when needed, but keep the passes light enough to preserve the clean edge between the head and stem.
3. Check the cabinet doors before installation. Remove old marks around the holes and make sure the screws fit the repainted knobs without forcing them. If the original knobs left an outline, clean it gently rather than hiding it under hardware positioned at a different height.
4. Install the knobs without scraping the new surface. Hold each knob firmly with a soft cloth while tightening from the back of the door. Stop once it sits securely; overtightening can damage the door or twist the painted base against the cabinet face.
5. Review the set in normal room light. Look across the doors to check that every knob sits level and has the same visual sheen. For me, consistent positioning matters more than making the metallic colour extremely bright.
Champagne, muted gold, or softly aged metallic paint can create a gentler effect than a vivid yellow gold. Where the existing hardware already has an attractive brass finish, cleaning and preserving it may be better than spraying it.
Pair Dark Bronze Hardware With a Blue-Gray Vanity
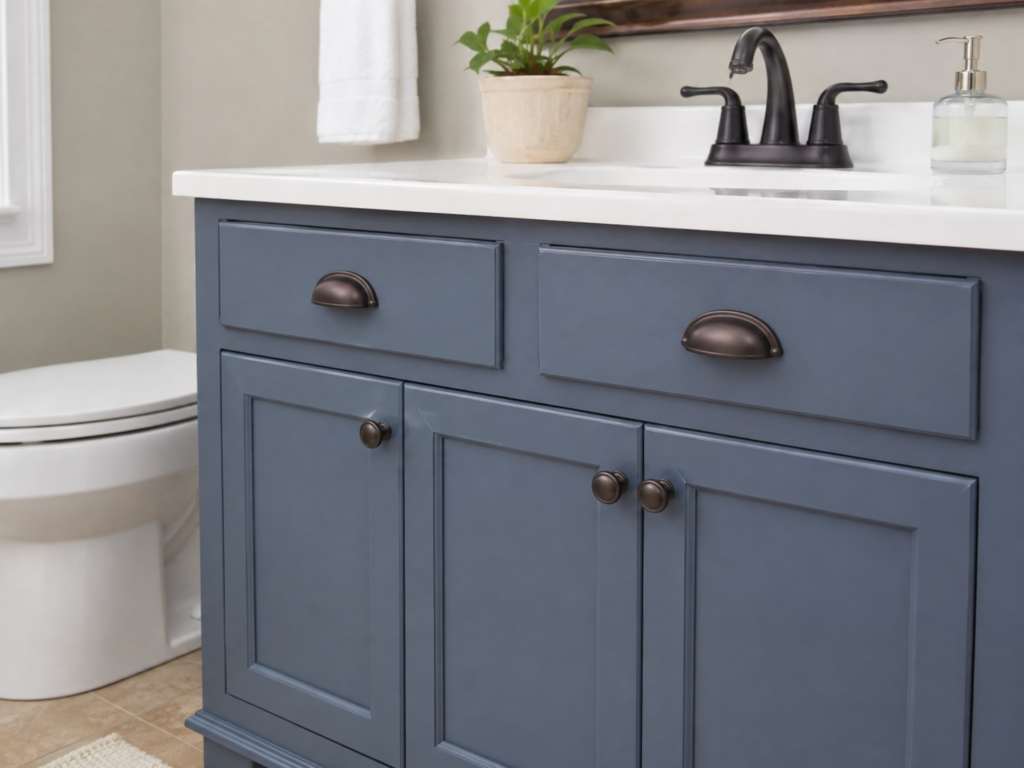
Dark bronze gives blue-gray cabinetry a softer contrast than pure black while still defining the handles clearly. The combination suits a bathroom vanity because the cup pulls are easy to grip and the round door knobs repeat the same dark finish.
Bathroom hardware faces moisture, soap residue, and frequent wiping, so preparation and curing matter even more here. Decorative spray paint should remain on the hardware only; it should not be used on plumbing parts or surfaces where the coating would remain wet or submerged.
Materials and Tools
· Cup pulls and matching round knobs
· Cleaner capable of removing soap and polish residue
· Fine abrasive pad
· Compatible metal primer
· Dark bronze or oil-rubbed-look spray paint
· Cardboard supports and small screws
· Screwdriver and labelled screw bags
· Soft non-abrasive cloths for later cleaning
Detailed Steps
1. Remove and label the vanity hardware. Cup pulls may use different screw lengths from the door knobs, so keep each set together. Clean the cabinet fronts around the old handles while they are exposed, but keep cleaners and moisture away from unfinished paintwork or damaged wood.
2. Prepare the metal thoroughly. Bathroom hardware may carry clear polish, hand cream, or cleaner residue that is difficult to see. Wash the front, back, underside, and screw posts, then lightly abrade glossy areas. Do not spray until the pieces are clean, dry, and free from sanding dust.
3. Prime and colour the cup pulls from several angles. The recessed underside is visible during use, so spray passes should reach beneath the lip without building a heavy ridge along the lower edge. Treat the knobs in the same batch so the final bronze tone remains consistent across doors and drawers.
4. Allow the finish to cure in a clean, dry place. Keep the pieces away from bathroom steam during this stage. Once ready, reinstall them with clean hands or a soft cloth and make sure the pull edges sit flat against the drawer fronts.
5. Care for the finished hardware gently. Wipe it with a soft damp cloth and avoid aggressive scrubbing or strong chemicals unless the coating instructions confirm compatibility. A painted finish can remain attractive, but it should not be treated like an indestructible factory coating.
A satin black finish can create a sharper contrast, while a muted pewter tone will feel cooler and quieter. Testing the sample beside the vanity colour is more reliable than choosing from the spray-can cap alone.
Refresh Warm Wood Furniture With a Brushed-Metal Look
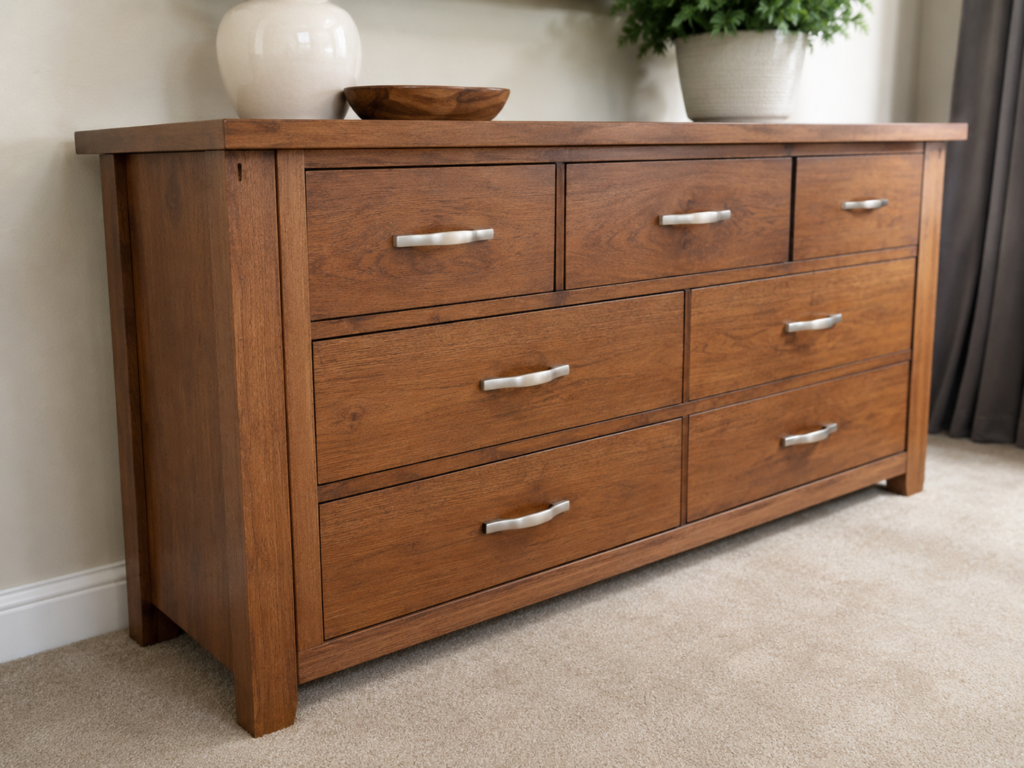
Natural wood already contains movement, colour, and grain, so a restrained metal finish often works better than an opaque statement colour. The simple bar pulls on the warm dresser add a cleaner line without distracting from the timber.
Spray painting can unify an older set of pulls when some pieces have become dull or discoloured. However, if the original plated finish is peeling badly, the damaged layers must be removed or stabilized first. Paint cannot make loose plating secure.
Materials and Tools
· Matching drawer pulls with secure posts
· Degreasing cleaner and soft brush
· Fine abrasive pad
· Primer suitable for the existing finish
· Muted silver, pewter, or brushed-metal-effect spray paint
· Cardboard supports
· Screwdriver and measuring tools
· Optional clear protective coating compatible with the colour layer
Detailed Steps
1. Compare the handles with the wood before committing to the colour. Hold a test piece against the lightest and darkest grain areas. A very bright silver may appear harsh, while a softer pewter or brushed tone can sit more naturally beside warm timber.
2. Clean and abrade the pulls evenly. Long bar handles show surface flaws more clearly than small knobs, so remove residue along the entire length. Use gentle, consistent pressure when scuffing so the new finish does not reveal random deep scratches.
3. Support the pulls above the work surface. Rest them on small blocks or suspend them with spare screws so the spray reaches the sides and undersides. Apply primer and colour in long passes that follow the length of the handle. This helps the finish look more even across the straight shape.
4. Inspect the coating from the side as well as the front. Bar pulls catch light along their edges, which makes thin spots and rough overspray easier to see. Add only the light correction coats that are needed, then leave the hardware untouched for the full curing period stated by the product.
5. Reinstall the pulls and protect the wood. Clean the drawer fronts first and keep metal tools from scraping the timber. Tighten the screws evenly so both posts sit flat. If one side lifts, check the screw alignment instead of forcing the handle down.
A muted antique brass finish can also suit warm wood, especially when the room contains warmer fixtures. I’d avoid a thick flat coating on detailed wood furniture unless the darker contrast is a deliberate part of the design.
Test the Finish on Mixed Knobs and Pulls Before Spraying the Full Set
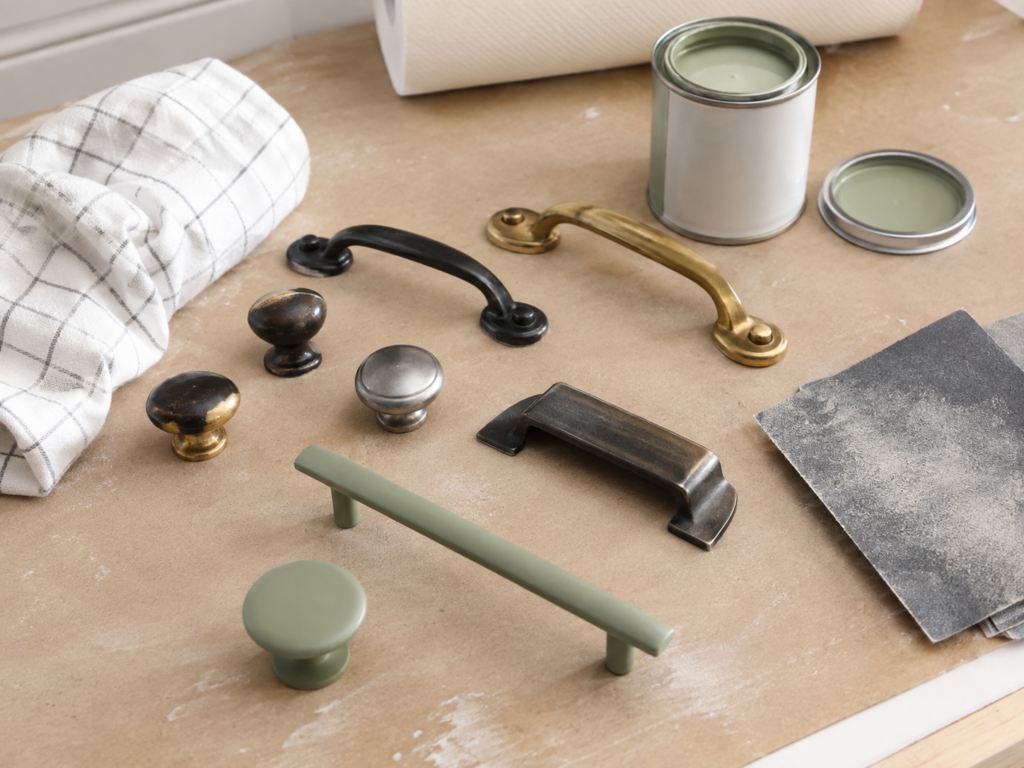
The mixed hardware workspace is a useful reminder that the same paint can look different on rounded knobs, curved pulls, and flat bar handles. Light falls differently across every shape, and an old dark undercoat may affect thin metallic or pale colours.
A test piece also shows whether the old finish reacts badly, whether primer is needed, and whether the chosen colour suits the furniture. It is much easier to correct one sample than to strip an entire set.
Materials and Tools
· One spare knob and one spare pull from the set
· Cleaner and fine abrasive materials
· Primer and selected spray colour
· Cardboard test surface
· Gloves and other label-recommended protective equipment
· The cabinet door, drawer sample, or a clear photograph of the furniture colour
· Notebook or labels for recording the preparation used
Detailed Steps
1. Select representative test pieces. Choose one rounded knob and one pull with edges or recesses, because they will reveal different coating problems. If no spare hardware exists, use the least visible piece first and avoid permanent changes until the result has been assessed.
2. Prepare the samples exactly as the full set would be prepared. Clean, abrade, and prime them rather than taking shortcuts. A test is only useful when it represents the real process. Record which products and preparation steps were used so the successful result can be repeated.
3. Spray the samples and examine the finish under several kinds of light. Check the front, underside, edges, and areas around the posts. Look for poor adhesion, wrinkling, roughness, colour variation, or loss of fine detail. Do not judge the result while the paint is still soft.
4. Place the cured samples beside the actual furniture. Compare them with the cabinet colour, wood grain, countertop, tap, hinges, and room lighting. Then decide whether the colour needs to become warmer, darker, softer, or less glossy.
5. Repeat the chosen method consistently across the full set. Keep the same cleaning, support, spray distance, coat sequence, and curing approach. Consistency is what makes inexpensive refinishing look intentional rather than like a collection of unrelated experiments.
Testing is especially helpful with muted green, cream, or unusual colours because they can either connect the hardware beautifully to the cabinetry or make it disappear. The sample will answer that question more reliably than imagination.
Spray-Painted Hardware Problems That Can Spoil the Finish
Skipping degreasing is one of the quickest ways to create peeling around the places people touch. Sanding alone may spread oily residue rather than remove it. Clean first, then abrade and wipe away the dust.
Spraying handles while they remain attached to the cabinet leaves hidden edges unfinished and risks overspray on doors, drawers, hinges, walls, and worktops. Remove the hardware and paint it in a suitable separate area.
Applying one heavy coat creates runs, soft edges, filled grooves, and paint that remains vulnerable beneath a dry-looking surface. Several controlled passes give the solvents and coating a better chance to behave as intended.
Painting screw threads or moving joints can make the hardware difficult to reinstall and may cause paint fragments to break away. Cover or avoid those areas while keeping the visible bases coated.
Handling the pieces too soon leaves fingerprints and can glue the base to the cabinet face. Surface dryness is not the same as full hardness. Follow the coating instructions and give the pieces a protected curing area.
Overtightening repainted knobs can twist the coating against the door and create a ring of damage. Tighten only until the hardware is secure, then check it again after normal use.
Using harsh cleaners on the finished handles may dull or soften the coating. Clean gently and treat spray-painted hardware as a refinished surface rather than factory-plated metal.
Frequently Asked Questions
Do cabinet handles need primer before spray painting?
Primer is often helpful, especially on glossy metal, mixed finishes, or surfaces where adhesion is uncertain. Choose a primer that is compatible with both the hardware material and the topcoat, and follow the product instructions.
Can I spray paint handles without sanding them?
Some products may be designed for minimal preparation, but cleaning and lightly dulling a glossy surface generally gives a more reliable base. Always test one piece because old coatings and plating can react differently.
Should I paint the screws as well?
Paint only screw heads that will remain visible and avoid coating the threads. A painted thread can bind inside the handle or cabinet and may shed chips during tightening.
Can I spray paint plastic cabinet handles?
Possibly, but the preparation and paint must be suitable for that plastic. Test a hidden or spare piece first because some plastics remain flexible or react poorly with certain coatings.
How do I stop knobs from sticking to the cardboard?
Mount them upright on spare screws pushed through cardboard or a scrap board. This keeps the painted edges away from the flat surface and makes it easier to reach the sides.
Will spray-painted handles last in a bathroom or kitchen?
Durability depends on preparation, compatible products, curing, frequency of use, and cleaning habits. Painted handles can work well, but they should be wiped gently and may eventually need touch-ups in high-contact areas.
Can different handle styles be painted the same colour?
Yes, a shared colour can make mixed knobs and pulls feel more coordinated. Test the finish on more than one shape because rounded, recessed, and flat surfaces reflect light differently.
Let Careful Preparation Do More Than the Colour
The most important part of learning how to spray paint cabinet handles is not choosing black, brass, bronze, silver, or green. The finish succeeds when the hardware is sound, thoroughly cleaned, lightly prepared, supported properly, coated in controlled passes, and left alone until it has hardened.
Begin with one test knob and one pull, then compare them with the actual cabinets in normal room light. That small trial can prevent wasted paint and helps the full set look consistent once it returns to the furniture.
Which hardware finish would suit your next cabinet update best: a strong dark contrast, a warm metallic tone, or a quiet brushed finish that lets the furniture remain the main feature?