Sliding wardrobe doors can make an entire bedroom feel dated even when the wardrobes behind them remain useful. The mirror may dominate the room, the laminate may have yellowed, or the plain panels may look disconnected from everything else you have changed.
Replacing a complete fitted wardrobe can also create far more work than the doors themselves require. If the tracks, panels, and frames remain sound, a surface makeover may be enough to make the storage feel considered again.
I don’t think every sliding door needs to disappear beneath a complicated pattern. A few narrow panels, a calmer paint colour, or a textured film can change the appearance while keeping the wardrobe practical.
The sliding mechanism must come first, though. Added trim, paint, film, and handles should not stop the doors passing one another or moving freely inside the tracks. Measure every clearance before attaching anything. Decorative enthusiasm is useful, but it is not known for respecting a five-millimetre gap.
Check the Doors and Tracks Before Decorating
Open and close every door several times before planning the makeover. Listen for scraping, watch for wobbling, and check whether each panel remains properly seated.
Sliding wardrobe systems vary. Some doors hang from an upper track, some carry most of their weight on lower rollers, and others use both upper and lower guides. Do not remove a heavy door until you understand how that particular system releases.
Inspect:
- Upper and lower tracks
- Rollers and guides
- Door frames
- Mirror edges
- Panel corners
- Loose trim
- Damaged laminate
- Swollen engineered wood
- Existing handles
- Floor clearance
- Gaps between overlapping doors
- Clearance beside walls and skirting
- Stops and anti-jump fittings
- Screws and brackets
A cracked mirror, loose glass panel, or badly bent frame needs professional assessment before decorative work begins. Do not cover unstable glass and assume the new layer will make it safe.
Tall mirrored panels can be extremely awkward to control. Ask another capable adult to help when removing or moving them, wear appropriate hand and foot protection, and keep children and pets outside the working area.
Identify the Door Surface
The correct preparation depends on what the visible panel is made from.
Mirrored Glass
Mirror needs careful cleaning and a decorative system intended for glass. Adhesives, films, and overlays should not damage the reflective backing or place uneven pressure on the panel.
Avoid sanding glass. If the mirror is broken, chipped, or separating from its frame, stop and arrange safe handling rather than attempting to disguise the damage.
Melamine or Laminate
These surfaces are smooth and nonabsorbent. Paint may struggle to grip unless the panels are cleaned thoroughly, lightly prepared when appropriate, and coated with a compatible bonding primer.
Peeling laminate creates a different problem. Loose material must be assessed and removed or repaired before another finish is placed over it.
Wood or Wood Veneer
Wooden doors may accept paint, stain, trim, or wallpaper, although old varnish and furniture polish can interfere with adhesion. Veneer is thin, so aggressive sanding may pass through the decorative surface.
Engineered Wood Panels
MDF and similar panels usually have smooth faces but more absorbent cut edges. Avoid soaking them during cleaning, and seal exposed areas before painting.
Metal Frames
Aluminium or steel frames may be kept visible, painted with a suitable system, or covered by lightweight decorative trim. Make sure any added layer does not prevent the doors from overlapping.
Measure the Sliding Clearances
This is one step I would never skip.
Close the doors and measure the gap between overlapping panels. Then slide each one fully in both directions and check the narrowest clearance beside the frame, track, floor, handles, and neighbouring door.
Write down:
- Door height and width
- Thickness of the existing panel
- Overlap between doors
- Gap between passing doors
- Frame width
- Handle projection
- Distance from panel to track
- Available floor clearance
- Maximum safe trim thickness
Foam strips, MDF moulding, shiplap panels, handles, and decorative overlays all add depth. A design may fit beautifully while the doors are standing separately and jam as soon as they return to the track.
Temporarily tape a sample strip to the thickest planned area. Slide the doors past one another before cutting the rest of the material.
Clean and Prepare the Panels
Remove handles and other detachable hardware where practical. Store screws in labelled bags so they return to the correct door.
Vacuum the tracks before cleaning the panels. Dust trapped around the rollers can make the doors feel worse after reinstallation, even when the makeover itself is fine.
Preparation may include:
- Removing loose dust
- Cleaning fingerprints and polish
- Degreasing laminate
- Washing mirror glass
- Removing old adhesive
- Securing loose trim
- Filling unwanted holes
- Lightly dulling a suitable glossy surface
- Applying bonding primer
- Testing adhesive
- Testing window film
- Marking the original door order
- Photographing roller positions
- Protecting tracks from paint
- Covering the floor
Do not flood framed doors with water. Moisture can travel beneath trim or into exposed engineered wood.
Let every cleaned panel dry fully before applying primer, adhesive, paint, or film.
Gather the Main Tools and Materials
- Measuring tape
- Long ruler or straightedge
- Spirit level
- Pencil
- Removable marker
- Low-tack masking tape
- Screwdriver
- Drill and suitable bits
- Utility knife
- Cutting mat
- Fine-tooth saw when required
- Eye protection
- Work gloves
- Dust protection
- Drop cloth
- Cleaner suited to the surface
- Clean lint-free cloths
- Sanding pads when appropriate
- Bonding primer
- Furniture or trim paint
- Synthetic brush
- Small foam roller
- Lightweight trim
- Thin MDF strips
- Decorative overlays
- Construction adhesive suited to both materials
- Paintable caulk
- Window film
- Application squeegee
- Wallpaper or adhesive vinyl
- Lightweight door pulls
Choose materials only after measuring the passing clearance. Thin trim may be less dramatic in your hand, but it becomes considerably more attractive when the wardrobe doors still open.
Add Lightweight Shiplap Panels to Plain Sliding Doors
Flat sliding doors provide a useful base for shallow decorative panels. Vertical lines can make a wide wardrobe feel taller, while the repeated grooves break up one large blank surface.
The added material needs to remain light and thin. Heavy timber boards may overload the rollers, and deep panels can stop one door passing behind another.
Materials and Tools
- Sound sliding wardrobe doors
- Lightweight shiplap-style panels
- Measuring tape
- Straightedge
- Fine-tooth cutting tool
- Adhesive compatible with both surfaces
- Low-tack tape
- Paintable caulk
- Primer
- Paint
- Small roller and brush
Add the Panelled Surface
- Measure the usable panel area. Keep the shiplap away from tracks, frames, guides, and overlapping edges. Tape one sample piece temporarily to the door, then slide every panel through its full movement to confirm the depth works.
- Plan the panel direction. Lay the door flat on protected supports and arrange the strips before applying adhesive. Centre the pattern or begin from one visible edge so the narrow final strip does not land in an awkward position.
- Cut and attach the panels. Mark each piece carefully and cut it with a tool suited to the material. Apply a controlled amount of compatible adhesive, press the panel flat, and use temporary tape or light weights while it settles.
- Refine the joins. Fill only the gaps that should disappear and leave the intended shiplap grooves visible. Prime exposed or absorbent material, then paint in thin coats without building excess colour near the door edges.
- Reinstall and test the doors. Return each panel to its original track position and move it repeatedly. Correct any rubbing before attaching projecting handles or further trim.
For me, the vertical layout is strong enough without extra decorative moulding around every edge. The narrow grooves already give the doors a clear rhythm.
A beginner can apply panels only to the centre door or use thin adhesive strips to create a similar linear effect with less cutting.
Use Paint and Reeded Film to Soften Mirrored Doors
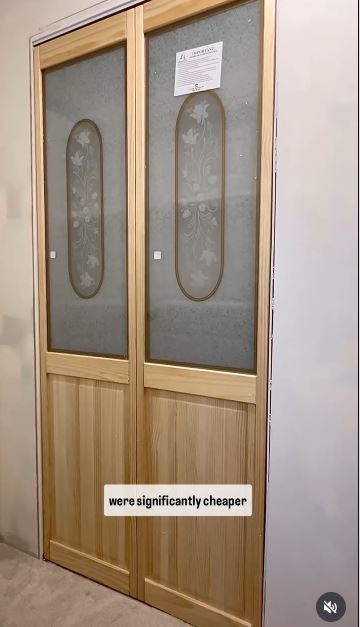
A full mirrored wardrobe can be useful, but it may reflect more of the room than you want. Reeded or fluted film softens the reflection without requiring the glass to be removed.
The painted frame can then connect the doors with the wall colour, furniture, or skirting. Keep the film inside the panel boundaries so it does not interfere with seals, guides, or handles.
Materials and Tools
- Sound mirrored sliding doors
- Glass cleaner
- Lint-free cloth
- Reeded or textured window film
- Spray bottle
- Application squeegee
- Sharp utility knife
- Straightedge
- Primer suited to the frame
- Compatible paint
- Small angled brush
- Foam roller
- New handles, if suitable
Apply the Film and Refresh the Frame
- Clean and inspect the mirror. Remove dust, polish, and fingerprints from the whole panel. Check the glass edges carefully and do not continue when the mirror is cracked or loose inside its frame.
- Measure and cut the film. Cut each piece slightly larger than the visible glass area. Keep the protective backing attached until the mirror and application tools are ready.
- Position the film carefully. Follow the film manufacturer’s application method, using a light mist when directed. Smooth from the centre towards the edges and work out trapped liquid or air without scratching the material.
- Trim and paint the surrounding frame. Use a sharp blade and straightedge to refine the film edges. Mask the finished panel, prepare the frame appropriately, and apply compatible primer and paint in light coats.
- Add the final hardware. Install lightweight pulls only where the door structure permits them. Test the handles through the full sliding path so they do not strike the neighbouring panel.
I know it can feel tempting to choose the strongest texture available, but a subtle reeded pattern often keeps more light in the room and feels easier to live with.
Frosted film, rice-paper patterns, narrow translucent stripes, or a film covering only the central area can create a quieter version.
Add Decorative Overlays to Mirrored Bypass Doors
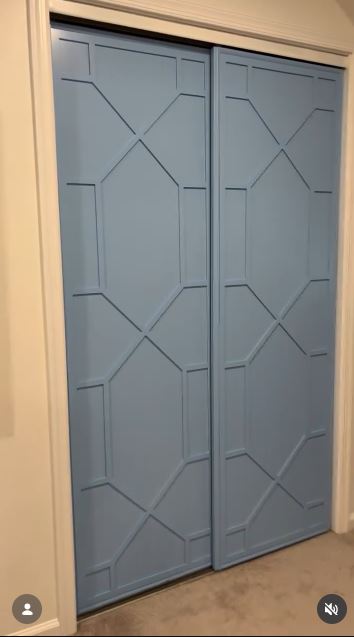
Decorative overlays can make a large mirror feel more like a series of framed panels. The mirror remains visible, but the added lines give it scale and connect it with other architectural details in the room.
Use very lightweight material and keep the pattern shallow. The overlays should not catch against the neighbouring door, upper guide, or lower track.
Materials and Tools
- Sound mirrored bypass doors
- Lightweight decorative overlays
- Measuring tape
- Removable marker
- Low-tack tape
- Straightedge
- Adhesive suitable for mirror glass
- Primer and paint suitable for the overlay
- Small roller
- Detail brush
Create the Overlay Pattern
- Design the pattern on paper. Measure the mirror area and sketch a simple grid, arch, or rectangular layout. Keep the lines away from door handles and the edges that disappear behind the neighbouring panel.
- Test the full thickness. Tape a sample overlay to the mirror and move the door completely open and closed. Check the narrowest overlap before preparing the remaining pieces.
- Arrange the overlays without glue. Use low-tack tape to hold every main piece in place. Step back, compare both doors, and correct the spacing before making the arrangement permanent.
- Prepare and attach the material. Paint the overlays separately when that produces cleaner edges. Once ready, use a compatible adhesive sparingly and support each strip so it remains straight while setting.
- Inspect the finished movement. Clean adhesive residue safely and test the doors again. Reinforce only loose areas rather than adding a second heavy line of glue around everything.
For me, broad spacing works better than a very busy grid. The mirror already reflects plenty of visual information from the room.
A simple border can be enough for a first project. You could also create one large central rectangle rather than covering the glass with many small divisions.
Create Shallow Panels With Thin MDF Trim
Plain slab doors can take on a more architectural shape with thin strips arranged into rectangles or elongated panels. The effect comes from proportion rather than depth, which suits sliding doors with limited clearance.
The trim must remain straight and evenly spaced. Small differences become noticeable when several doors sit side by side.
Materials and Tools
- Plain sliding door panels
- Thin MDF strips
- Measuring tape
- Long straightedge
- Pencil
- Fine cutting tool
- Compatible construction adhesive
- Low-tack tape
- Paintable caulk
- Primer
- Paint
- Roller and detail brush
Build the Panel Layout
- Measure the available depth. Test a sample MDF strip at the overlapping edge before planning the design. Make sure handles, guides, and neighbouring doors can still pass freely.
- Mark the full pattern. Lay the door flat and use a straightedge to draw the outer rectangles first. Compare the margins at the top, bottom, and sides before marking smaller internal sections.
- Cut and dry-fit every strip. Label the pieces according to their position and place them on the door without adhesive. Correct uneven joins now rather than attempting to hide them later with caulk.
- Attach and refine the trim. Apply a controlled adhesive line and hold each piece with low-tack tape. Fill narrow joins where appropriate, then prime the MDF faces and cut edges.
- Paint and reinstall the door. Apply thin colour coats, keeping the sliding edges clean. Once the finish is ready, return the door to its track and test every overlap.
I’d rather use fewer, larger rectangles than squeeze many tiny panels onto a wide wardrobe. Large shapes usually make the whole door feel calmer.
A single frame around the panel is the simplest version. Narrow vertical strips can also create a modern fluted effect without mitred corners.
Wardrobe Door Makeover Problems That Cause Trouble Later
Decorating Before Repairing the Track
New panels will not correct worn rollers, loose guides, or bent tracks. Repair the movement first so you can judge whether the doors remain worth updating.
Forgetting the Overlap Clearance
Trim that fits the visible front may catch against the door passing behind it. Test the thickest material at the narrowest overlap before cutting the complete design.
Adding Too Much Weight
Heavy timber, thick panels, and dense decorations can place extra strain on the sliding hardware. Choose lightweight materials and keep the original door system in mind.
Painting Over Greasy Laminate
Fingerprints, polish, and household residue can interfere with primer and paint. Clean the full surface carefully, including handle areas and door edges.
Treating Mirror Glass Like a Wooden Panel
Mirror cannot be sanded, screwed into casually, or covered with any available adhesive. Use materials intended for glass and stop when the panel is cracked or loose.
Covering Peeling Melamine
A decorative layer is only as stable as the surface beneath it. Remove or repair loose material before painting, papering, or attaching trim.
Losing Track of the Door Order
Sliding panels may have different roller settings or overlap positions. Label each door before removal and photograph the hardware.
Allowing Paint Into Rollers and Guides
Paint buildup can make the doors scrape or stick. Mask the working parts and keep coatings away from track contact points.
Choosing Handles That Project Too Far
A deep knob may collide with the adjacent door. Use low-profile pulls and test their position before drilling.
Applying Film to Dusty Glass
Tiny fibres and specks become visible beneath translucent film. Clean the mirror thoroughly and keep the working area as dust-free as possible.
Cutting Film Directly Against a Vulnerable Seal
A sharp blade can damage seals, trim, or mirror backing. Use a straightedge and cut with controlled pressure.
Moving a Heavy Mirrored Door Alone
Tall glass doors can be difficult to balance and control. Arrange capable help and prepare a clear, protected route before lifting.
Assuming Every Panel Can Be Painted
The finish and substrate determine whether paint will adhere. Test the complete preparation and paint system on a concealed area first.
Frequently Asked Questions
Can mirrored sliding wardrobe doors be painted?
Some specialist systems may be suitable for glass, but ordinary furniture or wall paint should not be applied without confirming compatibility. Film, shallow overlays, or a painted frame may provide a more manageable alternative.
Do laminate wardrobe doors need sanding?
That depends on the condition and paint system. Thorough cleaning and a compatible bonding primer are often important, while aggressive sanding can damage thin surface layers.
Can I attach wood trim to sliding doors?
Yes, provided the trim remains lightweight, securely attached, and thin enough for the doors to overlap. Test one sample through the full sliding movement before continuing.
How can I cover mirrored wardrobe doors without removing them?
Removable window film, suitable adhesive coverings, or shallow decorative overlays can reduce the visible mirror. Do not cover cracked or unstable glass.
Can wallpaper be used on wardrobe doors?
Wallpaper or adhesive vinyl may work on a smooth, clean, stable surface. Check the product’s suitability, test adhesion, and avoid adding material around rollers, tracks, and passing edges.
How do I stop painted wardrobe doors from sticking?
Keep paint away from rollers and contact edges, apply thin coats, and allow the finish to settle properly. Remove excess buildup before reinstalling the panels.
Should I remove the doors before upcycling them?
Removing them usually makes measuring, cleaning, painting, and attaching trim easier. Heavy or mirrored doors require careful handling, so follow the door system’s instructions and arrange help.
Let the Sliding Mechanism Guide the Makeover
Learning how to upcycle sliding wardrobe doors begins with keeping the doors useful.
A shiplap surface can add vertical texture, while thin MDF strips create a quieter panelled effect. Reeded film can soften large mirrors, and matching the doors to the wall colour can make fitted storage recede into the room. Even peeling melamine may be repairable when the core underneath remains sound.
Begin with the tracks, rollers, and clearances rather than the decorative finish. Measure the overlap, test one sample strip, and choose the lightest material that creates the effect you want. Then move every door through its complete path before calling the makeover finished.
Which update would suit your wardrobe best: shallow panels, textured film, a wall-matching colour, or a simple painted frame?