Shoes are often retired for reasons that have very little to do with whether they can still be worn. A canvas pair may look dull after several seasons, a plain slip-on can feel boring, a scuffed sneaker may need help in only a few spots, and a boot can become too worn for walking while the shape itself is still useful. I don’t think every pair needs to head straight to the bin once it stops looking new.
Shoe upcycling is one of those projects where I always put wearability before decoration. The finish can be playful, floral, patchworked, or deliberately mended, but the shoe still needs to bend in the right places, feel comfortable around the foot, and survive ordinary handling. That usually means using less material than you first think and paying attention to seams, flex points, and the type of upper you are working with.
The most convincing shoe makeovers also tend to use materials that already make sense with footwear: fabric paint on canvas, denim on sturdy slip-ons, soft printed cloth on espadrilles, visible stitching over damaged sneaker panels, braided fabric on sandal straps, lace over a simple upper, or an old boot reused entirely as a planter once it is no longer suitable for wearing.
Check Whether the Shoe Is Still Structurally Worth Upcycling
Decoration can hide marks, but it cannot repair a shoe that has stopped being safe or comfortable to wear. Before choosing paint or fabric, inspect the pair as if you were deciding whether you would happily walk in it for another season.
· Check the sole for separation, cracking, or areas that have become unusually thin.
· Flex the shoe gently and look for splits where the upper meets the sole.
· Inspect heel counters, toe boxes, elastic panels, eyelets, and lining for damage that affects fit.
· Clean off loose dirt before deciding which marks actually need covering.
· Keep shoes with serious structural damage for non-wearable projects, such as a boot planter, rather than disguising the problem.
· If one shoe fits differently after damage, repair that issue before adding decoration.
Match the Technique to the Material of the Upper
Canvas, denim, woven fabric, leather-look surfaces, and espadrille textiles do not behave the same way. The easiest results come from choosing a technique that works with the material instead of forcing one method onto every pair.
· Use flexible fabric paint on clean canvas or textile sneakers.
· Use soft denim or cotton patches on sturdy woven uppers that can support stitching.
· Choose thin printed fabric for espadrilles so the new layer does not make the shoe bulky.
· Use hand stitching for visible mending only where a needle can pass without damaging important structural layers.
· Keep lace appliques lightweight and flexible around bend points.
· Test glue, paint, or thread on a hidden area first if you are unsure how the shoe surface will react.
Plan Around Flex Points, Comfort, and Everyday Wear
The prettiest shoe can become irritating very quickly if a patch rubs the foot or a glued edge lifts at the first bend. I know it can feel tempting to cover the whole upper once you start, but shoes usually look better and wear better when you leave the important movement areas relatively light.
· Put the shoes on and note where the upper creases naturally when you walk.
· Avoid thick fabric layers directly over major flex lines unless the original material is very soft.
· Keep glue and rough seam allowances away from the inner foot surface.
· Let paint and adhesive cure fully before wearing the shoes outside.
· Trim bulky thread tails and check that no knots press through the lining.
· After the makeover, wear the shoes indoors briefly before relying on them for a full day.
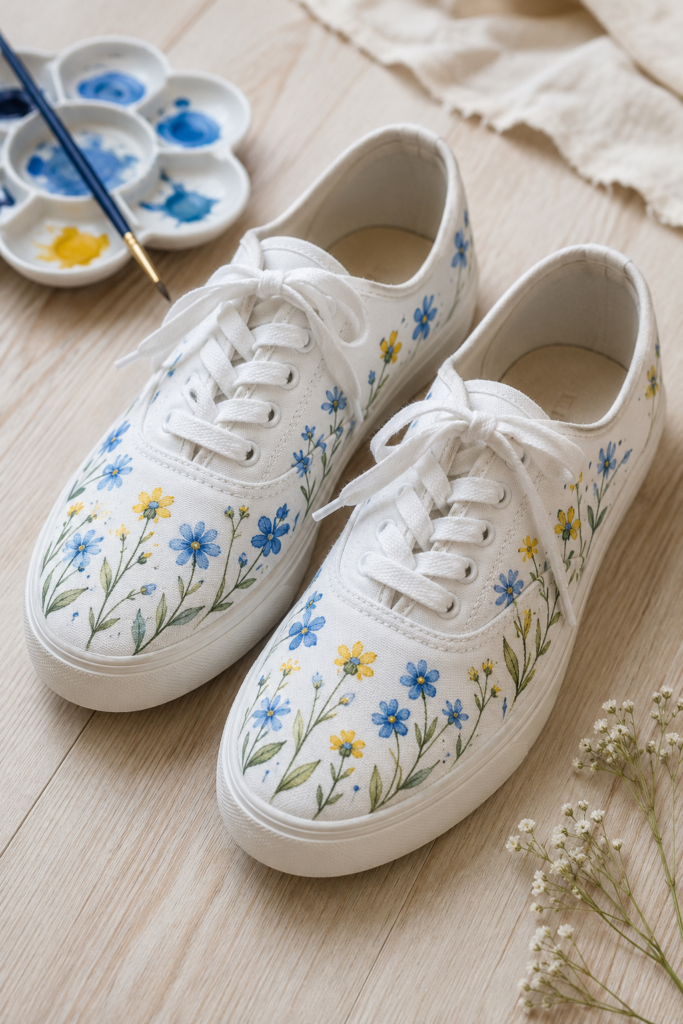
Paint Small Florals onto Plain Canvas Sneakers
Plain canvas sneakers are a very forgiving starting point because the fabric already behaves more like a painting surface than most shoe materials. Small flowers work particularly well here. They can disguise faint marks, break up a large blank area, and still leave enough original white space for the shoes to feel light rather than heavily decorated.
The part I like about this approach is that the flowers do not need to match perfectly from left shoe to right shoe. A repeated palette is enough to connect the pair. Keeping the stems slim and the blooms relatively small also helps the design bend with the fabric rather than forming one stiff painted panel across the toe.
Materials and Tools
· Clean canvas sneakers
· Flexible fabric paint or paint suitable for textile footwear
· Small paintbrushes
· Removable pencil or washable fabric marker for light guides
· Paper or shoe forms to support the inside while painting
· Optional clear flexible textile finish if compatible with the paint
Steps
1. Clean the uppers and let them dry fully. Stuff the shoes lightly with paper so the canvas stays smooth, then sketch only a few guide points for stems and flower placement. I’d keep the first layout sparse; you can always add another flower later.
2. Paint the larger flowers first, then connect them with fine stems and leaves. Work with thin layers so the canvas does not become stiff. Let one side settle before turning the shoe and adding more detail.
3. Repeat the same colours on the second shoe without trying to copy every flower exactly. The pair will still feel coordinated if the scale and colour balance are similar.
4. Allow the paint to cure according to the product instructions, remove the stuffing, then flex the shoes gently before wearing them. If the painted areas crack immediately, stop and reinforce only with a compatible flexible finish rather than adding more paint.
Variation: Paint only around the heel and outer side panels if you prefer a quieter design and want to keep the toe area almost plain.
Cover Slip-On Shoes with Denim Patchwork
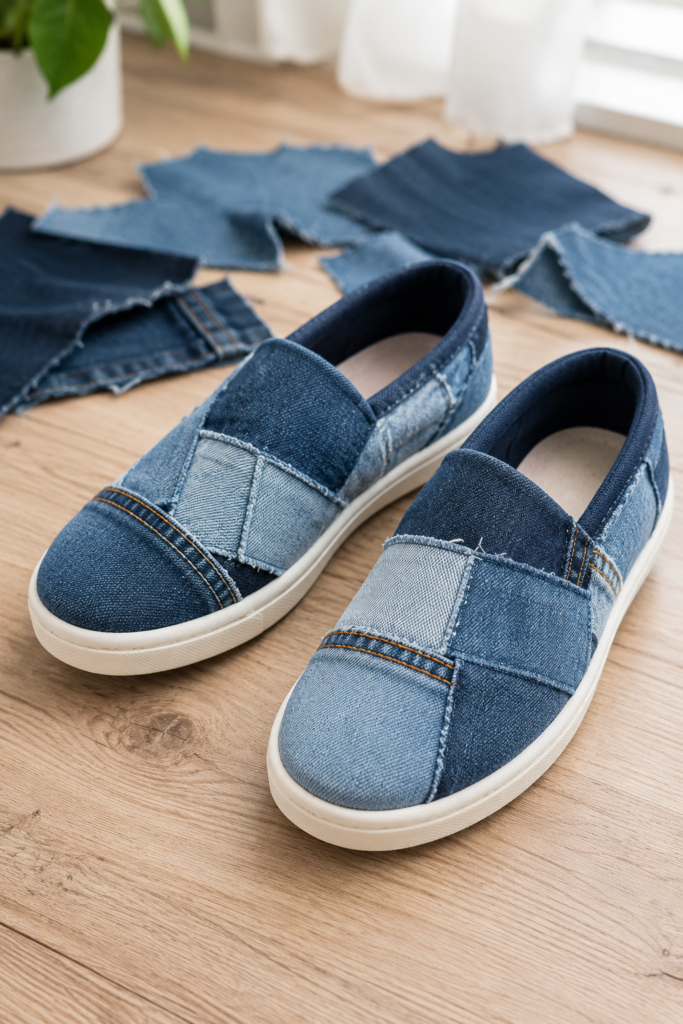
Denim scraps are useful for shoe upcycling because they are strong, familiar, and easy to mix without needing every piece to match. Light and dark washes give the surface enough variation on their own, so there is no need for extra trims. Using old jean seams or narrow stitched sections can add character, but I would keep the thickest parts away from places where the shoe bends sharply.
This version works best on slip-ons with a fairly simple fabric upper. The existing shoe remains the structure; the denim is only the new surface layer. That distinction matters because you do not want heavy patchwork to change the fit or stop the elastic and opening from stretching normally.
Materials and Tools
· Plain fabric slip-on shoes
· Soft denim scraps from old jeans
· Sharp fabric scissors
· Strong hand-sewing thread and needle, or flexible fabric adhesive where suitable
· Pins or small clips for temporary placement
· Optional fray-control product for very loose edges
Steps
1. Cut several small denim shapes from softer parts of old jeans. Avoid very thick waistband sections at first. Arrange the pieces on the shoes while they are stuffed so you can see where the patchwork crosses seams and flex lines.
2. Trim overlapping areas until the patches sit fairly flat. Leave the shoe opening, elastic, and sole edge clear. Then secure the largest pieces first, using small stitches or a flexible adhesive suited to the materials.
3. Add smaller patches to fill awkward spaces, but do not feel obliged to cover every millimetre. A little original fabric between denim pieces can make the layout easier to wear and less bulky.
4. Check the inside for thread ends or adhesive seepage, then try the shoes on indoors. If a patch pulls when you walk, adjust that area before completing the second shoe.
Variation: Use only two denim washes and repeat one original jean pocket seam across both shoes for a calmer, more deliberate look.
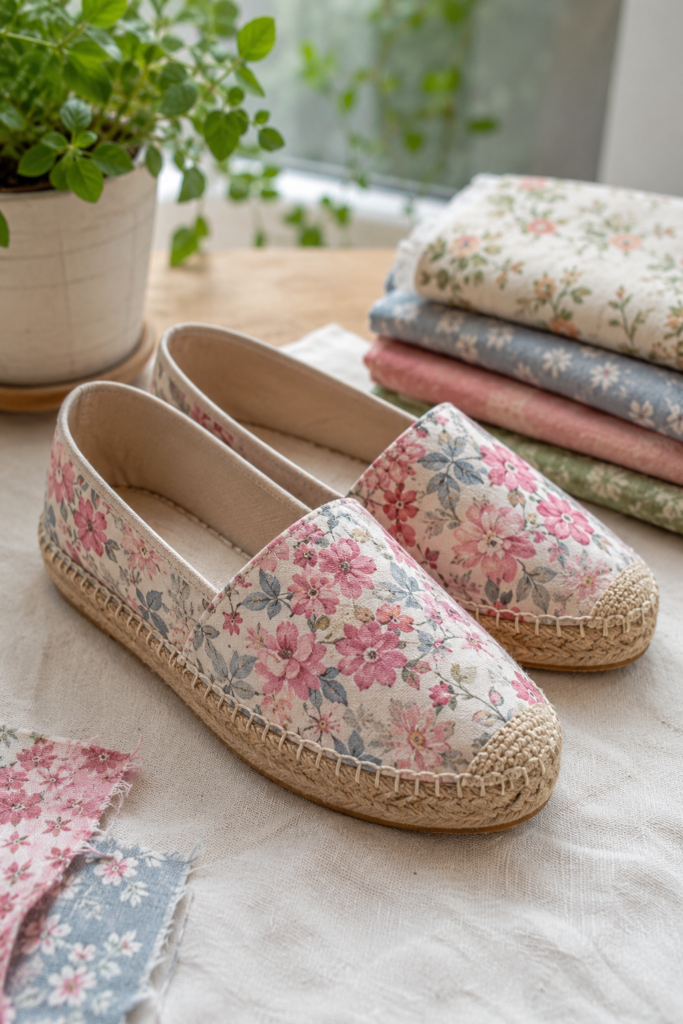
Wrap Espadrilles with Lightweight Floral Fabric
Espadrilles already combine fabric with a textured woven sole, so adding a new cloth layer can look surprisingly natural. A lightweight floral cotton gives the upper a softer, almost vintage feel without competing with the rope edge. This is one place where using a thin fabric really matters. Heavy upholstery scraps may look appealing on the table but can make the finished shoe feel rigid and overbuilt.
I’d treat the original upper almost like a pattern. The aim is not to reconstruct the whole shoe from scratch; it is to cover the worn visible surface neatly while preserving the opening, toe shape, and connection to the sole.
Materials and Tools
· Worn fabric espadrilles with sound soles
· Lightweight cotton or similar woven fabric
· Fabric scissors
· Flexible fabric adhesive suitable for footwear textiles
· Small brush or applicator for adhesive
· Clips or pins used carefully away from the foot area
· Optional matching hand-sewing thread for edge reinforcement
Steps
1. Clean and dry the espadrilles, then lay the floral fabric over one upper and smooth it into position. Mark generous rough shapes first rather than cutting exactly to size immediately.
2. Trim the fabric gradually, leaving enough allowance to turn or hide the edge neatly near the opening and sole line. Test the piece several times; the first cut does not need to be the final one.
3. Apply a thin, even layer of flexible adhesive to a small section of the original upper and smooth the fabric down without stretching it. Then continue section by section so wrinkles do not build up across the toe.
4. Finish the exposed edges neatly and reinforce them with a few discreet stitches if the construction allows. Let everything cure fully before walking in the shoes, then check that the fabric stays smooth when the toe bends.
Variation: Cover only the front vamp with floral fabric and leave the heel section original for a faster beginner version.
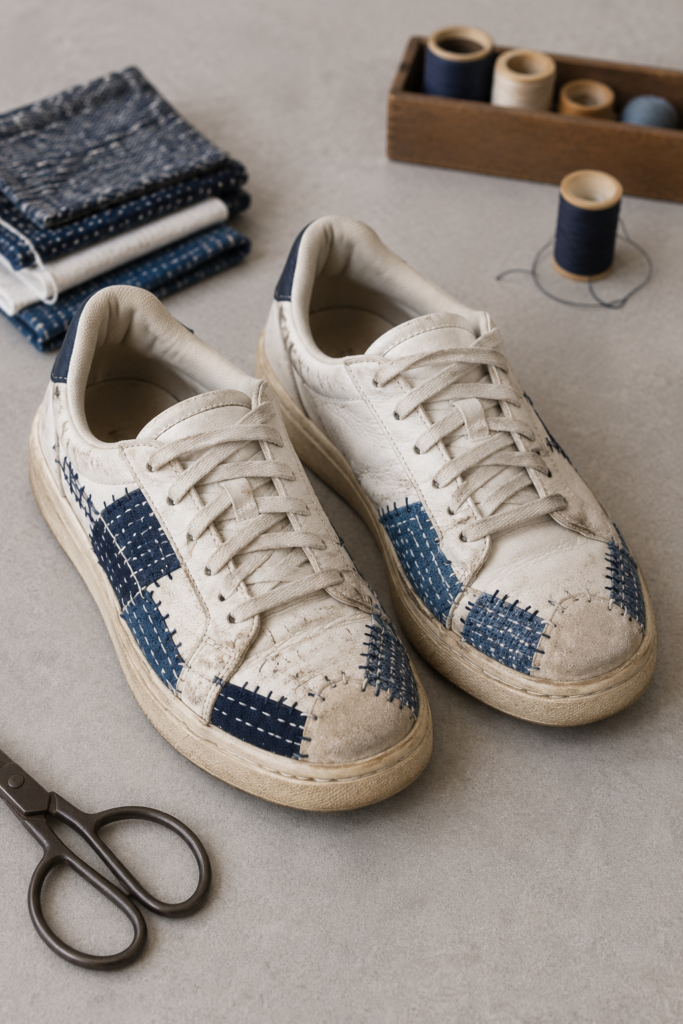
Use Visible Mending to Repair Worn Sneakers
Visible mending is especially satisfying on shoes that already look worn because it does not pretend the damage never happened. Small indigo patches and contrasting stitches can reinforce weak textile areas while giving the pair a deliberate repaired look. The important word is reinforce. A decorative patch should sit on fabric that still has enough strength around the damaged area to hold stitches.
This technique is better for surface wear, small holes, or frayed textile panels than for broken soles or collapsed shoe structure. I don’t think a patch should be used to disguise a problem that affects safe walking. For cosmetic wear, though, a few carefully placed stitches can make an old sneaker feel much more interesting.
Materials and Tools
· Worn textile or soft synthetic sneakers suitable for hand stitching
· Small sturdy fabric scraps
· Strong thread or embroidery thread
· Hand-sewing needle suitable for the upper material
· Thimble if helpful
· Small scissors
· Optional flexible textile adhesive for temporary patch positioning
Steps
1. Clean the shoe and identify which worn areas actually need reinforcement. Cut each patch slightly larger than the weak section so your stitches can catch sound material around the damage.
2. Position one patch at a time and secure it temporarily. Use simple running stitches, small crosses, or neat overcast stitches around the edge. Keep the tension firm enough to hold the patch but not so tight that the upper puckers.
3. Add only as many visible patches as the shoe needs. Repeating the same thread colour across several repair points helps scattered mends feel connected rather than accidental.
4. Check the inside for rough thread ends and then flex the shoe by hand. If a repair sits directly on a hard crease, adjust it before regular wear so the patch does not rub or tear away.
Variation: Use scraps from an old chambray or printed cotton shirt instead of denim when the sneaker upper is very lightweight.
Braid Fabric Scraps into New Sandal Straps
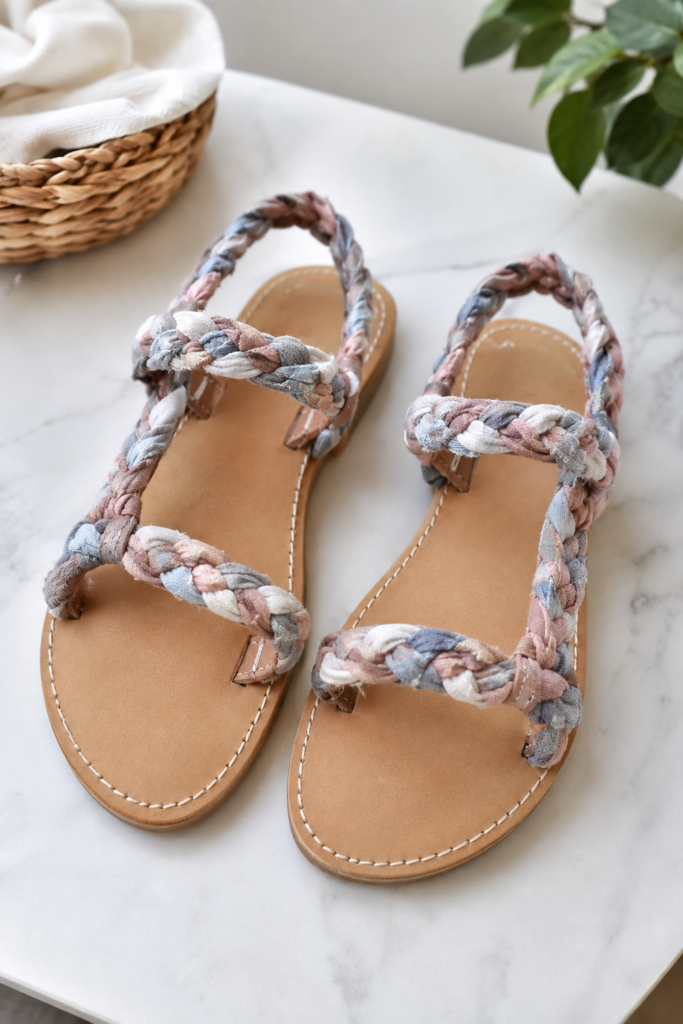
Long narrow fabric scraps are often the pieces left behind after larger sewing projects, and braided sandal straps give them a reason to stay useful. Soft cotton strips create a casual handmade texture that works particularly well with simple flat soles. The braid should feel substantial enough to hold its shape but not so thick that it becomes uncomfortable across the foot.
This is more of a repair-and-rebuild project than surface decoration, so I would only use a sandal base that is still structurally reliable. The attachment points deserve most of your attention. A lovely braid is not useful if it pulls away from the sole after a few steps.
Materials and Tools
· Flat sandal soles with intact bases and usable strap anchor points
· Long fabric strips from lightweight woven or knit textiles
· Scissors or rotary cutter
· Strong thread and needle
· Suitable strong flexible footwear adhesive if required
· Clips for holding braid ends
· Optional existing strap pieces to use as attachment tabs
Steps
1. Remove only the damaged decorative strap material while preserving any strong anchor tabs that can be reused. Measure the route each new strap needs to follow across the foot before cutting fabric strips.
2. Make several even fabric strips and braid them firmly without pulling so hard that the braid becomes stiff. Test the braid against your foot before securing the ends; this is where a few centimetres can make a big difference to comfort.
3. Stitch or securely attach the braid ends to the existing sandal anchor points using a method appropriate for the sole construction. Then reinforce the join so the stress is spread across a wider area rather than one tiny stitch point.
4. Try the sandals indoors and check that the straps hold the foot without digging in. Adjust before final trimming, then secure loose fabric ends so they do not unravel during wear.
Variation: Use an old soft T-shirt for stretchier braids, but make the straps slightly shorter because knit fabric can relax with wear.
Turn a Retired Boot into a Succulent Planter
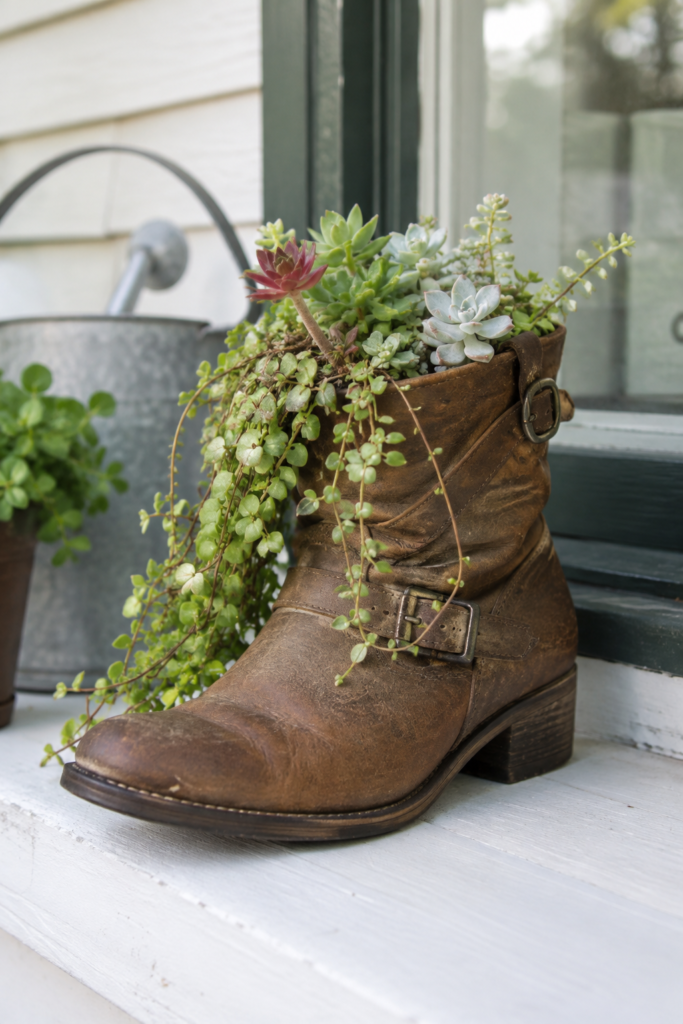
Not every shoe upcycle needs to end with something you wear. A boot with a tired sole, damaged lining, or fit problem can still have a useful shape for the garden. The deep opening provides height for a small planting display, and buckles, scuffs, and worn leather-look surfaces become part of the character rather than defects that need hiding.
For me, the easiest way to make this practical is to treat the boot as an outer planter rather than filling every corner directly with wet soil. A small nursery pot or simple liner can sit inside the shaft, which makes watering, drainage, and eventual plant replacement much easier.
Materials and Tools
· Old ankle boot that is no longer suitable for wear
· Small nursery pot or waterproof liner that fits inside the boot
· Potting mix suited to the chosen plants
· Small succulents or trailing plants
· A few pebbles if needed to stabilise an inner pot
· Optional outdoor-safe protective treatment for the boot exterior
Steps
1. Clean loose dirt from the boot and decide where it will stand. Check that the sole sits reasonably flat and that the upper is stable enough to support a small planted insert.
2. Choose a nursery pot or liner that fits inside the boot opening without forcing the sides outward. If the insert sits too low, place a stable lightweight spacer beneath it rather than filling the entire boot with soil.
3. Plant the succulents in the removable inner pot, keeping taller plants toward the back and trailing growth near the opening. Then lower the planted pot into the boot and adjust the height until the arrangement looks natural.
4. Place the boot somewhere sheltered from extreme weather unless its material can tolerate exposure. Water according to the plants’ needs and remove the inner pot when necessary so excess moisture does not stay trapped inside the shoe.
Variation: Use a pair of mismatched children’s rain boots as small herb planters if the material is easy to clean and the pots can be inserted without cutting.
Add Crochet Lace Appliques to Simple Slip-Ons
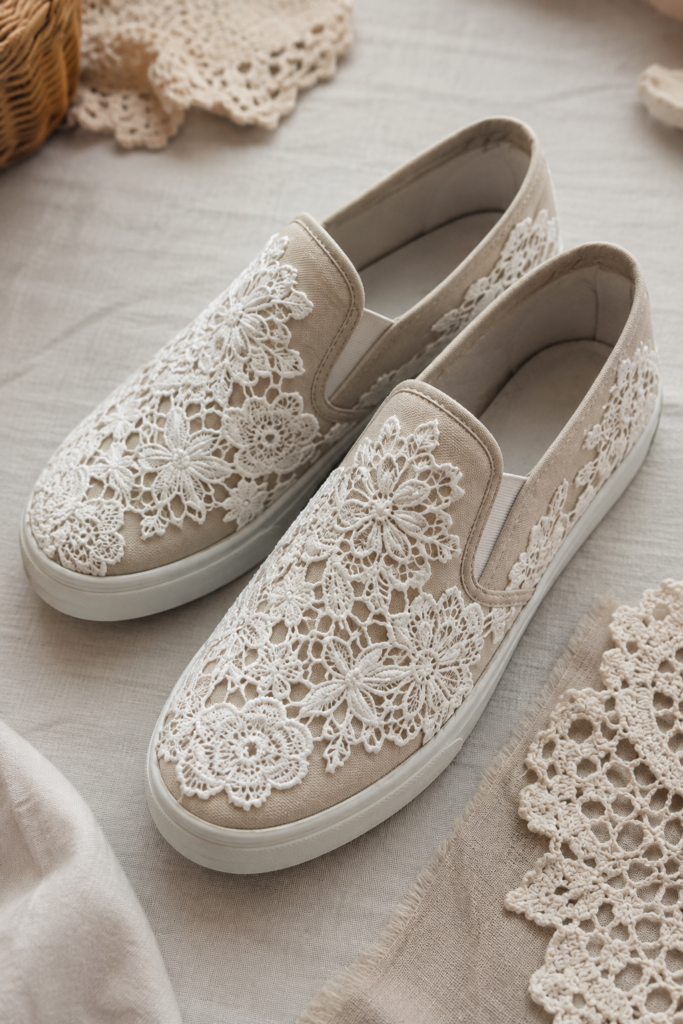
Lace and crochet appliques can change a very plain slip-on without requiring the whole shoe to be covered. The openwork is useful because the original fabric still shows through, so the result feels layered rather than heavy. Floral motifs are especially easy to arrange around the toe and side panels because you can overlap a few edges and let smaller pieces fill awkward gaps.
The main challenge is keeping the appliques flexible. Thick glue across the whole back can turn soft lace into a hard patch. I’d rather secure each motif around its stronger edges and add a few internal attachment points only where the lace lifts.
Materials and Tools
· Plain fabric slip-on shoes
· Lightweight crochet lace motifs or lace scraps
· Matching hand-sewing thread
· Fine needle suitable for the shoe upper
· Small sharp scissors
· Optional flexible fabric adhesive for temporary positioning
Steps
1. Arrange the lace on both shoes before attaching anything. Begin with the largest motifs over the broad toe area, then use smaller flowers or sections along the sides. Step back and compare the pair before moving on.
2. Trim only loose connecting threads or unwanted lace edges, keeping the main motif structure intact. If using adhesive for positioning, apply tiny amounts so it does not soak visibly through the openwork.
3. Stitch around stable outer sections of each applique and add a few discreet securing stitches through the centre where needed. Keep the shoe stuffed while sewing so the upper holds its normal shape.
4. Remove the stuffing and flex the shoe carefully. Any lace sitting across a deep crease may need one edge released and repositioned. Once comfortable, trim thread tails and check that nothing scratches the inside.
Variation: Use one large lace motif on the outer side of each shoe instead of covering the toe for a faster and more minimal update.
Shoe Upcycling Choices That Can Make a Good Pair Harder to Wear
Covering Flex Areas with Thick Layers
A shoe bends thousands of times in roughly the same places. If heavy denim, thick lace, or stiff adhesive sits directly across those creases, the new surface is more likely to lift, crack, or make the shoe uncomfortable. Move thicker decoration slightly away from the deepest flex points whenever you can.
Treating Glue as the Only Structural Fix
Adhesive is useful for positioning and some surface treatments, but it should not be expected to rescue a loose sole or carry the full load of a replacement sandal strap unless the product and construction are genuinely suited to that job. Structural footwear damage needs a proper repair method first.
Adding Decoration Before Cleaning the Shoe
Paint, glue, and fabric patches all behave badly on dust, grease, or loose surface dirt. A quick clean may not feel like the interesting part of the project, but skipping it is one of the easiest ways to end up with lifting edges later.
Making Both Shoes Identical at the Expense of Balance
Hand-painted flowers, denim scraps, visible mends, and lace motifs do not need to sit in exactly the same place on both shoes. Matching the general colour, scale, and amount of decoration usually looks more natural than forcing two mirror-image layouts.
Ignoring the Inside of the Shoe
A project can look neat from the outside while a knot, glue ridge, or folded fabric edge rubs the foot inside. Run your hand around the lining after every major stage and wear the finished pair indoors before taking them out for longer use.
Upcycling a Pair That Is Already Unsafe to Wear
A separating sole, broken support, badly worn tread, or unstable heel is not a decorative problem. If the shoe has reached that point, move it into a non-wearable project instead. The boot planter is a good example of letting an old shoe stay useful without pretending it should still be walked in.
Frequently Asked Questions
What type of shoes are easiest to upcycle?
Canvas sneakers and simple fabric slip-ons are usually the easiest because they accept paint, stitching, or light fabric layers more readily than highly coated or rigid materials. They also tend to have broad areas where decoration can sit without interfering with fastenings.
Can I use ordinary acrylic paint on shoes?
For wearable fabric shoes, a flexible paint intended for textiles is generally a better choice because shoe uppers bend repeatedly. A rigid paint layer may crack. Whatever you use, test it first and follow the product directions for curing and care.
Is glue or sewing better for adding fabric to shoes?
It depends on the upper and the location. Sewing can be durable on suitable textile sections, while a flexible adhesive may help on areas that are difficult to stitch. In many projects, a small amount of adhesive for positioning plus selective stitching gives better control than either method used heavily.
How can I keep upcycled shoes comfortable?
Keep thick materials away from flex points, avoid bulky knots inside the lining, preserve the shoe opening and elastic, and test the pair indoors after every major change. Comfort problems are much easier to correct before every edge has been permanently fixed.
Can damaged shoes be turned into planters?
Yes, if they are no longer suitable for wear but still have a stable shape. Using a removable nursery pot inside the shoe is often easier than filling the shoe directly with wet soil because it improves drainage and makes plant care simpler.
How should I clean shoes after upcycling them?
The safest care method depends on the new materials. Painted, glued, lace-covered, and patchworked shoes may no longer tolerate the cleaning method listed for the original pair. Spot cleaning is often the gentler option, but always follow the requirements of the materials you added.
Keep the Shoe Useful as You Change the Surface
The best shoe upcycles still feel like the original pair in the ways that matter. They bend where they should, stay secure on the foot, and remain comfortable enough to wear. The new part is the surface story: flowers where plain canvas used to be, old jeans across a tired slip-on, a visible repair instead of a hidden scuff, or soft lace over a shoe that needed more texture.
And when a pair has genuinely reached the end of its walking life, reuse does not have to stop there. A worn boot can hold a small planted pot without pretending to be footwear any longer. That shift is what I find most useful about upcycling. You are not forcing an object to stay what it was; you are noticing what still works and building the next use around that.