Old wood rarely looks promising when it first comes home. It may be dusty, scratched, full of old nail holes, or faded from years of use. Yet those marks are often exactly what make reclaimed timber more interesting than a new board from a shop. The trick is knowing which imperfections to keep and which ones need fixing before the wood becomes useful again.
One of the things I enjoy most about upcycling is working with materials that already have a history. With wood, especially, I don’t think every mark needs sanding away or every board needs to look identical. A little variation in grain, tone, and wear can make a finished piece feel much more natural.
Good upcycling wood projects begin long before the paintbrush or drill comes out. Choosing sound timber, cleaning it properly, measuring carefully, making secure joints, and using the right finish can turn forgotten boards into shelves, small tables, storage, planters, and plenty of other practical pieces.
Before You Start
Reclaimed wood deserves a proper inspection before you decide what to make from it. A dusty board may only need cleaning, while another could hide loose nails, deep cracks, splinters, rot, or an unstable section that makes it unsuitable for furniture.
Run your eyes over every face and edge of the wood. Remove protruding nails, screws, staples, and other sharp hardware carefully. If a fastener cannot be removed safely, choose another section of the board rather than building directly around it.
Brush away loose dirt before washing anything. Wood that only has surface dust may need nothing more than a stiff brush and a slightly damp cloth. Avoid soaking reclaimed timber, especially if you don’t know how dry or stable it is.
If you’ll be cutting, drilling, or sanding, wear appropriate eye protection and a dust mask and work where dust can be controlled. Finishes, stains, and some paints also need good ventilation.
One more thing: decide what the finished object needs to do before you begin. Decorative wall art can tolerate different wood than a stool, shelf, or table that must support weight. The wood should suit the job, not simply look interesting.
Why Upcycle Old Wood?
Old wood is worth checking before it ends up in the bin. A board may look scratched, faded, or rough but still have plenty of strength left for a smaller DIY project. Reusing what you already have can also make a project feel more personal because knots, nail holes, worn edges, and colour changes give reclaimed timber its own character.
Wood that is still structurally sound can often be reused for:
- Small shelves and wall storage
- Side tables and simple stools
- Wooden crates and organisers
- Plant stands and planter boxes
- Coat racks and hook boards
- Picture and mirror frames
- Decorative wall pieces
- Desk organisers
- Small benches
- Storage boxes and cubbies
- Rustic signs
- Simple indoor furniture
I don’t think every old mark needs to disappear. If a dent, faded patch, or nail hole doesn’t weaken the wood or make it unsafe, it can become part of the finished design rather than something you need to hide.
What Wood Can You Use for Upcycling?
You don’t need specially purchased reclaimed timber to begin. Useful pieces of wood often turn up in old furniture, leftover DIY materials, storage areas, or household items that are no longer being used.
Good sources of wood for upcycling may include:
- Old wooden shelves
- Drawer fronts
- Cabinet doors
- Broken furniture with reusable sections
- Leftover construction timber
- Wooden crates
- Bed slats
- Old table tops
- Offcuts from previous DIY projects
- Fence boards that are still in good condition
- Wooden boxes
- Unused cupboard panels
- Old solid-wood doors
- Carefully selected pallet boards
Always inspect reclaimed timber before using it. Avoid wood that feels soft from decay, has serious structural cracks, contains unidentified contamination, or is unsuitable for the finished project.
A decorative piece and a weight-bearing stool need very different standards. For furniture, I’d always choose strength before appearance.
Basic Tools and Supplies for Upcycling Wood
You certainly don’t need every woodworking tool available. A few basic items can handle many beginner upcycling projects, particularly if you choose wood that is already close to the size you need.
Depending on the project, useful tools and materials include:
- Tape measure
- Pencil
- Carpenter’s square
- Sandpaper
- Sanding block
- Stiff cleaning brush
- Clean cloths
- Hammer
- Pliers
- Screwdriver
- Drill/driver
- Suitable screws
- Wood glue
- Clamps
- Hand saw or another suitable cutting tool
- Paintbrushes
- Wood stain
- Furniture paint
- Clear protective finish
- Drop cloth or protective sheet
- Dust mask
- Work gloves
- Eye protection
There’s no need to buy everything before your first project. Start with the tools your particular piece actually requires. If your wood is already the right size, for example, you may be able to clean, sand, assemble, and finish it without doing much cutting at all.
Choose Sound Wood and Clean It Before You Design Around It
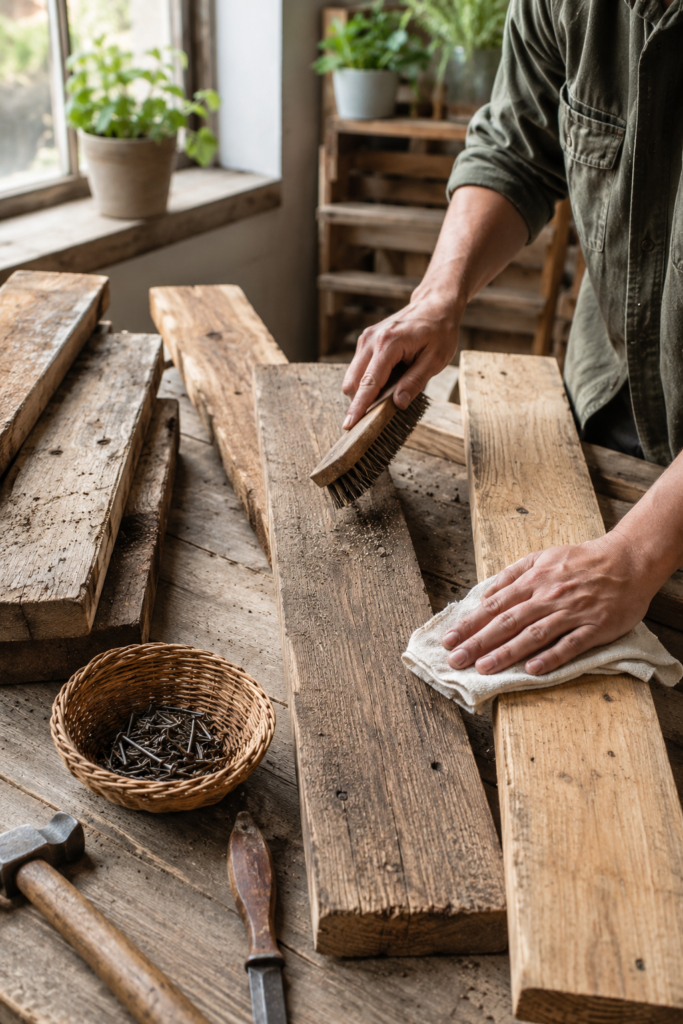
The first tip is probably the least glamorous, but it can save the entire project: clean and inspect the wood before deciding what it should become.
Weathered boards often look worse than they really are because dust sits inside the grain. Once that dirt is brushed away, you can judge the actual condition of the timber. Small nail holes, faded areas, and shallow dents may be worth keeping. Soft patches, deep splits, or serious damage are different.
I’d rather discover a weak section while the wood is still lying on the workbench than after it has become one leg of a table.
Materials and Tools
- Reclaimed or leftover wooden boards
- Stiff hand brush
- Clean cloths
- Pliers or a suitable nail-removal tool
- Hammer
- Small scraper if necessary
- Mild cleaning solution if the surface needs it
- Gloves
- Eye protection
A Practical Way to Prepare Reclaimed Wood
- Inspect the entire board first. Look along the surface and all four edges for splits, loose sections, sharp hardware, or signs that the timber has become too weak for the intended project. Turn the board over as well; the underside is easy to forget.
- Remove unwanted hardware carefully. Pull old nails, screws, and staples where possible without damaging more wood than necessary. If you want to keep old nail holes as part of the character, that’s fine—the dangerous metal needs to go, not every visual mark.
- Brush off loose dirt. Work along the grain with a firm brush so dust comes out of grooves and weathered areas. Then wipe the surface with a cloth rather than immediately attacking it with heavy sanding.
- Separate usable sections from damaged ones. You don’t need to save every centimetre of an old board. Cut plans around strong sections and keep smaller sound offcuts for future projects.
A useful alternative is to begin with discarded shelves, drawer fronts, cabinet panels, or leftover building timber instead of very rough pallet boards. They often need less preparation, which makes them easier for a first wood-upcycling project.
Sand Enough for Comfort Without Removing All the Character
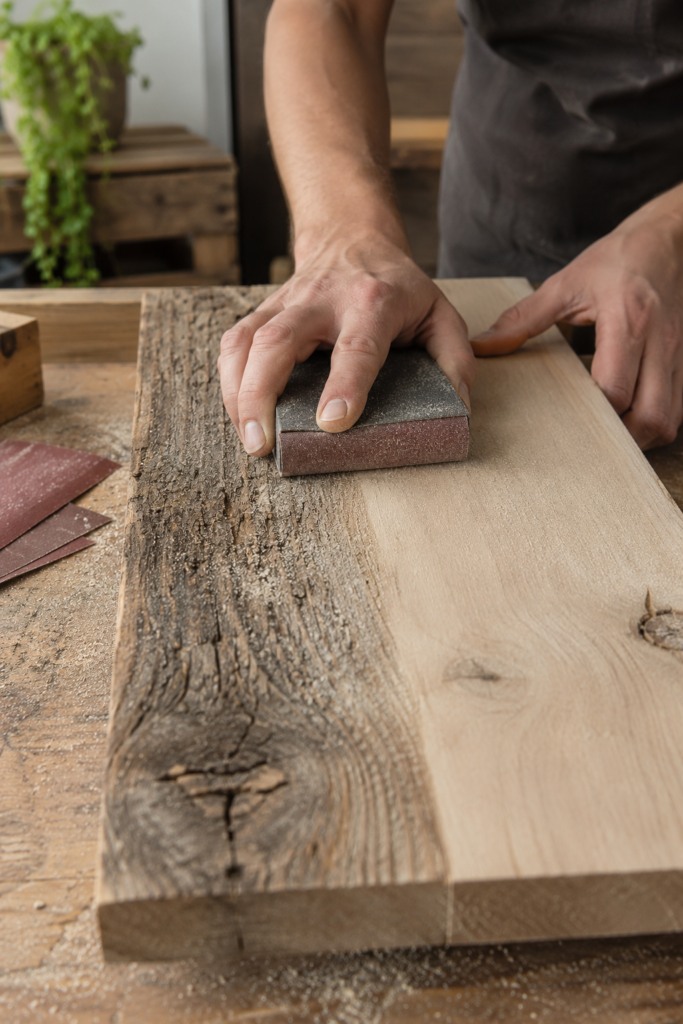
This is where people sometimes go too far. Reclaimed wood does need to feel safe and comfortable, but it doesn’t necessarily need to look factory-new.
If the whole appeal of the board is its aged grain, dents, and colour variation, aggressive sanding can remove the very details you wanted to keep. Concentrate first on splinters, rough edges, raised grain, and places that people will regularly touch.
For a tabletop or bench, comfort matters more than preserving every rough patch. For decorative wall pieces, you may be able to keep a more weathered finish.
Materials and Tools
- Sandpaper in progressively finer grades
- Sanding block
- Optional power sander for larger flat areas
- Dust mask
- Eye protection
- Brush or vacuum for dust
- Clean cloth
How to Sand Reclaimed Wood More Carefully
- Decide what actually needs smoothing. Run your hand close to the surface without dragging it across obvious splinters. Mark the roughest areas, edges, and corners so you can focus your effort where it matters.
- Begin with the rough areas. Use a suitable coarser abrasive on damaged or uneven sections, working with the grain. Avoid staying too long in one spot or you may create a hollow that becomes obvious once the finish goes on.
- Move gradually to a smoother surface. Once the major roughness is gone, switch to a finer abrasive. Then soften sharp corners and edges, particularly on shelves, stools, handles, and furniture that people will touch regularly.
- Remove all sanding dust before finishing. Dust left inside the grain can spoil paint, stain, or sealer. Brush or vacuum it away and wipe the surface clean before moving on.
One detail I wouldn’t skip is the edge test. A board can look wonderfully rustic while still feeling unpleasant to pick up. Keep the interesting grain; lose the splinters.
Measure Twice and Plan Before Cutting
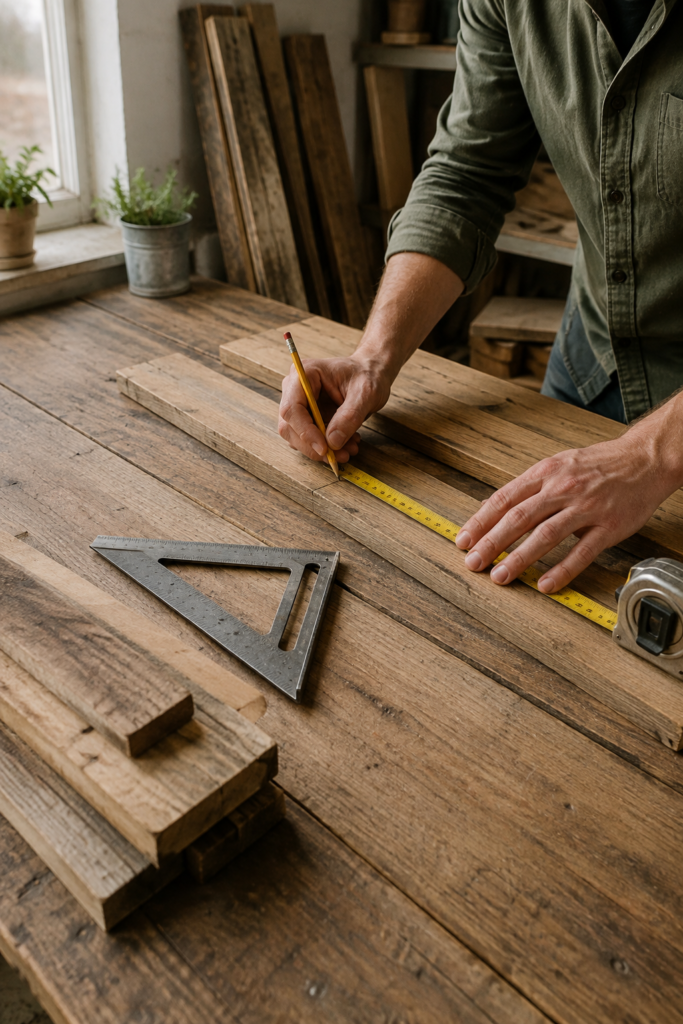
Old wood is often limited in quantity. You can’t always walk back to the shop and buy an identical replacement, so planning matters.
Lay your available boards out before cutting anything. Check their widths, straightness, grain direction, damaged areas, and usable lengths. You may discover that one attractive section is better saved for the visible front of a shelf while a plainer piece can become the back.
I know it can feel tempting to begin cutting as soon as an idea starts looking workable. Measure first. Then check it again.
Materials and Tools
- Tape measure
- Pencil
- Carpenter’s square
- Straightedge
- Reclaimed boards
- Paper for a rough sketch
- Suitable saw if cutting is required
- Eye protection
Plan Before You Make Permanent Cuts
- Sketch the finished object. It doesn’t need to be a technical drawing. A simple outline showing the top, sides, shelves, supports, or legs will help you understand how many pieces you actually need.
- Measure the available timber. Note which parts contain cracks, old hardware holes, or attractive weathered areas. Plan visible surfaces around the best sections rather than cutting every board into equal pieces immediately.
- Mark each cut clearly. Use a square where you need straight ends and make pencil marks you can actually see. Check how the pieces will meet before reaching for the saw.
- Dry-fit the layout. Place the marked components roughly in position. This is your chance to notice that a shelf is too deep, a support looks awkward, or a damaged knot sits exactly where a screw needs to go.
For smaller projects, cardboard templates can make this even easier. Cut the shape from scrap cardboard first and place it against the wood. It’s a cheap way to spot awkward proportions before a good reclaimed board becomes a strangely shaped offcut.
Test Stain, Paint, or Sealer Before Finishing the Whole Piece
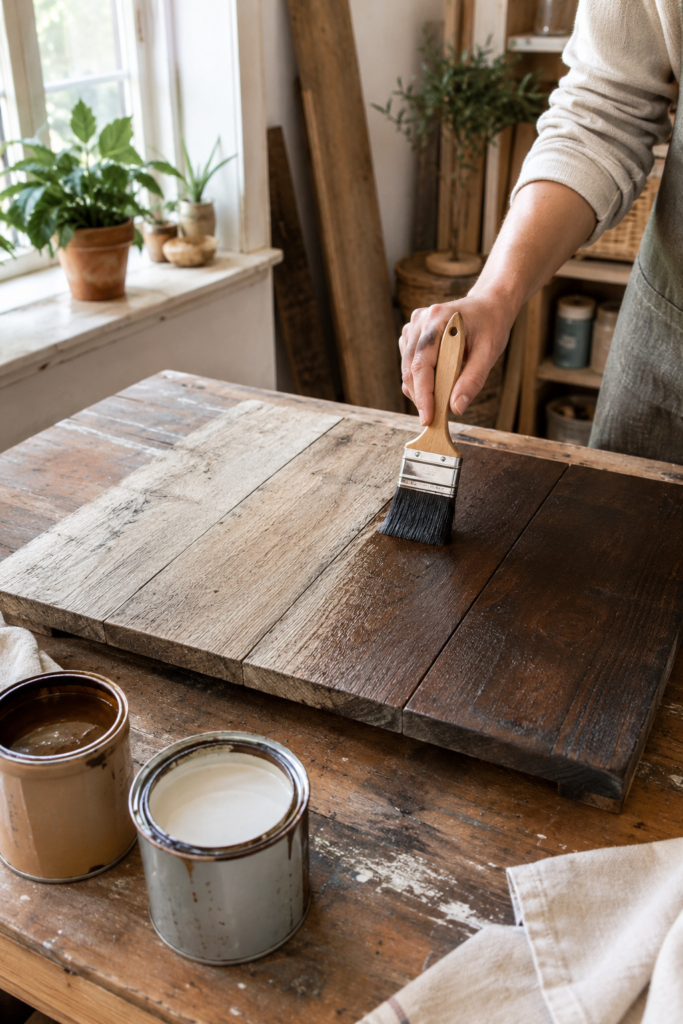
Reclaimed wood can respond unpredictably to finishes because different sections may have aged differently. One area may absorb stain quickly while another remains much lighter. Old marks and repairs can also become more obvious once the surface is wet.
That variation isn’t automatically a problem. In fact, it can be part of the appeal. The important part is knowing roughly what will happen before covering the visible face of your project.
Materials and Tools
- Clean prepared wood
- Suitable wood stain, paint, or clear protective finish
- Brush or lint-free application cloth
- Stirring stick
- Protective gloves where appropriate
- Drop cloth
- Clean rags
- Good ventilation
How to Approach the Finish
- Test a hidden or leftover section. Apply a small amount of your chosen finish to an offcut or the least visible part of the project. This gives you a better idea of how the existing grain, colour, and old marks will respond.
- Prepare the surface properly. Make sure sanding dust, grease, and loose debris are gone. A carefully applied finish can still look patchy if the surface underneath was never cleaned properly.
- Apply thin, controlled coverage. Work with the grain and avoid flooding deep cracks or corners. If you’re using paint instead, keep an eye on drips around edges and joints.
- Allow each stage to settle before deciding what comes next. Then look at the piece in normal room lighting before adding more colour or another protective layer. Patience suddenly becomes the least exciting tool in the workshop, but it usually earns its place.
A clear or lightly tinted finish works well when the timber already has colour and character you want to keep. Paint makes more sense if several mismatched boards need a more unified appearance. There’s no need to hide attractive grain simply because the wood is old.
Keep the First Build Simple and Strengthen the Joints
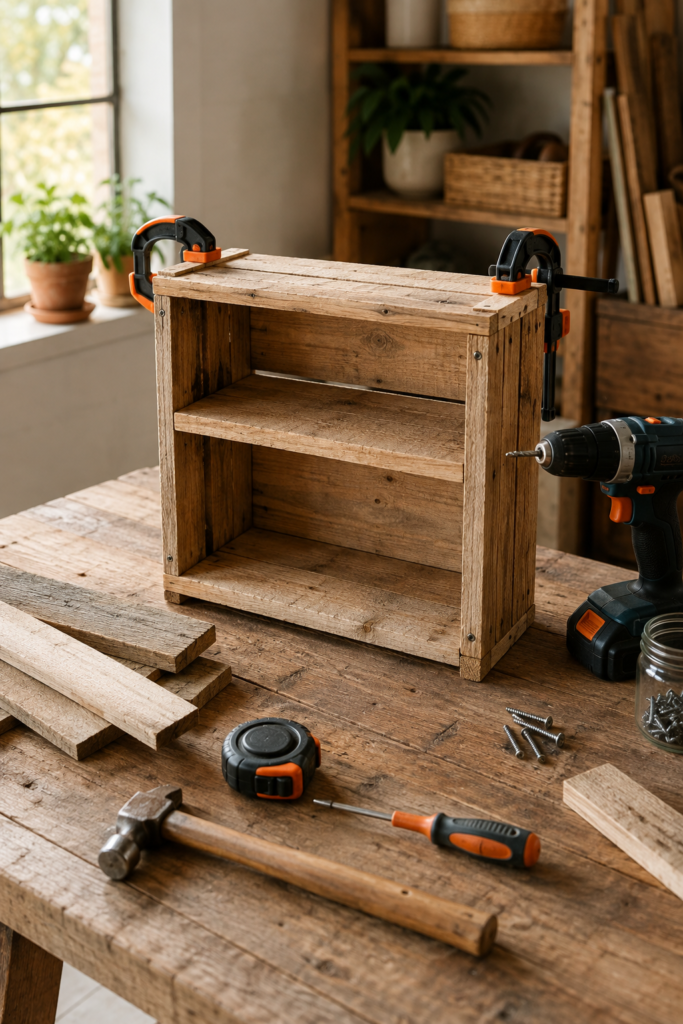
An uncomplicated box shelf is a very sensible first project for leftover wood. Four outer sides and one internal shelf can teach you a surprising amount about measuring, squaring, drilling, clamping, and keeping boards aligned.
The rustic texture also works in your favour. Minor colour differences between boards don’t need disguising, and small historic marks can make the finished storage piece more interesting.
What does matter is strength. A charming shelf that leans sideways is still a shelf with a problem.
Materials and Tools
- Prepared reclaimed boards
- Measuring tape
- Pencil
- Carpenter’s square
- Drill/driver
- Suitable screws
- Clamps
- Optional wood glue
- Screwdriver
- Eye protection
- Suitable saw if boards still need cutting
Build a Simple Upcycled Shelf
- Arrange the prepared pieces first. Choose which boards will form the sides, top, base, back, and internal shelf. Place the most attractive grain where it will remain visible and check that damaged sections aren’t positioned at important joints.
- Check the shape before fastening anything. Hold the pieces together and use a square to check the corners. If the shelf rocks or twists at this stage, correct the fit rather than hoping the screws will somehow pull everything into place.
- Prepare the screw positions. Mark the fixing points away from fragile edges, splits, and large weak knots. Depending on the wood, pilot holes can make fastening easier and reduce the chance of the reclaimed board splitting.
- Clamp and assemble the main frame. Keep the boards aligned while driving the screws. Add the inner shelf only after the outer structure is sitting correctly, then check that it remains level and square.
- Inspect the finished structure. Tighten loose fixings, smooth any newly exposed rough edges, and test stability before loading the shelf. Wear eye protection while drilling and keep your hands away from the drill bit and cutting tools.
For me, this type of project is more useful than jumping straight into complicated furniture. Once you understand how a simple box stays square and strong, larger projects become much easier to plan.
If you don’t have enough timber for a full freestanding unit, make a single wall shelf instead. Just make sure the wall fixings suit both the shelf and the weight you intend to place on it.
Make the Finished Piece Useful, Not Just Rustic
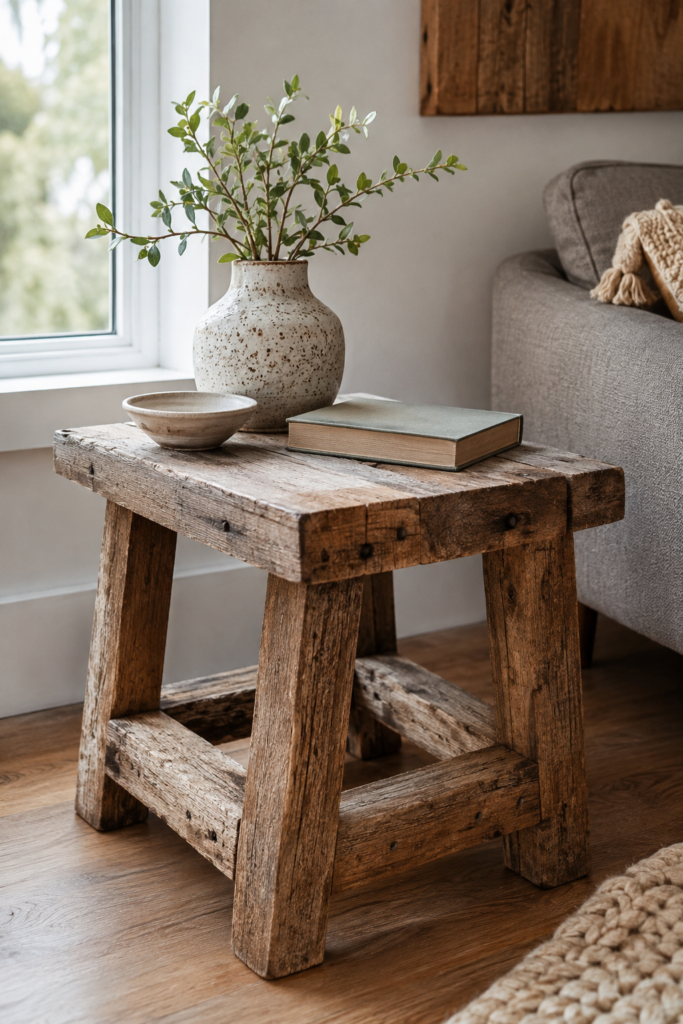
The final room setting is a useful reminder that upcycling doesn’t have to announce itself loudly. Reclaimed timber can sit comfortably beside ordinary furniture when the proportions and purpose make sense.
A small side table is a good example. It doesn’t need carved details, several paint colours, decorative transfers, and a collection of handles rescued from three different cabinets. Sometimes the wood has already done enough.
Before styling a finished furniture piece, check how it actually performs. Does it wobble? Are there rough corners? Is the top comfortable to touch? Can the surface cope with the way you intend to use it?
Useful Finishing Details
- Protective finish suited to the intended use
- Felt pads for the feet if needed
- Fine sandpaper for last-minute rough spots
- Screwdriver for checking fixings
- Simple décor rather than heavy clutter
Check the Piece Before Putting It to Work
- Test it on a level floor. Press gently on different corners and check for movement. If a leg or joint needs attention, repair it before the piece starts carrying books, lamps, planters, or other objects.
- Check every touch point. Feel around the tabletop edges, corners, and legs for rough areas. Lightly smooth anything uncomfortable without stripping away all of the aged texture.
- Style around the wood rather than covering it. A plant, book, lamp, or ceramic piece may be enough. Leaving some of the surface visible helps the reclaimed grain remain part of the finished design.
I don’t think an upcycled project needs to look heavily decorated to prove that work went into it. A straightforward piece that you genuinely use every day is a very successful second use for old timber.
Common Mistakes to Avoid
Skipping the inspection
Old timber can hide nails, screws, cracks, and soft areas beneath dirt. Building first and discovering them later can turn a small problem into a structural one. Inspect both sides and all edges before measuring your project.
Sanding away every sign of age
There’s a difference between making timber safe and making it look new. Concentrate on splinters and uncomfortable areas first. If an old saw mark, nail hole, or colour variation doesn’t affect safety or strength, consider keeping it.
Cutting before planning the layout
Reclaimed boards are often irregular and limited. Cutting several pieces immediately can leave you without enough usable timber for an important part of the project. Lay out the whole build first and decide where each board belongs.
Finishing dusty wood
Paint, stain, and sealer cannot disguise poor preparation. Sanding dust and dirt can leave the surface rough or uneven. Clean between preparation stages and inspect the wood in good light before adding a finish.
Depending on screws to correct badly fitting joints
Fasteners hold components together; they shouldn’t have to force badly cut boards into the right shape. Dry-fit the parts, check the corners, and correct obvious gaps before final assembly.
Forgetting the final purpose
A decorative sign and a stool have very different requirements. Furniture that will carry weight needs sound timber and secure joints, while an outdoor project needs materials and finishes suitable for outdoor conditions. Always design around function first.
Frequently Asked Questions
Is upcycling wood suitable for beginners?
Yes, especially if you begin with a small project such as a shelf, crate, plant stand, or simple side table. Choose timber that is already reasonably straight and sound so most of your time goes into learning basic preparation and assembly rather than repairing major damage.
Do I always need to sand reclaimed wood?
Not every surface needs heavy sanding, but rough edges and splinters should be addressed. Decorative wood can often keep more of its weathered texture, while tabletops and furniture usually need a smoother touch surface.
Should I paint reclaimed wood or leave the grain visible?
That depends on the condition of the timber and the look you want. If the grain and natural colour already work well together, a protective clear or lightly tinted finish may be enough. Paint can help when several pieces have very different colours or when you want the finished object to suit a particular room.
Can I use pallet wood for any upcycling project?
I’d be selective. Only use wood whose condition and previous use you understand well enough for the intended project, and avoid boards that are contaminated, badly damaged, or questionable for indoor, food-related, children’s, or pet uses. Other reclaimed boards, old shelves, and furniture components can sometimes be easier alternatives.
How can I stop reclaimed wood from splintering?
Smooth damaged edges before assembly and avoid placing screws extremely close to weak edges or existing cracks. Pilot holes may also help with some dry or brittle boards. Check again after cutting because a newly cut edge can expose fresh roughness.
How do I make an upcycled wood table or shelf more durable?
Durability begins with sound timber and secure construction rather than with the final coat of paint. Use appropriate fixings, reinforce weak joints, keep the structure square during assembly, and add a finish suited to the way the piece will be used.
Can an upcycled wood project stay outdoors?
Only if the timber, construction, fixings, and finish are suitable for outdoor exposure. An indoor furniture finish shouldn’t automatically be treated as weather protection. If you’re unsure, keep the piece indoors or in a protected area rather than letting a good project deteriorate outside.
Start With the Wood You Already Have
The most useful tips for upcycling wood aren’t really about buying more tools or making every project complicated. They’re about paying attention to the material you already have.
Clean it before judging it. Keep the sections that remain strong. Sand for safety and comfort without automatically removing every old mark. Measure before making permanent cuts, test the finish, and take the time to build secure joints.
That approach leaves room for the part I enjoy most: allowing old timber to still look like old timber while giving it a purpose that makes sense now.
You don’t need a workshop full of reclaimed boards to begin. One forgotten shelf, unused drawer front, sturdy offcut, or piece of old furniture may be enough for your next project.
Have a look at the wood you’ve been keeping “just in case.” What useful thing could it become instead of waiting in the garage for another year?