A good handmade gift often begins with something that already has a history: a worn pair of jeans, a box of mismatched buttons, a jar saved from the recycling bin, or a piece of timber that is too useful to discard. I’m Stella Eve Louise, and that is the part of upcycling I enjoy most – finding a practical second purpose without pretending the original material was never used.
For gifts, though, reuse needs a little extra care. The finished piece should feel clean, safe, useful, and deliberate enough that the recipient sees the thought behind it rather than the leftovers. These upcycling gift ideas work best when the old material contributes something the new object actually needs: strength from denim, texture from wood, pattern from buttons, or character from metal and glass. I don’t think every mark needs to disappear, but weak joins, sharp edges, unstable finishes, and awkward proportions do need attention. A thoughtful upcycled gift is still a gift first, so function matters just as much as the story behind the material.
Choose Gift Materials That Are Clean, Sound, and Worth Reusing
Upcycling for yourself gives you room to tolerate little quirks, but a gift needs a higher standard. I would begin by sorting every reclaimed material into three groups: safe to use as-is, repairable with a little work, and not worth passing on. Fabric should be clean and strong, wood should not have active rot or loose splinters, metal should be free from dangerous burrs, and glass should have no cracks. I don’t think sentiment should override condition; if the base material is failing, decoration will not turn it into a thoughtful gift.
The same applies to anything that will touch food, skin, heat, or a wall. Wash jars thoroughly, inspect jewelry findings, smooth sharp can edges, and check any reused hardware before building around it. The best upcycling gift ideas feel intentional because the reused material looks chosen, not merely rescued at the last minute.
Match the Finish and Fastening Method to How the Gift Will Be Used
A present that sits on a shelf has different demands from one that will be carried, washed, heated, or loaded with books. Before cutting or gluing anything, decide what the finished object must actually do. A tote bag needs reinforced handles, crate storage needs secure fixings, jewelry needs closed connections, and a candle container needs to tolerate normal candle use without hidden damage.
I know it can feel tempting to choose the prettiest glue, paint, ribbon, or paper first, but function comes before finish. Then you can choose decoration that suits the surface and expected wear. Where a structural join is involved, I’d rather use stitching, screws, bolts, or another dependable mechanical connection than ask decorative adhesive to do a job it was never meant to do.
Plan the Presentation So the Reused Material Feels Deliberate
A handmade gift does not need to disguise every sign of age. In fact, faded denim, old spool shapes, mismatched buttons, and worn timber can be the details that make an upcycled piece feel personal. What matters is editing. Clean surfaces, trim loose threads, align edges where alignment matters, and leave only the marks that add character rather than looking neglected.
Think about presentation early too. A simple recycled-paper tag explaining the material’s second use can make the gift feel considered without turning it into a speech about sustainability. For me, restraint helps here. If the project already has strong texture or colour, a plain wrap or reusable fabric tie often suits it better than piling on more decoration.
DIY Denim Jeans Utility Organizer
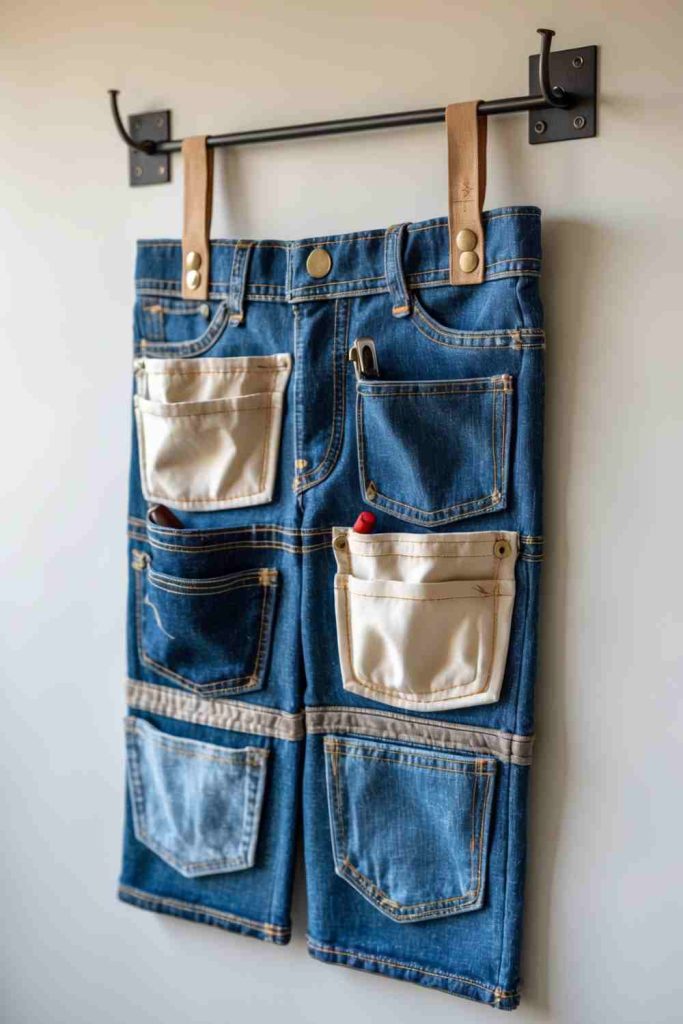
This idea turns old denim, spare fabric and sturdy hanging hardware into a wall organizer for tools, stationery, craft supplies or gardening bits. What makes it work as a gift is that the reclaimed material is not just decorative; it contributes to the finished object’s usefulness and character. A similar version can be adapted to the recipient’s style by simplifying the colours, changing the finish, or keeping more of the original surface visible.
The practical point I would watch is sewing and load-bearing pocket placement. Upcycling can make us eager to save every piece, but the best result comes from using only the parts that are still sound. Test the material before committing to the full build, then keep the final form easy to use, clean, carry, hang, or store as appropriate.
Materials and Tools
· Denim or other strong fabric
· Scrap fabric for extra pockets
· Scissors
· Ruler or tape measure
· Pins or clips
· Sewing machine or hand-sewing needle
· Strong thread
· Hanging rod or dowel
· Straps or loops
Steps for This Upcycled Gift
1. Prepare the reclaimed material. Clean the main material thoroughly and inspect it for damage before cutting, drilling, sewing, or decorating. Remove loose labels, rough fibres, rust flakes, splinters, or weak hardware as relevant. If any part seems structurally doubtful, replace it rather than asking the decorative finish to hide the problem.
2. Plan the size, layout, and recipient use. Arrange the parts before securing them and decide how the recipient is likely to use the finished gift. I know it can feel tempting to start attaching pieces immediately, but a dry layout usually reveals crowding, awkward balance, or weak support points. Then adjust the design while changes are still easy.
3. Build the main structure securely. Join the strongest parts first, using stitching, suitable adhesive, screws, wire, or other fasteners that match the materials and expected stress. Work slowly enough to keep edges aligned and surfaces flat. For anything that hangs, carries weight, or is handled repeatedly, test the connection before adding decoration.
4. Finish, test, and present it as a gift. Trim loose ends, smooth rough areas, clean fingerprints or adhesive residue, and add only the decoration the piece actually needs. Check that the item sits, hangs, opens, carries, or stores properly. Package it simply so the reused material remains part of the story rather than being buried under extra wrapping.
For me, the strongest version of this project is the one that still feels like old denim, spare fabric while clearly functioning as something new. I’d rather keep one honest reclaimed detail than cover every surface just to make it look newly bought.
Variation: Make a smaller, simpler version using the same core material, or change the finish to suit the recipient’s home or personal style. You can also group two or three coordinated pieces as a set, provided each one remains practical and safely finished.
DIY Lanterns from Old Cans
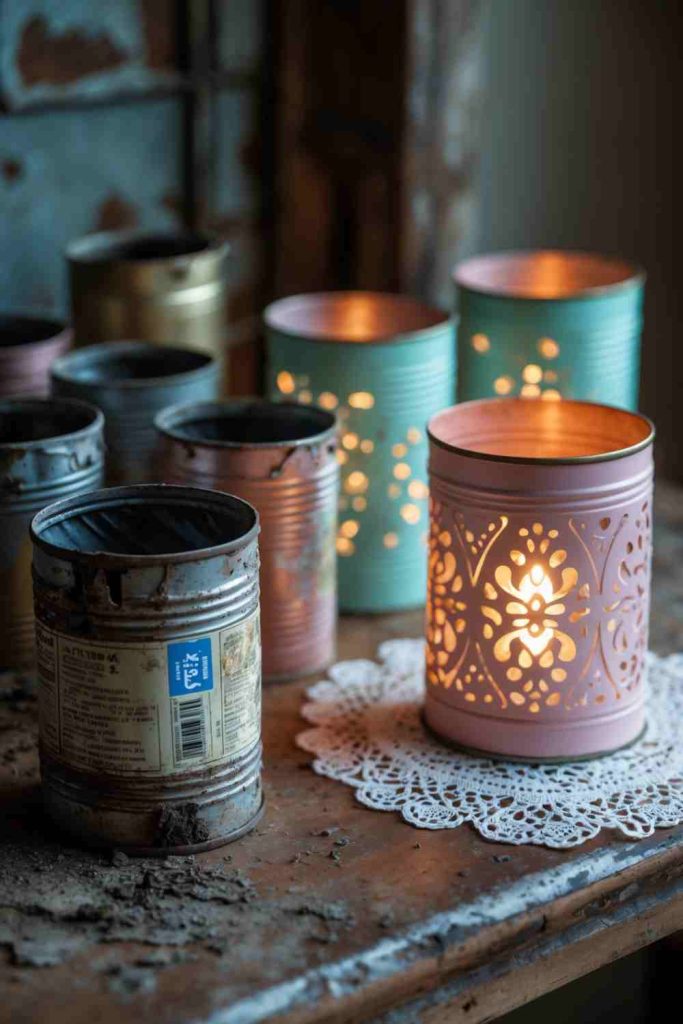
This idea turns clean empty metal cans into pierced lanterns that cast patterned light. What makes it work as a gift is that the reclaimed material is not just decorative; it contributes to the finished object’s usefulness and character. A similar version can be adapted to the recipient’s style by simplifying the colours, changing the finish, or keeping more of the original surface visible.
The practical point I would watch is sharp edges, drilling or punching, and heat safety. Upcycling can make us eager to save every piece, but the best result comes from using only the parts that are still sound. Test the material before committing to the full build, then keep the final form easy to use, clean, carry, hang, or store as appropriate.
Materials and Tools
· Clean metal cans
· Marker
· Hammer and nail or drill
· Work gloves
· Eye protection
· Sandpaper or metal file
· Paint suitable for metal if desired
· Battery LED lights
Steps for This Upcycled Gift
1. Prepare the reclaimed material. Clean the main material thoroughly and inspect it for damage before cutting, drilling, sewing, or decorating. Remove loose labels, rough fibres, rust flakes, splinters, or weak hardware as relevant. If any part seems structurally doubtful, replace it rather than asking the decorative finish to hide the problem.
2. Plan the size, layout, and recipient use. Arrange the parts before securing them and decide how the recipient is likely to use the finished gift. I know it can feel tempting to start attaching pieces immediately, but a dry layout usually reveals crowding, awkward balance, or weak support points. Then adjust the design while changes are still easy.
3. Build the main structure securely. Join the strongest parts first, using stitching, suitable adhesive, screws, wire, or other fasteners that match the materials and expected stress. Work slowly enough to keep edges aligned and surfaces flat. For anything that hangs, carries weight, or is handled repeatedly, test the connection before adding decoration.
4. Finish, test, and present it as a gift. Trim loose ends, smooth rough areas, clean fingerprints or adhesive residue, and add only the decoration the piece actually needs. Check that the item sits, hangs, opens, carries, or stores properly. Package it simply so the reused material remains part of the story rather than being buried under extra wrapping.
For me, the strongest version of this project is the one that still feels like clean empty metal cans while clearly functioning as something new. I’d rather keep one honest reclaimed detail than cover every surface just to make it look newly bought.
Variation: Make a smaller, simpler version using the same core material, or change the finish to suit the recipient’s home or personal style. You can also group two or three coordinated pieces as a set, provided each one remains practical and safely finished.
DIY Magnets from Bottle Caps
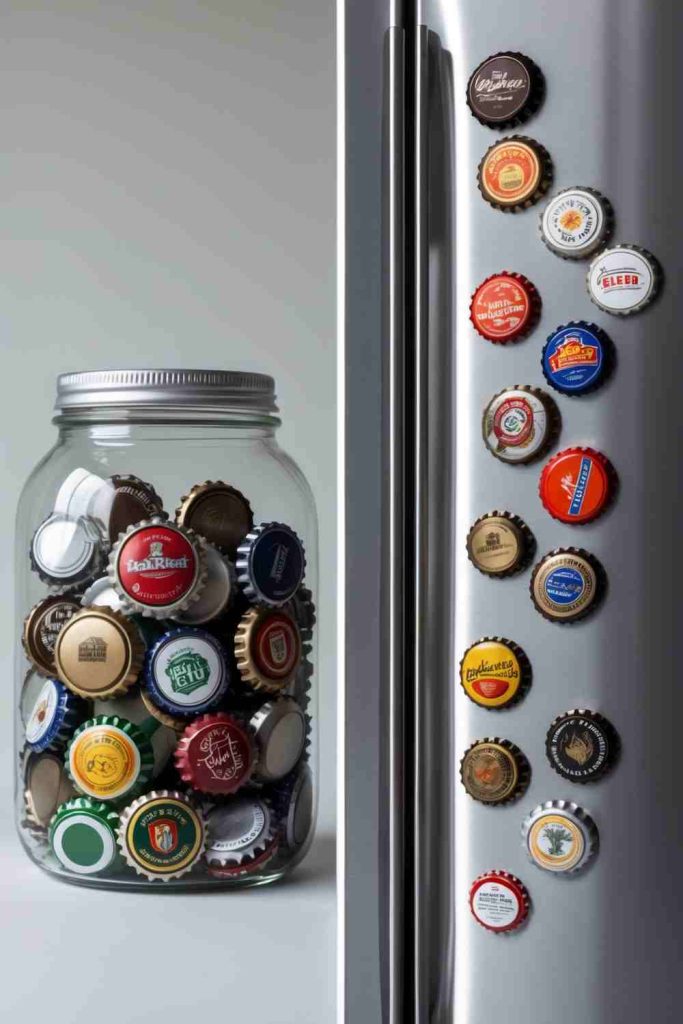
This idea turns clean bottle caps and small leftover decorations into small decorative magnets for a fridge or magnetic board. What makes it work as a gift is that the reclaimed material is not just decorative; it contributes to the finished object’s usefulness and character. A similar version can be adapted to the recipient’s style by simplifying the colours, changing the finish, or keeping more of the original surface visible.
The practical point I would watch is small magnets and secure adhesion. Upcycling can make us eager to save every piece, but the best result comes from using only the parts that are still sound. Test the material before committing to the full build, then keep the final form easy to use, clean, carry, hang, or store as appropriate.
Materials and Tools
· Bottle caps
· Small strong magnets
· Suitable adhesive
· Paint or paper scraps if desired
· Small beads or buttons
· Cleaning cloth
· Protective work surface
Steps for This Upcycled Gift
1. Prepare the reclaimed material. Clean the main material thoroughly and inspect it for damage before cutting, drilling, sewing, or decorating. Remove loose labels, rough fibres, rust flakes, splinters, or weak hardware as relevant. If any part seems structurally doubtful, replace it rather than asking the decorative finish to hide the problem.
2. Plan the size, layout, and recipient use. Arrange the parts before securing them and decide how the recipient is likely to use the finished gift. I know it can feel tempting to start attaching pieces immediately, but a dry layout usually reveals crowding, awkward balance, or weak support points. Then adjust the design while changes are still easy.
3. Build the main structure securely. Join the strongest parts first, using stitching, suitable adhesive, screws, wire, or other fasteners that match the materials and expected stress. Work slowly enough to keep edges aligned and surfaces flat. For anything that hangs, carries weight, or is handled repeatedly, test the connection before adding decoration.
4. Finish, test, and present it as a gift. Trim loose ends, smooth rough areas, clean fingerprints or adhesive residue, and add only the decoration the piece actually needs. Check that the item sits, hangs, opens, carries, or stores properly. Package it simply so the reused material remains part of the story rather than being buried under extra wrapping.
For me, the strongest version of this project is the one that still feels like clean bottle caps while clearly functioning as something new. I’d rather keep one honest reclaimed detail than cover every surface just to make it look newly bought.
Variation: Make a smaller, simpler version using the same core material, or change the finish to suit the recipient’s home or personal style. You can also group two or three coordinated pieces as a set, provided each one remains practical and safely finished.
DIY Kitchen Organizers from Tin Cans
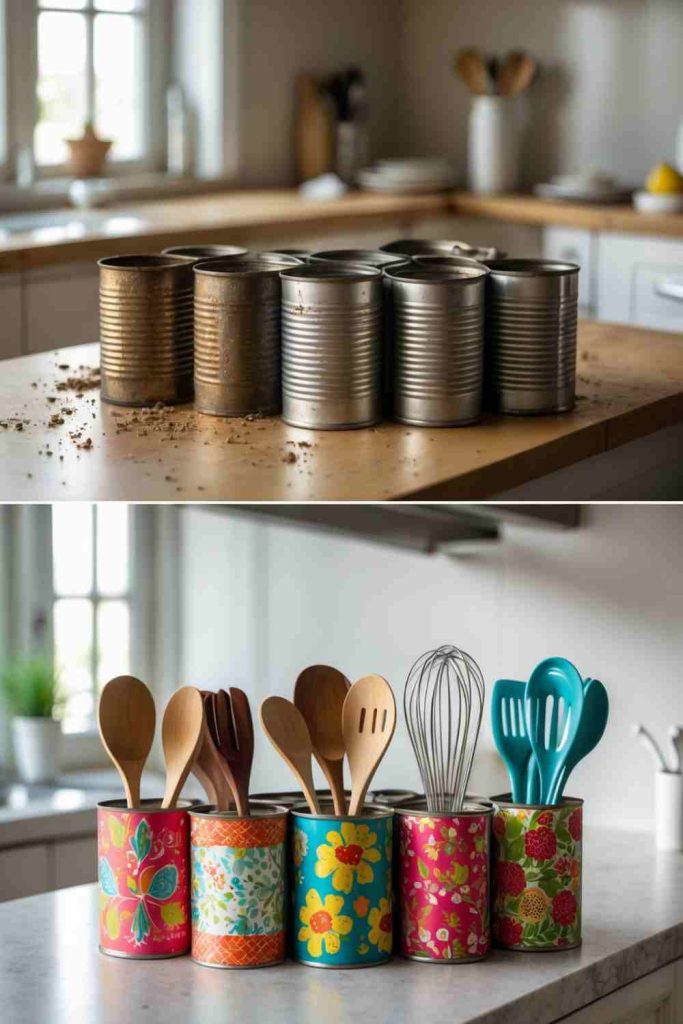
This idea turns clean tin cans and leftover paper or fabric into countertop holders for utensils and small kitchen tools. What makes it work as a gift is that the reclaimed material is not just decorative; it contributes to the finished object’s usefulness and character. A similar version can be adapted to the recipient’s style by simplifying the colours, changing the finish, or keeping more of the original surface visible.
The practical point I would watch is safe edges and wipe-clean practicality. Upcycling can make us eager to save every piece, but the best result comes from using only the parts that are still sound. Test the material before committing to the full build, then keep the final form easy to use, clean, carry, hang, or store as appropriate.
Materials and Tools
· Clean tin cans
· Paper or fabric scraps
· Scissors
· Ruler
· Adhesive or double-sided tape
· Ribbon or twine
· Labels if useful
· File or sandpaper for edges
Steps for This Upcycled Gift
1. Prepare the reclaimed material. Clean the main material thoroughly and inspect it for damage before cutting, drilling, sewing, or decorating. Remove loose labels, rough fibres, rust flakes, splinters, or weak hardware as relevant. If any part seems structurally doubtful, replace it rather than asking the decorative finish to hide the problem.
2. Plan the size, layout, and recipient use. Arrange the parts before securing them and decide how the recipient is likely to use the finished gift. I know it can feel tempting to start attaching pieces immediately, but a dry layout usually reveals crowding, awkward balance, or weak support points. Then adjust the design while changes are still easy.
3. Build the main structure securely. Join the strongest parts first, using stitching, suitable adhesive, screws, wire, or other fasteners that match the materials and expected stress. Work slowly enough to keep edges aligned and surfaces flat. For anything that hangs, carries weight, or is handled repeatedly, test the connection before adding decoration.
4. Finish, test, and present it as a gift. Trim loose ends, smooth rough areas, clean fingerprints or adhesive residue, and add only the decoration the piece actually needs. Check that the item sits, hangs, opens, carries, or stores properly. Package it simply so the reused material remains part of the story rather than being buried under extra wrapping.
For me, the strongest version of this project is the one that still feels like clean tin cans while clearly functioning as something new. I’d rather keep one honest reclaimed detail than cover every surface just to make it look newly bought.
Variation: Make a smaller, simpler version using the same core material, or change the finish to suit the recipient’s home or personal style. You can also group two or three coordinated pieces as a set, provided each one remains practical and safely finished.
Handmade Jewelry from Buttons
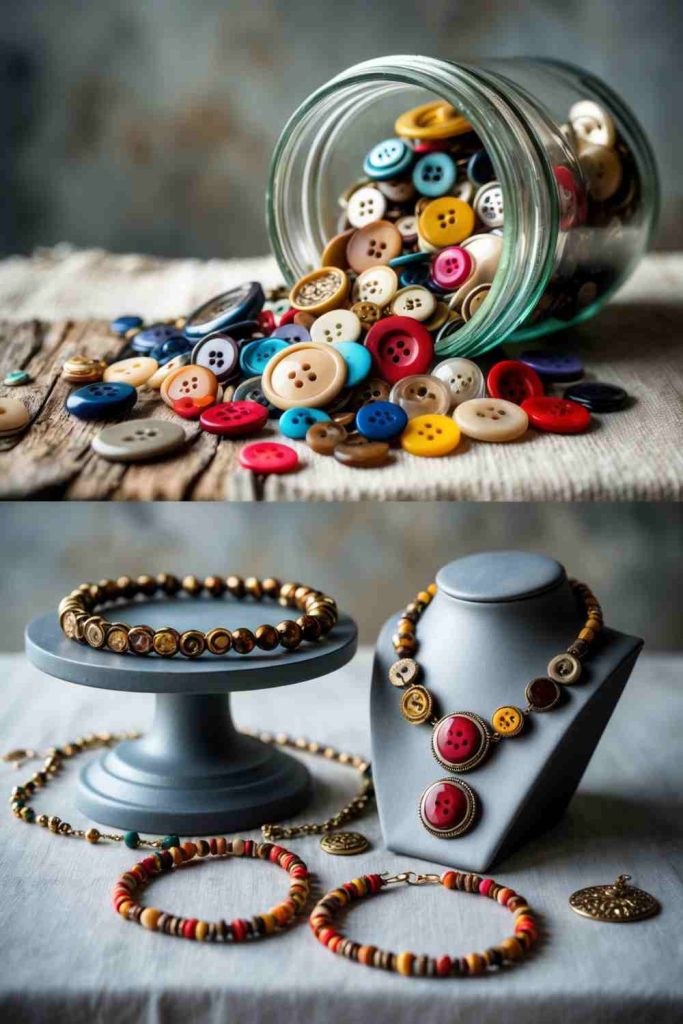
This idea turns orphaned buttons and leftover findings into wearable necklaces, bracelets or earrings with a collected look. What makes it work as a gift is that the reclaimed material is not just decorative; it contributes to the finished object’s usefulness and character. A similar version can be adapted to the recipient’s style by simplifying the colours, changing the finish, or keeping more of the original surface visible.
The practical point I would watch is secure jewelry findings and comfortable weight. Upcycling can make us eager to save every piece, but the best result comes from using only the parts that are still sound. Test the material before committing to the full build, then keep the final form easy to use, clean, carry, hang, or store as appropriate.
Materials and Tools
· Buttons
· Jump rings
· Chain, cord or beading wire
· Clasps
· Earring hooks if needed
· Round-nose and flat-nose pliers
· Beads if desired
· Small tray
Steps for This Upcycled Gift
1. Prepare the reclaimed material. Clean the main material thoroughly and inspect it for damage before cutting, drilling, sewing, or decorating. Remove loose labels, rough fibres, rust flakes, splinters, or weak hardware as relevant. If any part seems structurally doubtful, replace it rather than asking the decorative finish to hide the problem.
2. Plan the size, layout, and recipient use. Arrange the parts before securing them and decide how the recipient is likely to use the finished gift. I know it can feel tempting to start attaching pieces immediately, but a dry layout usually reveals crowding, awkward balance, or weak support points. Then adjust the design while changes are still easy.
3. Build the main structure securely. Join the strongest parts first, using stitching, suitable adhesive, screws, wire, or other fasteners that match the materials and expected stress. Work slowly enough to keep edges aligned and surfaces flat. For anything that hangs, carries weight, or is handled repeatedly, test the connection before adding decoration.
4. Finish, test, and present it as a gift. Trim loose ends, smooth rough areas, clean fingerprints or adhesive residue, and add only the decoration the piece actually needs. Check that the item sits, hangs, opens, carries, or stores properly. Package it simply so the reused material remains part of the story rather than being buried under extra wrapping.
For me, the strongest version of this project is the one that still feels like orphaned buttons while clearly functioning as something new. I’d rather keep one honest reclaimed detail than cover every surface just to make it look newly bought.
Variation: Make a smaller, simpler version using the same core material, or change the finish to suit the recipient’s home or personal style. You can also group two or three coordinated pieces as a set, provided each one remains practical and safely finished.
DIY Tote Bags from Old T-Shirts
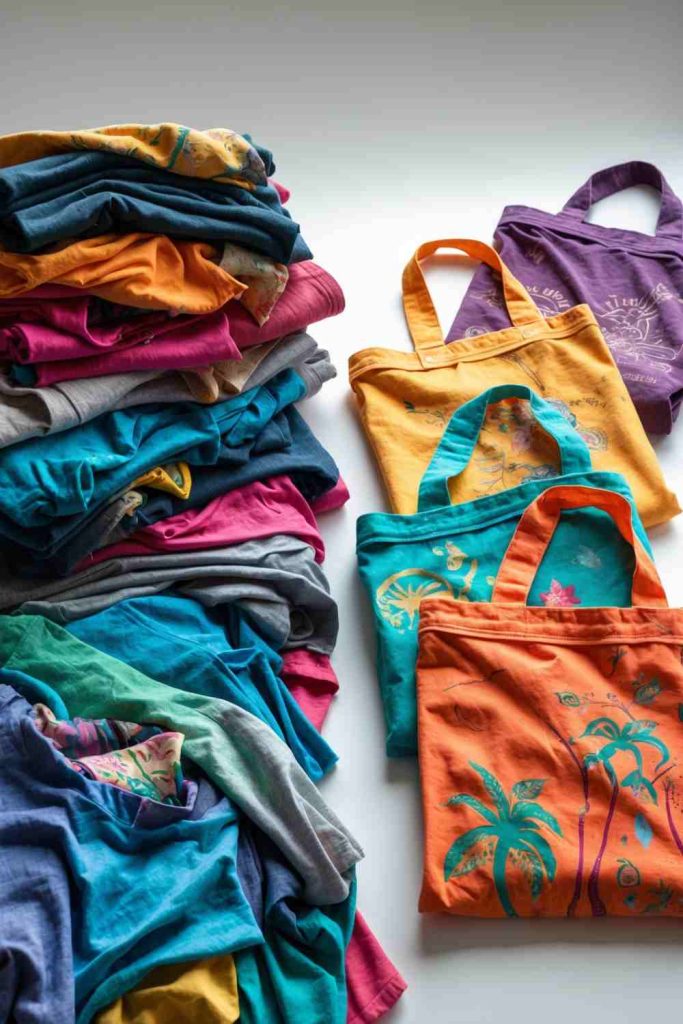
This idea turns old T-shirts with sound fabric into lightweight reusable tote bags. What makes it work as a gift is that the reclaimed material is not just decorative; it contributes to the finished object’s usefulness and character. A similar version can be adapted to the recipient’s style by simplifying the colours, changing the finish, or keeping more of the original surface visible.
The practical point I would watch is stretchy fabric and reinforced handles. Upcycling can make us eager to save every piece, but the best result comes from using only the parts that are still sound. Test the material before committing to the full build, then keep the final form easy to use, clean, carry, hang, or store as appropriate.
Materials and Tools
· Old T-shirt
· Fabric scissors
· Ruler
· Pins or clips
· Sewing machine or needle and strong thread
· Fabric marker
· Optional patches or fabric paint
Steps for This Upcycled Gift
1. Prepare the reclaimed material. Clean the main material thoroughly and inspect it for damage before cutting, drilling, sewing, or decorating. Remove loose labels, rough fibres, rust flakes, splinters, or weak hardware as relevant. If any part seems structurally doubtful, replace it rather than asking the decorative finish to hide the problem.
2. Plan the size, layout, and recipient use. Arrange the parts before securing them and decide how the recipient is likely to use the finished gift. I know it can feel tempting to start attaching pieces immediately, but a dry layout usually reveals crowding, awkward balance, or weak support points. Then adjust the design while changes are still easy.
3. Build the main structure securely. Join the strongest parts first, using stitching, suitable adhesive, screws, wire, or other fasteners that match the materials and expected stress. Work slowly enough to keep edges aligned and surfaces flat. For anything that hangs, carries weight, or is handled repeatedly, test the connection before adding decoration.
4. Finish, test, and present it as a gift. Trim loose ends, smooth rough areas, clean fingerprints or adhesive residue, and add only the decoration the piece actually needs. Check that the item sits, hangs, opens, carries, or stores properly. Package it simply so the reused material remains part of the story rather than being buried under extra wrapping.
For me, the strongest version of this project is the one that still feels like old T-shirts with sound fabric while clearly functioning as something new. I’d rather keep one honest reclaimed detail than cover every surface just to make it look newly bought.
Variation: Make a smaller, simpler version using the same core material, or change the finish to suit the recipient’s home or personal style. You can also group two or three coordinated pieces as a set, provided each one remains practical and safely finished.
Creative Photo Holders from Wooden Spools
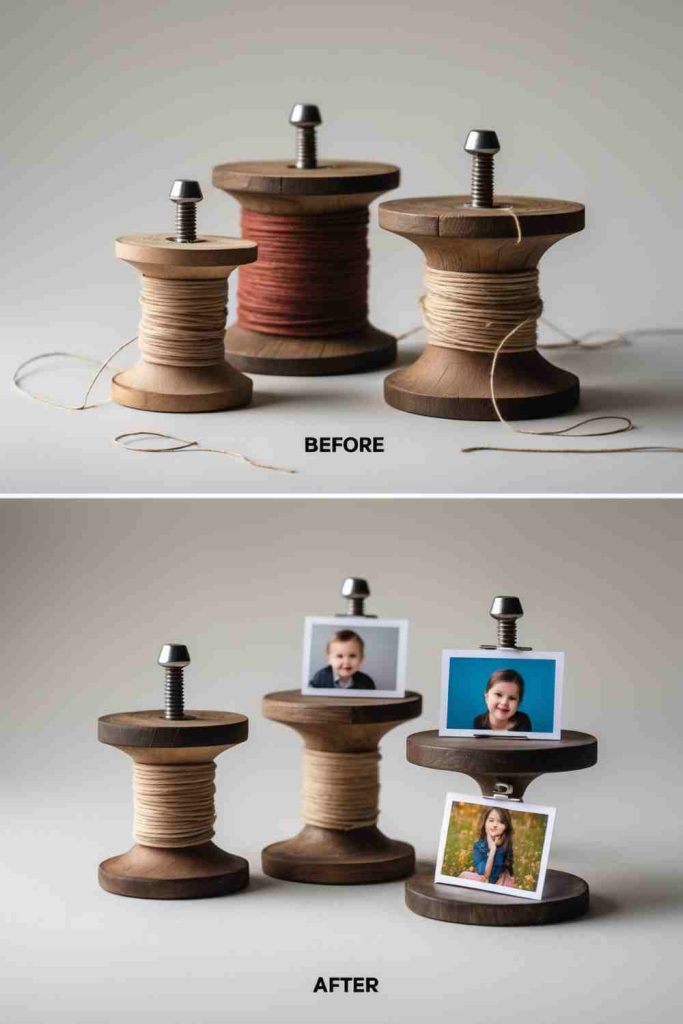
This idea turns old wooden thread spools and small hardware into small standing photo or note holders. What makes it work as a gift is that the reclaimed material is not just decorative; it contributes to the finished object’s usefulness and character. A similar version can be adapted to the recipient’s style by simplifying the colours, changing the finish, or keeping more of the original surface visible.
The practical point I would watch is stable bases and secure wire clips. Upcycling can make us eager to save every piece, but the best result comes from using only the parts that are still sound. Test the material before committing to the full build, then keep the final form easy to use, clean, carry, hang, or store as appropriate.
Materials and Tools
· Wooden spools
· Fine sandpaper
· Paint or finish if desired
· Wire photo clips or sturdy wire
· Pliers
· Small drill or awl if needed
· Adhesive
Steps for This Upcycled Gift
1. Prepare the reclaimed material. Clean the main material thoroughly and inspect it for damage before cutting, drilling, sewing, or decorating. Remove loose labels, rough fibres, rust flakes, splinters, or weak hardware as relevant. If any part seems structurally doubtful, replace it rather than asking the decorative finish to hide the problem.
2. Plan the size, layout, and recipient use. Arrange the parts before securing them and decide how the recipient is likely to use the finished gift. I know it can feel tempting to start attaching pieces immediately, but a dry layout usually reveals crowding, awkward balance, or weak support points. Then adjust the design while changes are still easy.
3. Build the main structure securely. Join the strongest parts first, using stitching, suitable adhesive, screws, wire, or other fasteners that match the materials and expected stress. Work slowly enough to keep edges aligned and surfaces flat. For anything that hangs, carries weight, or is handled repeatedly, test the connection before adding decoration.
4. Finish, test, and present it as a gift. Trim loose ends, smooth rough areas, clean fingerprints or adhesive residue, and add only the decoration the piece actually needs. Check that the item sits, hangs, opens, carries, or stores properly. Package it simply so the reused material remains part of the story rather than being buried under extra wrapping.
For me, the strongest version of this project is the one that still feels like old wooden thread spools while clearly functioning as something new. I’d rather keep one honest reclaimed detail than cover every surface just to make it look newly bought.
Variation: Make a smaller, simpler version using the same core material, or change the finish to suit the recipient’s home or personal style. You can also group two or three coordinated pieces as a set, provided each one remains practical and safely finished.
Stunning Mosaic Art from Old CDs
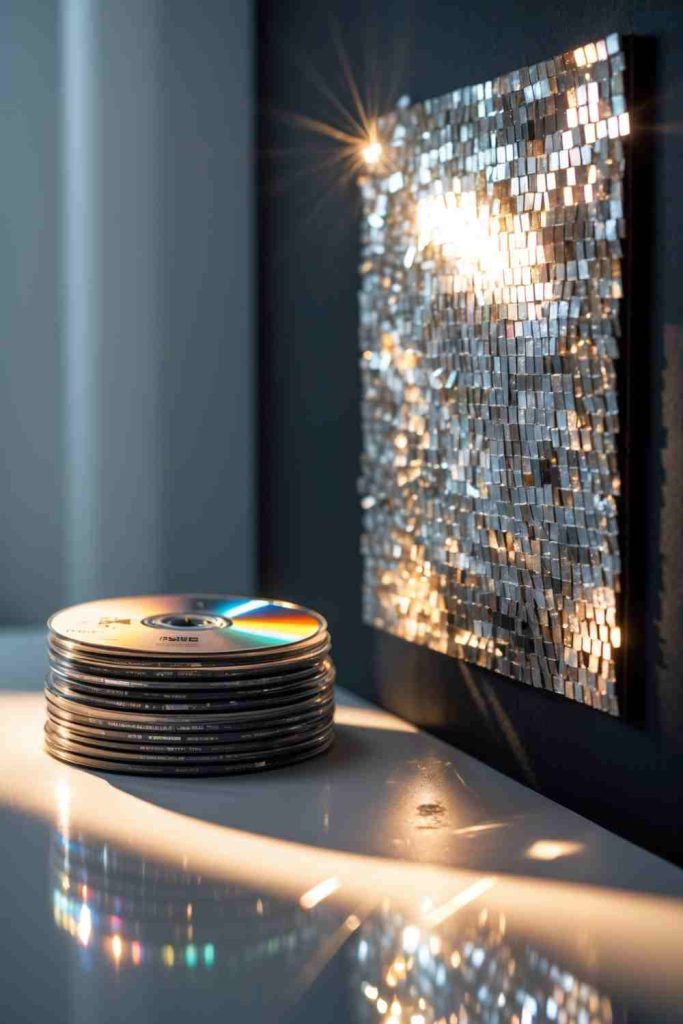
This idea turns scratched or unwanted CDs and a sturdy base into reflective mosaic wall art or a decorative panel. What makes it work as a gift is that the reclaimed material is not just decorative; it contributes to the finished object’s usefulness and character. A similar version can be adapted to the recipient’s style by simplifying the colours, changing the finish, or keeping more of the original surface visible.
The practical point I would watch is sharp shards and controlled cutting. Upcycling can make us eager to save every piece, but the best result comes from using only the parts that are still sound. Test the material before committing to the full build, then keep the final form easy to use, clean, carry, hang, or store as appropriate.
Materials and Tools
· Old CDs
· Heavy scissors or snips appropriate for the material
· Gloves
· Eye protection
· Sturdy backing board
· Strong adhesive
· Ruler
· Pencil
· Optional grout-like filler suitable for crafts
Steps for This Upcycled Gift
1. Prepare the reclaimed material. Clean the main material thoroughly and inspect it for damage before cutting, drilling, sewing, or decorating. Remove loose labels, rough fibres, rust flakes, splinters, or weak hardware as relevant. If any part seems structurally doubtful, replace it rather than asking the decorative finish to hide the problem.
2. Plan the size, layout, and recipient use. Arrange the parts before securing them and decide how the recipient is likely to use the finished gift. I know it can feel tempting to start attaching pieces immediately, but a dry layout usually reveals crowding, awkward balance, or weak support points. Then adjust the design while changes are still easy.
3. Build the main structure securely. Join the strongest parts first, using stitching, suitable adhesive, screws, wire, or other fasteners that match the materials and expected stress. Work slowly enough to keep edges aligned and surfaces flat. For anything that hangs, carries weight, or is handled repeatedly, test the connection before adding decoration.
4. Finish, test, and present it as a gift. Trim loose ends, smooth rough areas, clean fingerprints or adhesive residue, and add only the decoration the piece actually needs. Check that the item sits, hangs, opens, carries, or stores properly. Package it simply so the reused material remains part of the story rather than being buried under extra wrapping.
For me, the strongest version of this project is the one that still feels like scratched or unwanted CDs while clearly functioning as something new. I’d rather keep one honest reclaimed detail than cover every surface just to make it look newly bought.
Variation: Make a smaller, simpler version using the same core material, or change the finish to suit the recipient’s home or personal style. You can also group two or three coordinated pieces as a set, provided each one remains practical and safely finished.
Stylish Storage Solutions from Wooden Crates
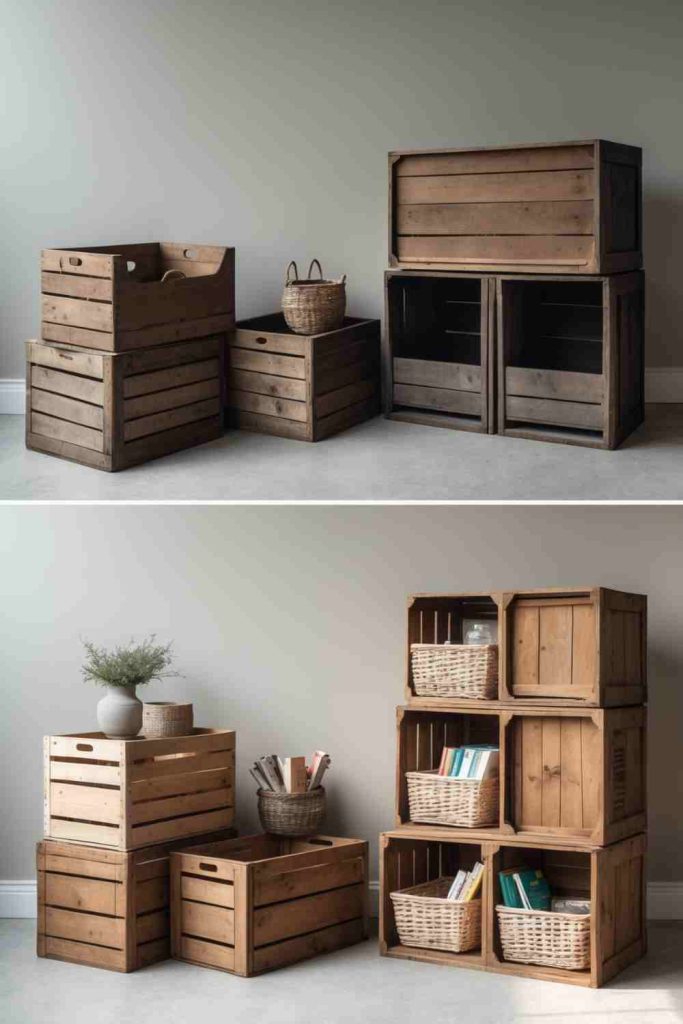
This idea turns sound wooden crates into stacked storage for books, baskets and small household items. What makes it work as a gift is that the reclaimed material is not just decorative; it contributes to the finished object’s usefulness and character. A similar version can be adapted to the recipient’s style by simplifying the colours, changing the finish, or keeping more of the original surface visible.
The practical point I would watch is structural stability and wall restraint. Upcycling can make us eager to save every piece, but the best result comes from using only the parts that are still sound. Test the material before committing to the full build, then keep the final form easy to use, clean, carry, hang, or store as appropriate.
Materials and Tools
· Wooden crates
· Sandpaper
· Screwdriver or drill
· Screws
· Measuring tape
· Level
· Paint or stain if desired
· Wall anchors if the unit requires restraint
Steps for This Upcycled Gift
1. Prepare the reclaimed material. Clean the main material thoroughly and inspect it for damage before cutting, drilling, sewing, or decorating. Remove loose labels, rough fibres, rust flakes, splinters, or weak hardware as relevant. If any part seems structurally doubtful, replace it rather than asking the decorative finish to hide the problem.
2. Plan the size, layout, and recipient use. Arrange the parts before securing them and decide how the recipient is likely to use the finished gift. I know it can feel tempting to start attaching pieces immediately, but a dry layout usually reveals crowding, awkward balance, or weak support points. Then adjust the design while changes are still easy.
3. Build the main structure securely. Join the strongest parts first, using stitching, suitable adhesive, screws, wire, or other fasteners that match the materials and expected stress. Work slowly enough to keep edges aligned and surfaces flat. For anything that hangs, carries weight, or is handled repeatedly, test the connection before adding decoration.
4. Finish, test, and present it as a gift. Trim loose ends, smooth rough areas, clean fingerprints or adhesive residue, and add only the decoration the piece actually needs. Check that the item sits, hangs, opens, carries, or stores properly. Package it simply so the reused material remains part of the story rather than being buried under extra wrapping.
For me, the strongest version of this project is the one that still feels like sound wooden crates while clearly functioning as something new. I’d rather keep one honest reclaimed detail than cover every surface just to make it look newly bought.
Variation: Make a smaller, simpler version using the same core material, or change the finish to suit the recipient’s home or personal style. You can also group two or three coordinated pieces as a set, provided each one remains practical and safely finished.
DIY Photo Frames from Metallic Lids
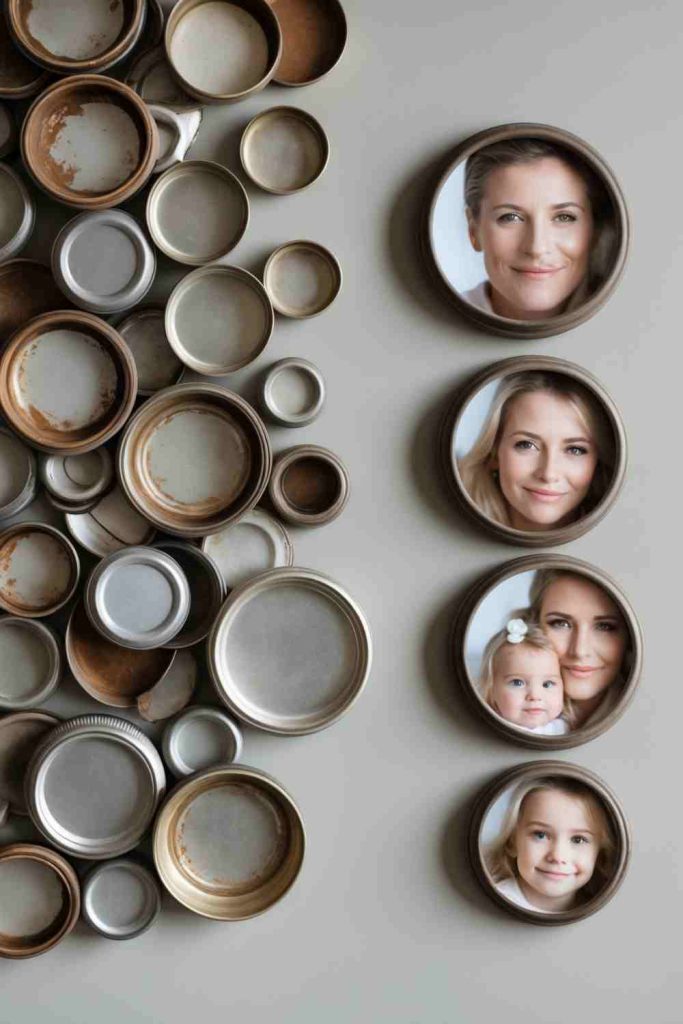
This idea turns clean metal lids and small printed photos into mini photo frames for magnets, ornaments or small displays. What makes it work as a gift is that the reclaimed material is not just decorative; it contributes to the finished object’s usefulness and character. A similar version can be adapted to the recipient’s style by simplifying the colours, changing the finish, or keeping more of the original surface visible.
The practical point I would watch is smooth edges and photo-friendly adhesive. Upcycling can make us eager to save every piece, but the best result comes from using only the parts that are still sound. Test the material before committing to the full build, then keep the final form easy to use, clean, carry, hang, or store as appropriate.
Materials and Tools
· Metal lids
· Printed photos
· Scissors
· Adhesive or photo-safe glue dots
· Paint if desired
· Ribbon or twine
· Magnets or hanging loops
· File for rough edges
Steps for This Upcycled Gift
1. Prepare the reclaimed material. Clean the main material thoroughly and inspect it for damage before cutting, drilling, sewing, or decorating. Remove loose labels, rough fibres, rust flakes, splinters, or weak hardware as relevant. If any part seems structurally doubtful, replace it rather than asking the decorative finish to hide the problem.
2. Plan the size, layout, and recipient use. Arrange the parts before securing them and decide how the recipient is likely to use the finished gift. I know it can feel tempting to start attaching pieces immediately, but a dry layout usually reveals crowding, awkward balance, or weak support points. Then adjust the design while changes are still easy.
3. Build the main structure securely. Join the strongest parts first, using stitching, suitable adhesive, screws, wire, or other fasteners that match the materials and expected stress. Work slowly enough to keep edges aligned and surfaces flat. For anything that hangs, carries weight, or is handled repeatedly, test the connection before adding decoration.
4. Finish, test, and present it as a gift. Trim loose ends, smooth rough areas, clean fingerprints or adhesive residue, and add only the decoration the piece actually needs. Check that the item sits, hangs, opens, carries, or stores properly. Package it simply so the reused material remains part of the story rather than being buried under extra wrapping.
For me, the strongest version of this project is the one that still feels like clean metal lids while clearly functioning as something new. I’d rather keep one honest reclaimed detail than cover every surface just to make it look newly bought.
Variation: Make a smaller, simpler version using the same core material, or change the finish to suit the recipient’s home or personal style. You can also group two or three coordinated pieces as a set, provided each one remains practical and safely finished.
Fresh Herb Jars from Glass Jars
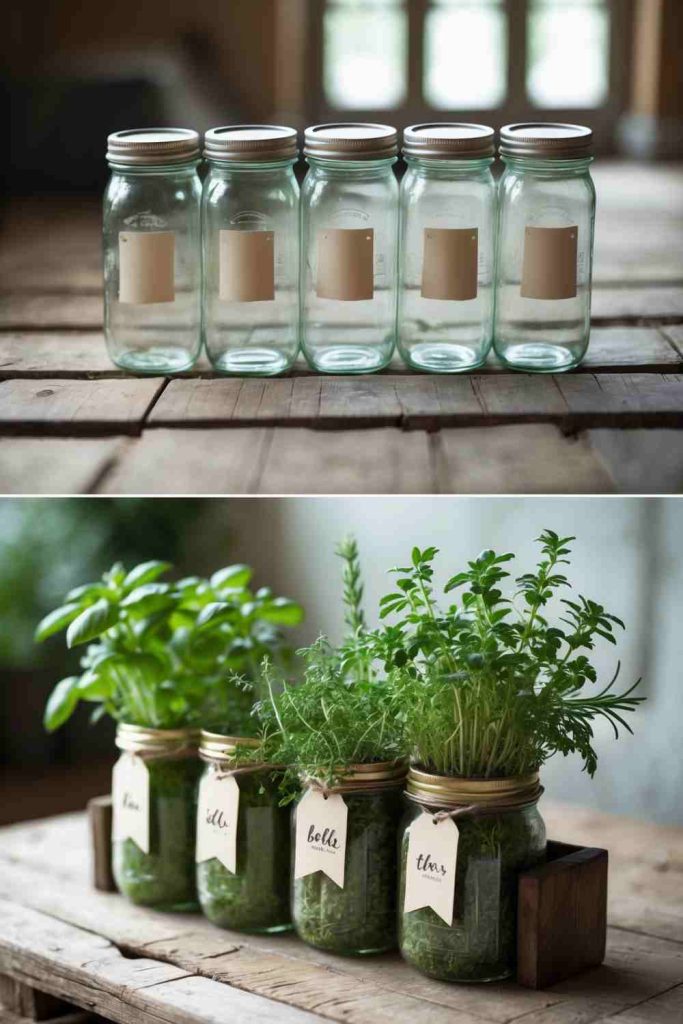
This idea turns clean jars and reusable labels or tags into giftable herb containers or propagation-style displays. What makes it work as a gift is that the reclaimed material is not just decorative; it contributes to the finished object’s usefulness and character. A similar version can be adapted to the recipient’s style by simplifying the colours, changing the finish, or keeping more of the original surface visible.
The practical point I would watch is food-contact cleanliness and moisture. Upcycling can make us eager to save every piece, but the best result comes from using only the parts that are still sound. Test the material before committing to the full build, then keep the final form easy to use, clean, carry, hang, or store as appropriate.
Materials and Tools
· Clean glass jars
· Labels or tags
· Twine
· Marker
· Herbs appropriate to the intended use
· Clean lids if storing dried herbs
· Tray or basket for gifting
Steps for This Upcycled Gift
1. Prepare the reclaimed material. Clean the main material thoroughly and inspect it for damage before cutting, drilling, sewing, or decorating. Remove loose labels, rough fibres, rust flakes, splinters, or weak hardware as relevant. If any part seems structurally doubtful, replace it rather than asking the decorative finish to hide the problem.
2. Plan the size, layout, and recipient use. Arrange the parts before securing them and decide how the recipient is likely to use the finished gift. I know it can feel tempting to start attaching pieces immediately, but a dry layout usually reveals crowding, awkward balance, or weak support points. Then adjust the design while changes are still easy.
3. Build the main structure securely. Join the strongest parts first, using stitching, suitable adhesive, screws, wire, or other fasteners that match the materials and expected stress. Work slowly enough to keep edges aligned and surfaces flat. For anything that hangs, carries weight, or is handled repeatedly, test the connection before adding decoration.
4. Finish, test, and present it as a gift. Trim loose ends, smooth rough areas, clean fingerprints or adhesive residue, and add only the decoration the piece actually needs. Check that the item sits, hangs, opens, carries, or stores properly. Package it simply so the reused material remains part of the story rather than being buried under extra wrapping.
For me, the strongest version of this project is the one that still feels like clean jars while clearly functioning as something new. I’d rather keep one honest reclaimed detail than cover every surface just to make it look newly bought.
Variation: Make a smaller, simpler version using the same core material, or change the finish to suit the recipient’s home or personal style. You can also group two or three coordinated pieces as a set, provided each one remains practical and safely finished.
Cozy Patchwork Quilt from Quilt Pieces
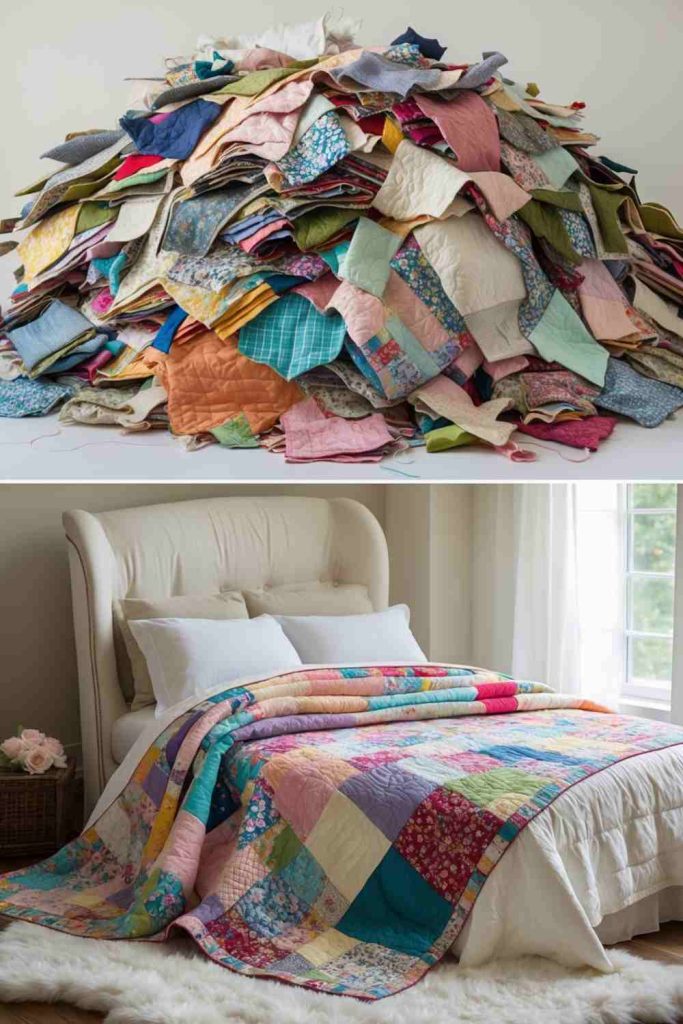
This idea turns usable fabric and quilt offcuts into a patchwork throw that combines leftover textiles. What makes it work as a gift is that the reclaimed material is not just decorative; it contributes to the finished object’s usefulness and character. A similar version can be adapted to the recipient’s style by simplifying the colours, changing the finish, or keeping more of the original surface visible.
The practical point I would watch is fabric strength, seam allowance and washable construction. Upcycling can make us eager to save every piece, but the best result comes from using only the parts that are still sound. Test the material before committing to the full build, then keep the final form easy to use, clean, carry, hang, or store as appropriate.
Materials and Tools
· Fabric pieces
· Scissors or rotary cutter with mat
· Ruler
· Sewing machine or needle
· Thread
· Pins or clips
· Backing fabric
· Batting if desired
· Iron and pressing surface
Steps for This Upcycled Gift
1. Prepare the reclaimed material. Clean the main material thoroughly and inspect it for damage before cutting, drilling, sewing, or decorating. Remove loose labels, rough fibres, rust flakes, splinters, or weak hardware as relevant. If any part seems structurally doubtful, replace it rather than asking the decorative finish to hide the problem.
2. Plan the size, layout, and recipient use. Arrange the parts before securing them and decide how the recipient is likely to use the finished gift. I know it can feel tempting to start attaching pieces immediately, but a dry layout usually reveals crowding, awkward balance, or weak support points. Then adjust the design while changes are still easy.
3. Build the main structure securely. Join the strongest parts first, using stitching, suitable adhesive, screws, wire, or other fasteners that match the materials and expected stress. Work slowly enough to keep edges aligned and surfaces flat. For anything that hangs, carries weight, or is handled repeatedly, test the connection before adding decoration.
4. Finish, test, and present it as a gift. Trim loose ends, smooth rough areas, clean fingerprints or adhesive residue, and add only the decoration the piece actually needs. Check that the item sits, hangs, opens, carries, or stores properly. Package it simply so the reused material remains part of the story rather than being buried under extra wrapping.
For me, the strongest version of this project is the one that still feels like usable fabric while clearly functioning as something new. I’d rather keep one honest reclaimed detail than cover every surface just to make it look newly bought.
Variation: Make a smaller, simpler version using the same core material, or change the finish to suit the recipient’s home or personal style. You can also group two or three coordinated pieces as a set, provided each one remains practical and safely finished.
Unique Wall Art from Old Keyboard Keys
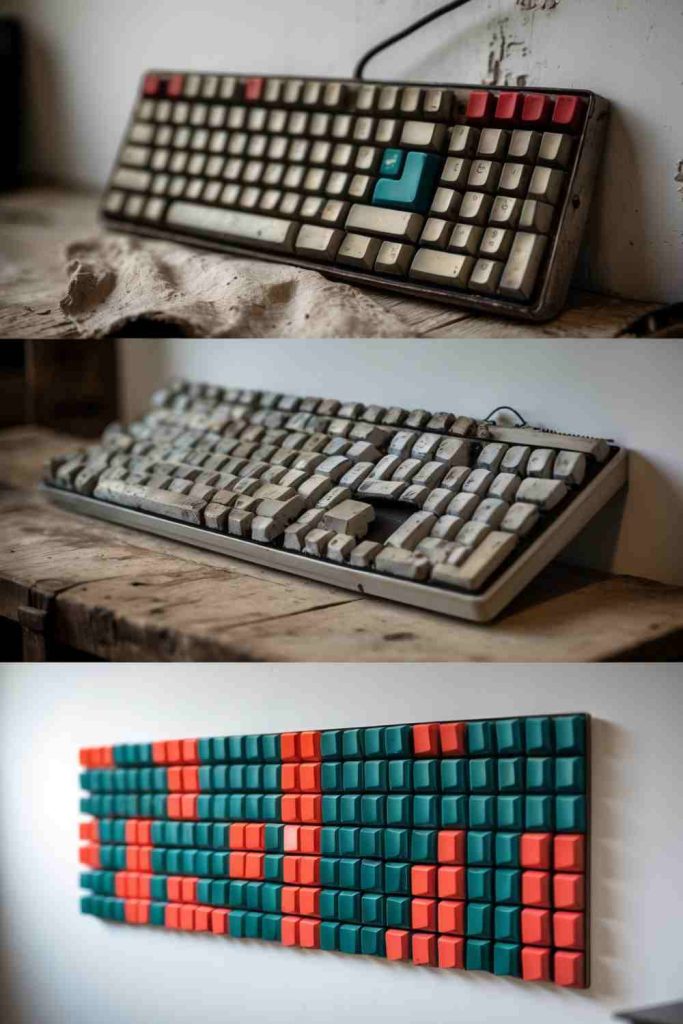
This idea turns clean keyboard keys from obsolete equipment into graphic wall art, initials or patterned panels. What makes it work as a gift is that the reclaimed material is not just decorative; it contributes to the finished object’s usefulness and character. A similar version can be adapted to the recipient’s style by simplifying the colours, changing the finish, or keeping more of the original surface visible.
The practical point I would watch is cleaning reclaimed electronics and secure wall mounting. Upcycling can make us eager to save every piece, but the best result comes from using only the parts that are still sound. Test the material before committing to the full build, then keep the final form easy to use, clean, carry, hang, or store as appropriate.
Materials and Tools
· Old keyboard keys
· Backing board
· Ruler
· Pencil
· Strong adhesive
· Paint if desired
· Frame or hanging hardware
· Cleaning brush
Steps for This Upcycled Gift
1. Prepare the reclaimed material. Clean the main material thoroughly and inspect it for damage before cutting, drilling, sewing, or decorating. Remove loose labels, rough fibres, rust flakes, splinters, or weak hardware as relevant. If any part seems structurally doubtful, replace it rather than asking the decorative finish to hide the problem.
2. Plan the size, layout, and recipient use. Arrange the parts before securing them and decide how the recipient is likely to use the finished gift. I know it can feel tempting to start attaching pieces immediately, but a dry layout usually reveals crowding, awkward balance, or weak support points. Then adjust the design while changes are still easy.
3. Build the main structure securely. Join the strongest parts first, using stitching, suitable adhesive, screws, wire, or other fasteners that match the materials and expected stress. Work slowly enough to keep edges aligned and surfaces flat. For anything that hangs, carries weight, or is handled repeatedly, test the connection before adding decoration.
4. Finish, test, and present it as a gift. Trim loose ends, smooth rough areas, clean fingerprints or adhesive residue, and add only the decoration the piece actually needs. Check that the item sits, hangs, opens, carries, or stores properly. Package it simply so the reused material remains part of the story rather than being buried under extra wrapping.
For me, the strongest version of this project is the one that still feels like clean keyboard keys from obsolete equipment while clearly functioning as something new. I’d rather keep one honest reclaimed detail than cover every surface just to make it look newly bought.
Variation: Make a smaller, simpler version using the same core material, or change the finish to suit the recipient’s home or personal style. You can also group two or three coordinated pieces as a set, provided each one remains practical and safely finished.
Vintage Wall Art from Old License Plates
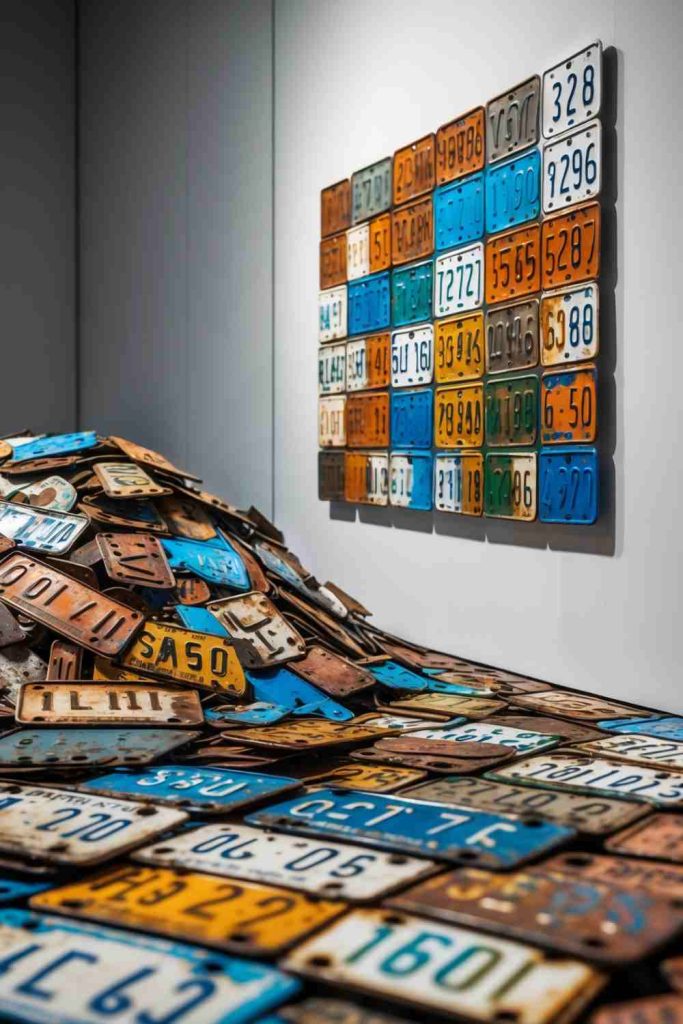
This idea turns retired license plates or similar stamped metal pieces into industrial-style wall art or a collage panel. What makes it work as a gift is that the reclaimed material is not just decorative; it contributes to the finished object’s usefulness and character. A similar version can be adapted to the recipient’s style by simplifying the colours, changing the finish, or keeping more of the original surface visible.
The practical point I would watch is sharp metal edges and secure mounting. Upcycling can make us eager to save every piece, but the best result comes from using only the parts that are still sound. Test the material before committing to the full build, then keep the final form easy to use, clean, carry, hang, or store as appropriate.
Materials and Tools
· Old plates
· Backing board if needed
· Drill or screwdriver
· Screws, bolts or suitable adhesive
· Gloves
· File
· Ruler
· Hanging hardware
Steps for This Upcycled Gift
1. Prepare the reclaimed material. Clean the main material thoroughly and inspect it for damage before cutting, drilling, sewing, or decorating. Remove loose labels, rough fibres, rust flakes, splinters, or weak hardware as relevant. If any part seems structurally doubtful, replace it rather than asking the decorative finish to hide the problem.
2. Plan the size, layout, and recipient use. Arrange the parts before securing them and decide how the recipient is likely to use the finished gift. I know it can feel tempting to start attaching pieces immediately, but a dry layout usually reveals crowding, awkward balance, or weak support points. Then adjust the design while changes are still easy.
3. Build the main structure securely. Join the strongest parts first, using stitching, suitable adhesive, screws, wire, or other fasteners that match the materials and expected stress. Work slowly enough to keep edges aligned and surfaces flat. For anything that hangs, carries weight, or is handled repeatedly, test the connection before adding decoration.
4. Finish, test, and present it as a gift. Trim loose ends, smooth rough areas, clean fingerprints or adhesive residue, and add only the decoration the piece actually needs. Check that the item sits, hangs, opens, carries, or stores properly. Package it simply so the reused material remains part of the story rather than being buried under extra wrapping.
For me, the strongest version of this project is the one that still feels like retired license plates or similar stamped metal pieces while clearly functioning as something new. I’d rather keep one honest reclaimed detail than cover every surface just to make it look newly bought.
Variation: Make a smaller, simpler version using the same core material, or change the finish to suit the recipient’s home or personal style. You can also group two or three coordinated pieces as a set, provided each one remains practical and safely finished.
Elegant Candle Holders from Old Teacups
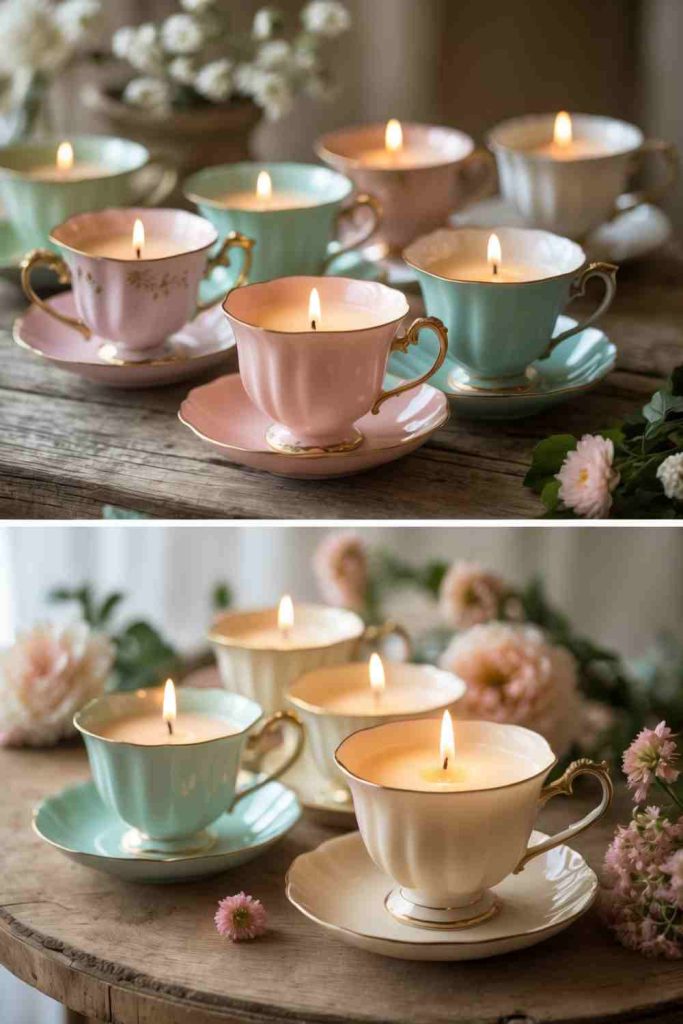
This idea turns old teacups and reusable candle containers or wax into small teacup candles for decorative gifting. What makes it work as a gift is that the reclaimed material is not just decorative; it contributes to the finished object’s usefulness and character. A similar version can be adapted to the recipient’s style by simplifying the colours, changing the finish, or keeping more of the original surface visible.
The practical point I would watch is heat, flame safety and container condition. Upcycling can make us eager to save every piece, but the best result comes from using only the parts that are still sound. Test the material before committing to the full build, then keep the final form easy to use, clean, carry, hang, or store as appropriate.
Materials and Tools
· Sound teacups
· Candle wax or clean recycled wax
· Correct candle wicks
· Wick holder or skewer
· Heatproof melting setup
· Thermometer if used
· Protective surface
· Labels
Steps for This Upcycled Gift
1. Prepare the reclaimed material. Clean the main material thoroughly and inspect it for damage before cutting, drilling, sewing, or decorating. Remove loose labels, rough fibres, rust flakes, splinters, or weak hardware as relevant. If any part seems structurally doubtful, replace it rather than asking the decorative finish to hide the problem.
2. Plan the size, layout, and recipient use. Arrange the parts before securing them and decide how the recipient is likely to use the finished gift. I know it can feel tempting to start attaching pieces immediately, but a dry layout usually reveals crowding, awkward balance, or weak support points. Then adjust the design while changes are still easy.
3. Build the main structure securely. Join the strongest parts first, using stitching, suitable adhesive, screws, wire, or other fasteners that match the materials and expected stress. Work slowly enough to keep edges aligned and surfaces flat. For anything that hangs, carries weight, or is handled repeatedly, test the connection before adding decoration.
4. Finish, test, and present it as a gift. Trim loose ends, smooth rough areas, clean fingerprints or adhesive residue, and add only the decoration the piece actually needs. Check that the item sits, hangs, opens, carries, or stores properly. Package it simply so the reused material remains part of the story rather than being buried under extra wrapping.
For me, the strongest version of this project is the one that still feels like old teacups while clearly functioning as something new. I’d rather keep one honest reclaimed detail than cover every surface just to make it look newly bought.
Variation: Make a smaller, simpler version using the same core material, or change the finish to suit the recipient’s home or personal style. You can also group two or three coordinated pieces as a set, provided each one remains practical and safely finished.
Rustic Bookshelf from Wooden Pallets
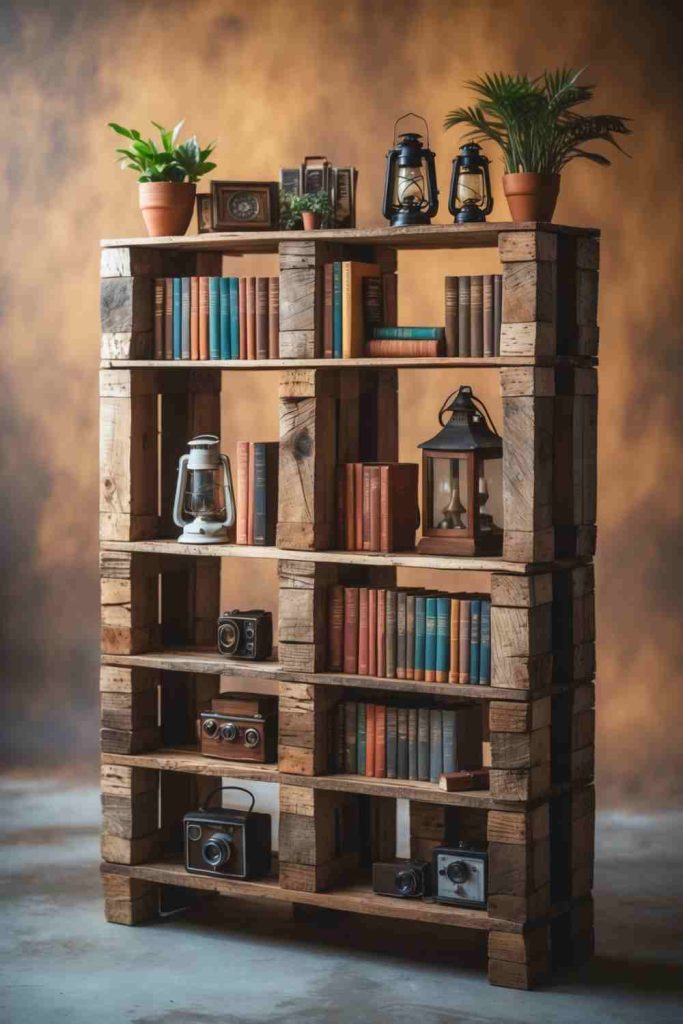
This idea turns reclaimed pallet boards that are clean and structurally sound into a small rustic bookshelf or display shelf. What makes it work as a gift is that the reclaimed material is not just decorative; it contributes to the finished object’s usefulness and character. A similar version can be adapted to the recipient’s style by simplifying the colours, changing the finish, or keeping more of the original surface visible.
The practical point I would watch is unknown pallet treatment, splinters and structural loading. Upcycling can make us eager to save every piece, but the best result comes from using only the parts that are still sound. Test the material before committing to the full build, then keep the final form easy to use, clean, carry, hang, or store as appropriate.
Materials and Tools
· Reclaimed pallet boards
· Pry bar if dismantling
· Saw
· Drill
· Screws
· Sandpaper or sander
· Measuring tape
· Square
· Eye protection
· Dust mask
· Finish if desired
· Wall restraint hardware
Steps for This Upcycled Gift
1. Prepare the reclaimed material. Clean the main material thoroughly and inspect it for damage before cutting, drilling, sewing, or decorating. Remove loose labels, rough fibres, rust flakes, splinters, or weak hardware as relevant. If any part seems structurally doubtful, replace it rather than asking the decorative finish to hide the problem.
2. Plan the size, layout, and recipient use. Arrange the parts before securing them and decide how the recipient is likely to use the finished gift. I know it can feel tempting to start attaching pieces immediately, but a dry layout usually reveals crowding, awkward balance, or weak support points. Then adjust the design while changes are still easy.
3. Build the main structure securely. Join the strongest parts first, using stitching, suitable adhesive, screws, wire, or other fasteners that match the materials and expected stress. Work slowly enough to keep edges aligned and surfaces flat. For anything that hangs, carries weight, or is handled repeatedly, test the connection before adding decoration.
4. Finish, test, and present it as a gift. Trim loose ends, smooth rough areas, clean fingerprints or adhesive residue, and add only the decoration the piece actually needs. Check that the item sits, hangs, opens, carries, or stores properly. Package it simply so the reused material remains part of the story rather than being buried under extra wrapping.
For me, the strongest version of this project is the one that still feels like reclaimed pallet boards that are clean while clearly functioning as something new. I’d rather keep one honest reclaimed detail than cover every surface just to make it look newly bought.
Variation: Make a smaller, simpler version using the same core material, or change the finish to suit the recipient’s home or personal style. You can also group two or three coordinated pieces as a set, provided each one remains practical and safely finished.
Upcycling Gift Mistakes That Can Make a Thoughtful Idea Feel Unsafe or Unfinished
Using reclaimed material that is too weak for the new job
A gift may look finished while still being structurally tired. Check fabric, wood, metal and hardware before building. Replace weak parts instead of hiding them.
Treating decorative glue as a structural fastener
Glue is useful, but heavy shelves, loaded pockets, jewelry findings and hanging pieces often need stitching, screws, bolts or another dependable connection.
Skipping edge preparation on cans, lids, CDs or plates
Sharp or rough edges turn a thoughtful project into an unpleasant one. File, sand, cover or otherwise make edges safe before decoration.
Ignoring heat and flame around candle projects
Teacup candles and lanterns need more than pretty styling. Use sound containers, suitable candle components, stable placement and conservative flame practices.
Making the gift hard to clean
Kitchen organizers, herb jars, totes and quilts all benefit from finishes that suit real maintenance. Avoid fragile embellishment where washing or wiping is expected.
Adding too much decoration to an already textured material
Buttons, license plates, denim, pallet wood and keyboard keys already carry strong visual information. Extra embellishment can make the project feel cluttered rather than thoughtful.
Forgetting the recipient’s actual habits
A clever object is not automatically a useful gift. Choose a project that fits the recipient’s space, routines, taste and tolerance for maintenance.
Failing to test hanging or load-bearing pieces
Wall art, crate storage, organizers and shelves should be tested before gifting. A safe handover matters more than a dramatic reveal.
Frequently Asked Questions
What makes an upcycled gift feel thoughtful instead of makeshift?
Clean preparation, a useful purpose, and careful finishing make the biggest difference. Choose reclaimed material because it suits the project, then edit the result so the original object feels intentionally transformed.
Can beginners make these upcycling gift ideas?
Yes. Bottle-cap magnets, decorated tin-can organizers, photo holders and T-shirt totes can be simplified easily. Projects involving power tools, candle wax, sharp metal or structural furniture need more care and may be better tackled with experienced help.
Should I hide scratches and wear on reused materials?
Not always. Honest wear can add character to denim, timber, metal and old hardware, but dirt, rust flakes, sharp damage and structural weakness should be cleaned, stabilized or removed.
How do I choose an adhesive for reclaimed materials?
Match the adhesive to both surfaces and the stress on the joint, and follow the product directions. For load-bearing or frequently handled joins, consider sewing or mechanical fasteners instead of relying only on glue.
Can upcycled gifts be washed or wiped clean?
Many can, but the cleaning method depends on the materials and finish. Plan for care before adding paper, loose embellishments, unsealed paint, or hardware that may not tolerate moisture.
Are reclaimed food jars safe to use as gifts?
Use only sound jars that can be cleaned thoroughly and keep decorative materials away from surfaces that directly contact food when that matters. If you are uncertain about a jar’s history or condition, use it for non-food storage instead.
How can I make an upcycled gift look more polished?
Repeat one or two design choices, trim loose edges, keep hardware consistent, and package the item simply. A neat finish usually does more than adding another layer of decoration.
Give Useful Materials a Second Life as Gifts
The strongest upcycling gift ideas start with two questions: is this material still useful, and would the finished object genuinely suit the person receiving it? Once those answers are clear, the decoration becomes much easier. Old jeans can become storage, buttons can become jewelry, jars can become herb gifts, and reclaimed wood can become furniture without erasing the story of the original material.
I like starting with one manageable project and finishing it carefully rather than collecting five half-made gifts. Clean it, test it, package it simply, and let the reused material be part of what makes the present personal. Which forgotten object in your home would you most enjoy turning into a gift next?