Bookmarks are small enough to overlook, which is probably why so many useful scraps are perfectly suited to becoming one. A strip of sturdy packaging, a piece of denim, a ribbon end, or the decorative corner of an old card can be turned into something that protects a reader’s place without asking for much new material. I like projects at this scale because the scraps that seem too small for anything else suddenly become enough.
For me the most successful upcycled bookmark is not the one with the most decoration. It is the one that slides between pages easily, stays flat, has no sharp or sticky edges, and still feels personal enough that you want to keep using it. I don’t think every leftover needs to become décor; sometimes the useful second life is a quiet little object tucked inside a book.
The material can change completely from one bookmark to the next, but the practical questions stay similar. Will it bend without cracking? Will the surface rub ink or paint onto a page? Is the top embellishment secure? Once those details are handled, even very ordinary leftovers can become thoughtful reading accessories or simple handmade gifts.
Choose a Bookmark Base That Will Not Damage Pages
A bookmark spends most of its life pressed against paper, so the base matters more than it first appears. I would choose material that is thin enough to sit comfortably inside a closed book but firm enough that it does not crumple every time it is pulled out. Before decorating, check both sides and every edge rather than focusing only on the front.
· Use clean, dry cardboard, cardstock, denim, ribbon, leather, map paper, calendar paper, or other scraps that are still structurally sound.
· Avoid greasy packaging, flaking coatings, brittle leather, damp paper, or fabric with loose dye that could transfer onto pages.
· Round or soften sharp corners on rigid materials so they do not catch thin paper.
· Keep very thick layers, bulky knots, hard beads, and raised decorations away from the part that sits inside the book.
· If you are reusing printed paper, check that the ink does not smear when rubbed gently with a dry cloth.
· Set aside anything sentimental or collectible if cutting it would destroy an item you would rather preserve.
Test Adhesives, Paint, Stitching, and Surface Finishes First
Small bookmarks often combine materials that behave very differently. Paper absorbs moisture, fabric flexes, ribbon frays, and leather can show every glue mark. I know it can feel tempting to decorate first and solve the construction later, but a tiny test piece can prevent warped card, stiff fabric, bleeding ink, or an adhesive line that remains tacky against a book page.
· Test glue on an offcut and use the smallest amount needed for a secure bond.
· Let paint, ink, marker, or sealant cure fully according to its own instructions before placing the bookmark in a book.
· Use stitching for fabric layers or flexible attachments when glue would create a hard ridge.
· Avoid glitter, loose sequins, or flaky surface finishes that can shed between pages.
· Protect a delicate paper design with a thin backing rather than adding several heavy wet coats.
· For leather, ribbon, or fabric, check both sides for rough thread ends, stiff adhesive, and scratchy hardware.
Plan the Edge, Tassel, and Final Thickness Before Finishing
A bookmark can look neat on the craft table and still become awkward once the book closes around it. The final edge treatment, hole placement, tassel, or charm should be planned before the last layer goes on. That keeps the decorative parts where they can be seen without turning the inside of the book into a lumpy stack.
· Place tassels, beads, buttons, and charms at the top where they can remain outside the closed pages.
· Reinforce punched holes in thin paper if the ribbon will be pulled often.
· Trim fraying ribbon and fabric edges neatly, or stitch around them when the material needs extra stability.
· Keep metal clamps, eyelets, and grommets smooth and well away from delicate page surfaces.
· Close the finished bookmark inside an expendable notebook first to check thickness and pressure points.
· Pull gently on every attached ribbon, tassel, or sewn detail before giving the bookmark as a gift.
Cardboard Upcycled Bookmarks Ideas You’ll Adore
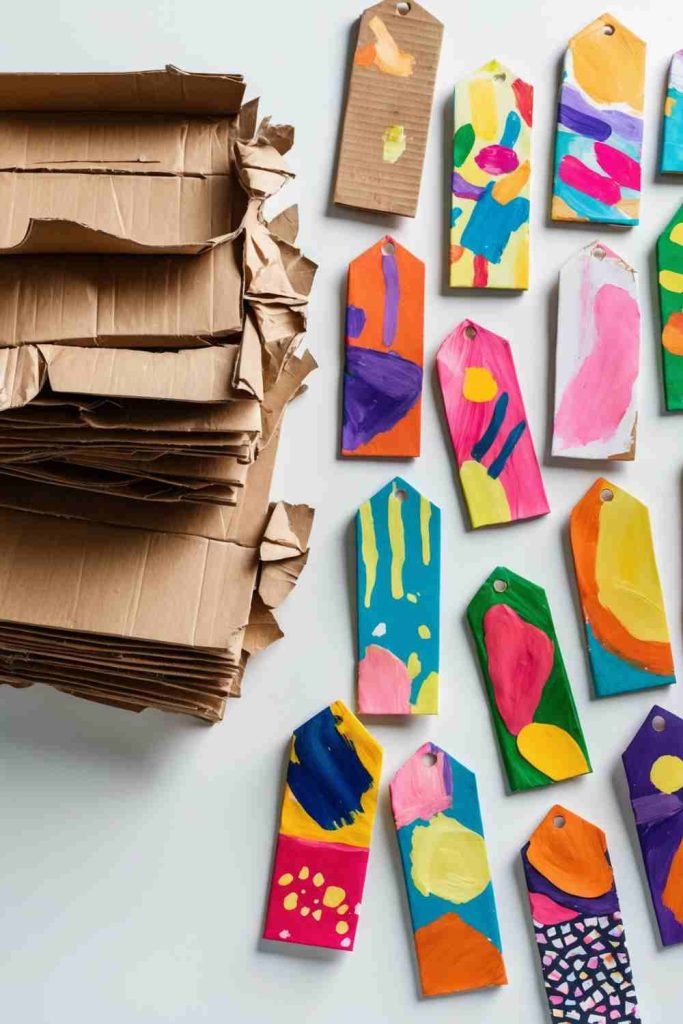
Cardboard is one of the easiest bookmark materials to reclaim because sturdy packaging already has the flat shape and strength the project needs. A clean cereal box panel, mailer insert, or product carton can become the base, while smaller paper and fabric scraps can provide the decorative layer. The useful part is choosing cardboard that bends slightly without splitting along the fibres.
I would keep the central reading area fairly smooth and save the more tactile details for the top. Thin collage paper, a hand-drawn pattern, or one pressed paper shape can change the look without making the bookmark thick. If the printed side of the packaging is unattractive, simply turn it inward and cover it with a reused paper offcut.
Materials and Tools
· Clean thin cardboard from packaging
· Paper, fabric, or magazine scraps
· Pencil and ruler
· Scissors or craft knife with cutting mat
· Glue suitable for paper
· Hole punch
· Optional ribbon or yarn scrap
Steps for This Upcycled Bookmark Project
1. Cut a strong base. Flatten the packaging and choose a section without deep folds, grease, or torn fibres. Mark a long narrow shape and cut it cleanly, then round the corners slightly so the cardboard will not catch a page. Flex it once before decorating; if the surface cracks, choose a better section.
2. Add a thin decorative layer. Cover one or both sides with reused paper, a small fabric strip, handwriting, or a simple painted design. Work from the centre outward with a light coat of adhesive so the cardboard does not buckle. Press it flat beneath a clean sheet of paper while the join sets.
3. Finish the edges. Trim any overhanging paper after the adhesive has set, then smooth rough cardboard fibres with careful scissor work or a very fine abrasive if suitable. If you want a top hole, punch it far enough from the edge that the cardboard will not tear under a tassel.
4. Check it inside a book. Add a light ribbon or yarn loop if desired, then close the bookmark inside an old notebook. Make sure the decoration does not leave a ridge and that no adhesive remains tacky. Reinforce the top hole with a small paper patch on the back if it begins to stretch.
Cardboard does not need to look like packaging once the edges are neat. For me, the quickest improvement is simply covering the printed side and keeping the final shape crisp.
Variation: Cut narrow strips from several cartons and cover them with matching paper scraps to make a coordinated set without needing identical cardboard.
Chic Upcycled Bookmarks Ideas for Creative Readers
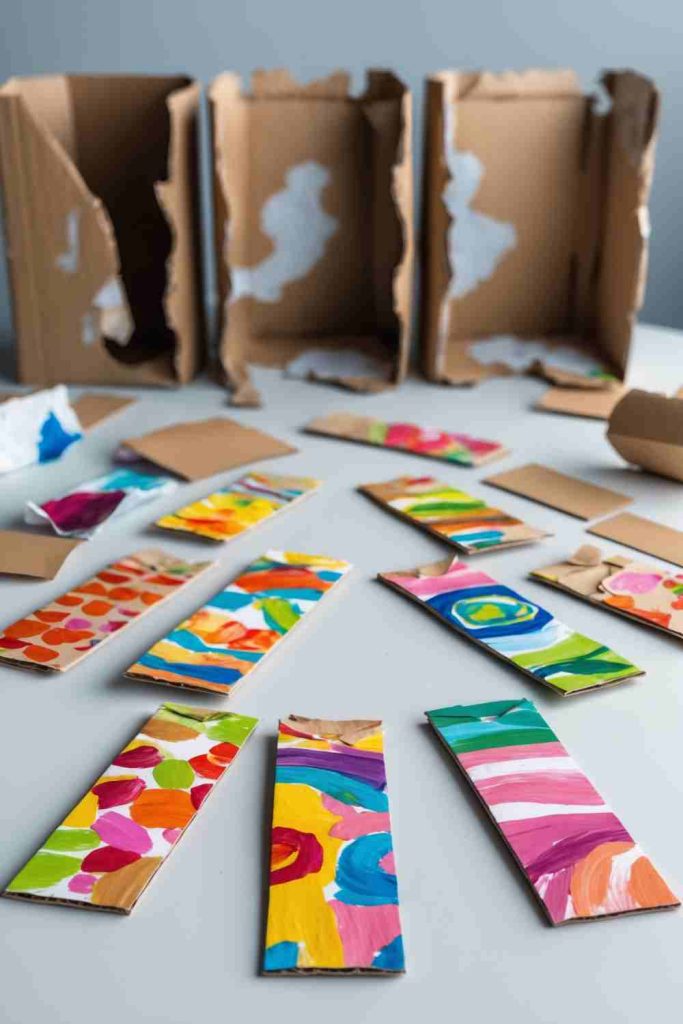
A more polished bookmark can still begin with leftovers. Old greeting-card fronts, patterned stationery, clean packaging inserts, and fabric offcuts all work when the palette is kept restrained and the layers stay thin. Instead of adding many small embellishments, one strong contrast—such as dark card against a pale paper strip—can make the finished piece feel deliberate.
The practical trick is to decide which material provides structure and which material is only decorative. A soft scrap of fabric may look lovely but needs a stable backing; a glossy card may already be strong enough on its own. I’d rather build one reliable base and decorate it lightly than stack several weak layers together.
Materials and Tools
· Sturdy reclaimed card or greeting-card offcut
· One or two thin decorative scraps
· Paper glue or double-sided adhesive
· Scissors
· Ruler
· Optional corner punch
· Optional narrow ribbon
Steps for This Upcycled Bookmark Project
1. Choose a restrained combination. Lay several scraps together before cutting and select one structural base plus one or two accent materials. Keep the colours or patterns connected so the small format does not feel crowded. Check that the decorative pieces are thinner than the base.
2. Cut the bookmark cleanly. Measure a comfortable length, cut the base straight, and then cut the accent pieces slightly smaller so a narrow border remains visible. Rounded corners can help reduce wear, but avoid complicated silhouettes if the material is likely to snag.
3. Layer without bulk. Attach the largest accent first using a thin, even adhesive layer, then add only the details that genuinely improve the design. Press the piece flat while it sets. If fabric is used, trim stray threads before the final join instead of sealing them under glue.
4. Finish for repeated use. Inspect the front and back, rub the edges gently to check for lifting, and add a simple top ribbon only if it stays outside the pages. Close the finished bookmark in a book and remove any element that leaves a visible bump.
A bookmark is a tiny canvas, so there is nowhere for clutter to hide. I find that one good paper texture or fabric accent usually does more than five small decorations.
Variation: Use a monochrome base with one reclaimed metallic gift-wrap strip for a cleaner, more formal version suitable for gifting.
Craft Beautiful Upcycled Bookmarks Ideas with Ease

Easy bookmark projects work best when the material does part of the design work for you. A decorative section from a package, a clean paper bag, an old note card, or a scrap of printed fabric can already provide colour and pattern. The craft then becomes mostly about choosing the right section, cutting neatly, and reinforcing it enough for repeated handling.
This is a useful beginner project because perfection is not essential, but page safety still matters. I would skip thick embellishments and focus on flat techniques such as stamping, drawing, stitching a simple line through fabric, or adding one narrow paper border. The result can look personal without demanding specialist tools.
Materials and Tools
· Decorative scrap paper, card, or flat fabric
· Sturdy backing card if needed
· Scissors
· Pencil and ruler
· Glue or sewing thread as appropriate
· Optional stamp or pen
· Optional hole punch and yarn
Steps for This Upcycled Bookmark Project
1. Find the strongest decorative area. Look over the scrap and choose a section without creases, stains, or weak edges. If the material is thin, pair it with a backing card before cutting so both layers can be shaped together. Avoid placing a major design right where the top hole will go.
2. Cut and align the layers. Trim the base and decorative layer to the same general bookmark shape. If you want a border, cut the top layer slightly smaller. Dry-fit everything first, then mark any hole or stitch placement while the layers are still separate.
3. Secure the surface. Glue paper layers with a light even coat or stitch fabric to the backing with small flat stitches near the edges. Smooth from the centre outward and remove excess adhesive immediately. Keep knots and thread ends on the outer top area rather than inside the reading surface.
4. Add a simple finish. Punch the top only after the layers are stable, add a light tassel if desired, and trim the final edges. Test the bookmark in a closed book, especially if stitching or fabric is involved, and flatten any raised join before use.
Ease comes from using a scrap that already has character. I don’t think a beginner bookmark needs a complicated technique when the material itself already looks interesting.
Variation: Make several from the same old card or gift bag, changing only the top ribbon so each bookmark feels related but not identical.
Upcycled Bookmarks Ideas to Spark Your Creativity
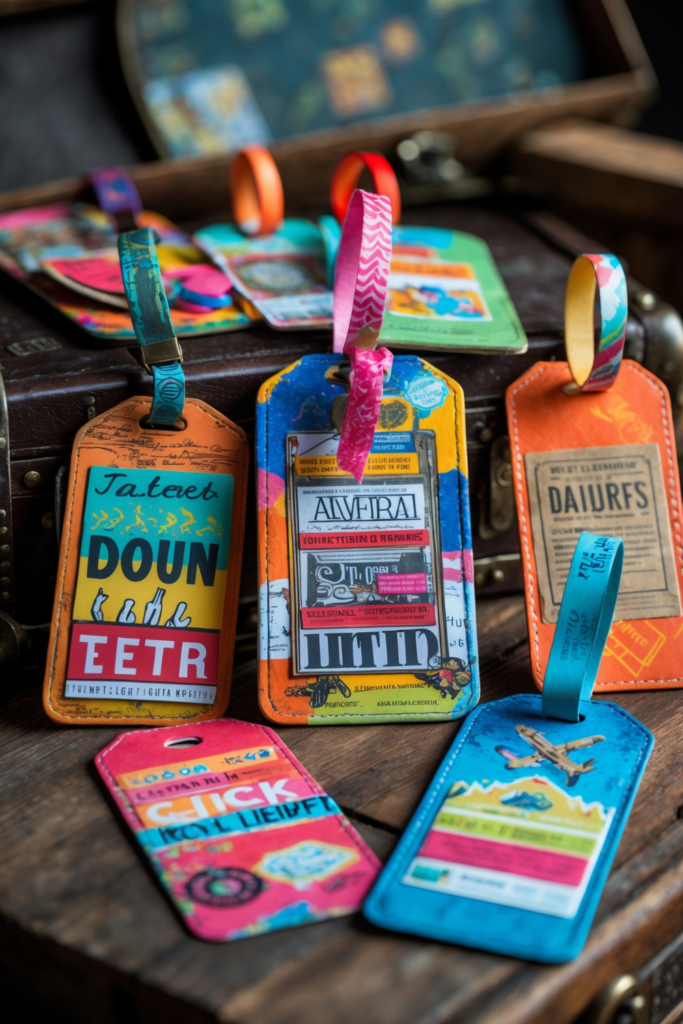
Some of the best bookmark ideas begin by looking at leftovers by shape rather than by their original purpose. A long strip from a paper bag, a narrow postcard edge, a clean label panel, or even a stitched fabric strip can all become bookmark material. The change of viewpoint is useful because it lets you work with what is already on the table instead of buying a dedicated craft blank.
I like to arrange several scraps before committing to glue. A small diagonal paper piece, a line of visible hand stitching, or a single cut-out shape can create movement without adding thickness. The point is not to make every surface busy; it is to let one or two reused details turn an ordinary strip into something recognisable.
Materials and Tools
· Assorted narrow paper or fabric scraps
· Backing card if required
· Scissors
· Glue stick or suitable adhesive
· Needle and thread for optional stitching
· Pencil
· Optional small paper punch
Steps for This Upcycled Bookmark Project
1. Sort by usable shape. Lay out scraps and group the long, flat pieces that are already close to bookmark proportions. Remove anything with weak folds, sticky residue, or loose coating. Choose one base and a few small accents rather than trying to use every scrap at once.
2. Build the layout dry. Place the accents on the base without adhesive and move them around until the balance feels right. Leave enough clear space near the bottom to slide easily between pages. If stitching is planned, mark a simple line or border now.
3. Attach or stitch the accents. Secure paper with a thin adhesive layer or sew fabric accents with flat stitches that will not create hard knots against the page. Work slowly around corners and keep all edges fully bonded so they cannot lift during use.
4. Edit the finished design. Step back before adding anything else. Trim loose fibres, erase pencil marks, and remove an embellishment if the surface feels busy. Add a light top loop only if it improves handling, then test the bookmark in a book.
The first arrangement rarely needs to be the final one. I know it can feel tempting to glue as soon as an idea appears, but moving scraps around for two extra minutes usually gives a cleaner result.
Variation: Use only offcuts from one previous craft project so the bookmark becomes a small record of that larger make.
Upcycled Bookmarks Ideas You’ll Love to DIY
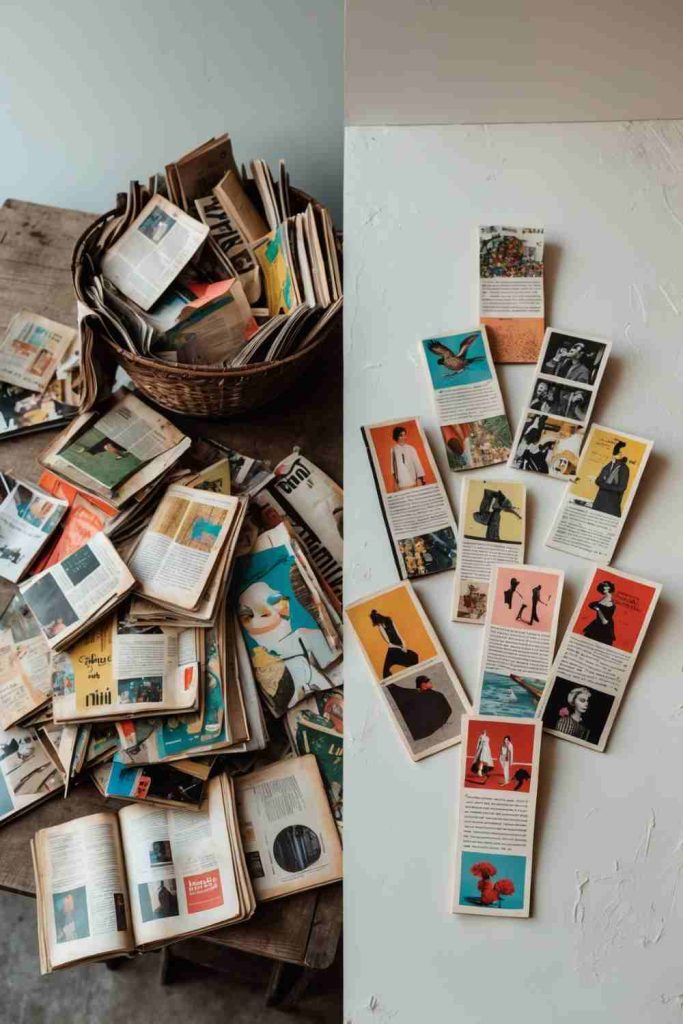
A bookmark can carry a lot of personality without needing a complicated construction. Old cards, paper scraps, clean labels, fabric remnants, and even narrow lace pieces can be combined into a flat layered design. The most important choice is still the base: it should be strong enough to survive repeated pulling without becoming bulky between pages.
For a handmade look, I would leave a small amount of visible texture instead of sealing everything into a glossy finish. A stitched line, a neatly frayed fabric edge, or a handwritten word can make the piece feel personal. What matters is making sure those details are secure and positioned where they will not abrade the paper.
Materials and Tools
· Reclaimed card base
· Small paper, lace, or fabric remnants
· Scissors
· Glue or needle and thread
· Ruler
· Pen or pencil
· Optional narrow twine or ribbon
Steps for This Upcycled Bookmark Project
1. Prepare the base first. Cut the reclaimed card to a long narrow shape and inspect both sides. Cover unwanted printing with a flat paper layer if needed. Round the corners lightly and keep the top area free for any future hole or ribbon.
2. Choose one focal detail. Select a short piece of lace, a fabric patch, a paper motif, or a handwritten label as the main decoration. Place it before attaching anything else and make sure it does not extend beyond the bookmark edges where it could catch.
3. Secure the layers neatly. Use glue sparingly for paper or small stitches for textile pieces. Flatten the work while it sets and keep the back tidy. If the accent is thick, place it near the top so it remains outside the page stack when the book is closed.
4. Finish with restraint. Add a small top loop, trim all threads, and check every edge with your fingertips. Slide the bookmark into several parts of a book and make sure it does not drag or mark the paper. Remove any extra decoration that makes the fit awkward.
For me, the most lovable handmade bookmarks are usually the ones with one clearly chosen detail. Tiny does not have to mean crowded.
Variation: Turn an old handwritten note or recipe copy into a sentimental paper accent by using a scan or duplicate rather than cutting the original.
DIY Upcycled Bookmarks Ideas for a Greener Touch
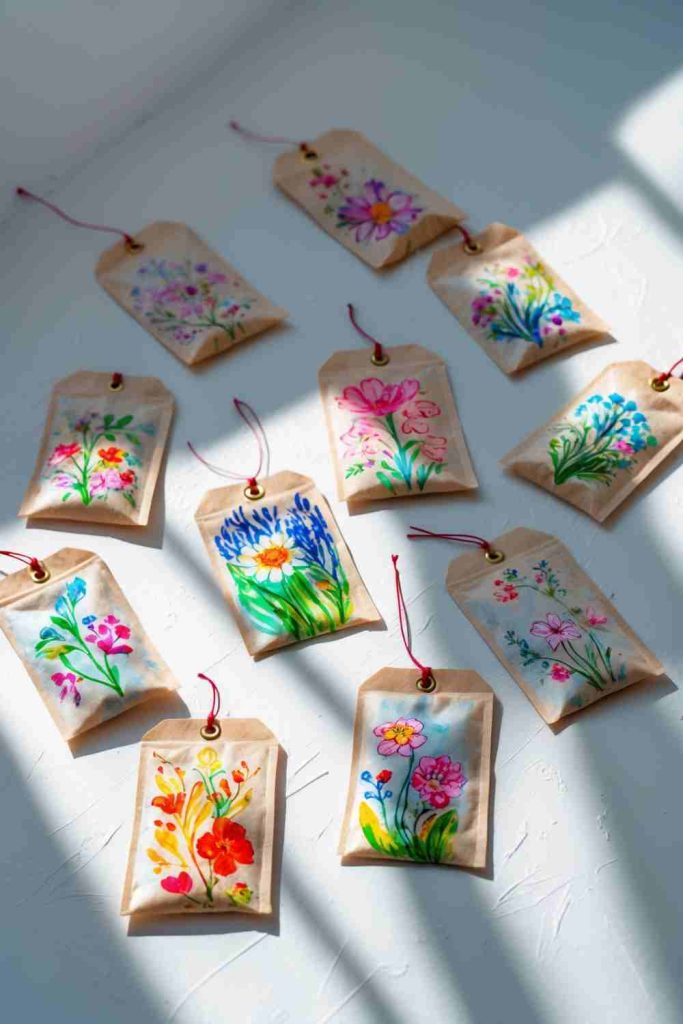
A useful way to keep this craft genuinely reuse-focused is to choose materials that would otherwise be difficult to justify saving: narrow paper bags, clean carton flaps, packaging tissue, fabric selvages, or ribbon ends. Because a bookmark is small, these fragments can be enough without needing to cut into a larger usable item.
The “greener” part is not about adding a label to the craft; it comes from using what is already available and avoiding unnecessary new layers. I would also skip disposable decorative extras if the reclaimed material already has colour or print. A simple, durable bookmark that lasts is more useful than one covered in loose additions that fall away quickly.
Materials and Tools
· Clean household paper or textile offcuts
· Reclaimed card backing
· Scissors
· Minimal paper or fabric adhesive
· Needle and thread if needed
· Optional saved ribbon end
· Optional pencil or stamp
Steps for This Upcycled Bookmark Project
1. Choose scraps with a clear second use. Pick small leftovers that are too narrow for larger crafts but still clean and strong. Separate structural pieces from purely decorative ones. If a paper scrap is very thin, pair it with card recovered from packaging rather than buying a new blank.
2. Design around what you have. Let the size and print of the scrap influence the shape. A narrow fabric selvage can become a vertical accent; a printed paper bag section may need only a border. Avoid cutting several new pieces just to force a complicated pattern.
3. Join with as little material as necessary. Use a light coat of adhesive, or sew textile pieces with simple stitches. Press paper flat and keep the back free of hard ridges. If the original scrap has attractive edges, preserve them only when they will not snag pages.
4. Make the bookmark durable enough to keep. Strengthen weak corners, weave thread tails securely, and add a reused ribbon only if the top needs a handle. Test the finished piece in regular use rather than adding a protective product automatically; some sturdy materials need no extra coating.
I’d rather make one durable bookmark from three genuine leftovers than buy a pile of new embellishments for a project that is supposed to be about reuse.
Variation: Use a saved paper shopping bag and its handle cord together, turning the printed bag into the base and the cord into a simple top loop.
Upcycled Bookmarks Ideas Made Easy and Fun

Denim scraps are especially good for bookmarks because the fabric is strong, easy to cut into narrow strips, and already has a familiar texture. A worn pair of jeans may have damaged knees or hems but still contain plenty of sound fabric around the legs and pockets. The key is keeping the strip thin enough that the book can close comfortably.
I would use a single layer for heavier denim and only add backing if the cloth is very soft or stretchy. Visible topstitching can become decoration, so there is no need to cover every surface. Buttons and lace can work near the top, but anything hard should stay outside the page area.
Materials and Tools
· Sound denim scrap from old jeans
· Sharp fabric scissors
· Needle and strong thread or sewing machine
· Optional lace or narrow fabric trim
· Optional small flat button for the top
· Pins or clips
· Optional ribbon scrap
Steps for This Upcycled Bookmark Project
1. Cut along the denim grain. Choose a flat section without thick seam allowances and cut a long strip. If possible, use an existing stitched edge as one side of the bookmark. Trim loose white threads unless you want a controlled frayed edge.
2. Stabilise the shape. For soft denim, fold a narrow hem or stitch close to the long edges. Heavier denim may need only a straight topstitch. Keep the fabric flat while sewing and avoid bulky folded corners that would create pressure inside the book.
3. Add decoration only near the top. Sew on a small lace strip, fabric tab, or flat button above the area that will sit between pages. Use secure stitches and hide knots inside a folded top edge if possible. Avoid glue where it could soak through and stiffen the fabric.
4. Test flex and thickness. Press the bookmark flat, trim thread ends, and slide it between pages. Close the book and check that the denim does not create a large wedge. If it is too thick, remove backing or layered trim rather than forcing the book around it.
Denim already brings texture, so I don’t think it needs much help. One line of contrasting thread is often enough to make the piece feel finished.
Variation: Cut the bookmark from a section that includes an original jeans topstitch line, using that old construction detail as the main design feature.
Upcycled Bookmarks Ideas with Stunning Floral Cards
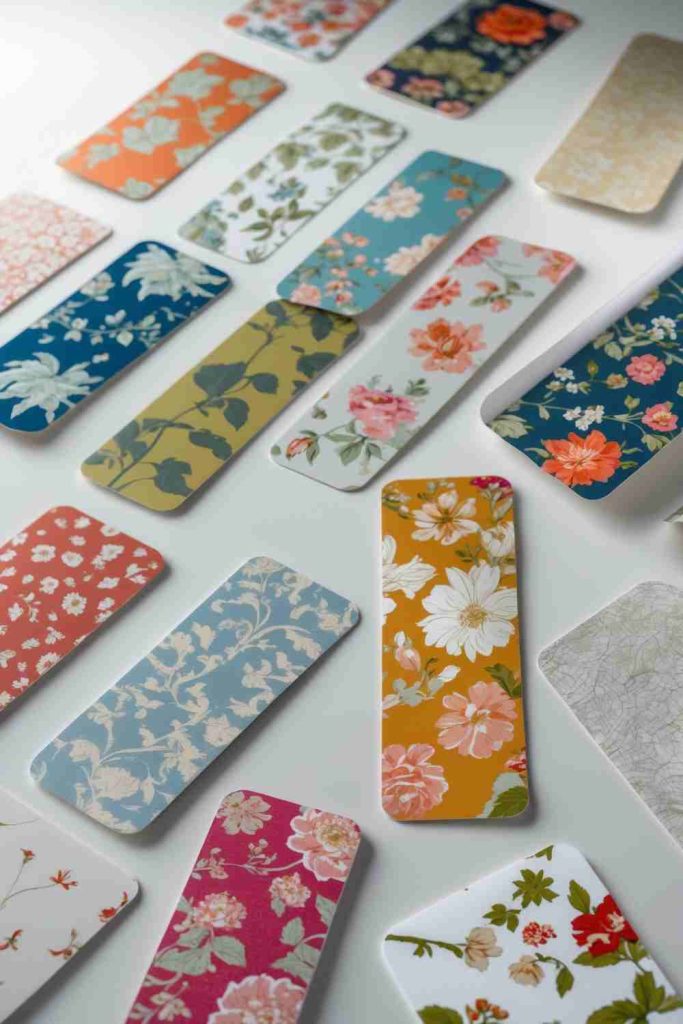
Old floral greeting cards are almost ready-made bookmark material because the printed surface already has a focal design. The job is to select a section that reads well at a narrow scale and give it enough backing that repeated use does not crease the card. This is also a nice way to keep part of a card without storing the whole folded piece.
If the card has a written message you want to preserve, I would avoid cutting through it and use the decorative front only. A thin backing can hide the original reverse side and strengthen a weak printed panel. Floral imagery is already detailed, so the finishing should stay quiet.
Materials and Tools
· Old floral greeting card
· Reclaimed cardstock backing
· Pencil and ruler
· Scissors or paper trimmer
· Paper adhesive
· Hole punch
· Optional ribbon or embroidery-thread tassel
Steps for This Upcycled Bookmark Project
1. Choose the floral section. Move a narrow paper template across the card front until the flowers sit well inside the bookmark shape. Avoid cutting through a central bloom awkwardly if a small shift creates a better composition. Mark the shape lightly on the reverse.
2. Cut and back the card. Trim the floral panel cleanly, then cut a reclaimed cardstock backing to match. Apply a thin adhesive layer and align the two pieces carefully. Press them flat so the front does not ripple.
3. Refine the edges. Once the bond is secure, trim any misalignment and round the corners slightly. If you want a top hole, place it where it does not remove an important part of the printed design. Reinforce the back with a small card patch if the paper feels soft.
4. Add a light finishing detail. Thread a small ribbon or embroidery-floss tassel through the top and knot it securely. Keep beads and heavy charms off the reading surface. Close the finished bookmark in a book to confirm that the card and backing remain flat.
Floral cards already contain more design work than most bookmarks need. I would let the printed flowers stay in charge and keep the ribbon simple.
Variation: Use two coordinating floral cards to make a front-and-back design, but only if both layers remain thin enough for comfortable use.
Upcycled Bookmarks Ideas Using Colorful Ribbons

Ribbon scraps work differently from paper bookmarks because they are soft, flexible, and naturally narrow. A single sturdy ribbon can sit between pages with almost no bulk, while woven or braided ribbon gives a more decorative look. The main challenge is preventing frayed ends and making sure any hardware stays outside the page area.
I would avoid using a very slippery satin ribbon if it falls out of the book too easily unless the top includes a small flat anchor. Grosgrain, woven cotton tape, or reclaimed fabric ribbon often grips pages more reliably. Any bead, clamp, or button should be light and well secured.
Materials and Tools
· Saved ribbon lengths or fabric tape
· Sharp scissors
· Needle and thread
· Optional small flat button or bead for the top only
· Optional ribbon clamp with smooth edges
· Ruler
· Fray-control method appropriate to the ribbon
Steps for This Upcycled Bookmark Project
1. Choose the right ribbon length. Select a strip long enough to extend slightly beyond the book while still leaving any decoration outside the page block. Check for weak, faded, or shredded sections and cut them away. If using several ribbons, compare thickness before layering or braiding.
2. Finish the lower end. Fold and stitch the bottom edge, or use another suitable fray-control method for the ribbon type. Keep the finish flat. A bulky knot near the bottom will sit inside the book, so move decorative knots and charms to the top instead.
3. Build the top detail. Attach a small button, bead, fabric tab, or simple bow at the upper end with secure stitching. If using a metal clamp, make sure its edges are smooth and that the clamp will remain above the pages when the bookmark is in use.
4. Test how it behaves in a book. Place the ribbon between pages and close the book. Pull it gently to see whether it slides out too easily. If the ribbon is very slick, add a stitched fabric tab at the top or choose a more textured ribbon rather than adding heavy hardware.
Ribbon bookmarks feel effortless when the material is right. The part I would check carefully is grip; a lovely ribbon that slips out every time the book moves quickly becomes annoying.
Variation: Braid three narrow leftover ribbons only for the top section, leaving one flat ribbon length inside the book so the reading area stays thin.
Upcycled Bookmarks Ideas with Embossed Floral Designs You’ll Love
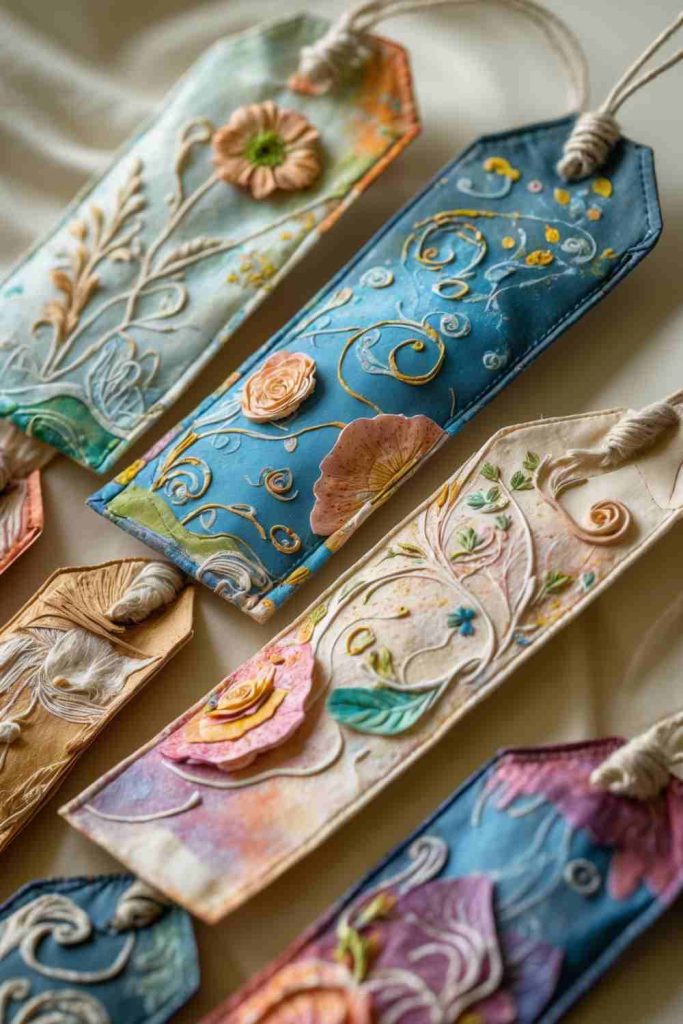
Embossed card has texture built into the surface, which makes it an attractive material to rescue from old invitations, packaging, greeting cards, or craft offcuts. Because the raised pattern already provides depth, the bookmark does not need many added layers. The main aim is to preserve the relief while keeping the back flat.
I would choose an embossed section that still feels flexible and clean. Very brittle coated card can crack along the raised areas when cut, so test a small edge first. A plain backing helps strengthen the bookmark without competing with the floral texture on the front.
Materials and Tools
· Embossed paper or card offcut
· Thin reclaimed cardstock backing
· Sharp scissors or paper trimmer
· Paper adhesive
· Soft colouring medium if desired
· Hole punch
· Optional narrow ribbon
Steps for This Upcycled Bookmark Project
1. Select a complete embossed motif. Position the bookmark shape so the floral relief is not cut awkwardly through the centre. Test one small cut at the edge to make sure the coating does not flake. If it does, choose a different section or simplify the shape.
2. Back the embossed piece. Cut a plain recycled cardstock panel to match and attach it with a very thin adhesive layer. Press from the flat back rather than crushing the raised front. Let the layers settle under light even pressure without flattening the embossing.
3. Highlight the relief carefully. If the raised pattern needs more contrast, brush colour lightly across only the highest areas or leave it unchanged. Avoid wetting the card heavily. Keep added decoration flat so the embossed texture remains the main feature.
4. Finish without crushing the surface. Trim the edges, punch a top hole if wanted, and add a light ribbon. Test the bookmark in a book with the embossed side facing away from very delicate paper at first. If the relief is unusually deep, reserve it for sturdier books or reduce the backing thickness.
Embossing already gives the eye something to notice. I’d keep extra embellishment to a minimum rather than hiding the very texture that makes the reclaimed card worth using.
Variation: Leave the embossed front uncoloured and use a contrasting reclaimed card on the back for a quieter, more modern finish.
Upcycled Bookmarks Ideas Using Leather Scraps for a Rustic Touch
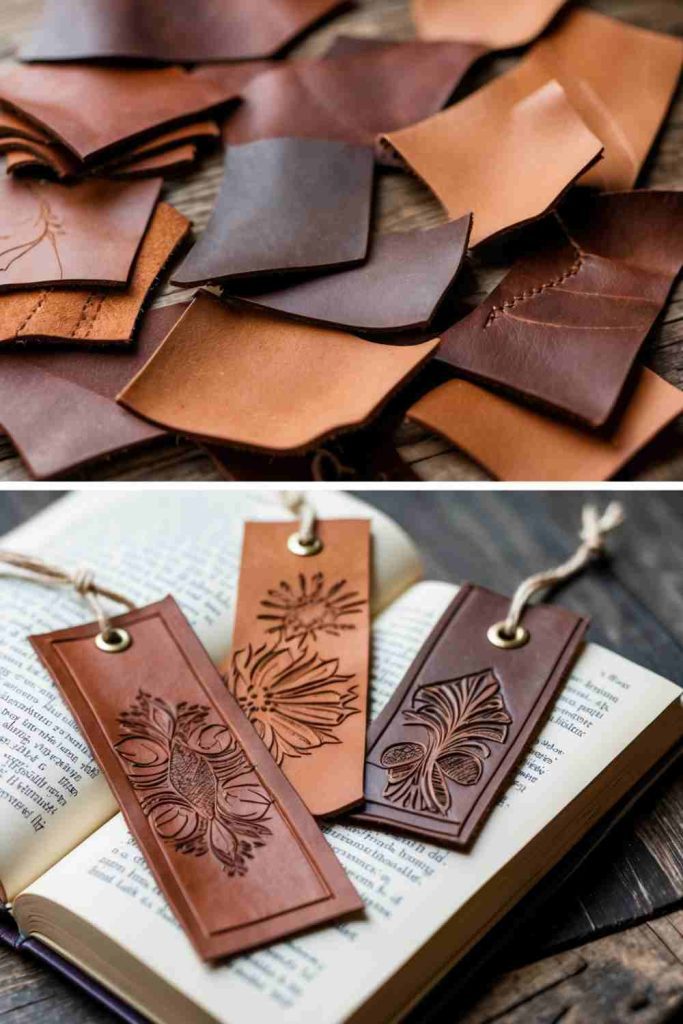
Small leather offcuts can become durable bookmarks when the hide is thin, flexible, and still in good condition. Offcuts from old bags, belts, upholstery samples, or previous leather projects may be large enough even when they are useless for bigger repairs. The surface already carries texture, so a simple cut shape often works better than heavy decoration.
Thickness is the first thing I would check. Stiff belt leather can be too bulky between pages, while soft garment leather may stretch or curl. A medium-thin scrap that bends easily without cracking is usually more comfortable. Any finish or conditioner should be fully absorbed and non-tacky before the bookmark touches paper.
Materials and Tools
· Thin sound leather scrap
· Sharp craft knife or leather scissors
· Cutting mat
· Ruler
· Leather punch
· Optional blunt embossing or stamping tools
· Optional soft cord or narrow ribbon
Steps for This Upcycled Bookmark Project
1. Inspect and clean the scrap. Choose leather without flaking finish, deep cracks, sticky residue, or heavy seams. Wipe or clean it in a way appropriate to the material and let it dry fully. Flex the strip several times to make sure the surface does not shed.
2. Cut a clean narrow shape. Use a ruler and sharp tool on a protected mat to cut the bookmark. Round the corners slightly and remove any fuzzy underside fibres that form lumps. Keep the shape simple so the edges remain smooth.
3. Add restrained surface detail. If desired, press a small pattern near the top or make a few decorative punch marks. Avoid cutting so many holes that the leather becomes weak. Any paint or finish should be compatible with the leather and fully dry before use.
4. Punch and finish the top. Create one clean hole well away from the edge and thread a soft cord or ribbon through it. Smooth the back, check for sharp hardware, and test the bookmark inside a closed book. If it creates too much thickness, use it in larger hardbacks or switch to a thinner scrap.
Leather can look finished with almost nothing added. For me, a clean cut and one small stamped detail usually feel better than turning the surface into a miniature ornament panel.
Variation: Use the naturally worn edge from an old leather item as the top of the bookmark while cutting the page-contact edges fresh and smooth.
Upcycled Bookmarks Ideas with Vintage Map Pages for Travel Lovers

Old map pages make expressive bookmarks because even a very small strip can contain roads, coastlines, place names, or colour blocks that feel like a miniature journey. Damaged road atlases, outdated tourist maps, or duplicate printed maps are good candidates, especially when the larger sheet is no longer useful. I would avoid cutting any map with genuine archival or personal value.
Map paper is often thin, so the design usually needs a backing. The backing can be cut from packaging card, which keeps the project firmly in the reuse category. Choose a section first, then decide whether the place name, route, or landscape shape should sit near the centre or top.
Materials and Tools
· Discarded or outdated map page
· Thin reclaimed cardstock
· Paper adhesive
· Ruler
· Scissors or paper trimmer
· Hole punch
· Optional twine or ribbon scrap
Steps for This Upcycled Bookmark Project
1. Frame the map section. Use a narrow scrap-card template to move across the map and identify an interesting composition. Choose a section that still reads clearly at bookmark scale. Mark the cut lines lightly on the reverse so the printed surface stays clean.
2. Back the paper. Cut the map strip and a matching piece of reclaimed card. Apply a thin adhesive layer, align the pieces, and smooth from the centre outward. Press flat while the bond sets to prevent waves.
3. Trim and protect vulnerable edges. Refine the sides after backing rather than trying to align two perfect cuts from the start. Round the corners slightly and reinforce the top if a hole will be added. Avoid thick sealants unless the paper genuinely needs extra protection.
4. Add a simple travel-inspired finish. Thread twine, narrow ribbon, or a saved cord through the top and knot it securely. Keep charms light and outside the page stack. Test the bookmark in a book and check that printed ink does not rub off onto your fingers or pages.
I like map bookmarks most when the map is still recognisable. There is no need to cover every road with stickers or lettering; the geography is already the decoration.
Variation: Make a pair from two sections of the same old map—one showing the starting place and one the destination—for a simple travel-themed gift.
Upcycled Bookmarks Ideas Using Old Calendar Pages
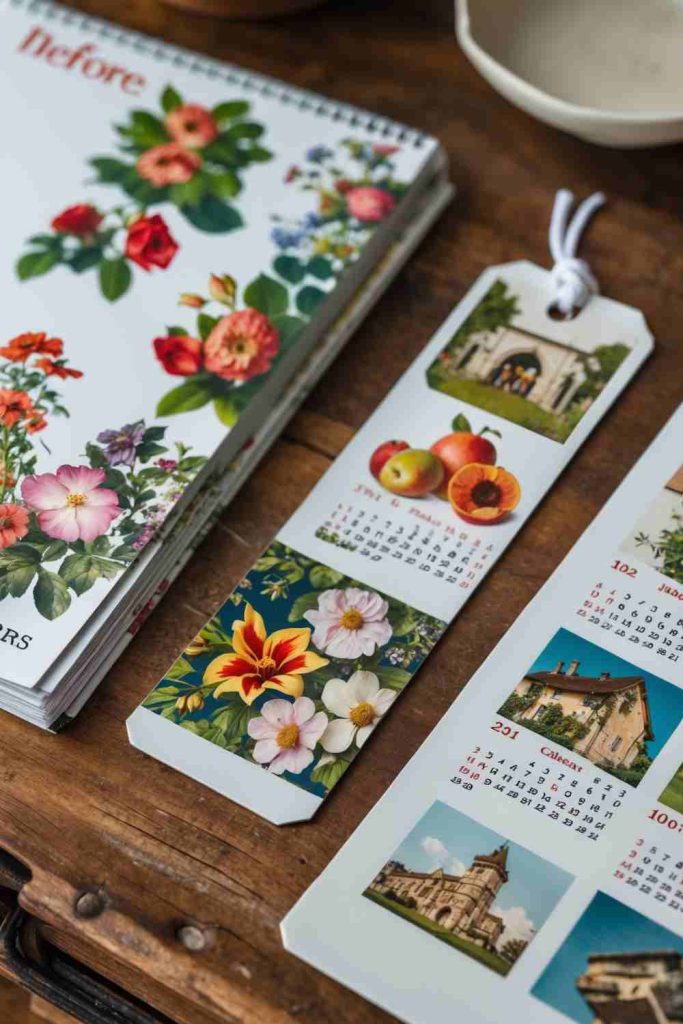
Expired calendars often contain large photographs, illustrations, or patterned borders that still look useful after the dates have become irrelevant. A bookmark only needs a narrow slice, so even a calendar page with writing or torn corners may contain several good sections. The paper is usually too light on its own, which makes backing especially helpful.
I would choose imagery that survives being cropped into a tall narrow shape. A landscape can become an abstract colour strip, while a floral or illustrated page may offer several different bookmarks from one sheet. The date grid can also be useful if you like graphic numbers, but it should feel intentional rather than accidental.
Materials and Tools
· Outdated calendar page
· Reclaimed cardstock backing
· Scissors or paper trimmer
· Pencil and ruler
· Paper adhesive
· Hole punch
· Optional yarn or ribbon
Steps for This Upcycled Bookmark Project
1. Choose an image that crops well. Move a bookmark-sized template across the calendar page and look for sections with a clear focal point. Avoid damaged folds and areas weakened by hanging holes. Mark the chosen strip on the back.
2. Cut a matching backing. Trim the calendar image and cut packaging card or another reclaimed cardstock piece slightly larger. Glue the image to the backing with a light coat, then trim the backing flush after the layers have settled.
3. Clean up the edges and top. Round the corners if desired and punch the top only after checking the composition. If the calendar paper is glossy, make sure the adhesive has bonded at every edge rather than relying on a heavy top coating.
4. Finish and test. Add a small yarn tassel or ribbon loop, keep all knots outside the page area, and press the bookmark flat. Slide it into a book and check the printed surface for smudging or transfer before regular use.
Calendar art is already designed to catch the eye, so one page can make several bookmarks without much added decoration. I’d let the crop do most of the creative work.
Variation: Use the date grid on the reverse as a graphic backing instead of hiding it, creating a bookmark that clearly shows where the material came from.
Bookmark Upcycling Mistakes That Can Mark Pages, Add Bulk, or Fall Apart
Making the Bookmark Too Thick
A bookmark sits under pressure when a book closes. Several layers of cardboard, stacked fabric, bulky knots, or hard beads can distort pages and the spine. Build with one structural base and keep raised decoration at the top where it can stay outside the page block.
Using Wet or Tacky Finishes Too Soon
Paint, glue, sealant, or marker that feels dry on the surface may still transfer if it has not cured properly. Follow the material’s own instructions, then test the bookmark against scrap paper before putting it into a valued book.
Leaving Rough or Sharp Edges
Cut card fibres, unfinished leather corners, metal clamps, or stiff dried glue can catch thin pages. Run your fingertips along both sides and every edge, then smooth or trim anything that feels sharp before use.
Punching a Hole Too Close to the Top
A ribbon hole placed near a weak edge can tear after only a few pulls. Leave enough material around the hole, reinforce thin paper from the back, and keep heavy tassels or beads off delicate bases.
Overdecorating the Reading Surface
Buttons, charms, lace knots, thick flowers, and dimensional embellishments may look appealing but belong mostly above the pages. Keep the section that sits inside the book flat and flexible.
Ignoring Dye, Ink, and Surface Transfer
Unknown fabric dyes, old printing ink, glitter, or chalky coatings can rub onto paper. Test reclaimed materials by rubbing them with a clean dry cloth and avoid anything that sheds or stains.
Using Weak Scraps Just Because They Are Recycled
Reuse is only useful when the material still has enough strength for its new job. Brittle card, cracked leather, crumbling cork, or badly frayed ribbon may create a bookmark that fails quickly. Choose a smaller sound section or save the weak material for a lower-stress craft.
Frequently Asked Questions
What are the easiest upcycled bookmark materials for beginners?
Thin cardboard, greeting cards, calendar pages, and sturdy paper packaging are usually the simplest because they cut cleanly and can be backed easily. Ribbon and denim are also manageable if you are comfortable with a few basic stitches.
Do I need to laminate an upcycled bookmark?
No. Many sturdy card, leather, denim, ribbon, and cork bookmarks work well without lamination. Use reinforcement only when the material needs it, and avoid adding a thick plastic layer automatically if a simple backing or edge repair is enough.
How can I stop a paper bookmark from curling?
Use very little wet adhesive, apply it evenly, and press the bookmark flat while the layers set. Pair very thin paper with a stable reclaimed card backing, and avoid coating one side heavily while leaving the other untreated.
Can I use buttons, beads, or charms on bookmarks?
Yes, but keep hard or bulky pieces at the top so they remain outside the closed pages. Attach them securely and avoid anything sharp, heavy, or likely to scratch the book cover.
What is the best way to reuse fabric scraps as bookmarks?
Choose stable woven fabric such as denim or cotton, trim fraying edges, and use stitching rather than thick glue for structural joins. Keep seams flat and test the final thickness inside a book before adding more layers.
How do I make an upcycled bookmark suitable for a gift?
Focus on clean edges, a secure top detail, and a material that suits the recipient. A simple coordinated tassel or handwritten note on the back often feels more thoughtful than adding many decorations.
Can children make these bookmark projects?
Many paper and fabric versions can work as supervised crafts, but the method should match the child’s age and skill. Adults should handle craft knives, sharp punches, hot tools, small magnets, metal findings, or other potentially hazardous materials, and loose small parts should be kept away from very young children.
Let Small Scraps Keep Your Place in the Next Book
Upcycled bookmark ideas work because they ask very little from a material before giving it a useful new role. A clean strip of cardboard, denim, ribbon, an old card, a calendar image, leather scrap, map page, cork offcut, or woven paper fragment can be enough once the edges are safe and the surface is kept thin.
The part I would remember is function first: a bookmark should protect the page, not compete with it. Choose one sound leftover, keep the page-contact area smooth, and add decoration only where it improves the piece without making the book uncomfortable to close. That is usually all the project needs.
If you have a small scrap pile nearby, pick one material that feels too useful to throw away and turn it into a bookmark before reaching for something new. Which leftover would you most like to keep inside your next book?
16 Upcycled Home Accents Ideas
19 Brilliant Upcycling Ideas to Transform Everyday Items